Fixing Z-Fighting in Origami
Have you ever seen the polygons of your design overlap each over creating so–called “z–fighting” effect?

In this tutorial we’ll explain why it happens and what you can do about this.
The Simplest Example
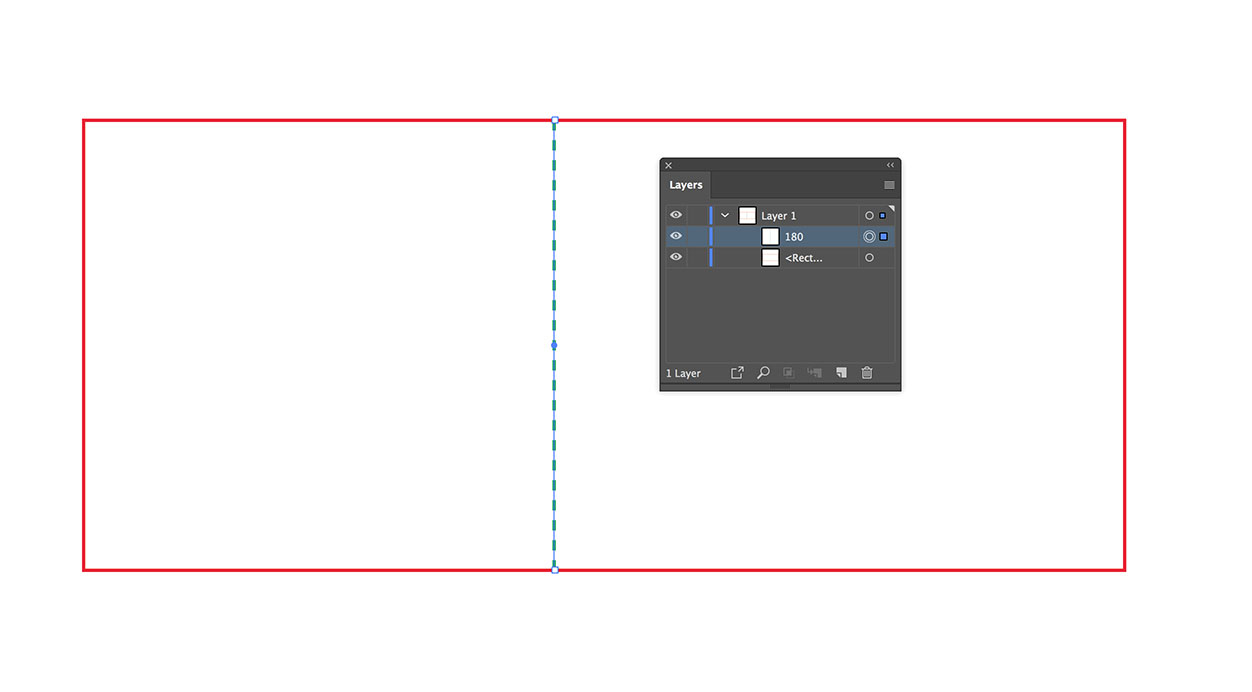
Create a new Illustrator document and draw a simple dieline there. The red rectangle is a cutting line, the green dashed line is a crease, configured to fold the paper at 180 degrees.
Now set the layer name to “Origami” and add a blue rectangle at another layer as the artwork:
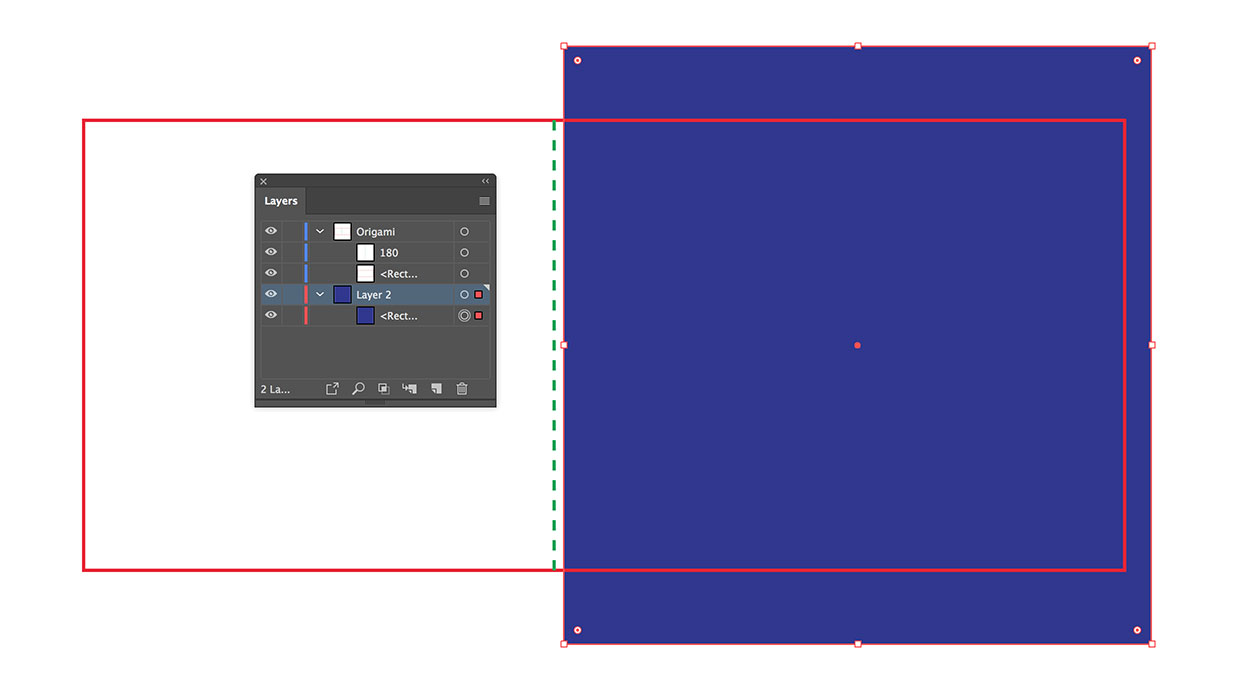
We should have a white–blue paper folded twice somewhere in the middle. Let’s have a look at this dieline in Origami:
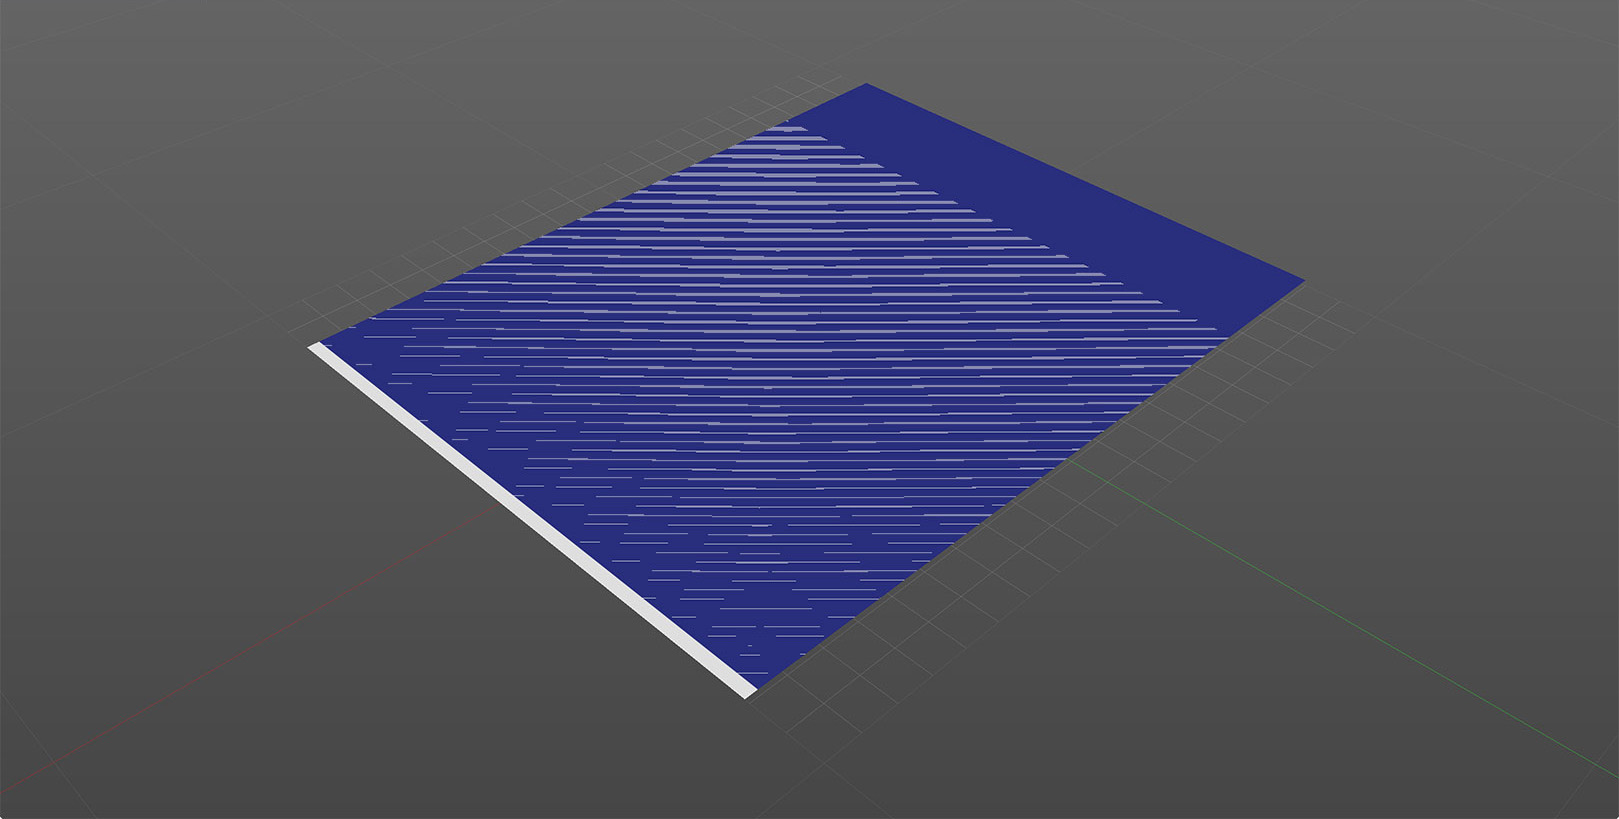
Here you are, we’ve got the simplest z–fighting ever. The blue part “conflicts” with the white part (actually the backside) of the shape and you see the surface is partially blue and partially white, depending on the viewing angle.
Why It Happens?
The reason is simple: having a 180 degrees crease places the left part of our shape exactly at the sample place as the right one. The output model consists of two planes located at the same position, so when it comes to rendering, it is nearly impossible to tell which one covers the other. Finally, as rendering rounds up numbers to speed the things up, we get different results even for neighbor pixels! That’s why you partially see both planes at the same time.
You don’t actually need to have a 180 degrees crease to get the same effect. Imagine a glue or tuck flap that is located exactly at the same place as the other panel (side or front). This gives you the similar effect of z–fighting (as displayed at the top of the page).
How To Fix That?
To prevent z–fighting you need to avoid overlapped panels. Doing this solves 99% of z–fighting cases, so it is good to know some tricks for that. There are different ways of fixing the problem. And the simple ones are not always the best. Have a look at the list below for what you can do:
Play With Crease Angle
The simplest way to remove z–fighting in the example above is to set the folding angle to something below 180 degrees, say 179 degrees.
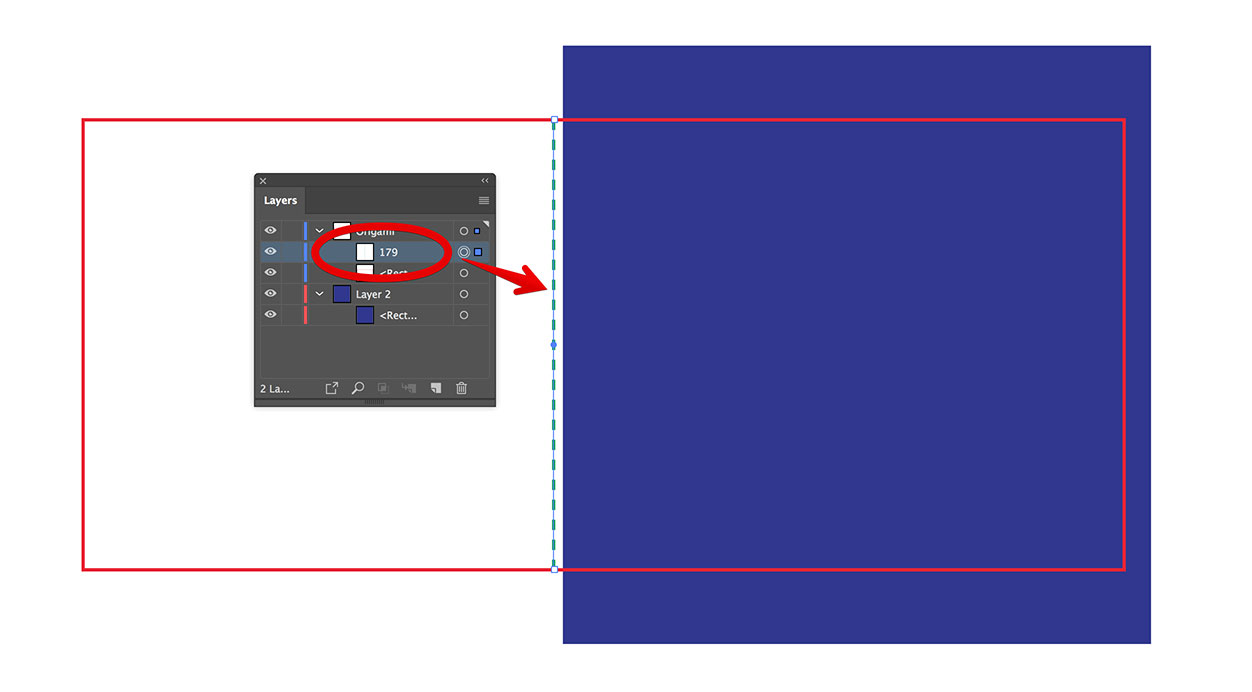
By doing this you tell Origami to not fold the pieces completely together, so the planes don’t overlap and we get rid of z–fighting easily:
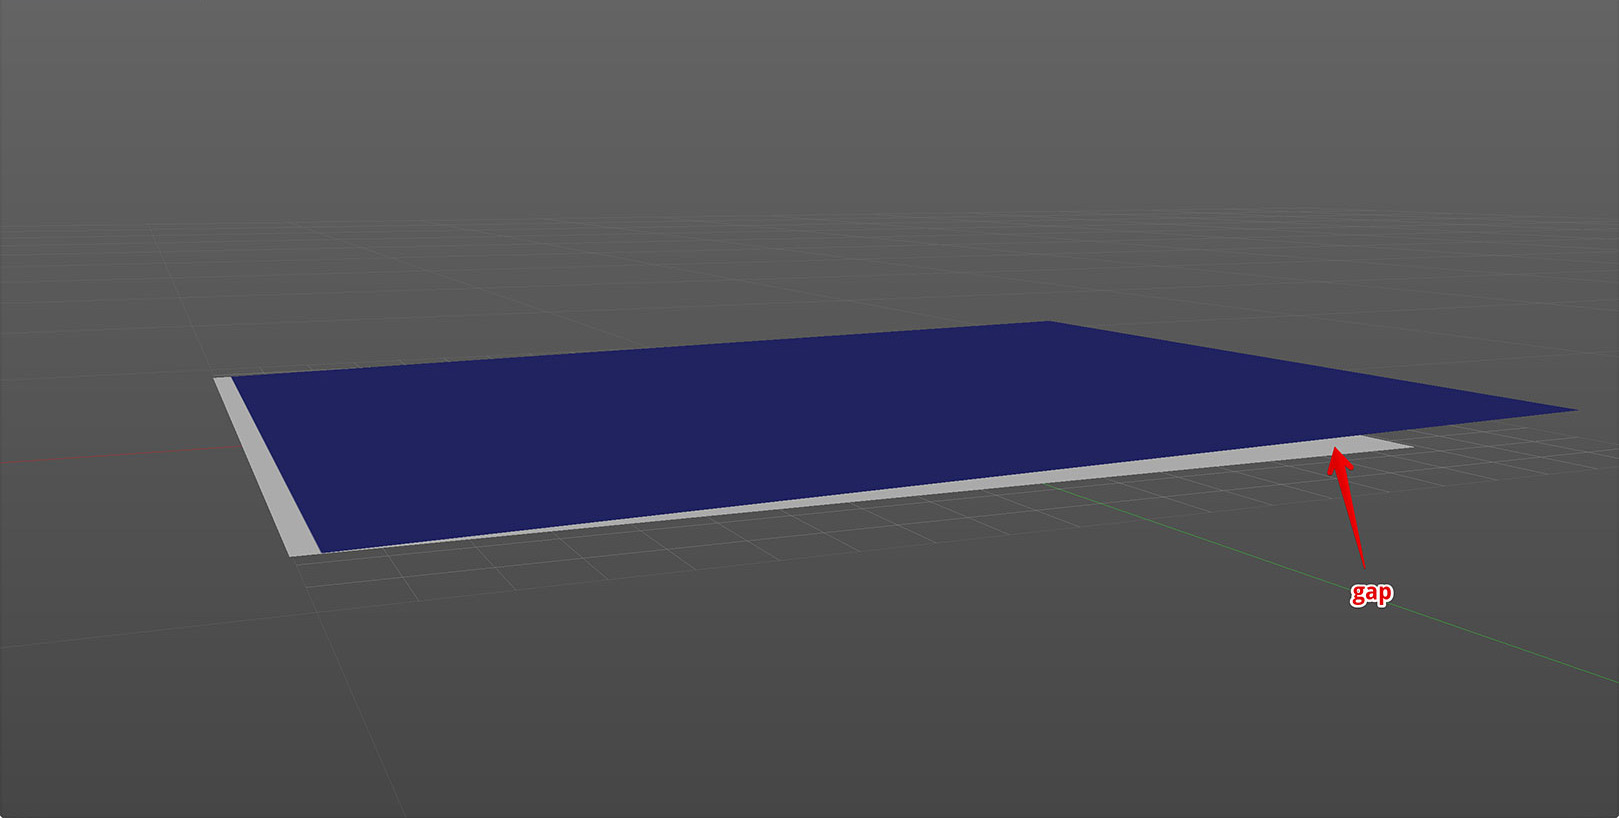
However, it comes at a price. You can see the visible gap at the right part of the shape. As we set the angle to 179 degrees, the panels are not parallel anymore and the top one slowly raises above the bottom.
This method works well for small and/or invisible panels, like glue or tuck flaps. Just fold them up inside a bit to avoid overlapping and prevent z–fighting.
Use Two Creases Instead Of One
Another approach is to replace a single 180 degrees crease line with two 90 degrees creases at a small gap. This way you keep the planes parallel, but add some distance between them in 3D, which eliminates z–fighting. Let’s do this with our test dieline:

Here we added two crease lines with a gap between. Let’s have a look at the 3D model in Origami:
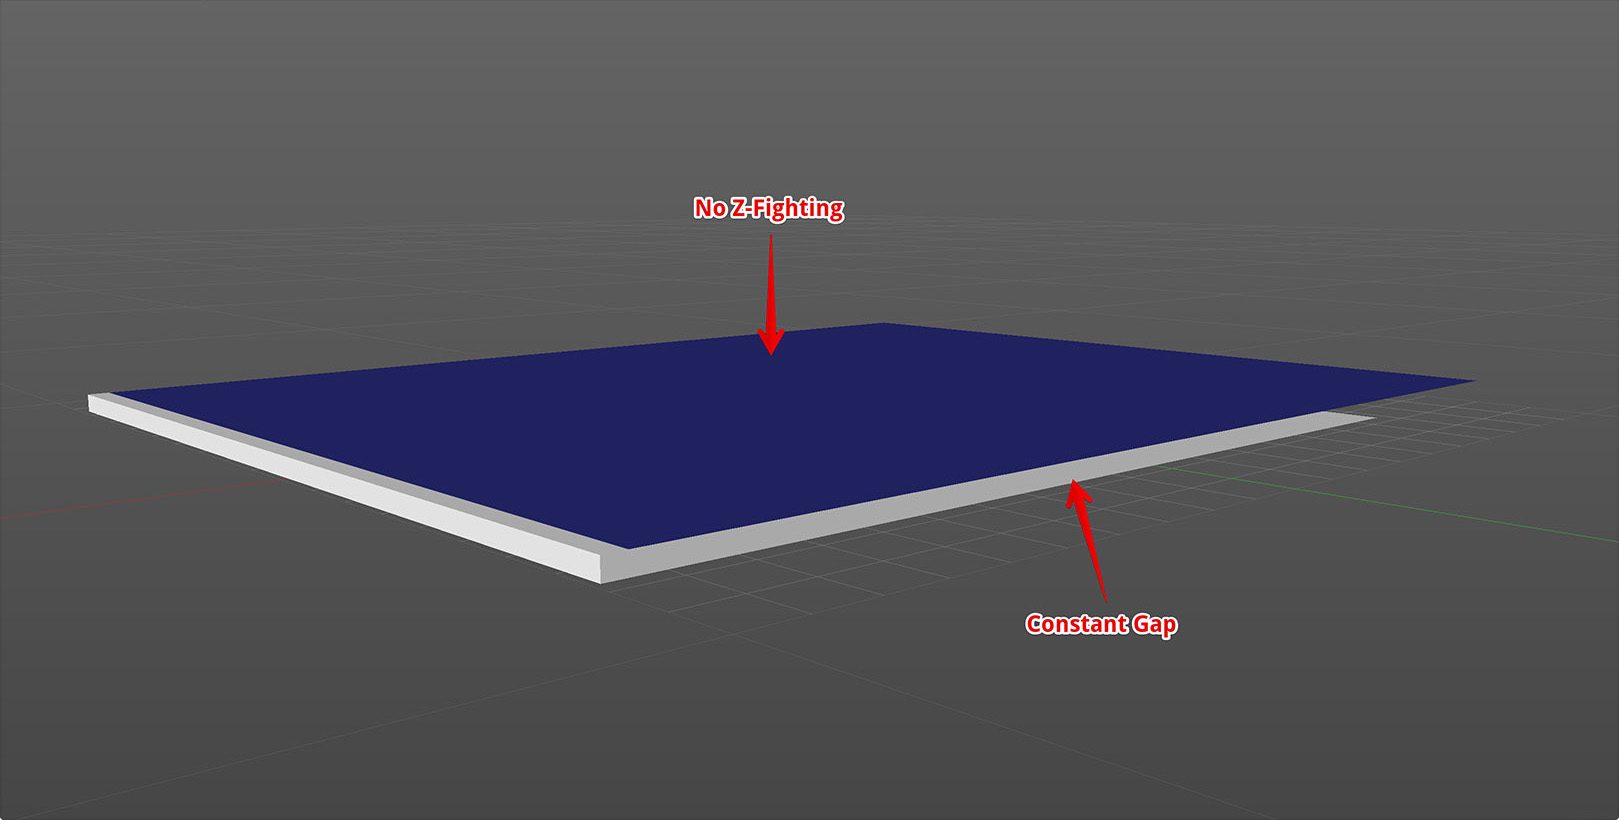
No z–fighting, and the gap is constant. Although it looks big, it doesn’t really matter as we can always control it by moving the crease lines closer in the dieline. Make the gap size about the same as the paper thickness and nobody will ever notice this. Actually, that’s exactly what happens to the paper in real life when it is folded this way.
This method is good for various tabs, tags and other pieces of paper that are folded together at 180 degrees. That’s what Origami does for tagged box in its online dieline generator.
Use Proper Dimensions
For the most carton boxes, the right solution is to adjust the panel size, so the z-fighting is not possible. For instance, if you have a 4–sides dieline with a glue flap:
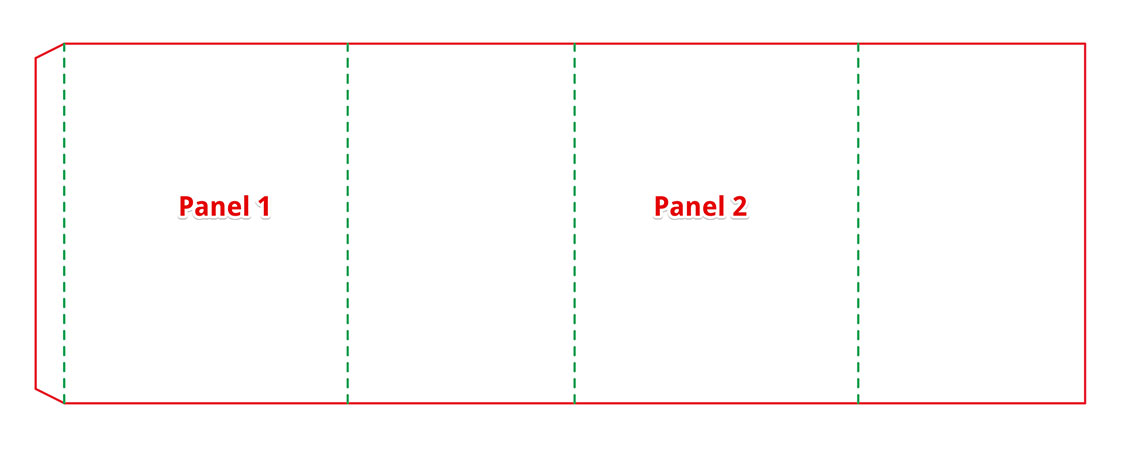
You need to make “Panel 1” at the left slightly smaller than the opposite “Panel 2” in the middle. The first panel could be the back, and the second is the front and they should be of the same size, but as we have a glue flap here, we’ll have z–fighting between the glue flap and the right most panel if the width of both 1st and 2nd panels is the same.
However, if you reduce the width of the first panel and move the glue flap with its crease line a bit to the right (to the width of paper thickness), you will effectively put the flap inside the box, as it should be.
Origami dieline creator does this for glue flaps in FEFCO boxes and for cover panels in ECMA boxes.
Use Complex Cuts For Flaps
Sometimes you can keep the panel size as is. Instead you make the cut line a little bit more complex at the glue flap, so it goes inside the box by itself. Compare the simple glue flap at the left with the modified at the right:
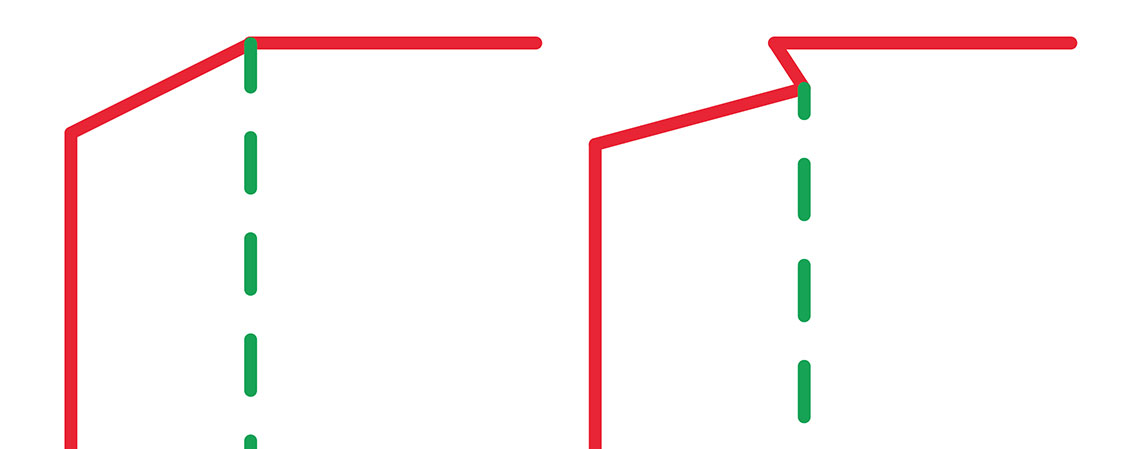
The one at the right does not need to narrow down its panel. Instead, it cuts it a bit and effectively moves the crease line to the right, so the flap itself goes inside the box.
Origami uses this method in its dieline generator for glue flaps in ECMA boxes.
That’s All
You now understand z–fighting better and should not be surprised by it anymore. Next time you see it, simply choose on of the methods listed above and modify the dieline to avoid this effect.
Feel free to share your own z–fighting tricks, so we can update this tutorial.
Want More Hints?
- Almost Vertical/Horizontal — crease line is probably misaligned;
- Impossible Shape — shape cannot be folded as a whole;
- Path Is Not Closed — the dieline needs a solid, continuous outline path;
- Crease Line In Main Outline — the main outline must be made of cuts;
- Intersecting Curved Cuts — it might not be easy;
- Empty Layout — why there is no dieline visible?
- Hanging Element — what if a path goes nowhere?
- Impossible Crease Line — a crease that shouldn't be;
- Inconsistent Crease Lines — similar crease lines must have same angles;
- Invalid Crease — crease lines have limitations;
- Overlapping Lines — cut and crease lines must not overlap, as well;
- Separate Element — the dieline should come in one piece;
- The Points Are Too Close — avoid crowded spaces;
- Z-Fighting — what to do with overlapping polygons.
There's more from the older folding engines:
- Intersecting Holes — holes must not overlap;
- Outside Hole — all holes must be inside the outline path;
- Misaligned Elements — ends must meet, perfectly;
- Elements Are Too Small — keep dieline paths simple;
- Triangulation Failed — Origami fails to make a 3D mesh of a dieline.
Adobe and Adobe Illustrator are either registered trademarks or trademarks of Adobe Systems Incorporated in the United States and/or other countries.