Path Is Not Closed
Origami needs a closed, continuous path around all the die–drawing graphics in its layer. It must be a cut line without any gaps. Origami uses this path to make a shape outline before it starts making holes and folding the shape.
What to check?
You have something like this somewhere in your die drawing:
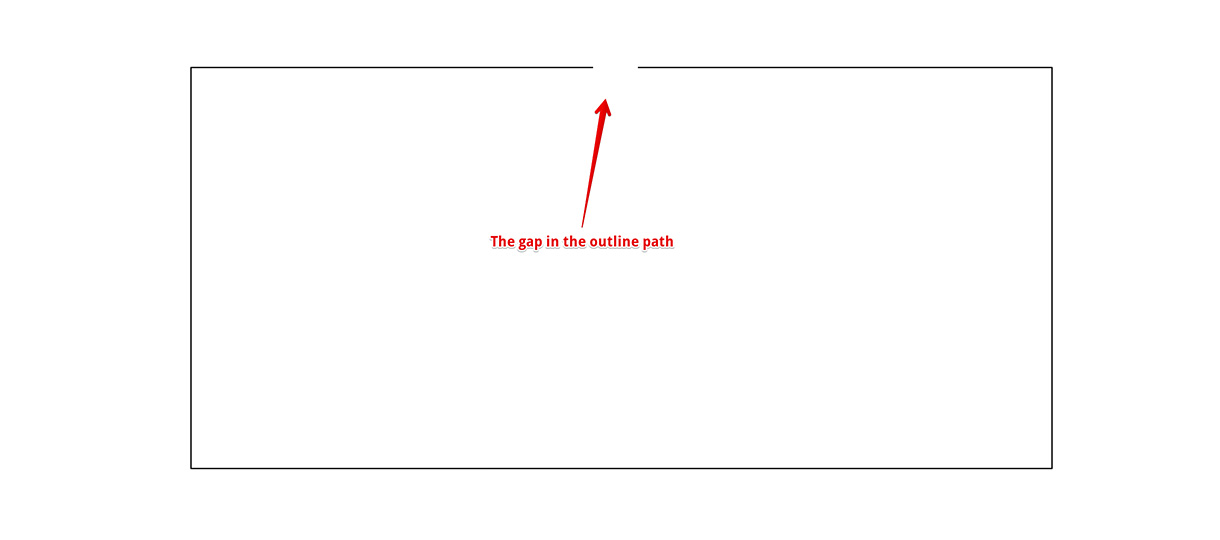
You may not have such an obvious issue, but somewhere there is a gap in your outline path preventing Origami to find a closed loop. Origami will mark the problem path with red and place marks on every point not connected to something else. For the dieline above it will look like this:

Use the markers to locate the problem points and fixing the gaps — simple.
However, sometimes you may get absolutely correct points marked red. Let’s modify the dieline and add an inner cut, then load it to Origami:
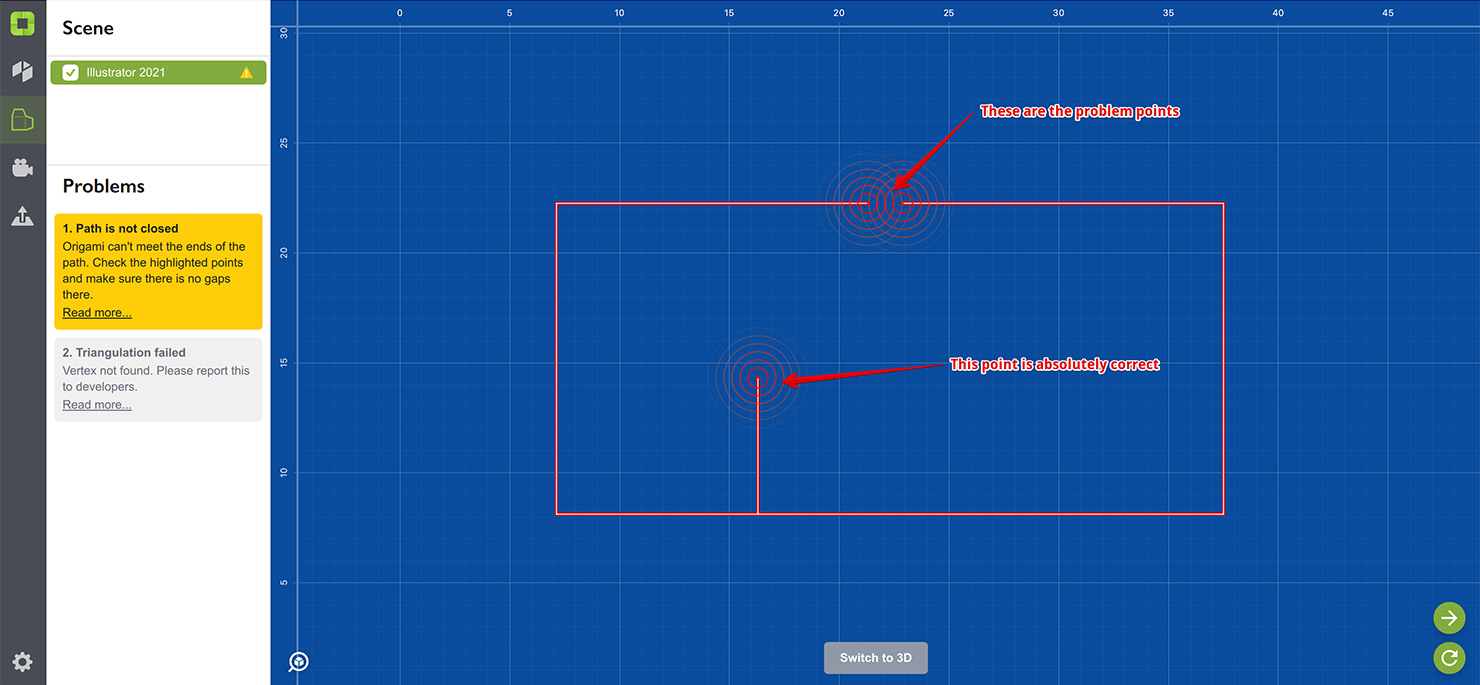
You see that Origami marked the inner cut point too. That cut is absolutely correct and the problem is not there, but as the end point of the cut is “hanging” (not connected to anything else), Origami wants you to make sure there is no mistake here. You should ignore warnings for such points and focus on the really problem ones. There must be at least one incorrect point if you see the error.
Connection issues
Here is a real dieline having “path is not closed” problem:
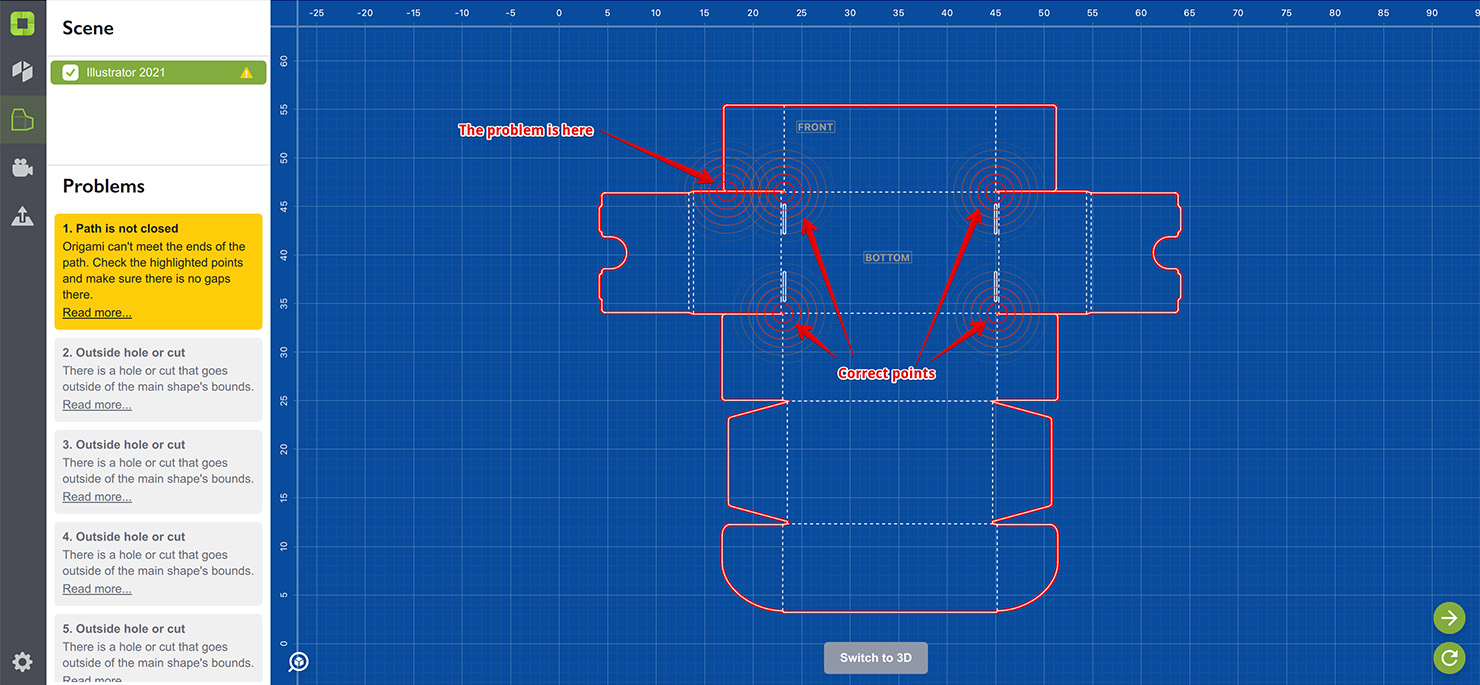
The four points in the middle are correct and marked just because they are not connected to other cuts, we’ll skip them and focus on the point at the top left part of the dieline. If you check it in Illustrator, you’ll notice no issues:

However, if you check the coordinates of the top curve endpoint and the horizontal line, you’ll see a very little misalignment. Although being little, the gap is enough for Origami to decide that the paths are not connected. A simple re–aligning and snapping one curve to another in Illustrator fixes the problem, but there is a better strategy: consider making all the dieline elements intersect each other at points.
This way Origami doesn’t have to guess if the paths really intersect or not. Here is the close–up of the dieline above with the top curve moved up a bit:
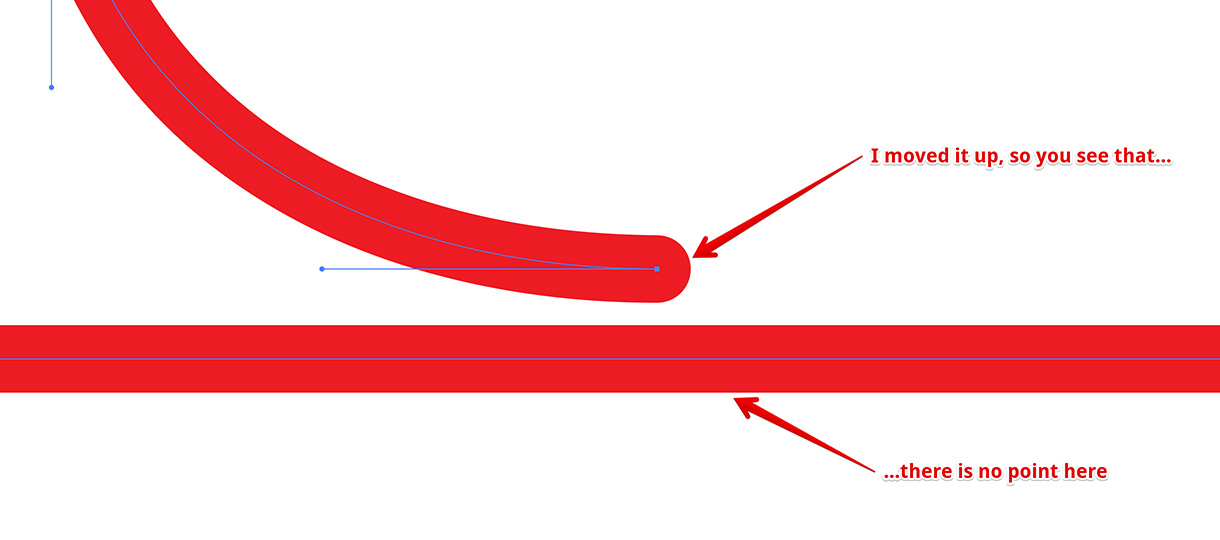
You see that there is no point on the bottom path, so you need to snap the top curve to the line in order to make sure they are connected. It is easy to make a mistake here, so that’s why it is much better to add a point to the bottom line, then snap the top curve to that point:
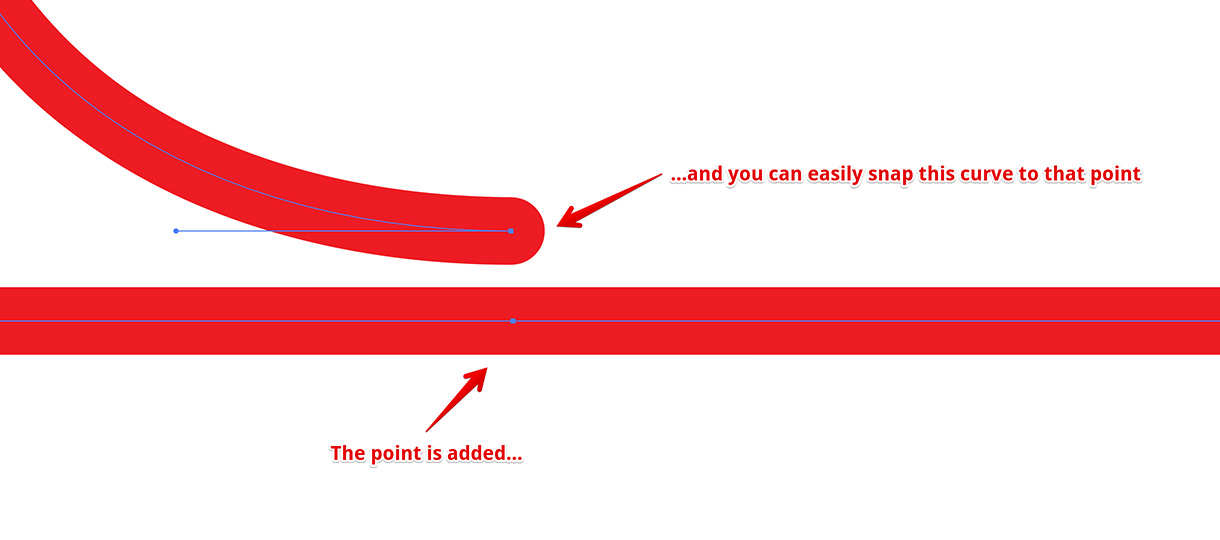
Making sure all the dieline elements intersect at points helps both Origami and your dieline, as this reduces the chances of getting errors later in production.
Want More Hints?
- Almost Vertical/Horizontal — crease line is probably misaligned;
- Impossible Shape — shape cannot be folded as a whole;
- Path Is Not Closed — the dieline needs a solid, continuous outline path;
- Crease Line In Main Outline — the main outline must be made of cuts;
- Intersecting Curved Cuts — it might not be easy;
- Empty Layout — why there is no dieline visible?
- Hanging Element — what if a path goes nowhere?
- Impossible Crease Line — a crease that shouldn't be;
- Inconsistent Crease Lines — similar crease lines must have same angles;
- Invalid Crease — crease lines have limitations;
- Overlapping Lines — cut and crease lines must not overlap, as well;
- Separate Element — the dieline should come in one piece;
- The Points Are Too Close — avoid crowded spaces;
- Z-Fighting — what to do with overlapping polygons.
There's more from the older folding engines:
- Intersecting Holes — holes must not overlap;
- Outside Hole — all holes must be inside the outline path;
- Misaligned Elements — ends must meet, perfectly;
- Elements Are Too Small — keep dieline paths simple;
- Triangulation Failed — Origami fails to make a 3D mesh of a dieline.
Adobe and Adobe Illustrator are either registered trademarks or trademarks of Adobe Systems Incorporated in the United States and/or other countries.