Multiple Shapes
You can have more than one shape in scenes in Origami. This is convenient if you want to make a more complex construction, like a display stand. This tutorial shows how it works and how to control the shapes.
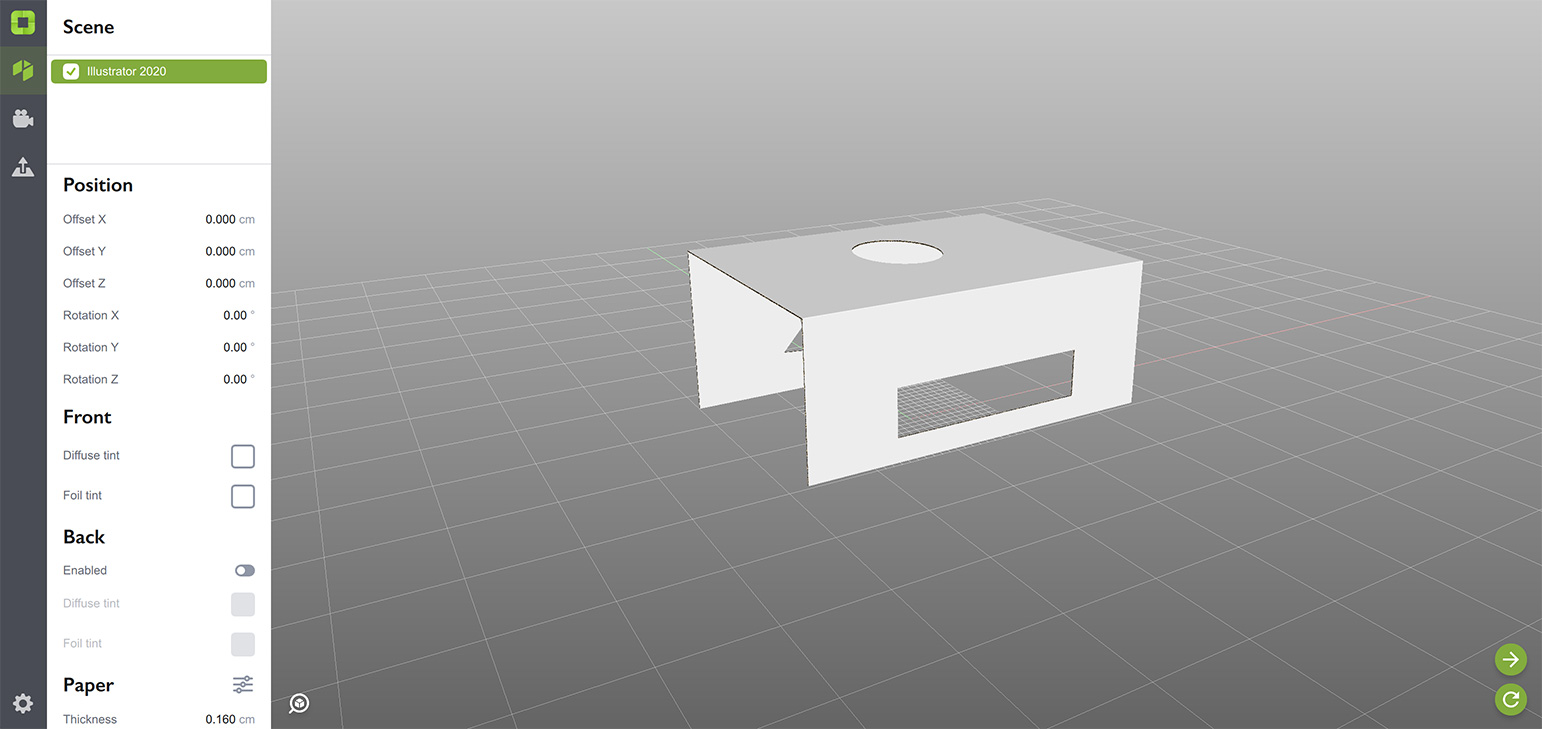
We’ll start with the scene we had in the last tutorial:
Ready? Let’s go!
Shapes List
The list at the top of the scene panel shows all the shapes in the scene:
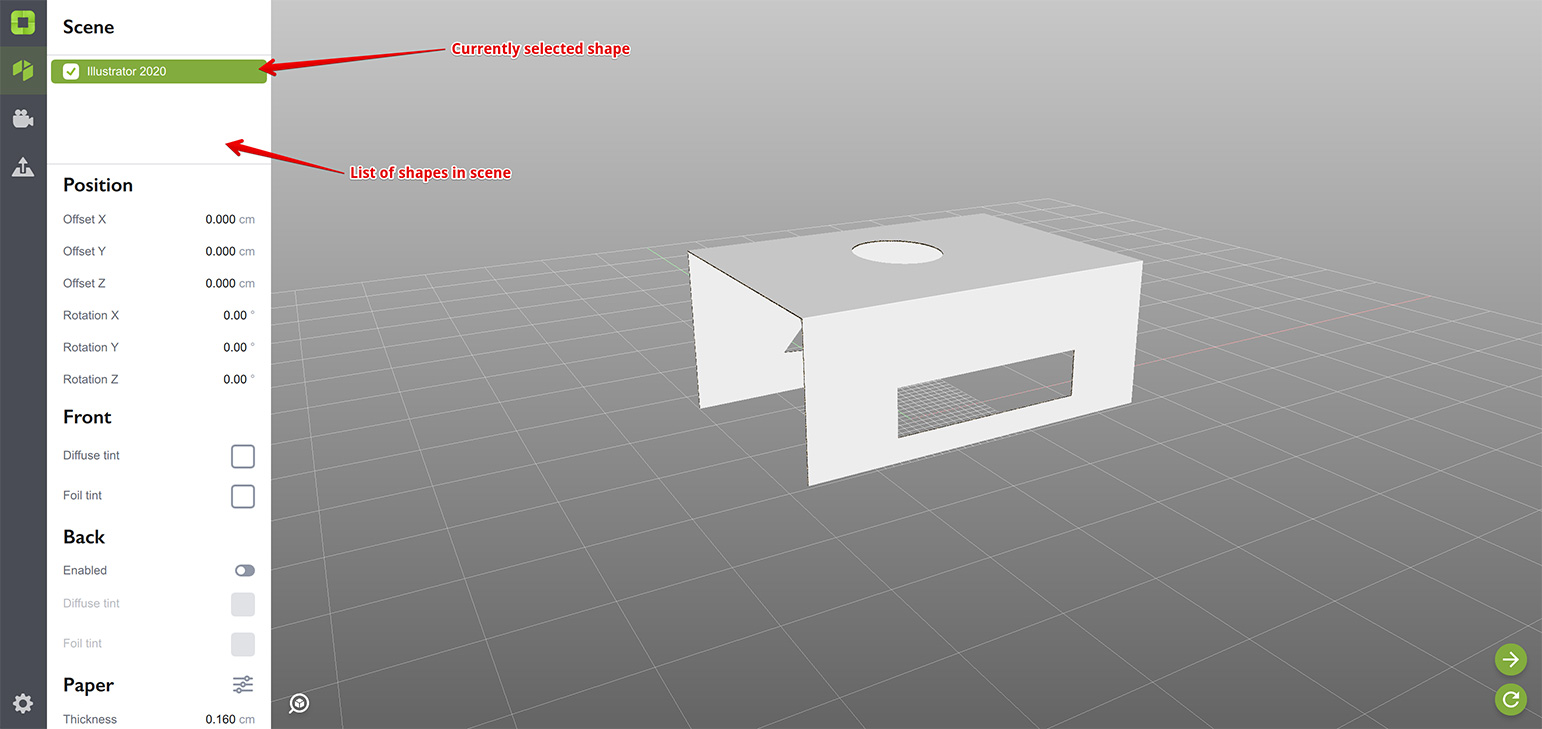
So far we have just one shape, which is selected. The Send and Receive buttons at the bottom right corner of the window are context–based and depend on the current selection. If something is selected — you see them. If nothing is selected — you see the Plus button instead.
As you need the Plus button to add a new shape to the scene, you need to remove the current selection first. You can do so by clicking the empty area of the scene list, or the scene background in preview:
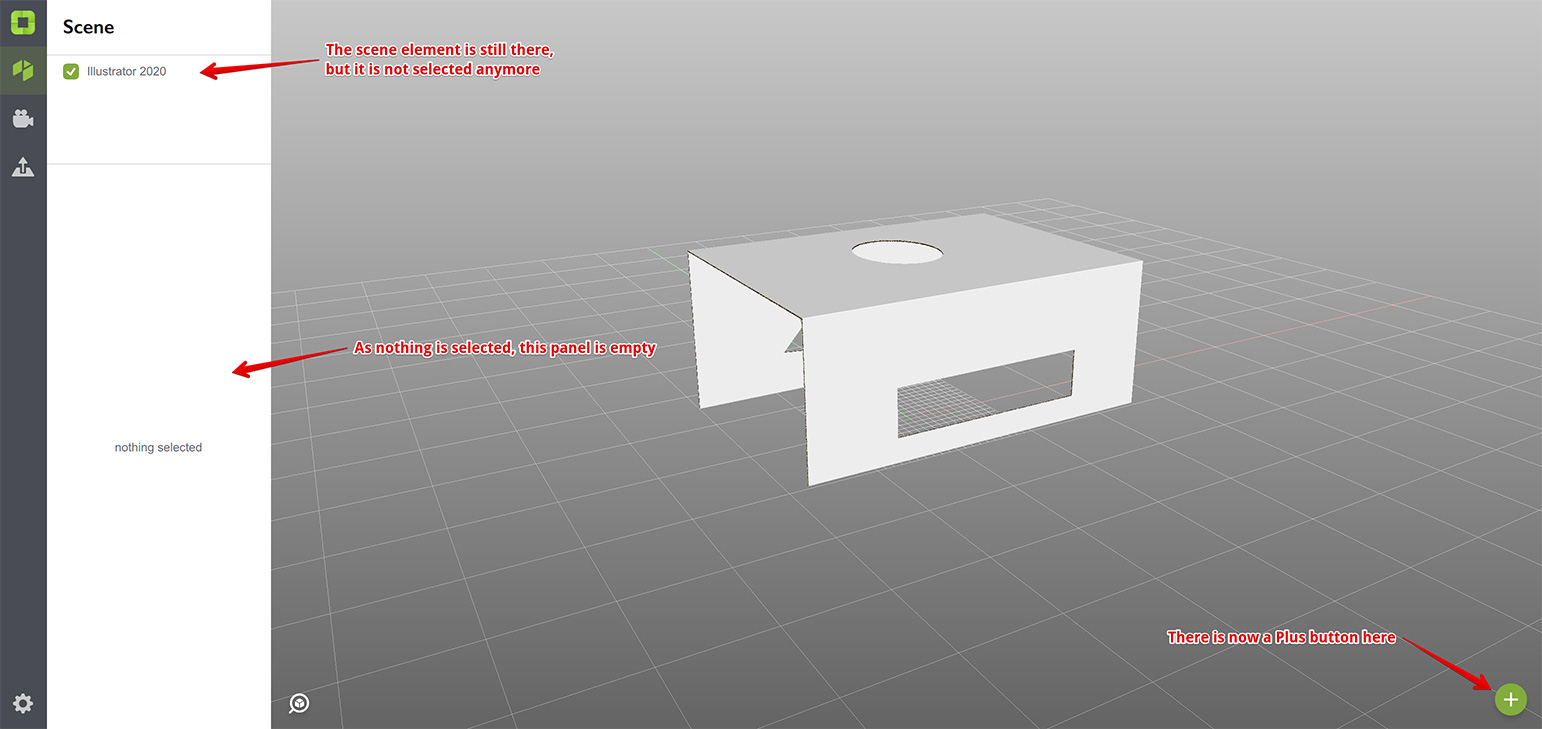
Once the selection is gone, the bottom of the scene panel becomes empty and the Plus button appears at the bottom right corner of the window. We are now ready to add a new shape to the scene.
Adding a New Shape
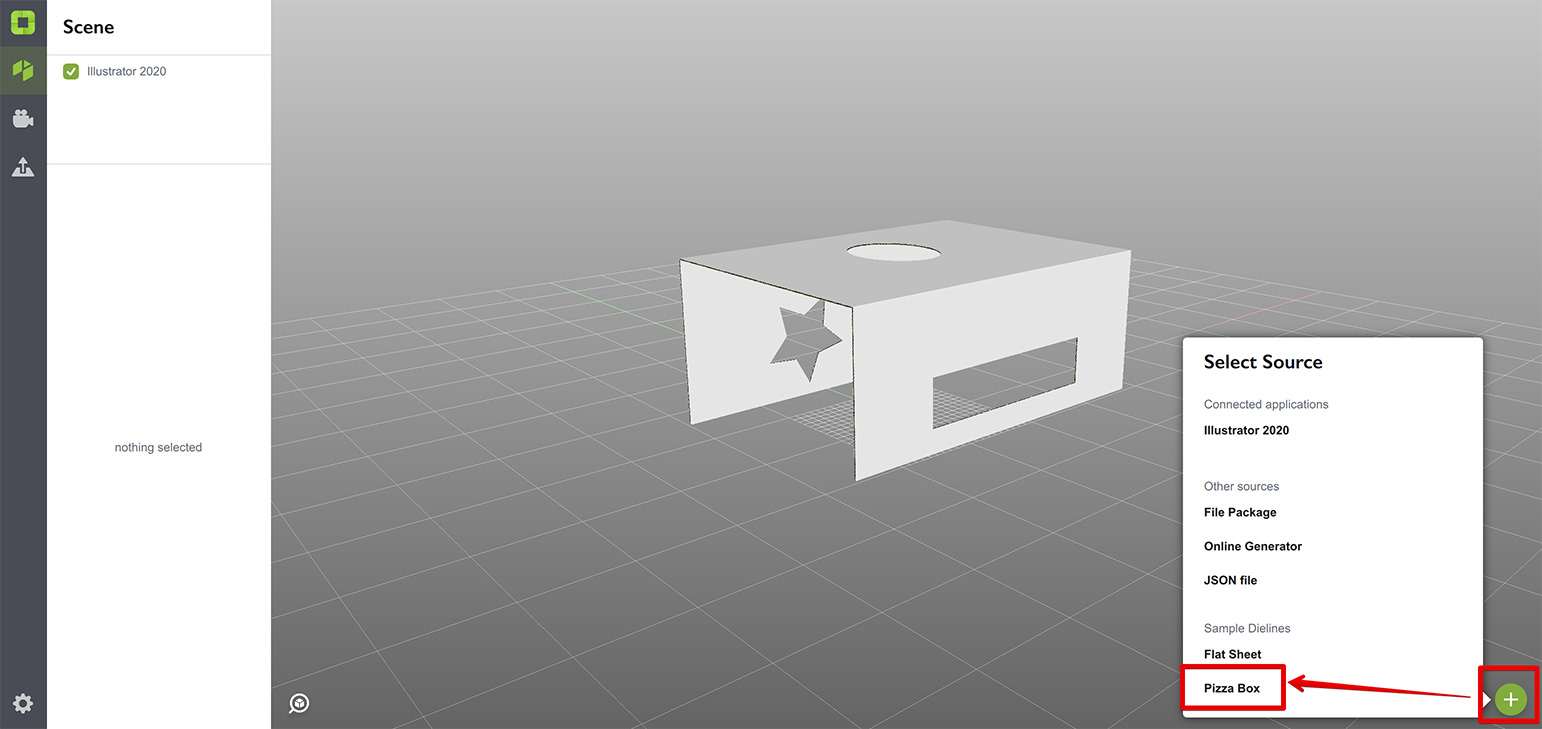
We’ll use the built–in pizza box, but you can make a new shape in Illustrator and add it instead. It works absolutely the same way. Click the Plus button and select the pizza box item in the popup:
Once you clicked the pizza box item, the new shape is added and selected. The scene should look this way now:
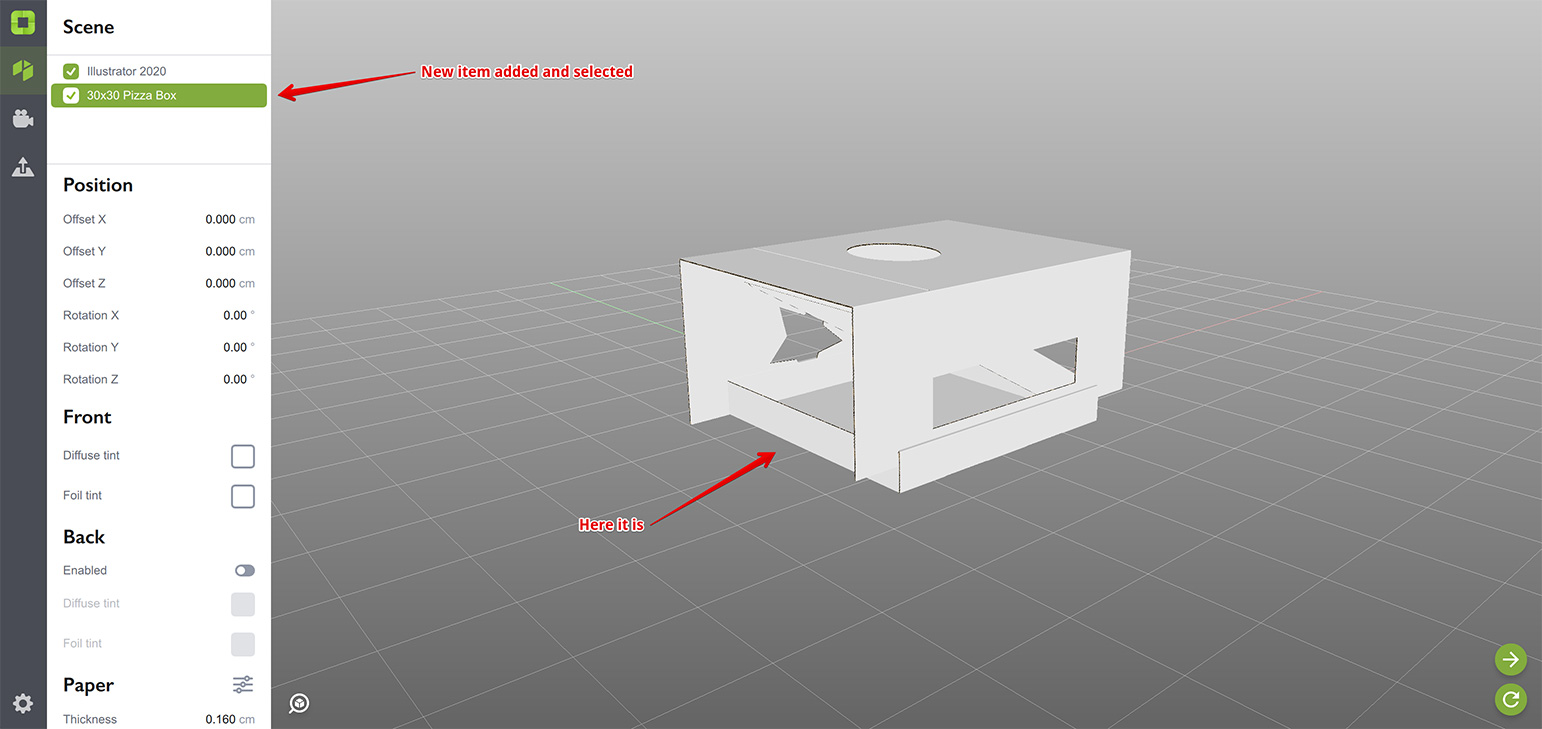
The scene list now has two items and you can switch between them by either clicking the list items, or by clicking the shapes themselves in preview.
Moving Shapes Around
Now let’s put the pizza box on top of the first shape which becomes a “stand” for the box. We’ll use the Position section of the pizza box parameters in order to do so. As the Z axis controls the vertical offset in Origami, we’ll need to modify the Offset Z parameter. Here I adjusted it to make the box standing on the first shape:
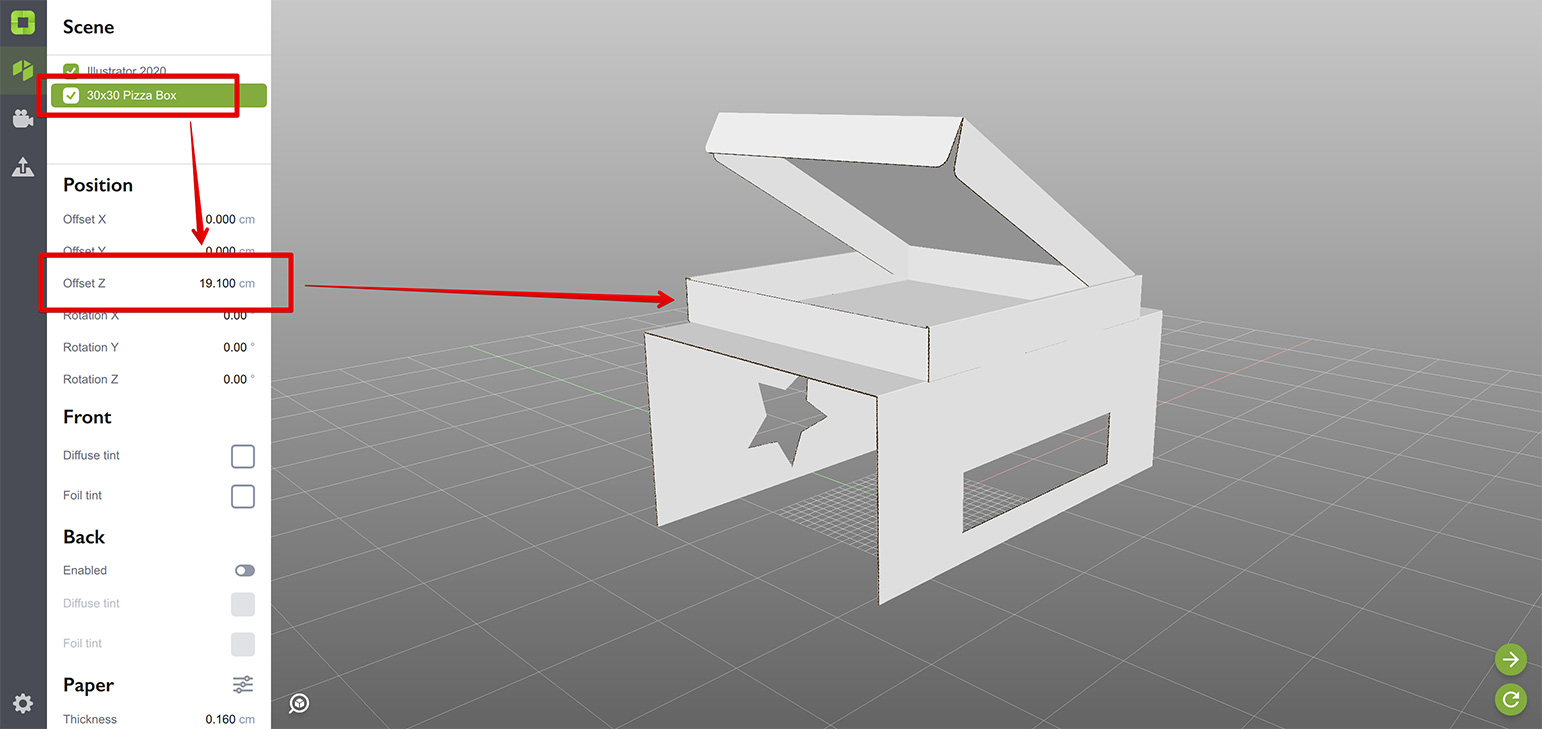
Your number might differ as it depends on the bottom shape’s parameters, but the idea is the same. Let’s now rotate the box a bit towards us:
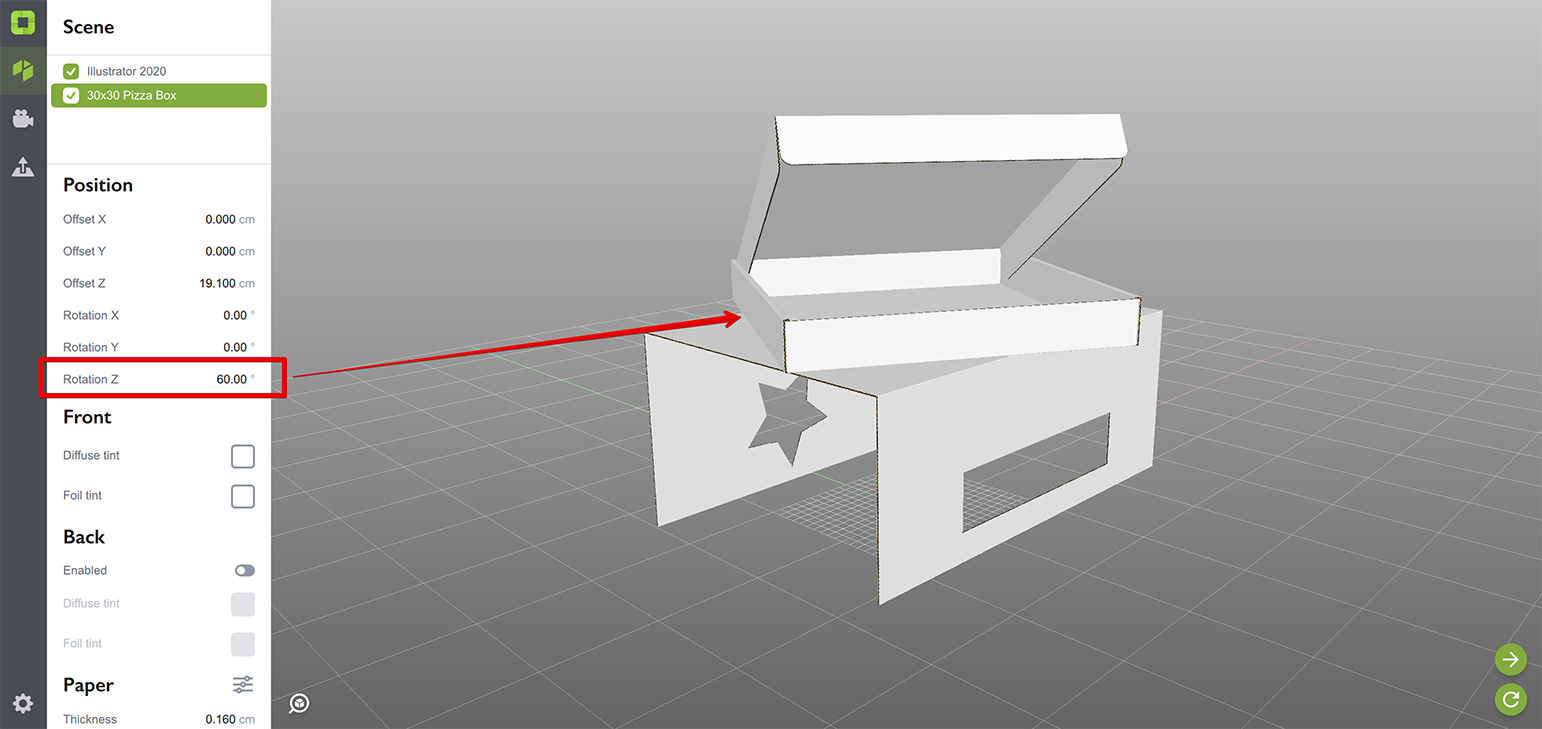
Again, as the Z axis points up — we’ve rotated the box around it. Try moving and rotating shapes along all the axes and see what happens. You can always revert it back with undo, or by placing zeros in all the offset and rotation fields.
Other Operations
You can temporary hide a shape by unchecking its box in the list. If you don’t need the shape at all, you can delete it by right–clicking the list item and selecting Delete item there. You can also rename and clone objects using the same right–click context menu.
Saving Scenes
Now as you have a complex scene, you might want to save it. Click File → Save in the main application menu or use the Save item in the main panel to do so. Saved scenes are good for preserving specific configurations of multiple elements like the pizza box on the stand we’ve just made.
What’s Next?
Just two more steps left, click the link below to continue.
- Dieline Generator — make dielines faster with the online generator;
- Export and Rendering — learn to export scenes or render them.
Adobe and Adobe Illustrator are either registered trademarks or trademarks of Adobe Systems Incorporated in the United States and/or other countries.