Making a Simple Dieline
This time we’ll start from scratch directly in Illustrator without making a sample dieline in Origami first. This is what usually happens when you get a dieline from someone else — it is just an Illustrator file that you need to import to Origami. Let’s go.
Origami Errors
When something goes wrong, Origami displays an error message. These messages guide you through the process and let you fix the problem easily step by step. Let’s see some basic errors you will most likely see while making your first steps in Origami. Make sure you get no documents open in Illustrator, then make a new project in Origami, make sure the scene is empty, click the Plus button at the bottom right of the window and select your Illustrator in the popup menu:
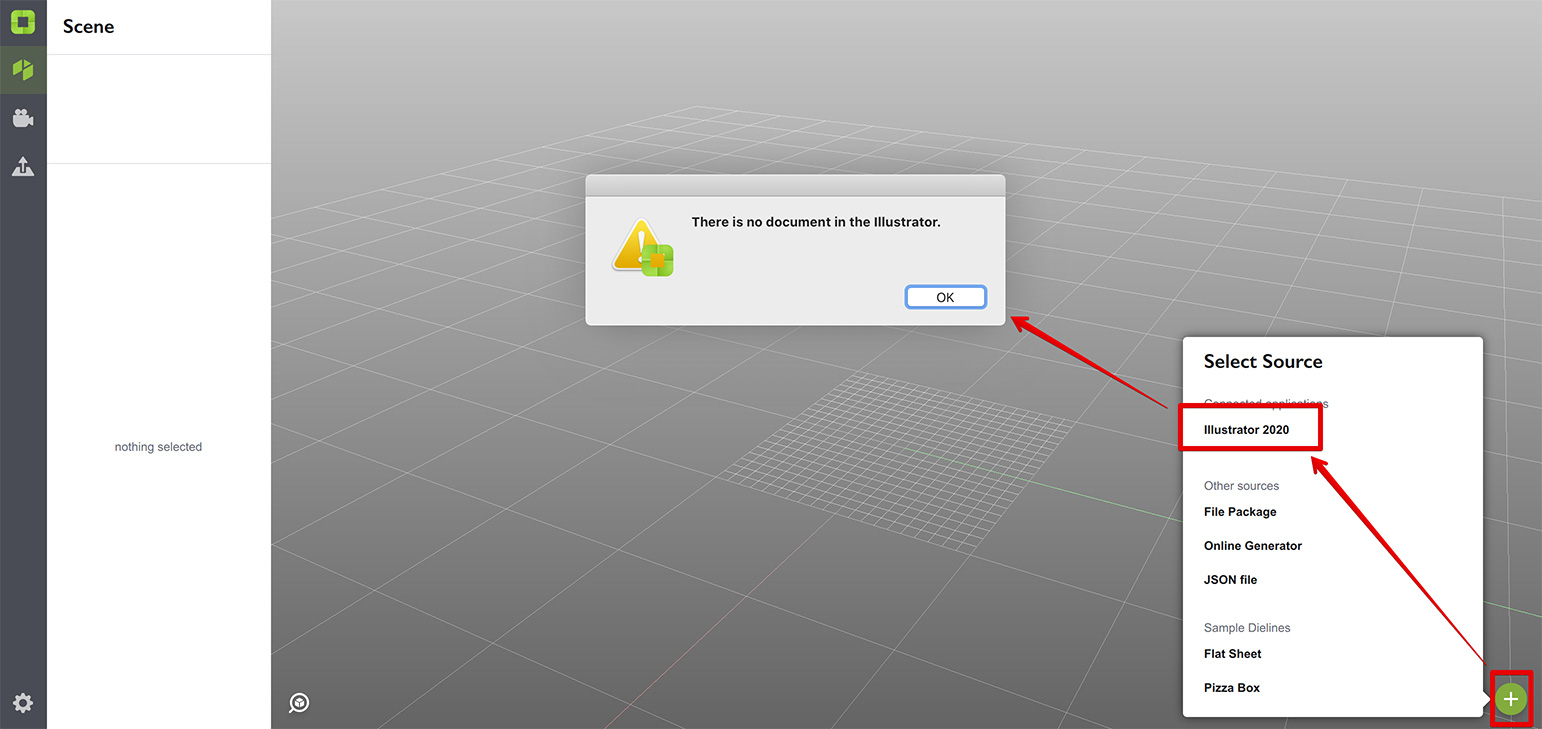
The error is quite obvious: there is no document in Illustrator, so Origami has nothing to do and displays the error. Let’s make a new document in Illustrator and try again:

Again, the error directly tells you what is missing: the Origami layer. If you changed nothing in settings, the Origami layer should be named “Origami”. Add that layer to your document and try again:

Well, the next step is obvious: you need to add a dieline to the Origami layer in Illustrator in order to go further. We’re almost there, let’s add a dieline.
A Simple Dieline
There are two types of lines in dielines: cuts and creases. Origami needs cut lines to be solid and crease lines to be dashed. Color or thickness don’t matter, it is only about the “Dashed line” flag. We’ll focus on the cut lines in this tutorial and discuss the crease lines in the next one.
Select the “Origami” layer in Illustrator and make a simple rectangle with a solid line. Stroke and fill colors don’t matter, yet we recommend to disable filling for obvious reasons. You should get something like this in Illustrator:

Now switch back to Origami and try to add the shape again:

We did it! Although the dieline is dead simple, you made it completely from scratch. Let’s make it more complex now.
A More Complex Dieline
First of all, let’s make the outline a little bit different:
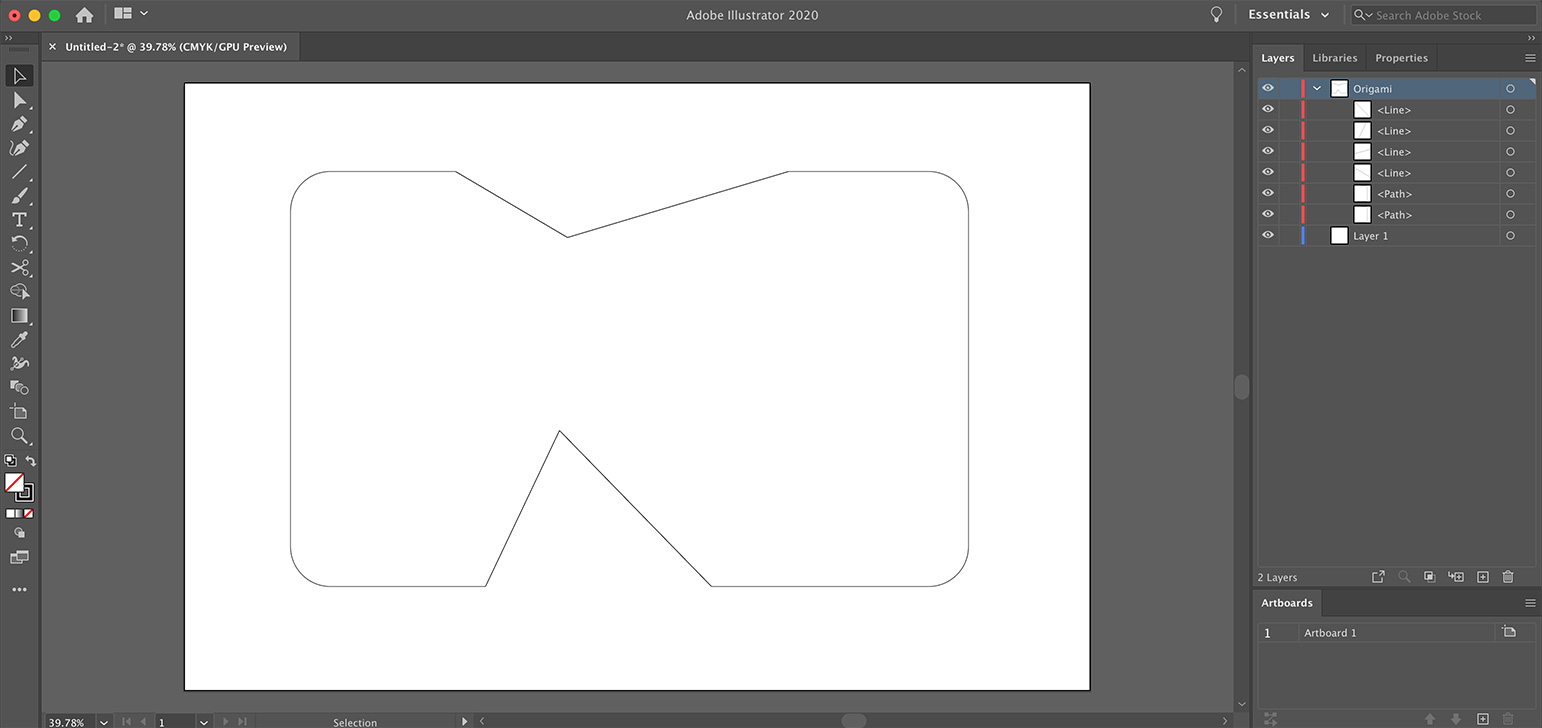
Here I made a rounded rectangle, then cut two triangles from its top and bottom. Feel free to make your own custom shape, maybe use an ellipse instead of rectangle — that’s absolutely up to you. Then go to Origami and click the Refresh button (or simply hit the space bar on your keyboard):
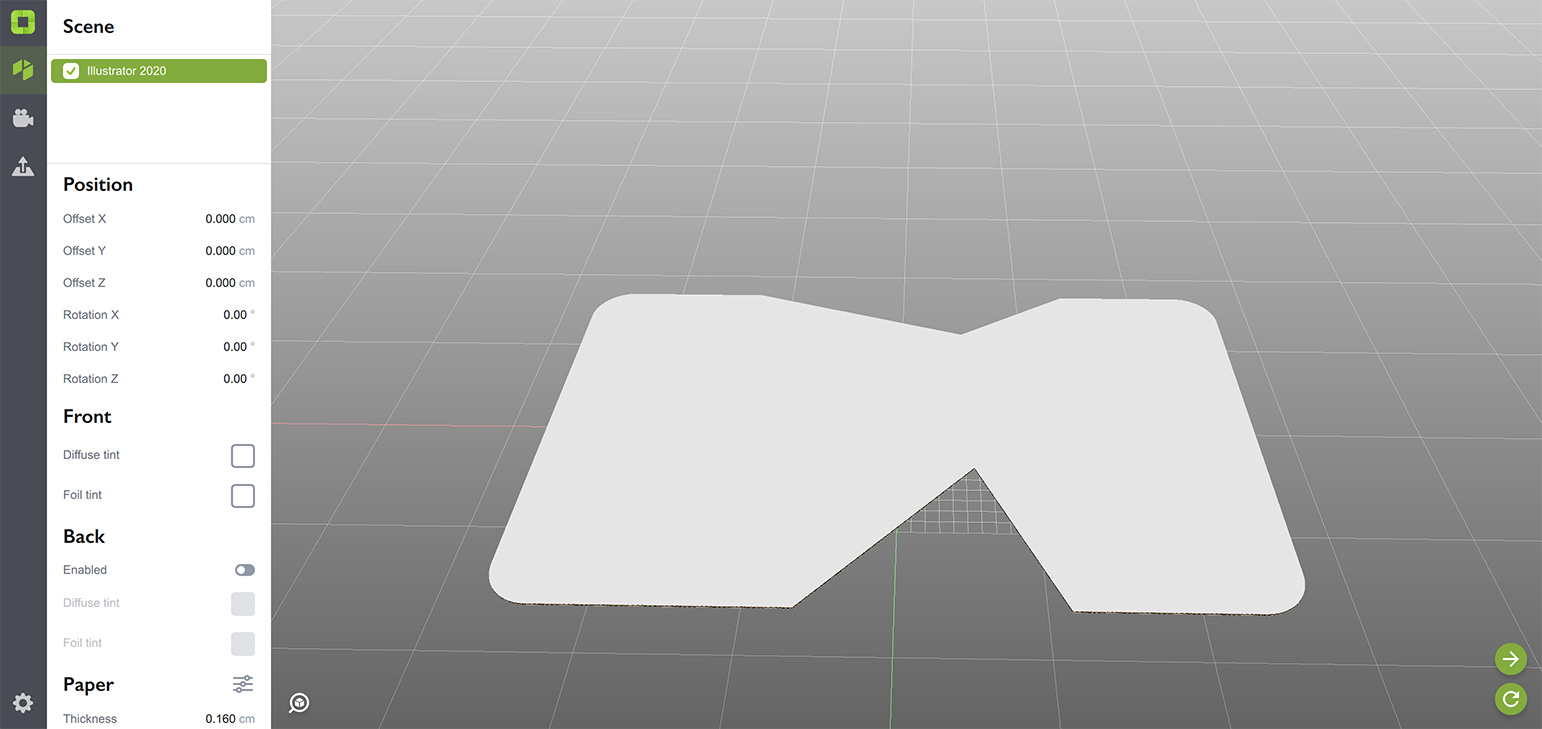
Great, so Origami makes flat cardboard pieces based on the outline you provide. You can rotate it with your mouse to see it from above or below. Let’s make another step now.
Adding a Hole
Or making a window, doesn’t matter. The idea is simple and was used it the previous tutorial when we made a window in the pizza box lid. You simply draw a hole where you want it. Just make sure you use the same solid line. Here I made two, cause why not?
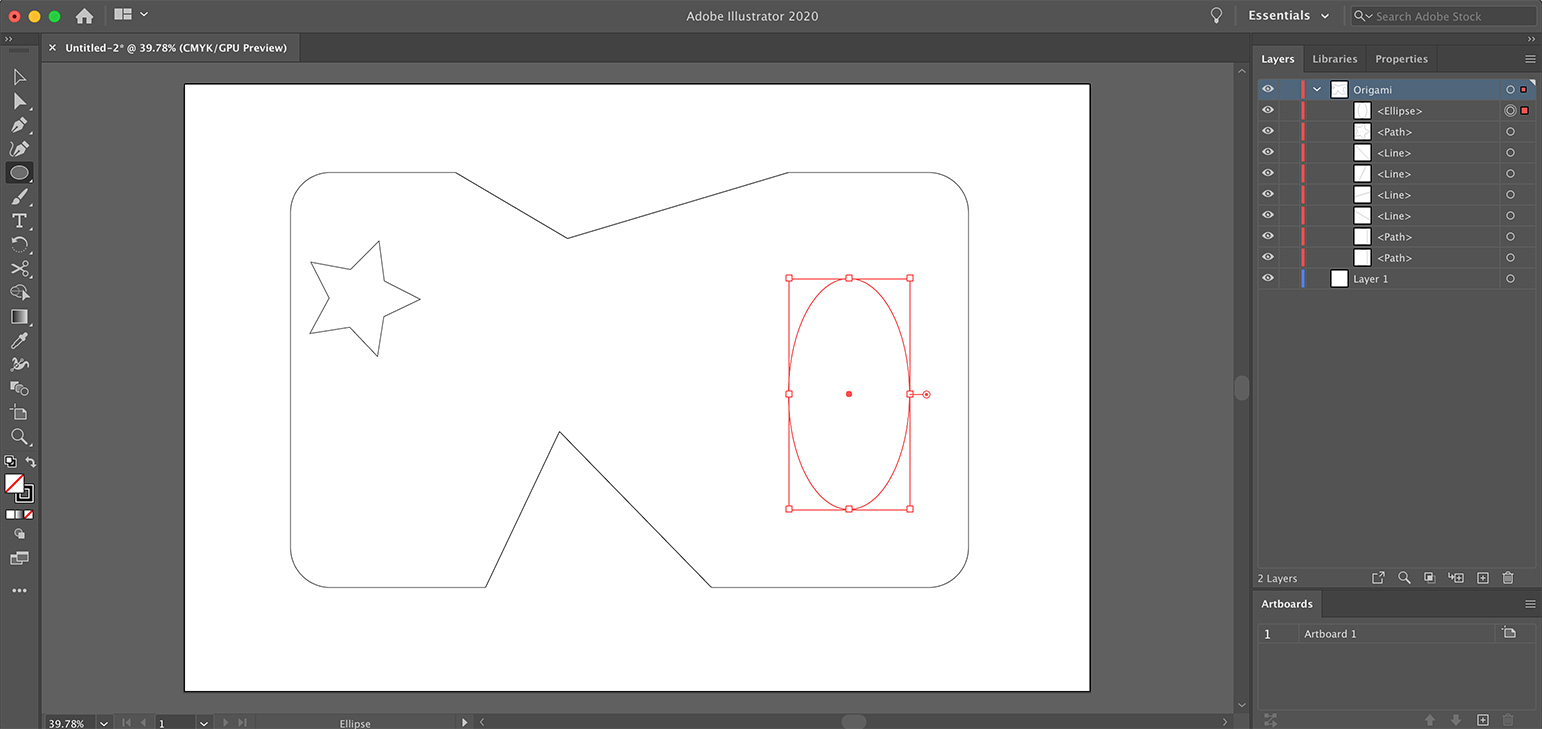
I used the star shape for the first one and ellipse for another. You can use whatever you want, just make sure the dieline matches two rules:
- all the holes are inside the main outline;
- no holes are intersecting.
You’ll get an error if any of the rules above is broken (try this yourself later). Meanwhile here is my dieline in Origami after refreshing:
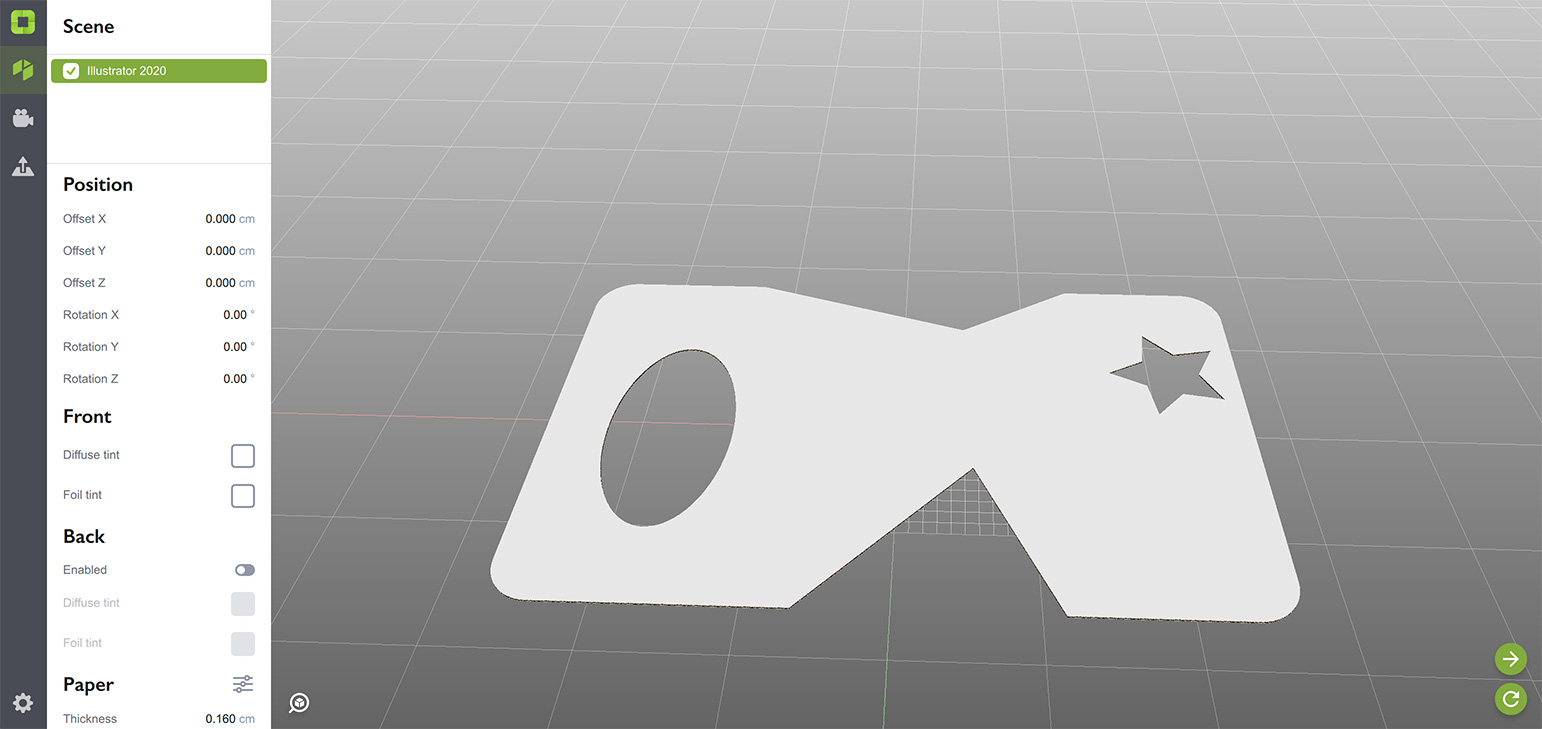
You might notice that the dieline look flipped in Origami, compared to the one in Illustrator. That’s fine, we’ll explain it below.
Adding Artwork
Now as you have your first dieline, it is time to add some artwork. The artwork can be added to any layer, except for the one with dielines. I have “Layer 1” in my document, so I’ll add it there. You can do the same or add more layers, if needed. Origami only reads visible layers and artwork, so you can control what to display in preview.
Here I made a simple artwork:

Not a masterpiece. Make a better one and make sure that it is placed in a separate layer, not in the Origami one. Only dielines should be placed into the Origami layer, otherwise you’ll get quite unpredictable results.
Now lets refresh the Origami shape:
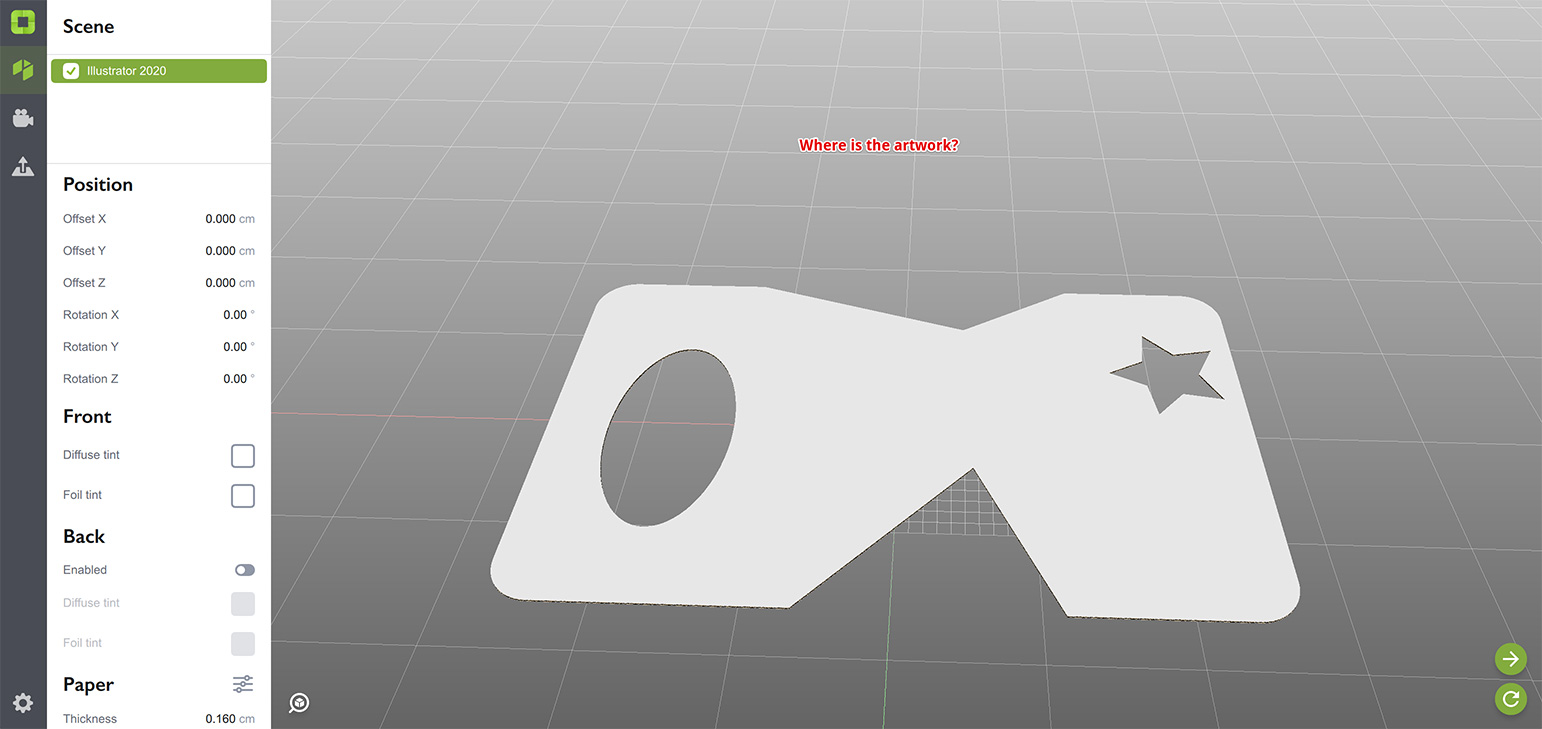
No artwork. What is wrong? Actually, nothing is wrong. Simply rotate the shape to see the bottom part:

Now if you rotate the shape, so the artwork goes left to right as in Illustrator, you’ll see that the holes now also match the Illustrator version. Magic!
Why is the Artwork at the Bottom?
Good question. You’ll understand it better in the next lesson, when we start adding crease lines and actually folding the dieline, but imagine you are folding a box this way. You start with a flat sheet, then fold sides up, then fold and lock the top and complete the box. If you want the artwork to be on the outer side of the box, where should it initially be? Right, it should be at the bottom!
No worries, you can also have the artwork at the top, if you like. We’ll discuss this later.
What’s Next?
Now as you made your first simple dieline and got the artwork at the bottom, you are ready to fold it up. Click the link below to do so.
- Adding Creases — learn how to fold a dieline;
- Defining Bottom — tell Origami where is the bottom of the shape;
- Multiple Shapes — how to have several objects in the same scene;
- Dieline Generator — make dielines faster with the online generator;
- Export and Rendering — learn to export scenes or render them.
Adobe and Adobe Illustrator are either registered trademarks or trademarks of Adobe Systems Incorporated in the United States and/or other countries.