Illustrator–Specific Features of Origami
Origami comes with Adobe Illustrator plugin that simplifies integration a lot. You can read more about this in our “Connecting to Illustrator” tutorial. However, there are more Illustrator–specific features in Origami and this tutorial covers the advanced ones.
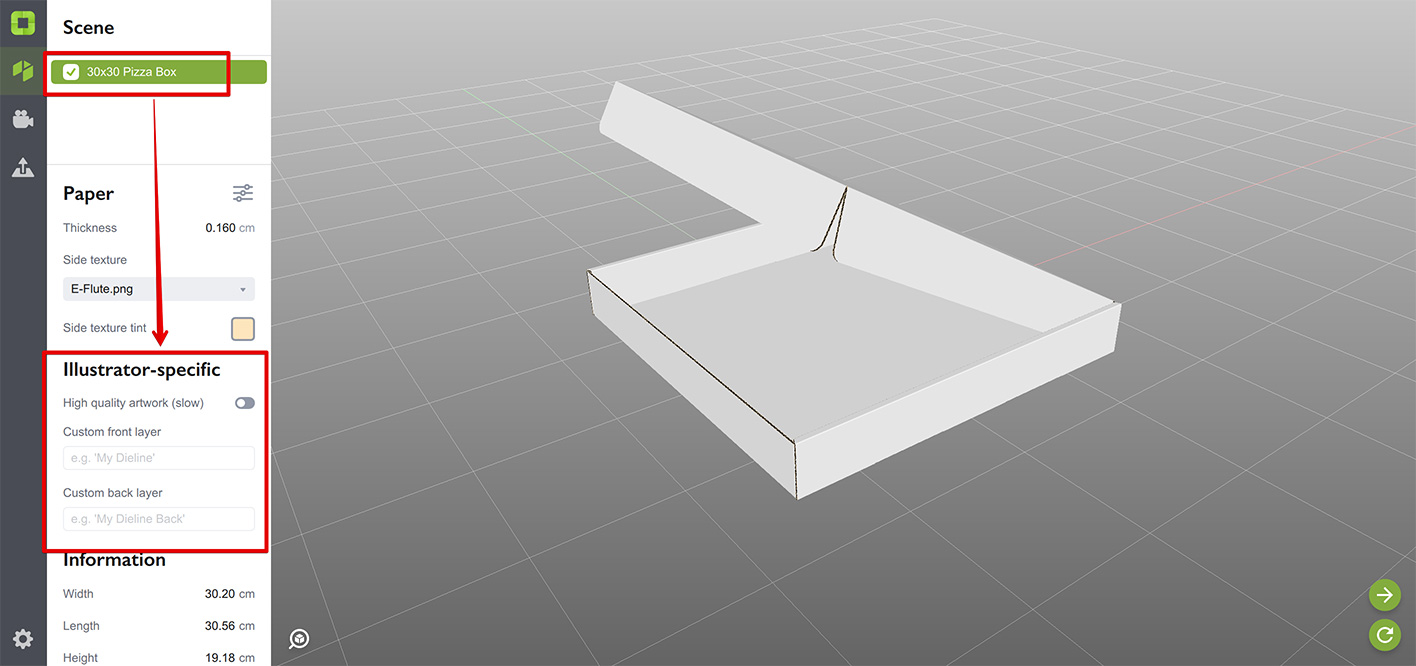
You can find the options here, note that they are configured individually for each element of the scene:
Let’s start with the Artwork Quality option.
Artwork Quality
When you click Refresh button at the bottom right corner of the window, Origami asks its Illustrator plugin to get the latest dieline and artwork and send them back. In order to do so, the plugin asks Illustrator to make a raster version of the currently open project. This may include multiple artboards, foil masks, extra channels and so on and it may take a while on large or complex projects. Sometimes it even takes tens of seconds. It is acceptable to wait a bit before you do the final export, but not while you are working on the project. As we can’t speed up Illustrator, we added an option to request the artwork in low resolution which usually works much faster.
Here you can see the difference between the high and low quality artwork modes:
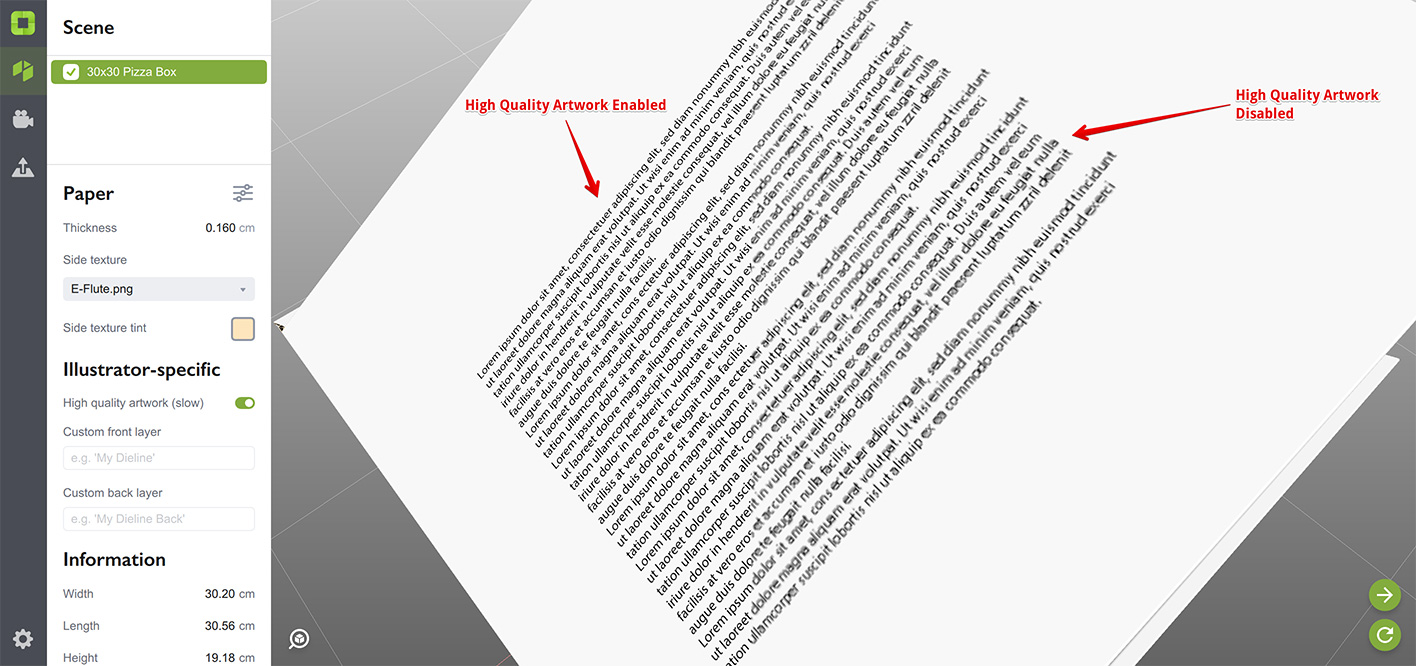
You usually work in low–quality mode while making up a scene. Once done, you can switch to high–quality mode and refresh the shape one more time to get the latest artwork in proper quality. Then you can save the project and return to that quality image later or work on other parts of the scene. High quality artwork does not affect Origami speed if you don’t fetch it from Illustrator.
You can configure quality settings in Origami preferences window:
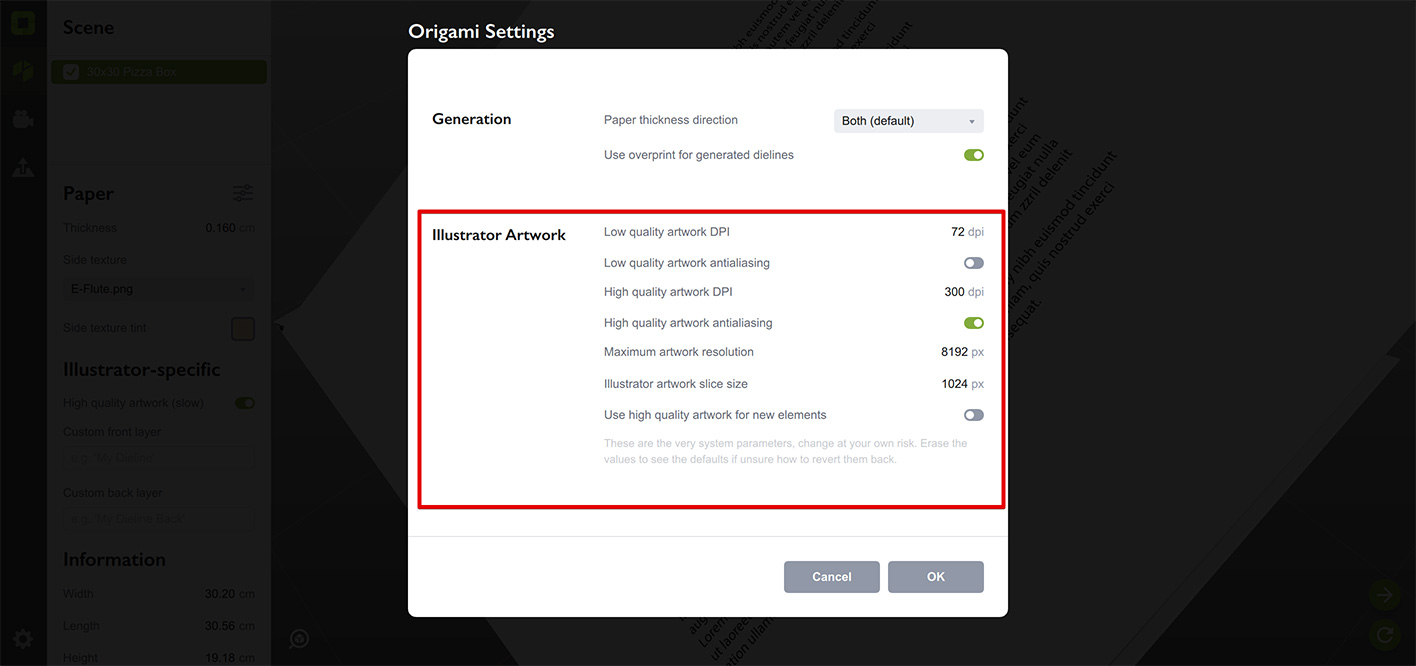
Here are the options explained:
- Low quality artwork DPI — the DPI Origami uses to rasterize the artwork for low quality preview. It is 72 by default;
- Low quality artwork antialiasing — sets if Origami needs to apply antialiasing option when it rasterizes a low quality artwork preview, disabled by default;
- High quality artwork DPI — same as above, but for high quality preview. It is 300 by default;
- High quality artwork antialiasing — same as above, but for high quality preview. Enabled by default;
- Maximum artwork resolution — when Origami requests an artwork it takes the DPI mentioned above and applies it to the dimensions of the selected artboard. This gives a resolution in pixels which is then compared to the value of this parameter. If the resolution is higher — it is scaled down proportionally, so the larger side matches the parameter. Then Origami uses this resolution for rasterizing the artwork. Default is 8192, higher values lead to slower rendering and may not work on low–end graphics adapters;
- Illustrator artwork slice size — sometimes Illustrator can’t rasterize the whole artwork at once, so Origami cuts it in square chunks and rasterizes them one by one. This parameter controls the chunk size being used. It can be increased to speed the rasterization up, but at some point it might stop working and you get a black image instead of artwork. Reduce the maximum resolution here to sort it out. Default is 1024;
- Use high quality artwork for new elements — this configures whether the new elements should use high or low quality artwork by default. Default is false.
You don’t need to override the defaults in most cases. Make sure you fully understand the parameter you change before doing so.
Origami Layers Lookup
When you receive a dieline from Illustrator or send it back, Origami needs to find a layer that contains a dieline in order to read or modify it. Sometimes it even needs to create the layer first.
By default Origami uses “Origami” as a front layer name and “Origami Backside” as a backside layer name. Origami runs through the visible Illustrator project layers one by one and uses the first one that matches the name (i.e. contains the “Origami” text). In order to avoid collisions, Origami also checks that the front layer name doesn’t match the backside name, so “Origami Backside” layer does not match “Origami” name even if it goes before the layer named “Origami”.
This way you can have layers like “Origami 1”, “Second Origami” — both will be identified and used. Backside layers should be named accordingly: “Origami Backside 1”, “Second Origami Backside” etc, so they match the “Origami Backside” mask for the back side of the dieline.
The layer finding algorithm is below:
- Get all the visible layer names in the same order they are in the Illustrator project;
- Run through them with the front layer name defined in settings;
- If a layer name contains the front layer name and doesn’t contain the back layer name — use this layer as the front one;
- Then run through the layers again with the back layer name defined in settings;
- If a layer name contains the back layer name — use this layer as the back one.
This means you can have multiple versions of the same dieline in a single document by leaving just one dieline visible or by arranging their layers in a proper order, so the one you want to use is at the top of the list. Backside layers (if any) are managed in a similar way.
Sometimes you may need more than just one default name. Say some of your projects have dielines in “Origami” layer, while other projects use “Dieline” layer name instead. You can tell Origami to use both names by placing “Origami, Dieline” text in the Origami layer name field of the Origami settings window. You also need to put “Origami Backside, Dieline Backside” or similar text into the Origami backside layer names in settings, so Origami can also find backside layers and artboards.
When multiple layer names are provided, the algorithm of matching the layers stays pretty much the same. The only difference that instead of matching with just one name, Origami tests all the names provided in settings against each Illustrator layer. The first match wins.
Custom Layer Names
Sometimes even having multiple alternative layer names is not enough and you need to use a very specific layer name. Origami has an option for that, and best of all it lets you have multiple dielines in the same Illustrator project! The option is: custom layer names.
Let’s make a simple Illustrator project with two layers, each containing a dieline:
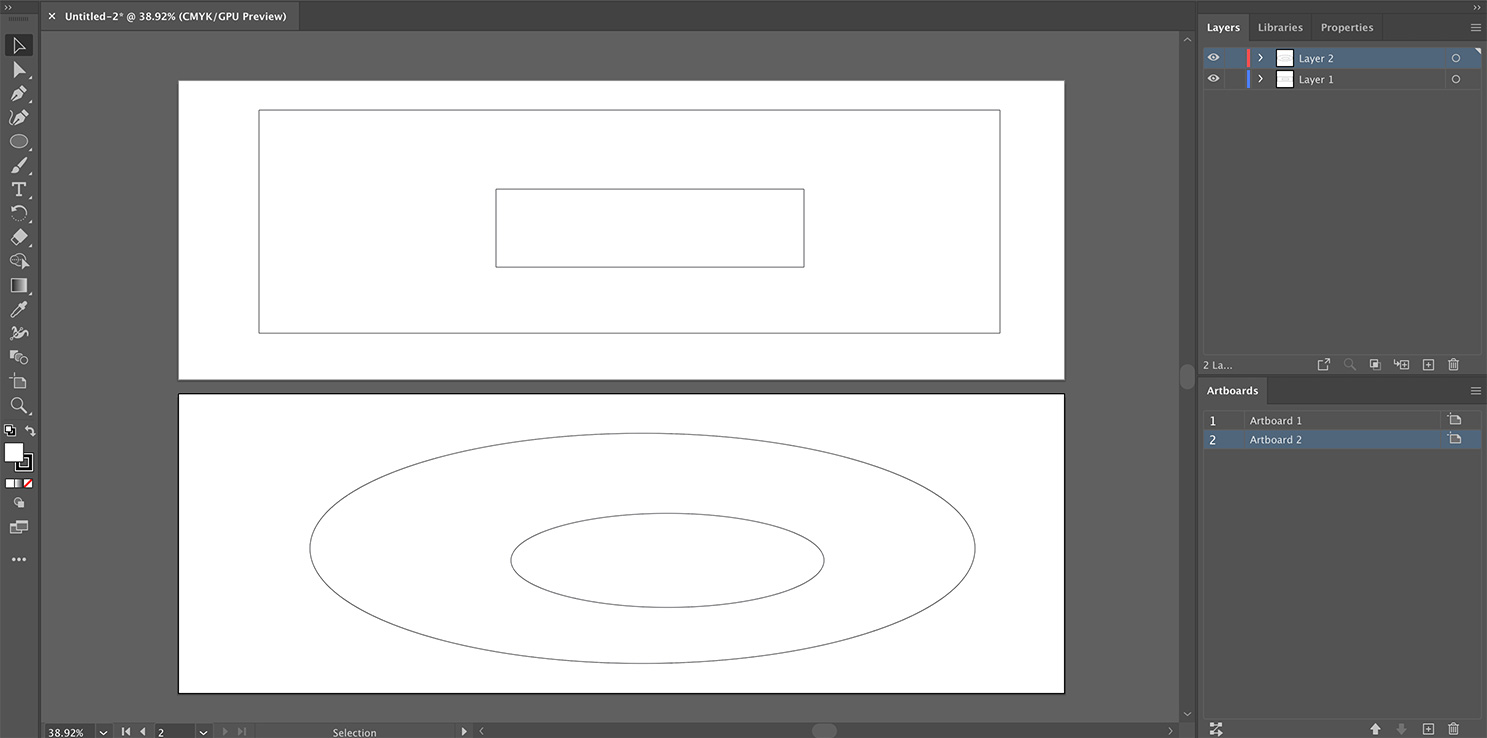
Here we have two layers: “Layer 1” with rectangular shape and “Layer 2” with a round one. Both have “non–Origami” names and if you try to read the project in Origami, you’ll get a “no dieline” error as Origami cannot find a layer with standard name in the project.
Instead, we’ll make a sample “Flat sheet” dieline to start with and edit its custom layer name field this way:
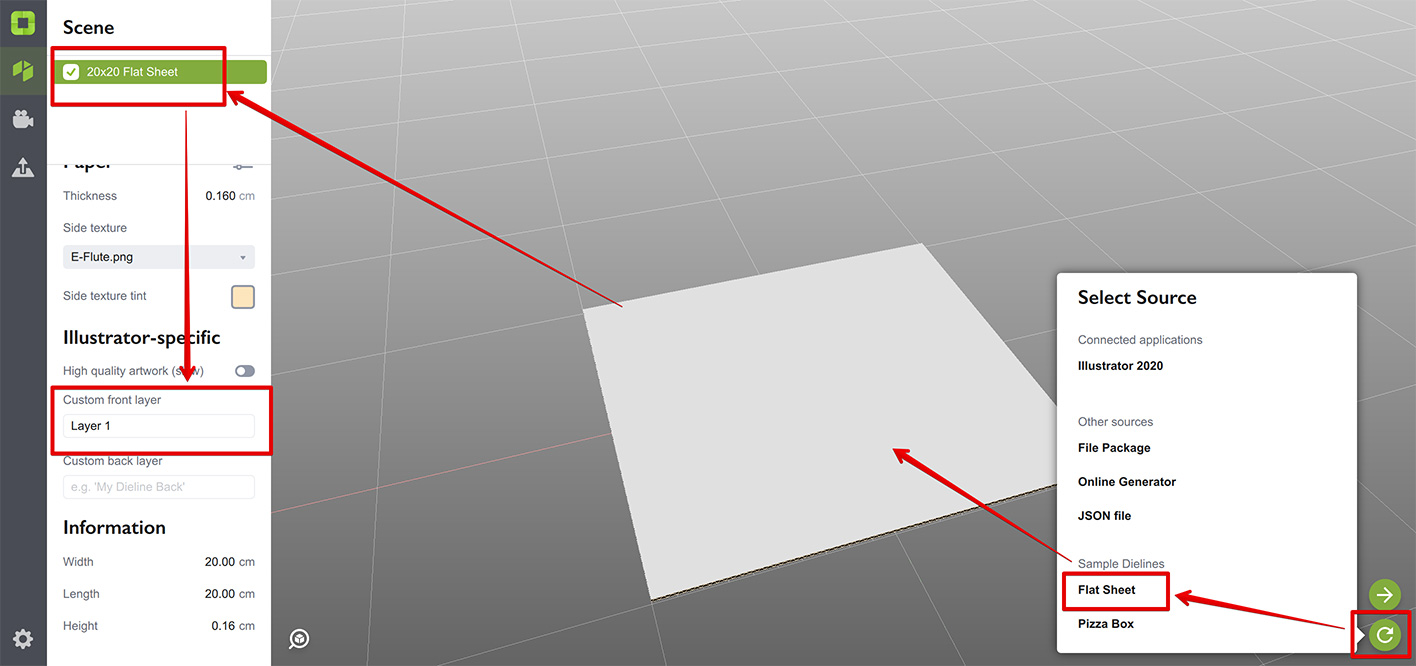
Now Origami has a shape that expects to find its dieline in “Layer 1” layer in Illustrator. Let’s refresh it from the Illustrator document we have:
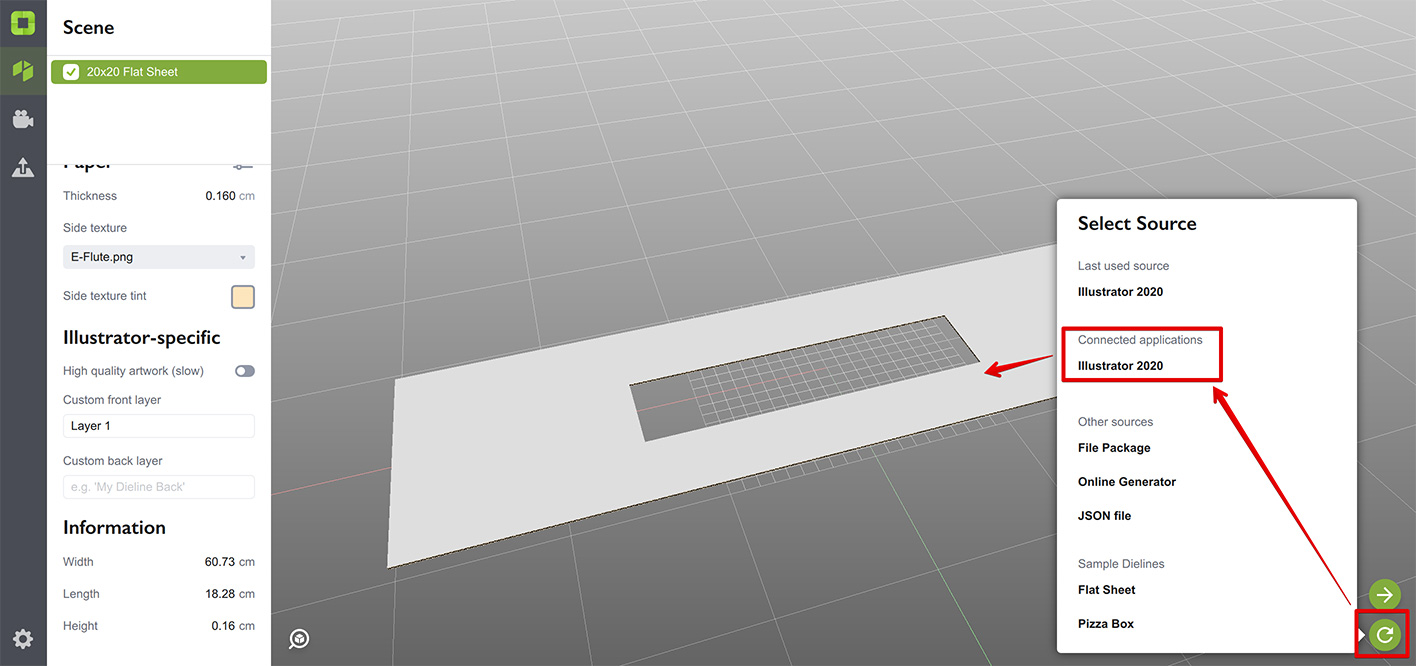
You see we’ve got a dieline from “Layer 1”. Now right–click the scene element in the top left corner and select Duplicate in the pop–up menu. Then modify the new item properties this way:
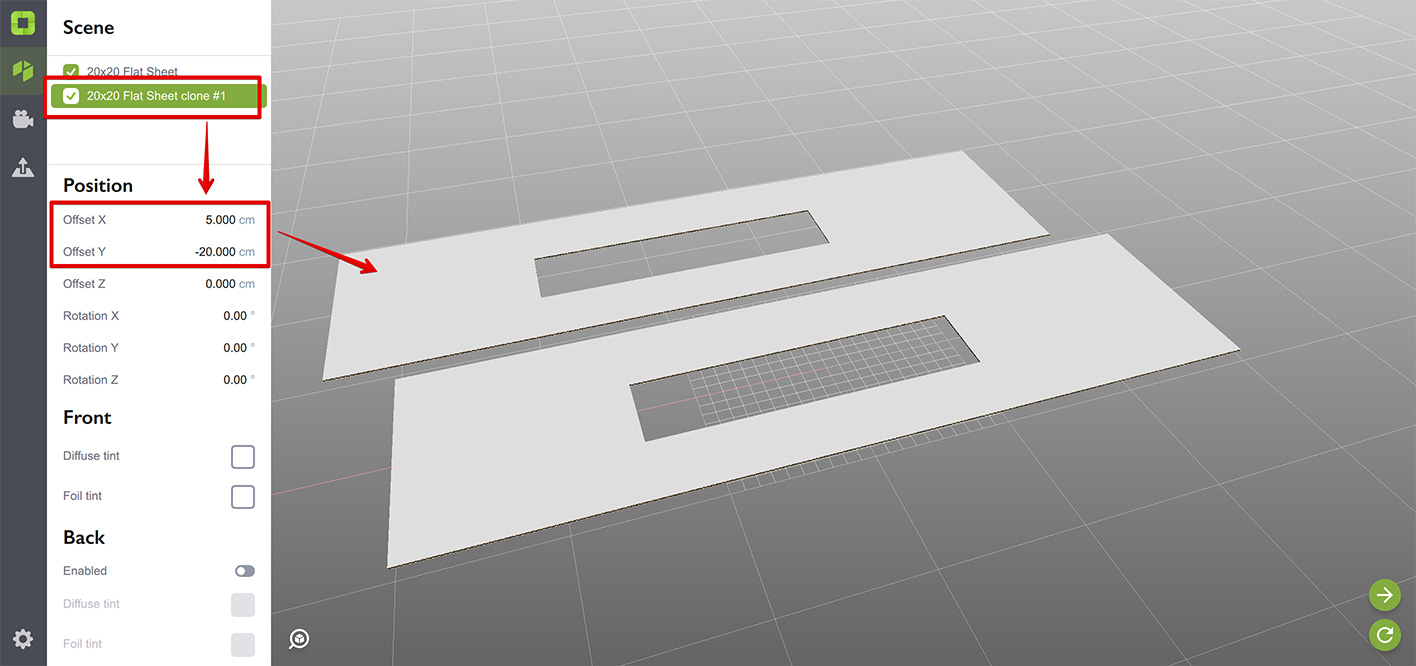
We simply changed X and Y parameters so both shapes got closer to each other. The new shape still displays the rectangular dieline as it is still a copy of the first one. Now scroll the panel down to the Illustrator–specific section and change the front layer name to “Layer 2”. Then click Refresh at the bottom right corner of the window to see the result:
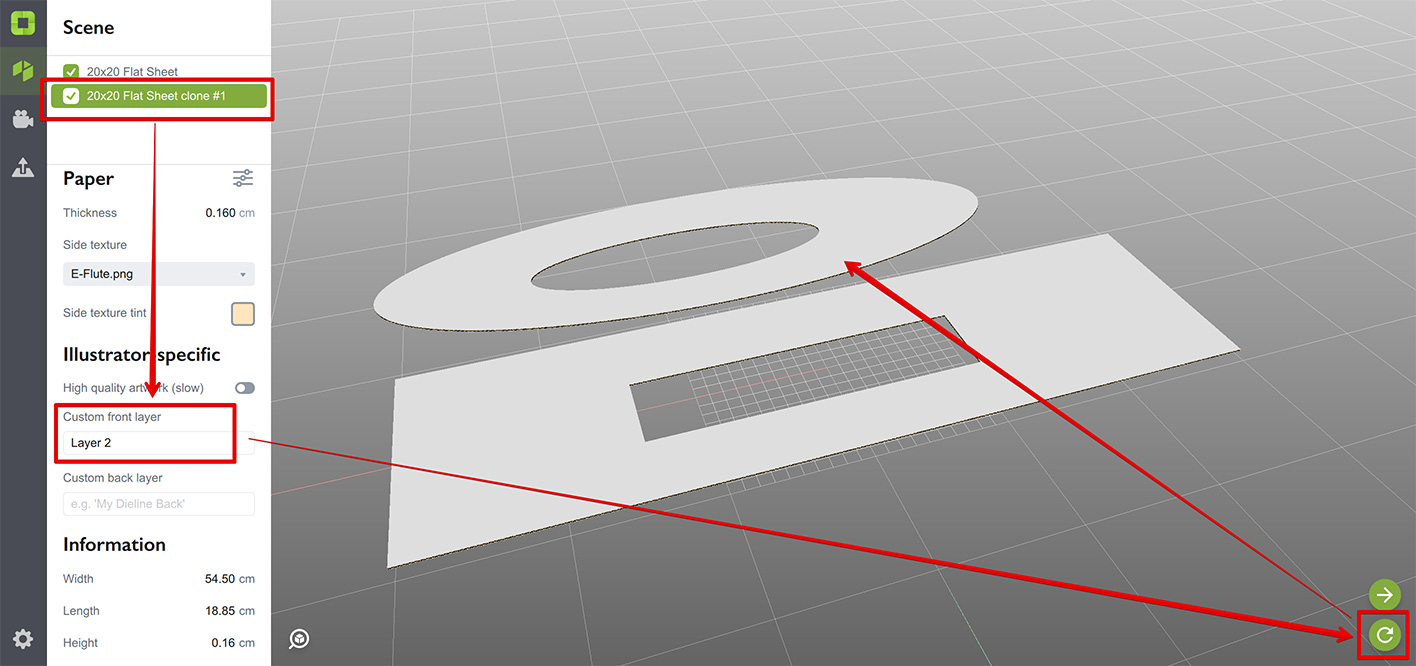
This way you can have multiple dielines in the same Illustrator project. If you use backside artwork, you need to specify custom back layer names for every shape you specify the custom front name. Otherwise Origami will use the standard backside layer name defined in settings which is hardly what you need.
If it doesn’t work, make sure that you edited the cloned shape, not the original one. Also check that you provided proper layer names, exactly as they are defined in Illustrator. No extra symbols or spaces allowed as Origami needs the layer name to be exactly the same as the one you provided.
That’s All
Now you know it all, good job! Go visit more tutorials if you like.
Adobe and Adobe Illustrator are either registered trademarks or trademarks of Adobe Systems Incorporated in the United States and/or other countries.