Dieline Viewer
Origami lets you see dielines in flat non-folded mode (2D view), so you can check them for errors, adjust folding angles and place anchors. This tutorial explains this in more details.
We’ll start with making a simple pizza box, but you can use your own dieline if you like:
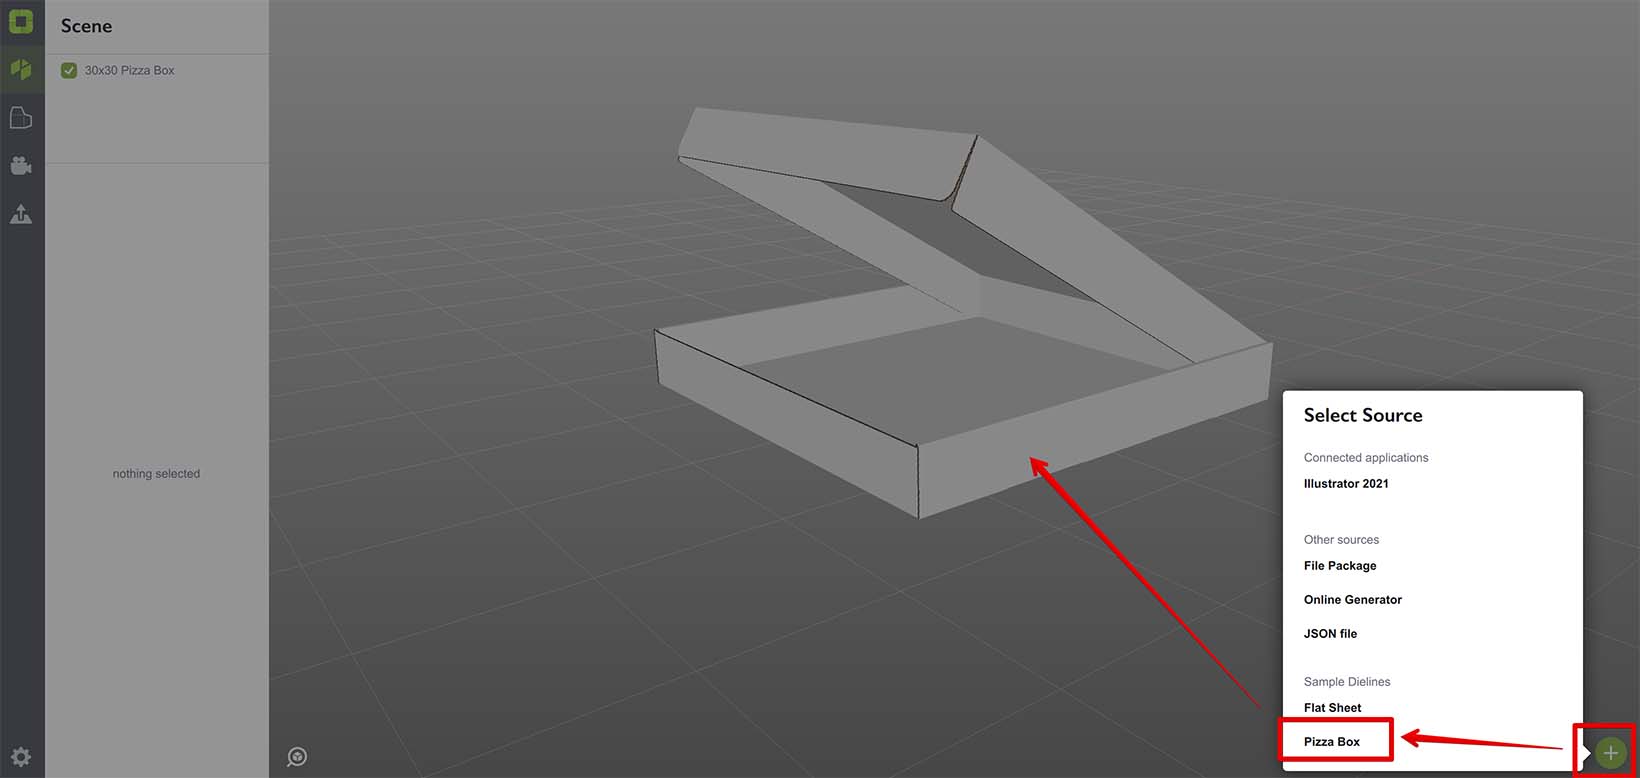
Once the box is ready, click the “2D mode” button at the left panel to switch to the dieline viewer.
Viewing Dielines in 2D Mode
Here’s what you will see when you click the “2D mode” button:
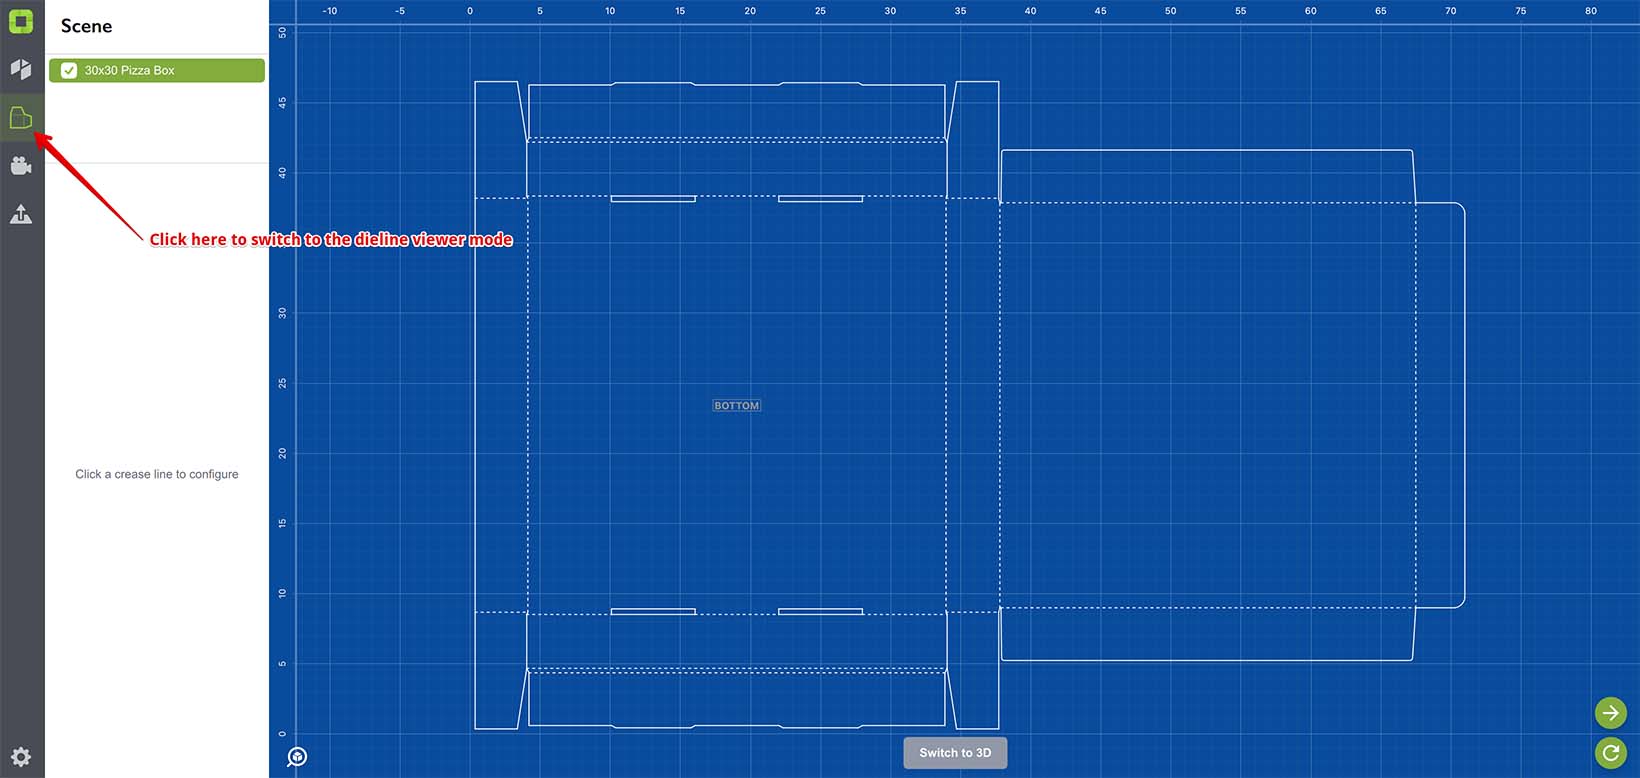
The panel at the left displays the same list of scene elements, while on the right you see the unfolded flat dieline.
You can zoom the dieline in and out with your mouse wheel and click its elements to make changes. More information about this below.
Changing Folding Angles
To change the folding angle click the crease line you want to edit. The line parameters will appear on the left:
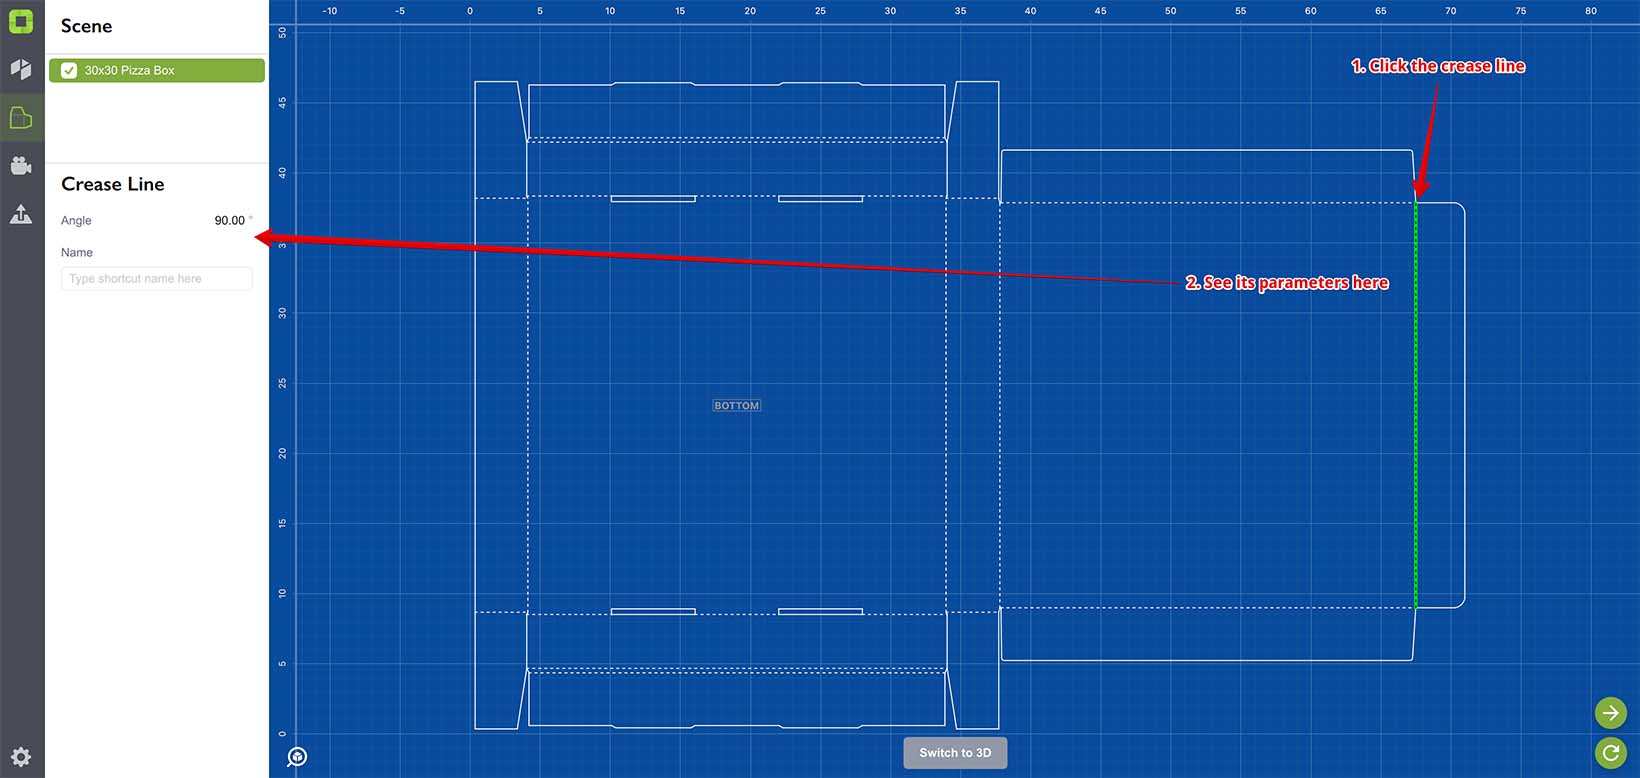
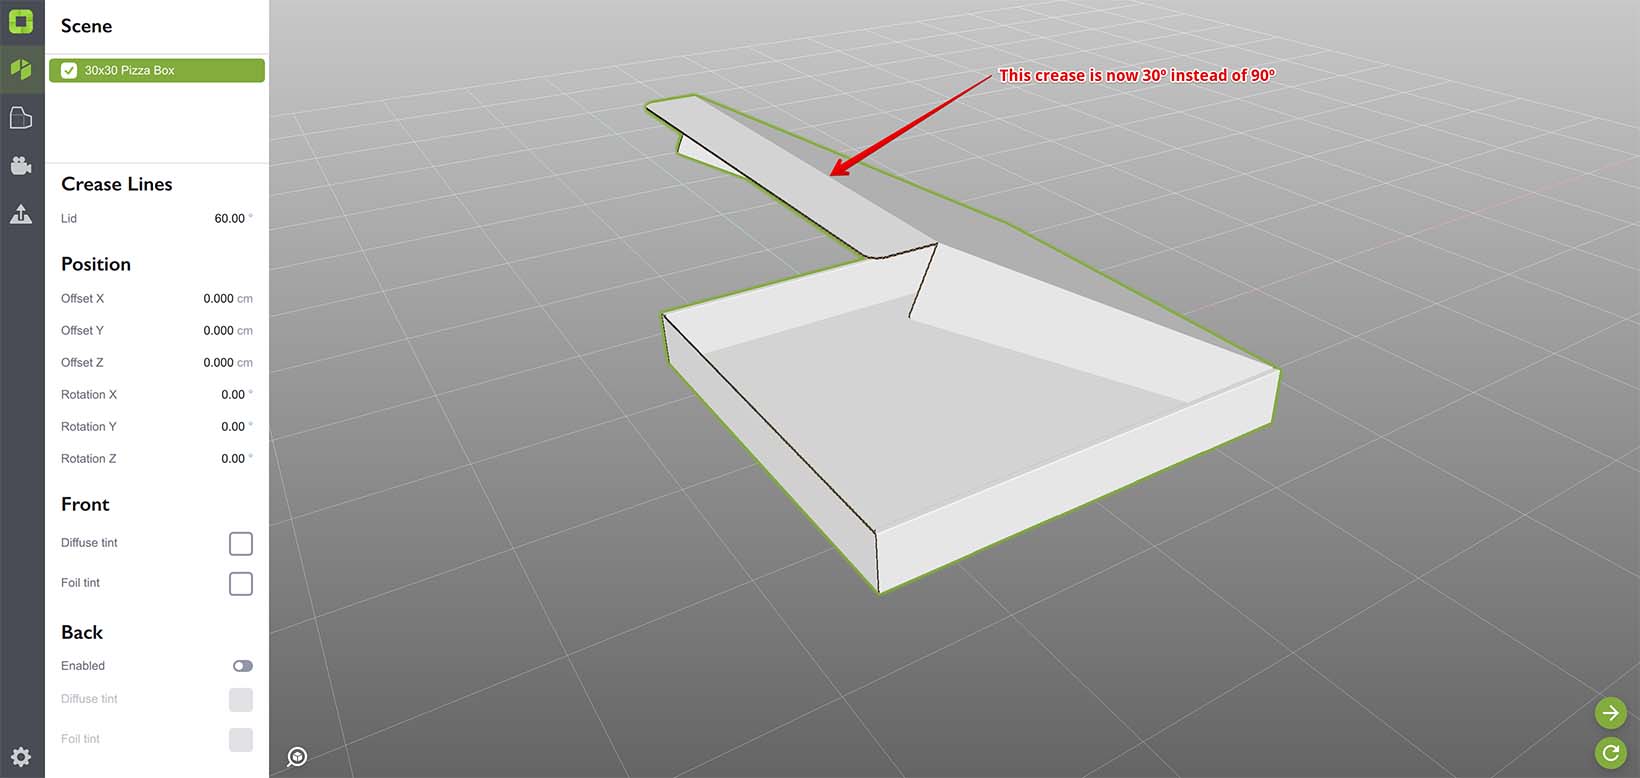
The Angle parameter is the folding angle. You can edit it and see the shape changed. Let’s change it to 30° and see what happens:
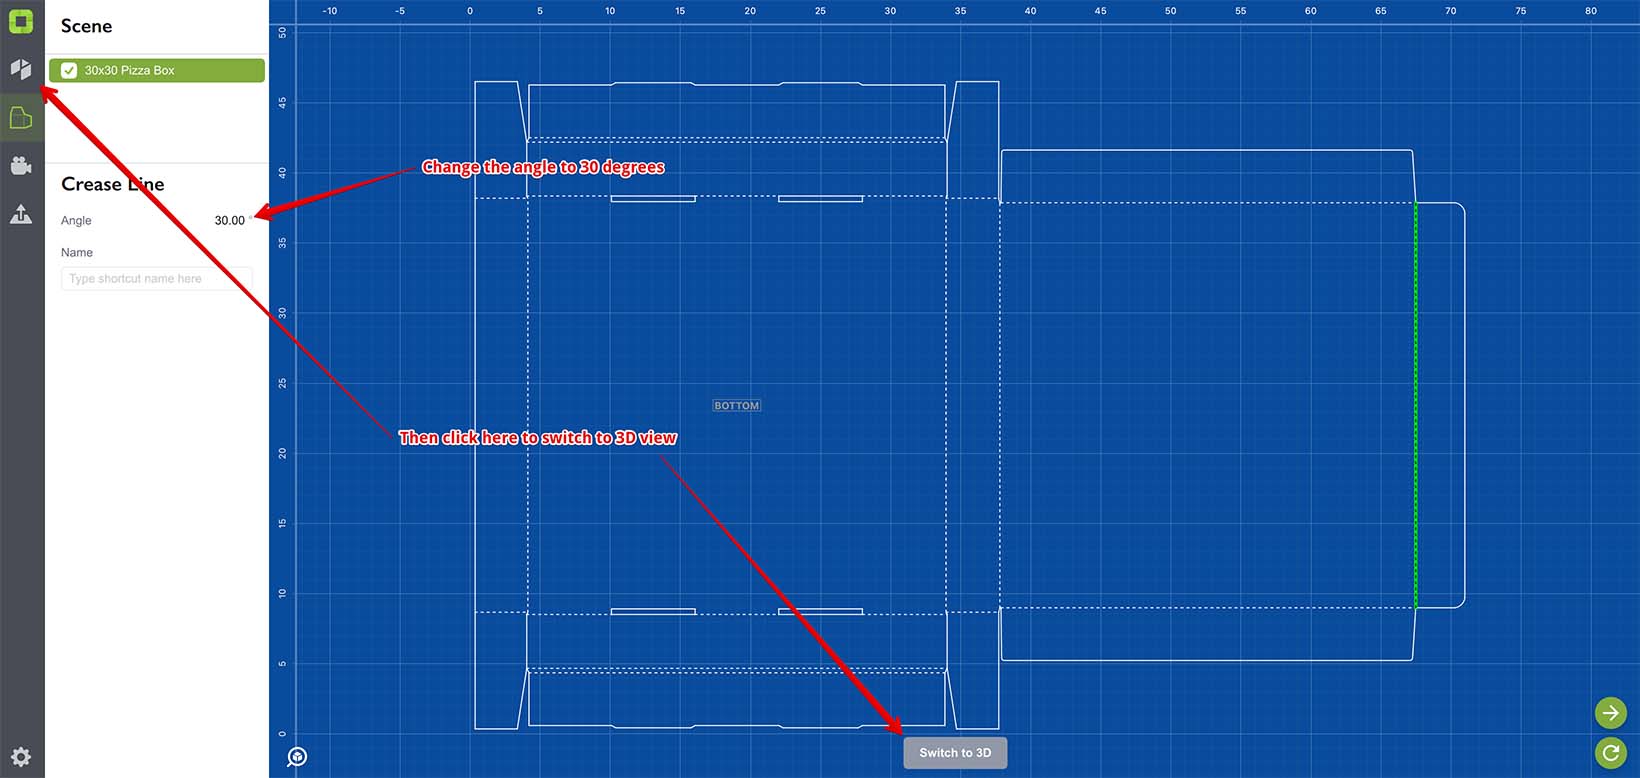
Now switch to 3D view and see the shape changed:
Switch back to the 2D view, select the same crease line again and find the other field named Name in the Crease Line section on the left:
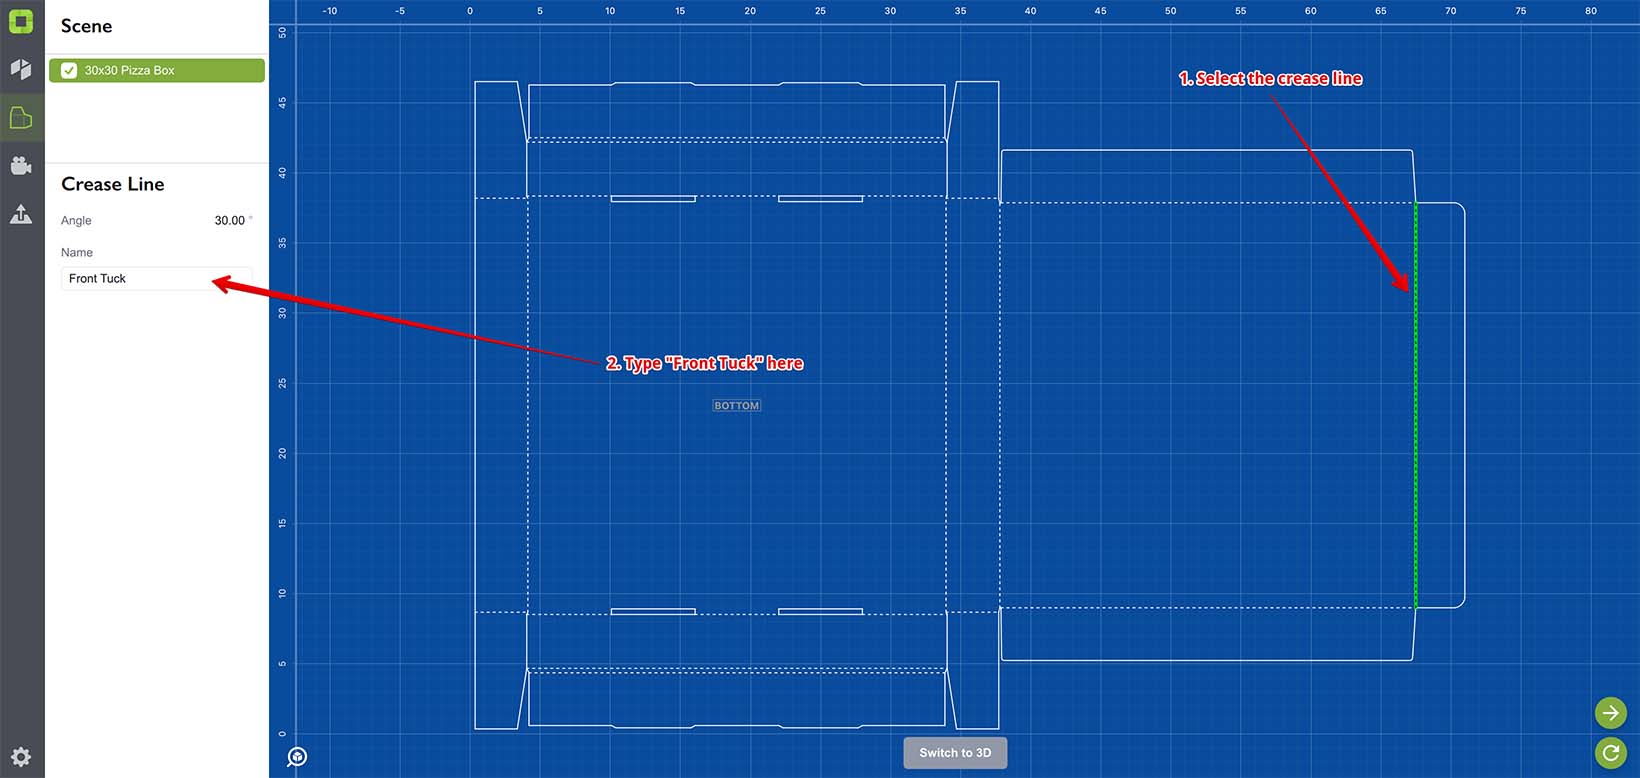
You can create “named” crease lines using this field. Type “Front Tuck” into the field and switch back to the 3D view:
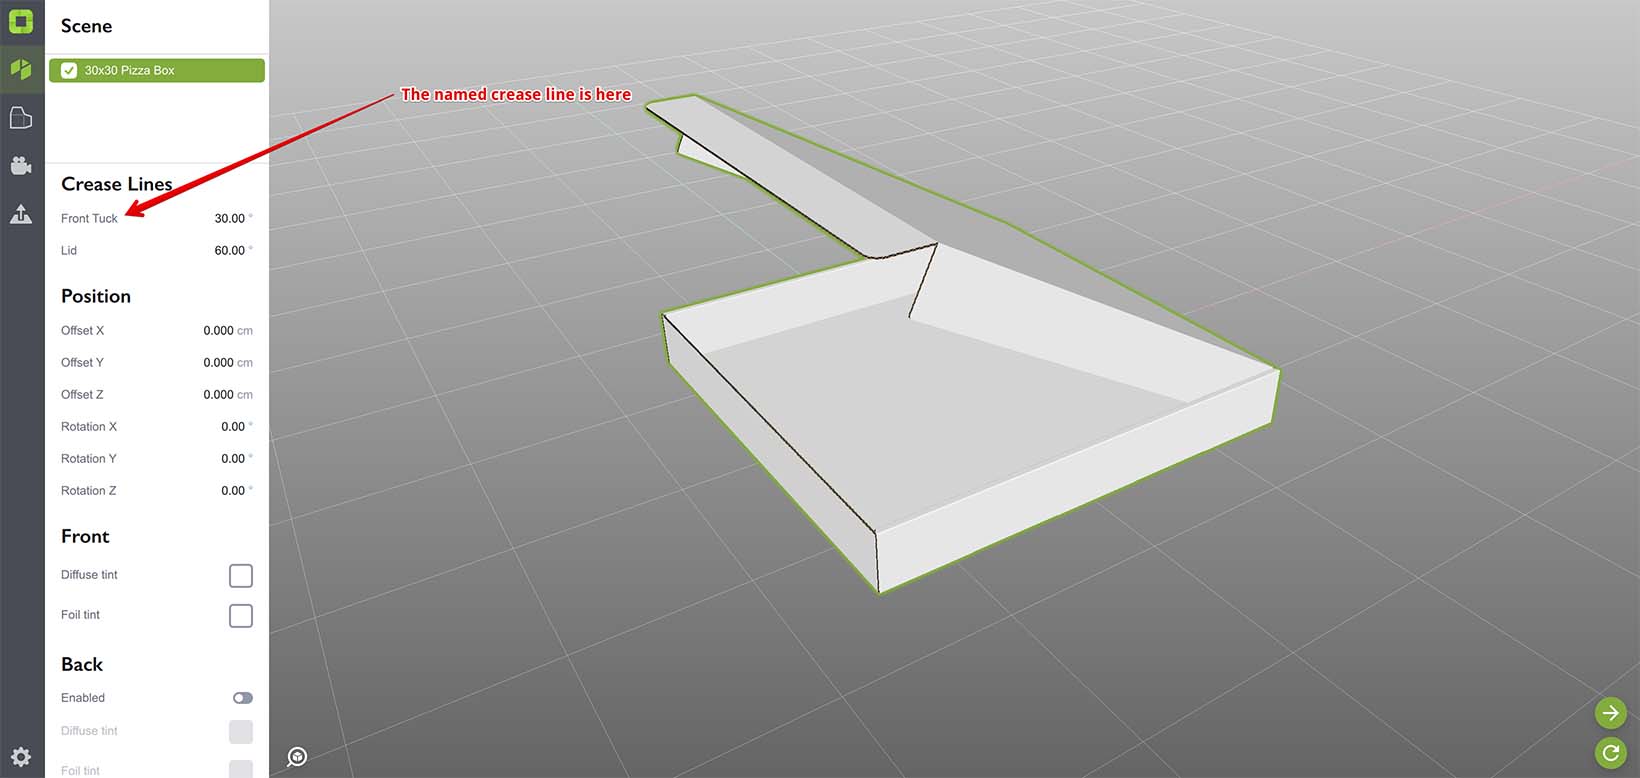
Notice the “Front Tuck” control is displayed at the left, showing the 30° angle you entered earlier. Now you can change the angle right here without switching to the dieline viewer.
Each name assigned to a crease line is displayed only once in the properties panel, and you can use the same name for multiple crease lines. This way changing the angle will affect all of them, which is very convenient for symmetrical elements of the dieline.
You may have as many named crease lines as you need. To remove the named crease line from the list, simply erase its name in the dieline viewer.
Hold the Control key on Windows or Command key on Mac to select multiple crease lines. The name or angle you enter will be applied to all the selected lines.
Note, that changing the angle in Origami does not change the dieline in Illustrator and updating the dieline will reset the changes you made in Origami. In order to prevent that you need to send the updated dieline to Illustrator first, then make the changes you need in Illustrator and read the dieline back.
Editing Anchors
Switch to the dieline viewer and notice the “Bottom” anchor in the dieline:

You can click it to select and see its properties on the left. You will need that for rotating the folded shape.
That’s the same anchor you place in Illustrator by creating a dummy path named “Bottom”. You can grab the anchor with your mouse and drag it somewhere else.
For adding or removing anchors, right click the dieline. A pop-up menu will appear:
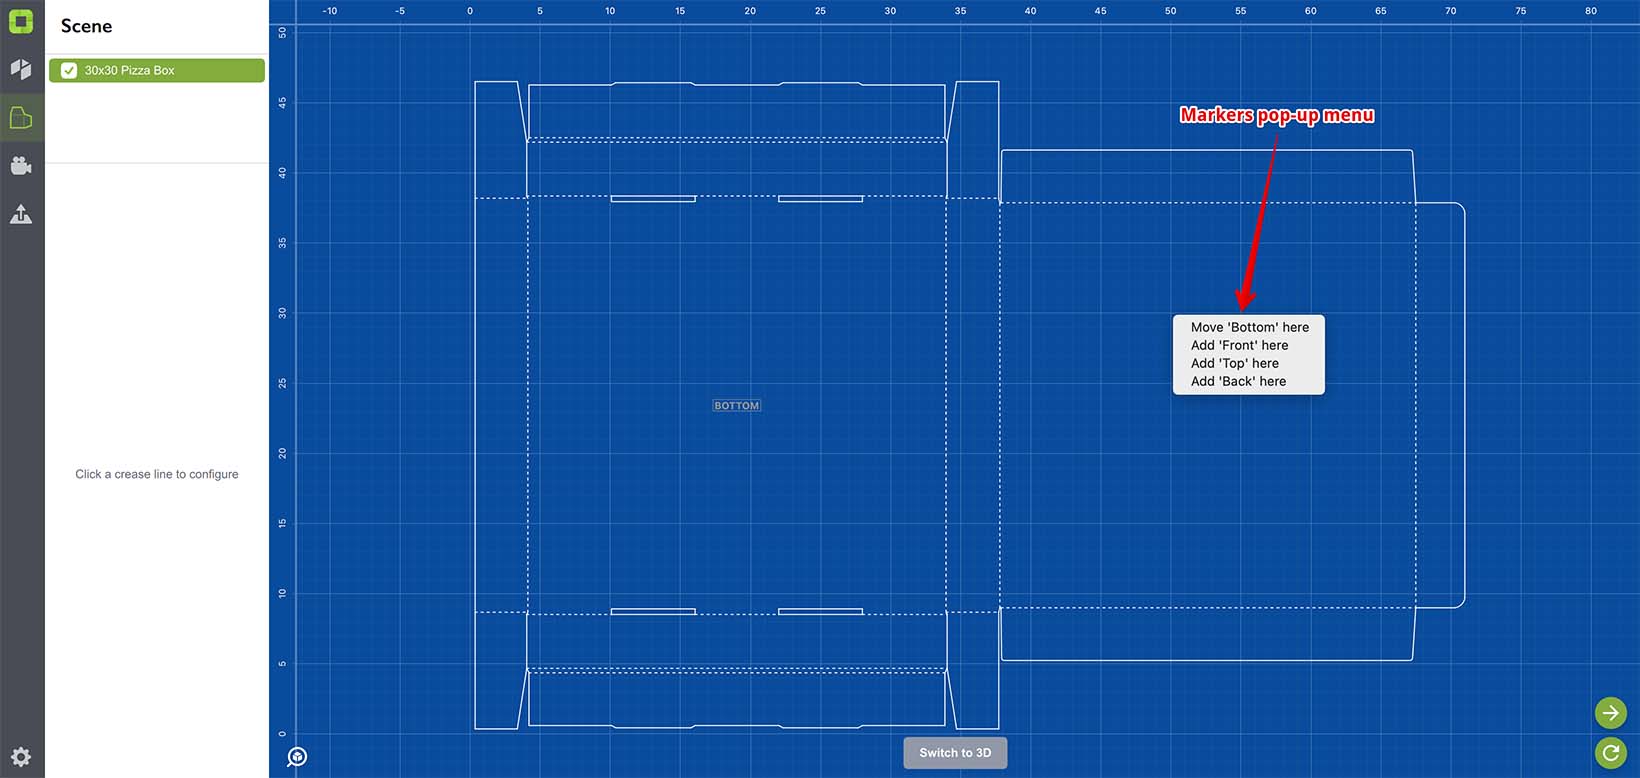
Depending on the click location you can add a new anchor there or move the existing one to that place. If you right-click the anchor, you will also have an option to remove it.
Note, that as with named crease lines you need to send the changes back to Illustrator (or any other vector editor you use) before reading the dieline, as otherwise the changes to anchors you made in Origami will be lost.
Dieline Verification
The dieline viewer is also used to display dieline issues. Read more about dieline verification here.
Adobe and Adobe Illustrator are either registered trademarks or trademarks of Adobe Systems Incorporated in the United States and/or other countries.