Checking Dielines for Errors
Origami detects many dieline problems and displays hints to help you fix them before it is too late. This tutorial shows how it works by intentionally making a problem dieline and then fixing it.
Let’s start with an obviously incorrect dieline:
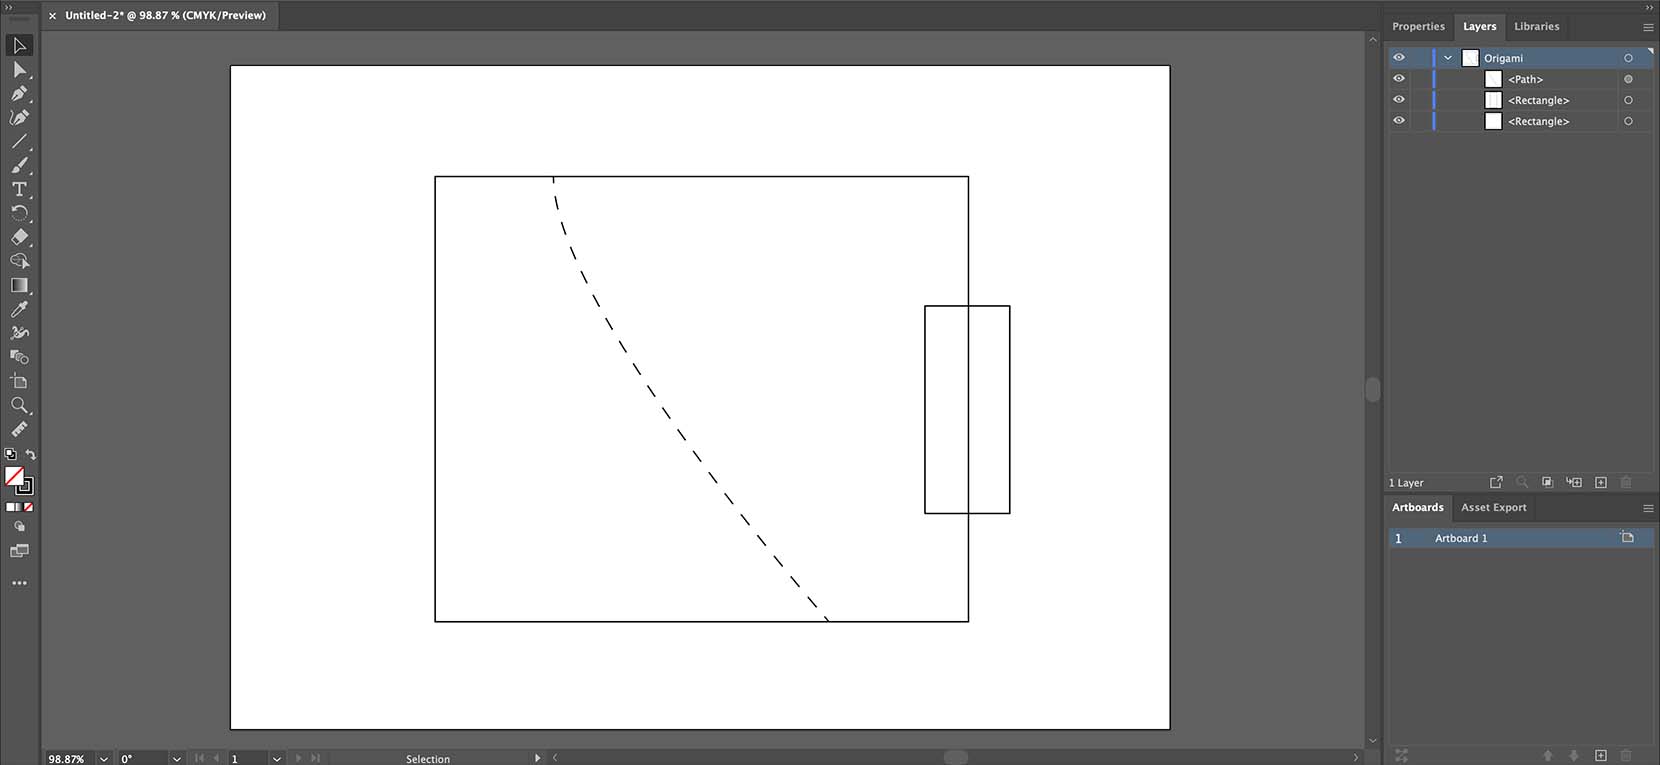
Can you spot the issues? There are two of them: the crease line is not straight and the cut lines are intersecting making an “outside” hole.
Dieline Viewer
Not let’s try loading it to Origami. Once loaded you’ll notice that Origami switched to the dieline viewer mode and now displays a warning sign next to the scene element:

Origami displays the list of issues on the left and highlights the currently selected issue on the right. The first issue Origami discovered is with the crease line, which is not straight. It highlighted the problem element with red and provided a brief description of the problem, so you can quickly fix it. For additional information, there is a read more link next to the error description.
Let’s click the other issue in the list to see what happens there:
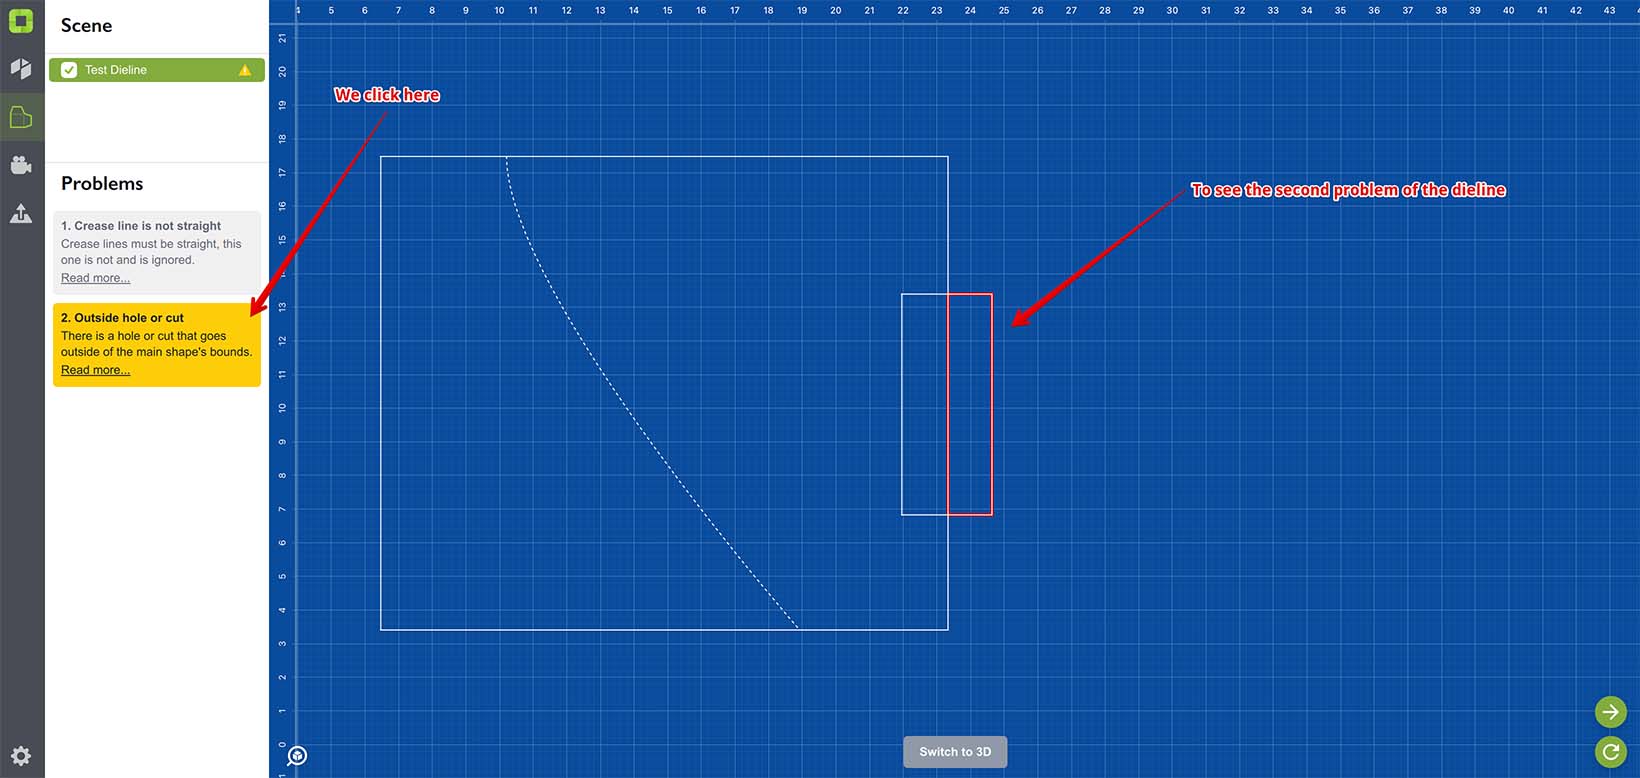
That’s the “outside hole” problem, which usually means overlapping cut contours. Now as we understand both problems, we can start fixing them.
Fixing Invalid Crease Line
Let’s go back to Illustrator and make the crease line straight:
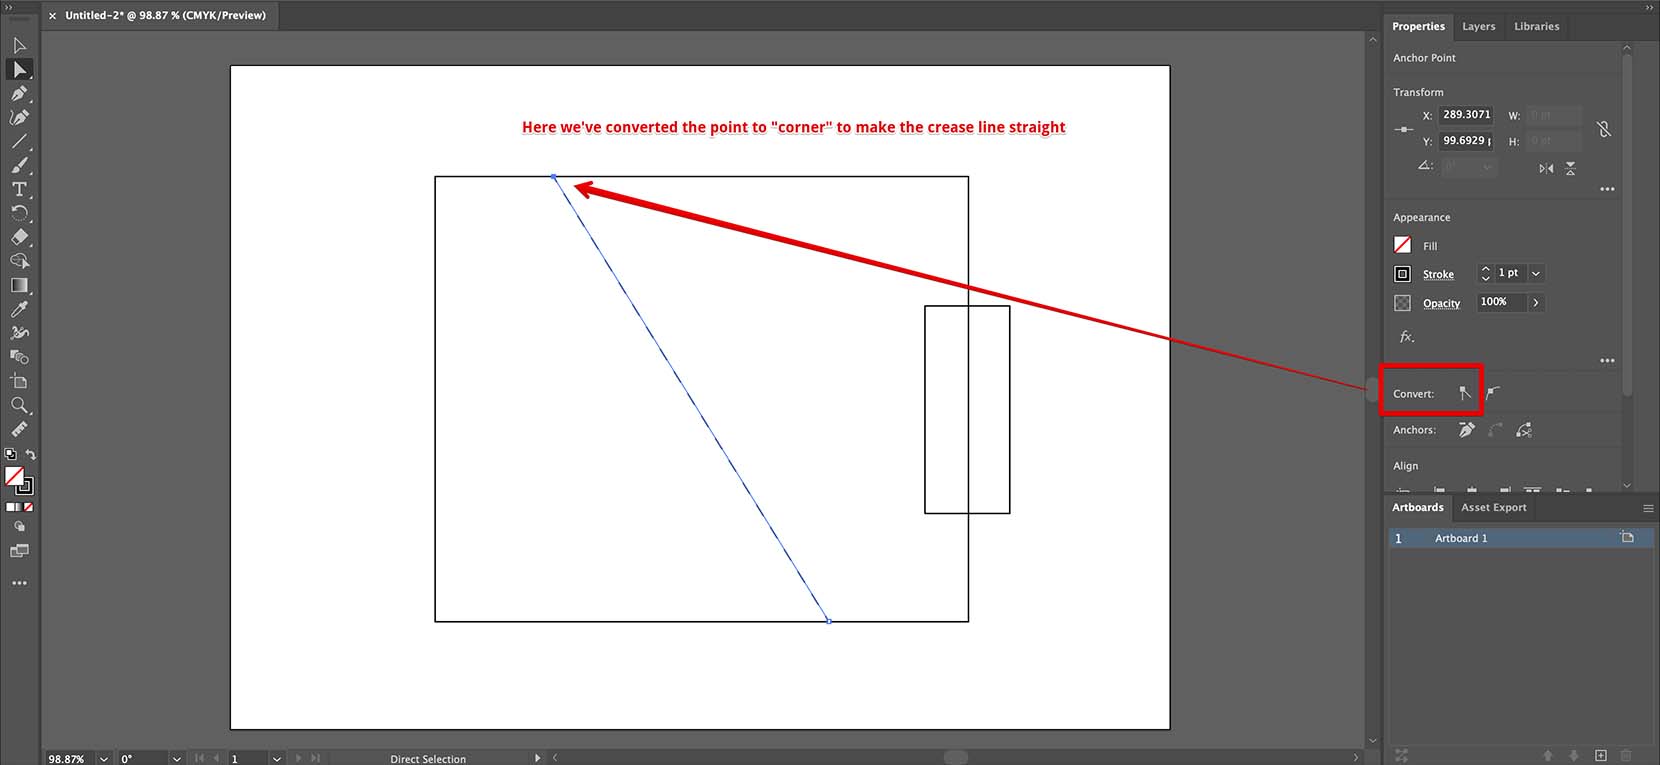
We clicked the top point of the crease line and converted it to “corner”, so the crease line became straight. Now let’s switch to Origami and update the dieline:
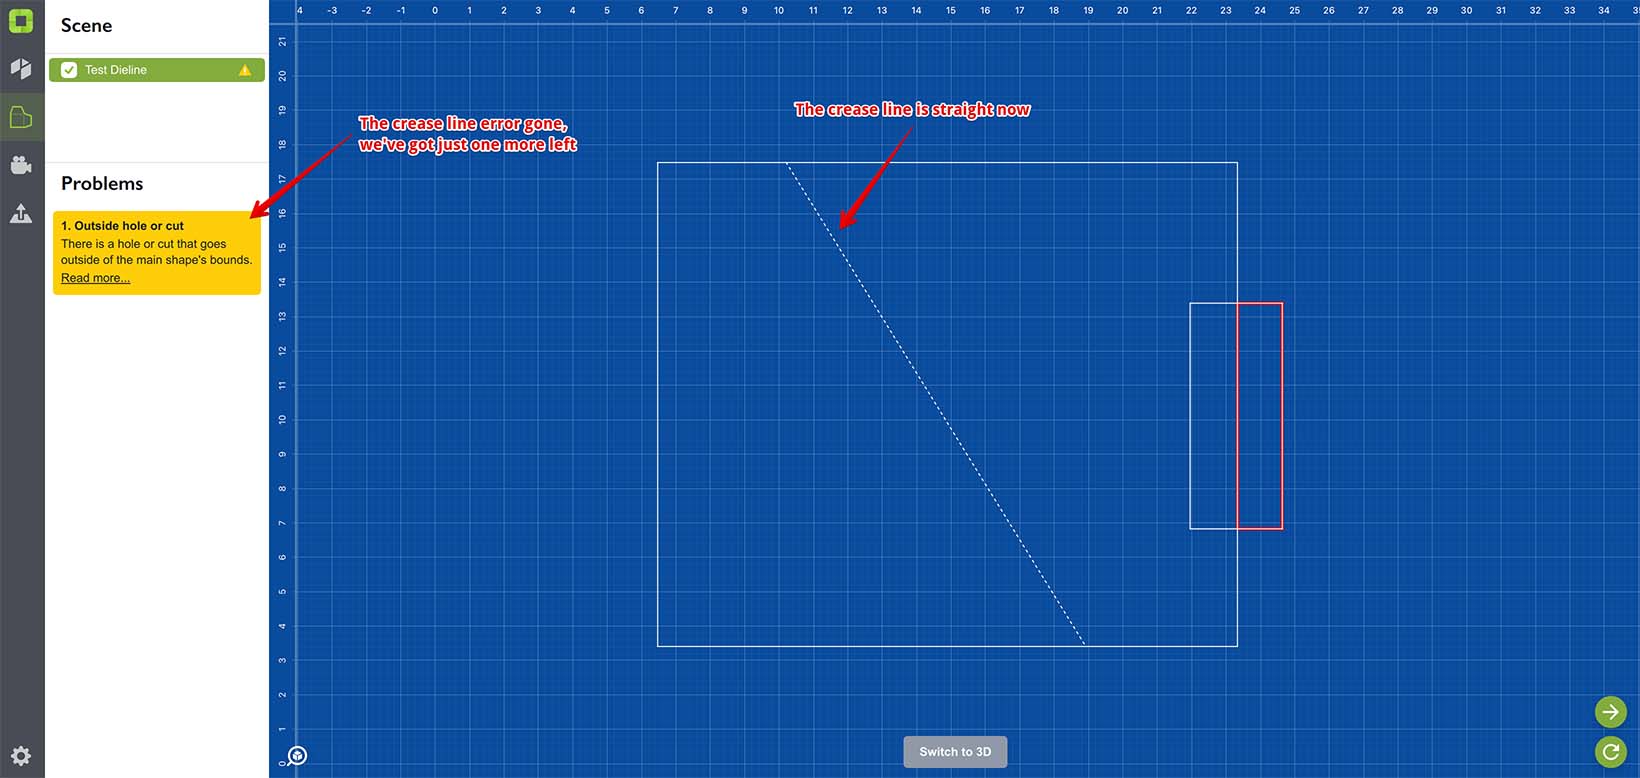
You see that the crease line is now straight and only one issue is left in the list. Let’s fix that, too.
Fixing the Outside Hole Issue
Again, switch back to Illustrator and move the right element to the left, so it goes inside the main rectangle:

You can also remove that small rectangle, or join it with the main one and remove the inner part — that’s up to you. The goal is to have just one main contour of the dieline.
When done, switch to Origami and update the dieline:
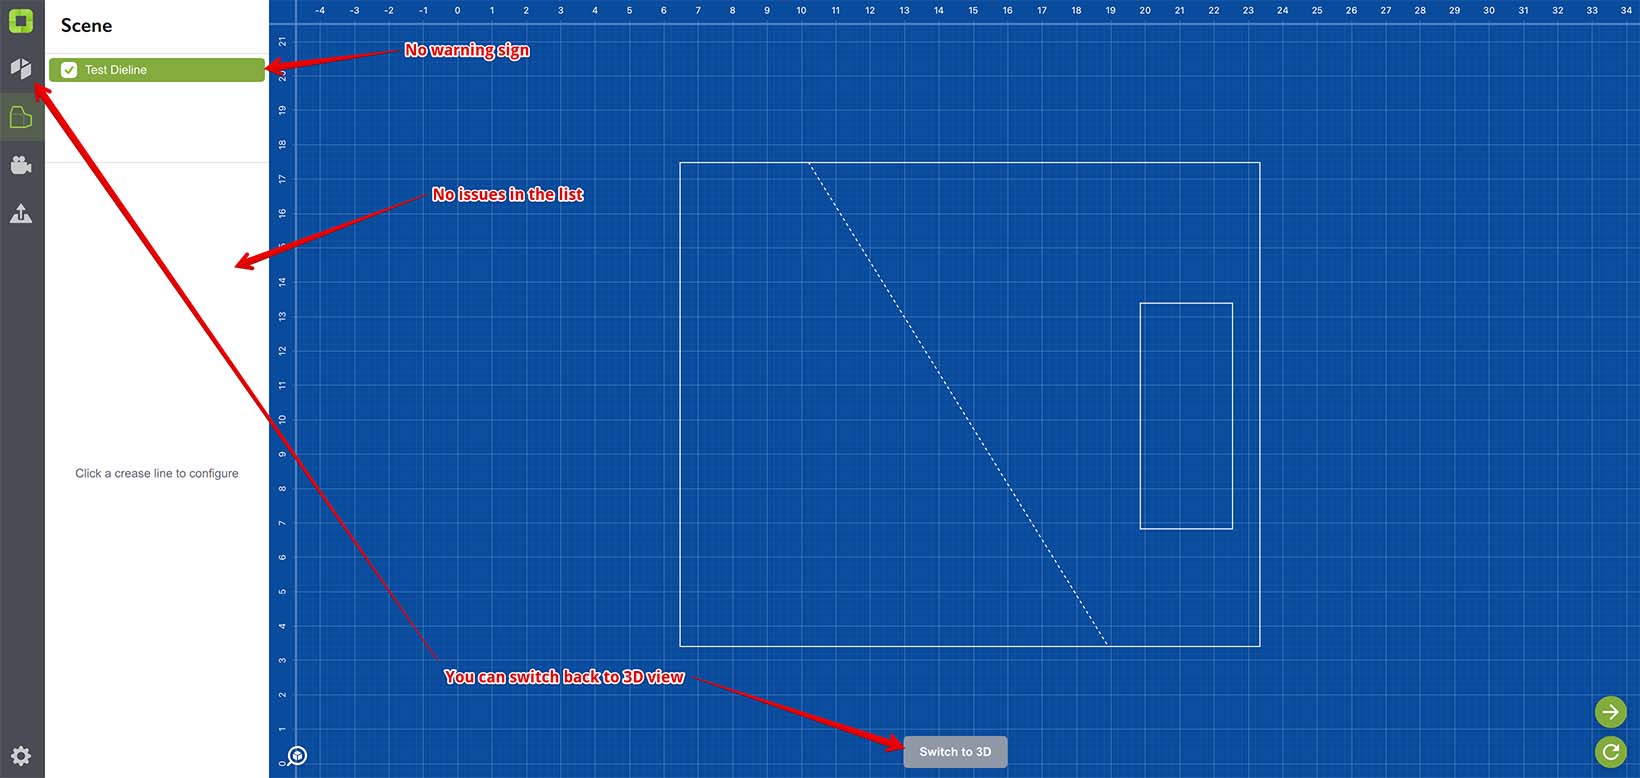
Notice there is no warning sign anymore, there is no errors in the list which means the dieline is now considered correct by Origami. You can switch back to 3D view to see the folded shape.
Notes
You can switch to 3D view even if the dieline has issues. Origami still tries its best to fold the shape up, even the problem one. However, it cannot guarantee the proper folding if there are issues with the dieline. The problems Origami detects may affect the printing or cutting process, or take extra time for preprocessing before printing, so it is a good idea to fix them earlier.
If you get way too many issues with the dieline, consider starting with the top ones and going from top to bottom, updating the dieline after fixing each problem. Sometimes a single problem may cause a number of secondary ones which disappear once the main issue is fixed.
You can read more about possible dieline problems using the links below:
- Almost Vertical/Horizontal — crease line is probably misaligned;
- Impossible Shape — shape cannot be folded as a whole;
- Path Is Not Closed — the dieline needs a solid, continuous outline path;
- Crease Line In Main Outline — the main outline must be made of cuts;
- Intersecting Curved Cuts — it might not be easy;
- Empty Layout — why there is no dieline visible?
- Hanging Element — what if a path goes nowhere?
- Impossible Crease Line — a crease that shouldn't be;
- Inconsistent Crease Lines — similar crease lines must have same angles;
- Invalid Crease — crease lines have limitations;
- Overlapping Lines — cut and crease lines must not overlap, as well;
- Separate Element — the dieline should come in one piece;
- The Points Are Too Close — avoid crowded spaces;
- Z-Fighting — what to do with overlapping polygons.
There's more from the older folding engines:
- Intersecting Holes — holes must not overlap;
- Outside Hole — all holes must be inside the outline path;
- Misaligned Elements — ends must meet, perfectly;
- Elements Are Too Small — keep dieline paths simple;
- Triangulation Failed — Origami fails to make a 3D mesh of a dieline.
Adobe and Adobe Illustrator are either registered trademarks or trademarks of Adobe Systems Incorporated in the United States and/or other countries.