Origami and Affinity Designer
Although Origami comes with a convenient Adobe Illustrator plugin, you can use it with any other vector editor capable of loading and saving SVG files. The tutorial is based on Affinity Designer, but you can do the same with any other editor.
Before We Start
With Illustrator you can start making a dieline in Illustrator and load it to Origami later. When it comes to other editors, you always start in Origami. You make a dieline there, then export it, edit in your vector editor and load back. The integration is based on importing and exporting SVG files and it is not easy to re–create all the files manually, so it is much easier to let Origami do the first step and then simply use the generated files.
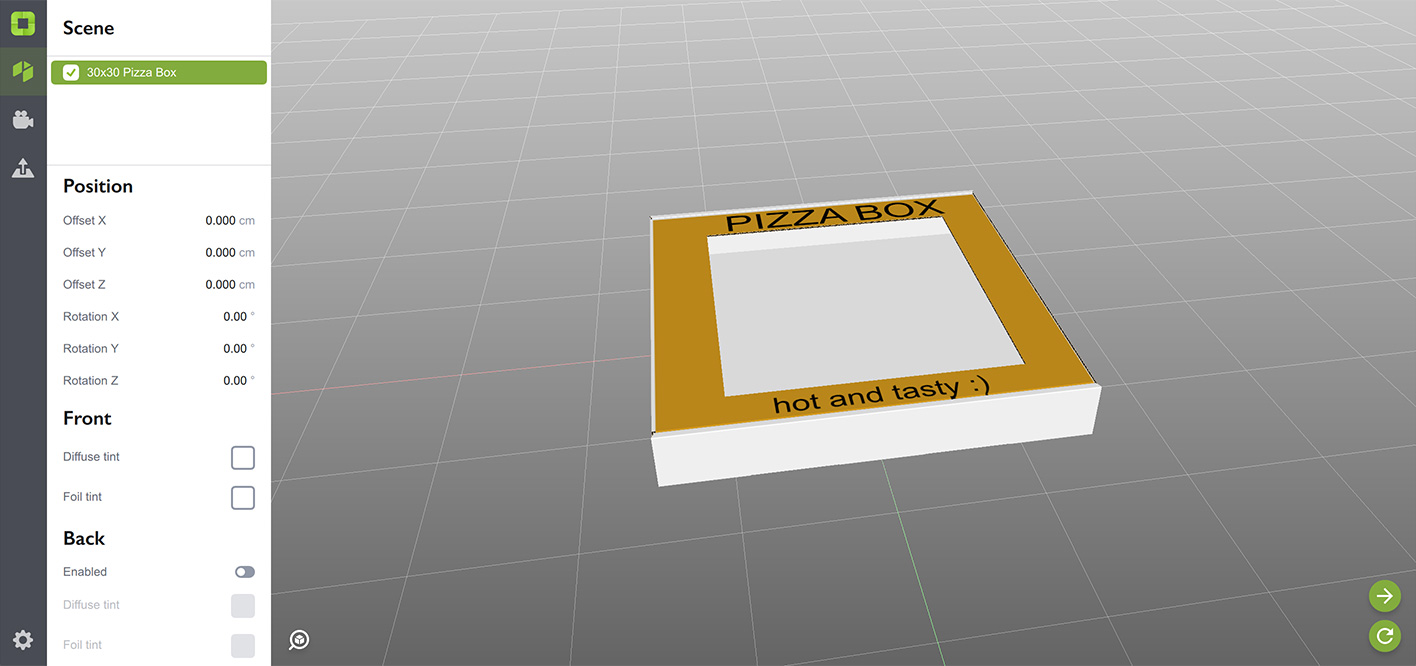
We’ll start with making a pizza box in Origami that will be used in this tutorial:

Now as we have a dieline in Origami, we are ready to send it to Affinity Designer.
Exporting to File Package Format
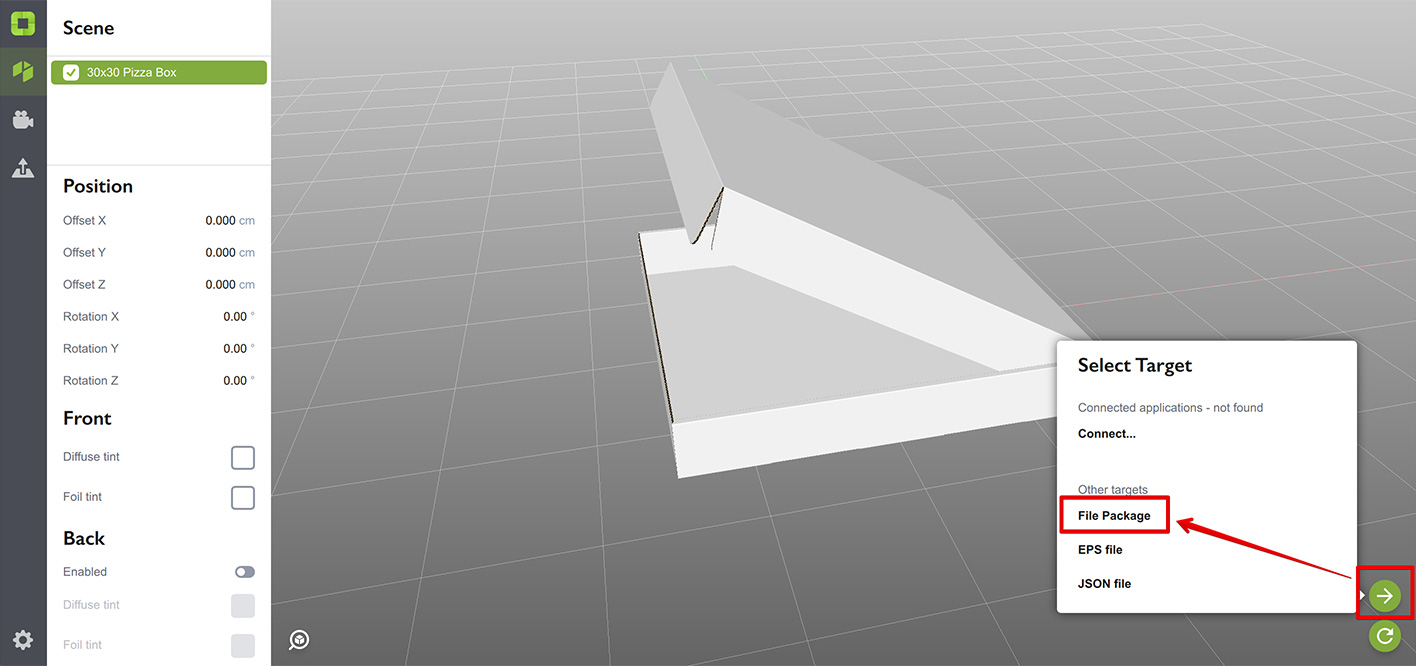
The next step is to export the dieline, so Affinity Designer (or any other vector editor) could read that. To do so click the Send button and select File Package target in the popup window:
You will be asked for a destination folder and then Origami will export the dieline to that folder. You can open it in Finder or Explorer, depending on your operating system. Here’s what it looks like on Mac:
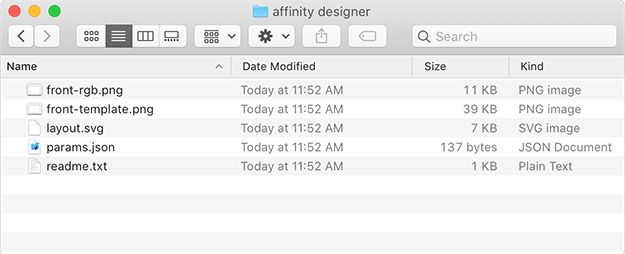
There are several files there:
- readme.txt — this file contains a brief description of all the other files and helps if you forget something;
- layout.svg — the dieline itself in SVG format. You will load it to your vector editor and then save it back for loading to Origami;
- front-rgb.png — the artwork of the front side of the shape. That’s what is displayed by Origami on top of your box;
- front-template.png — the raster version of the dieline, can be used as a template for your artwork;
- params.json — various parameters of the dieline that don’t really matter for this tutorial.
There could be more files if you enable backside or will be using foil masks, but the ones above are the main ones. Have a look through them, read the readme.txt file and then we can move to the next step.
Loading Dieline to Affinity Designer
We’ve just exported the dieline as a set of raster and vector files. Now we can load them to vector editing software to make some changes. Let’s start with the dieline, run Affinity Designer, select File → Open there and pick the layout.svg file you’ve just exported:
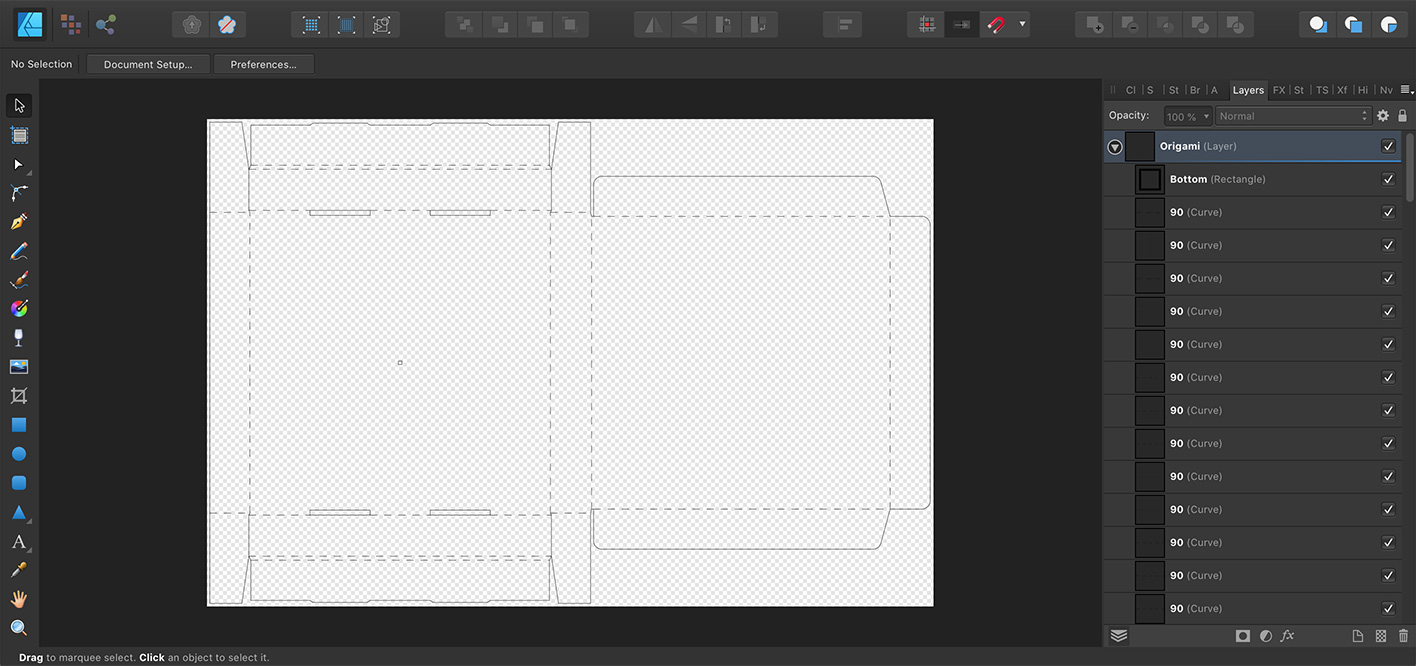
You see the dieline is loaded to Affinity Designer and all the elements are available in the “Origami” layer of the editor. Now you can make the changes you want. In this tutorial we’ll add a square window to the box lid and change the lid opening angle. Let’s start with the window:
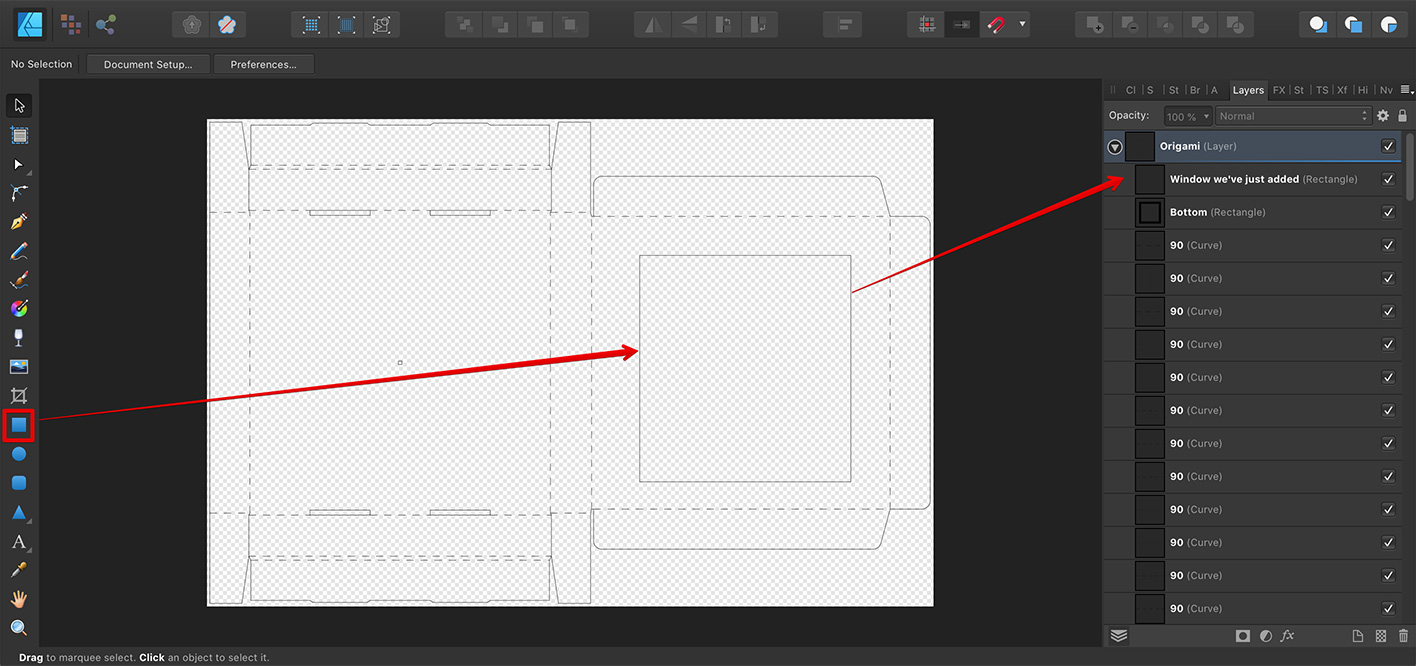
I simply made a new rectangle shape in the “Origami” layer and changed its style to match the other elements. It is essential to have a solid stroke style for cut elements of the dieline, so I did that too.
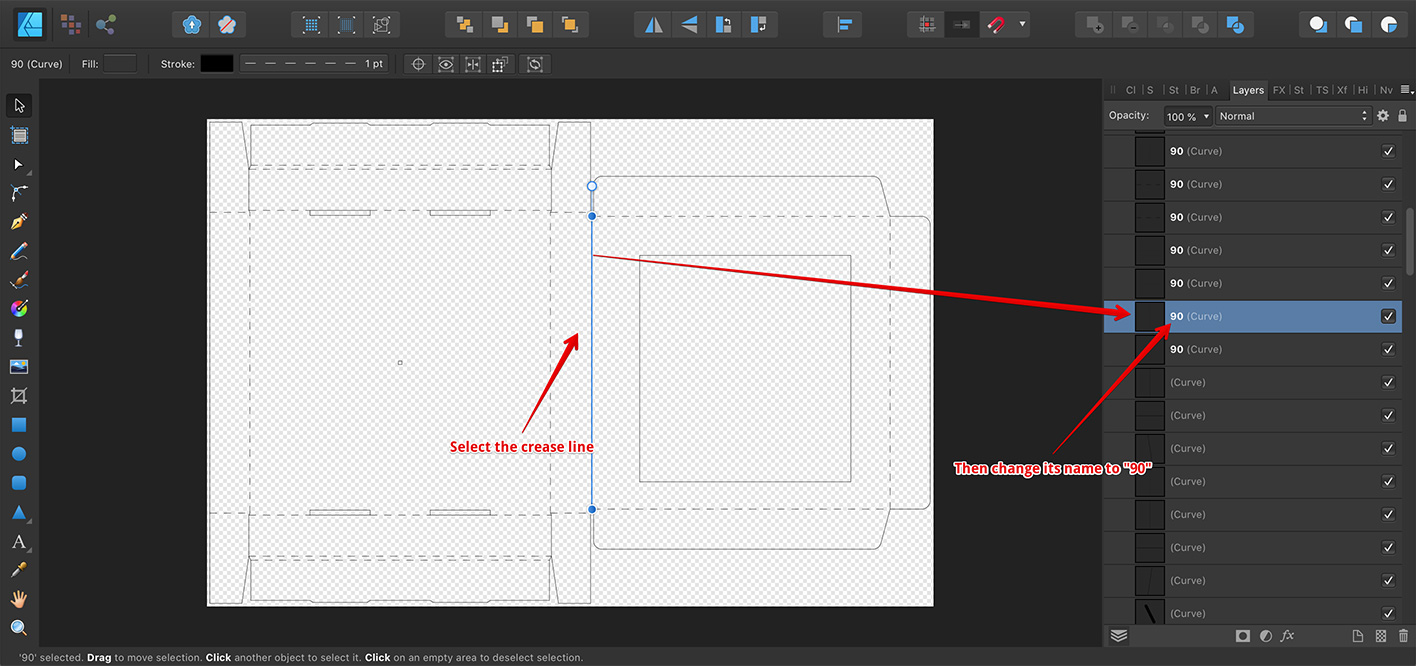
Now we need to locate the crease line controlling the angle of the lid and change its value to 90 to close the box:
We’ve done all the changes and it is now time to save the modified dieline back to the layout.svg file. The key thing here is to use File → Export option in Affinity Designer, as using the Save item will save the dieline as an Affinity Designer project, instead of the SVG file.
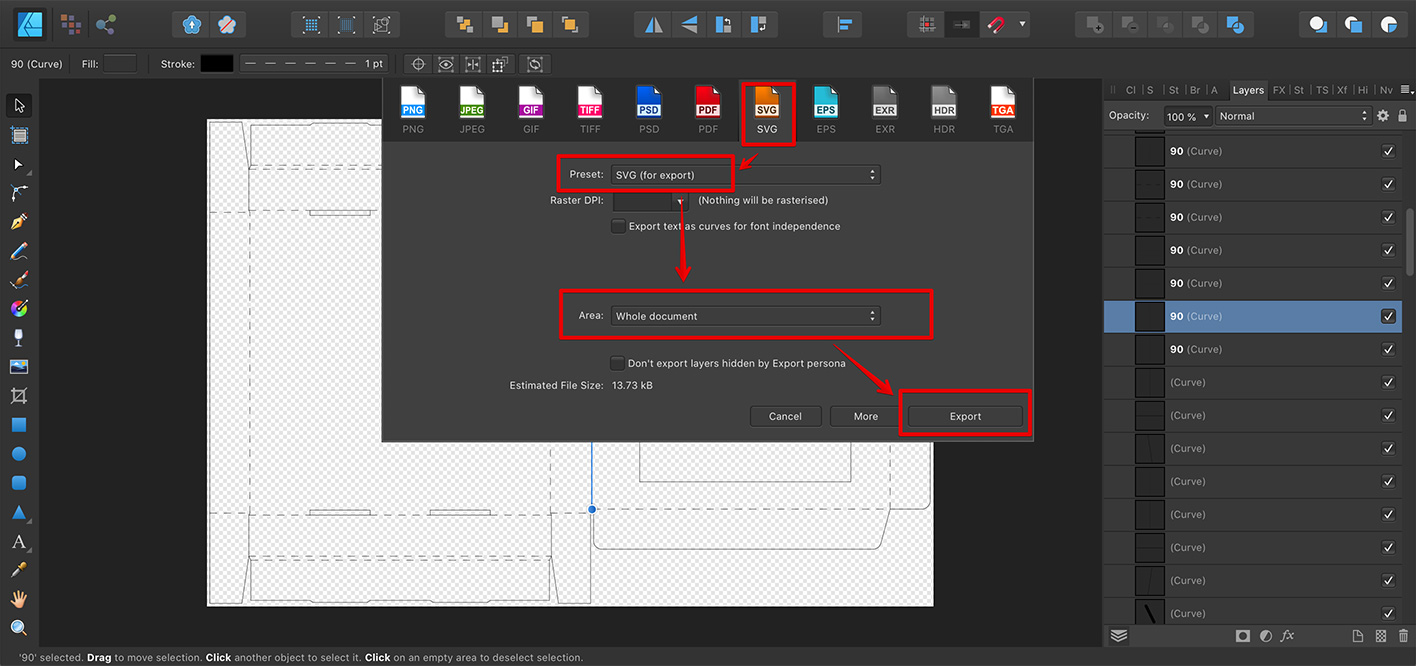
In exporting window select SVG format, select SVG (for export) preset, make sure you export the whole document and click the Export button. You will be asked for a file name to export to, select the layout.svg file exported by Origami and confirm you want to overwrite it.
Once done, switch back to Origami.
Loading the Dieline Back
Now as you have changed the dieline, it is time to load it back to Origami. To do so, simply click the Refresh button. Origami remembers the last option you used for exporting, so it reads the dieline back from the same place. Or you can right–click the Refresh button and select the source manually:

In both cases you’ll end up with the updated box in Origami. The lid is closed (as we set the angle to 90°) and there is a square window in the lid.
Adding Artwork
Artwork is added a similar way. Let’s re–export the box as a file package again to the same folder and this time open the front-template.png file in Affinity Designer:
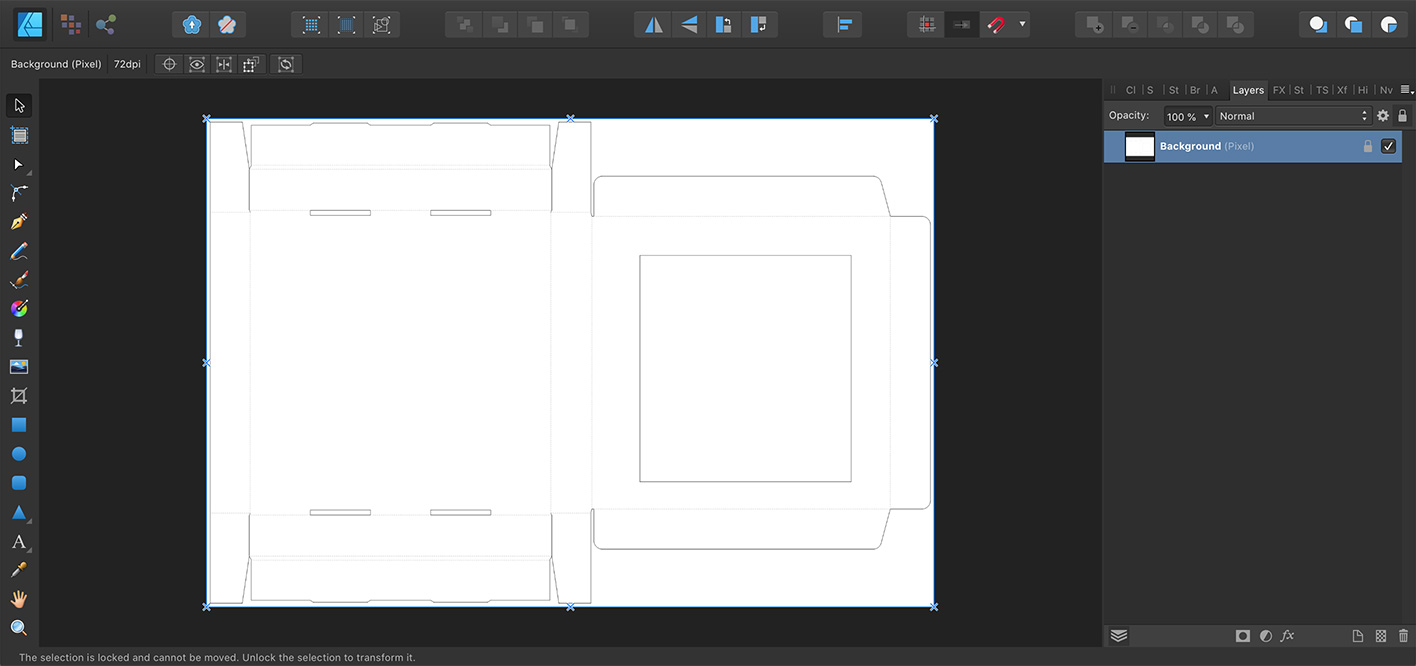
The template contains the window we recently added. If it doesn’t — make sure you have re–exported the dieline after loading it back to Origami. As the template is a simple raster file, it has just 72 dpi and you are free to change that. The rule of thumb is to keep the artwork proportions exactly the same as in the dieline SVG file. You don’t actually need the raster template at all, instead you can use the vector dieline as a template.
Let’s add some graphics to the lid of the box:
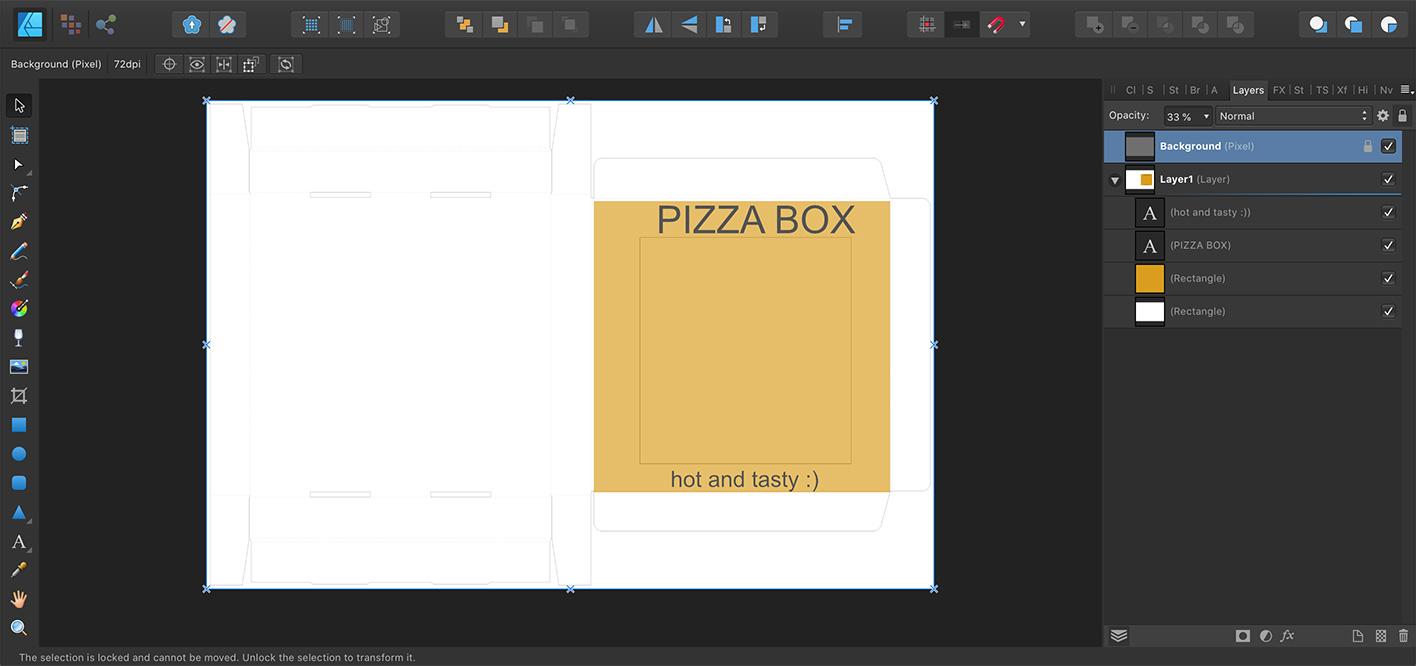
I made a new layer and placed the semi-transparent template on top of it as a reference. Then I added some simple artwork elements and it is now time to export it back to Origami. You should get the idea by now: we need to replace the front-rgb.png file with the new artwork. Hide the template and use File → Export → PNG to export the new artwork to the PNG file initially exported by Origami.
Once done, go back to Origami and click Refresh button to see the updated artwork:
If you see the contours of the dieline on the box after importing the artwork back, make sure that you hid the template before exporting so it doesn’t get into the PNG–file with artwork.
If the artwork looks transparent in Origami, make sure you added a solid white background to the artwork project before exporting.
Backside Artwork
Have a look at our backside artwork tutorial for more details on the topic first.
Now if you enable the backside artwork in Origami shape properties and export the dieline to a file package, you’ll see two extra files: back-rgb.png and back-template.png in the export folder. The files do exactly the same as the front-xxx ones, but for backside. You can edit them the same way and Origami will read them back when you click Refresh.
Foil
If the Origami project you use does not have a foil mask (it usually doesn’t), the mask will not be exported next to the artwork and dieline files. However, if you look at the readme.txt file in the export folder, you’ll notice the name: front-foil.png. Once you make such a file in the export folder and load it back to Origami, the foil mask will be loaded and applied. Let’s make the “PIZZA BOX” letters look like red foil, for instance:
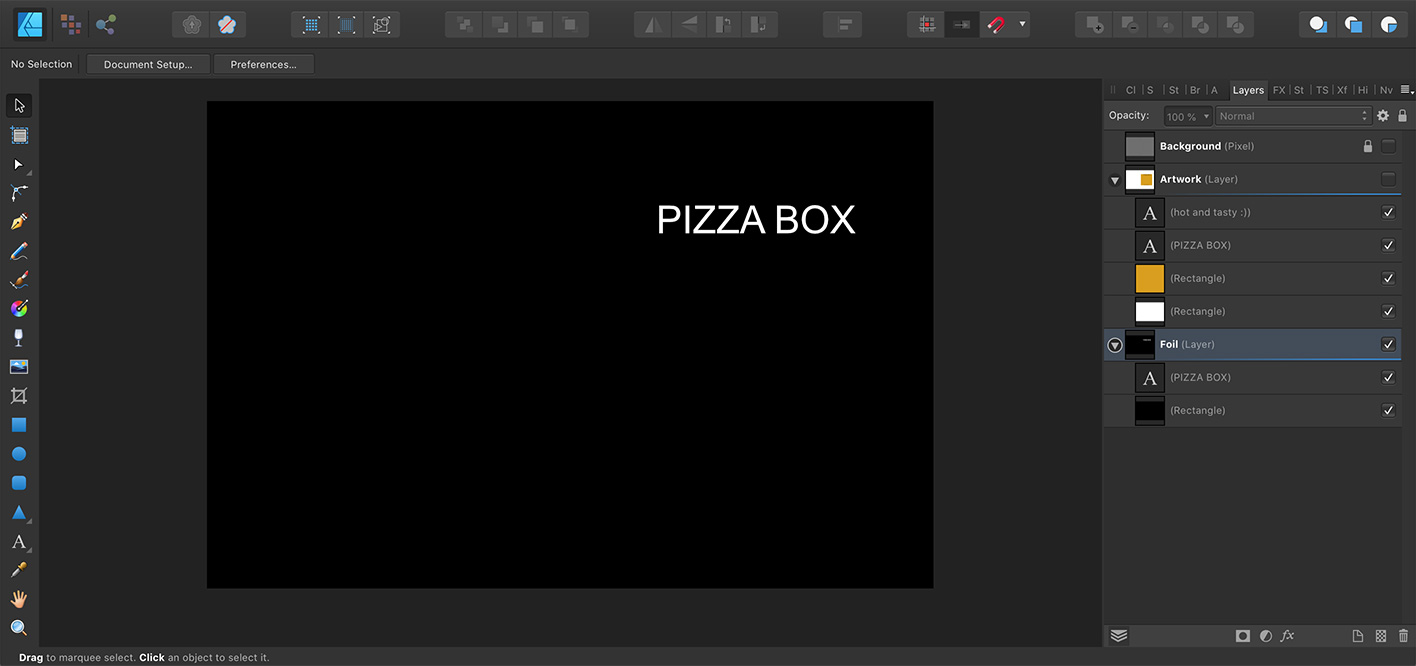
Here I made a copy of the artwork layer, removed the unneeded items, hid the other layers and changed the colors so the box becomes black and the “PIZZA BOX” text becomes white. As this is a foil mask, the white pixels mean “foil”, while the black ones mean “no foil”. You can also use gray color to specify the amount of foil reflection you need.
Note that you don’t define foil color here, just the mask.
Now export the mask to front-foil.png file into the dieline export folder next to the other PNG and SVG files and click Refresh in Origami:
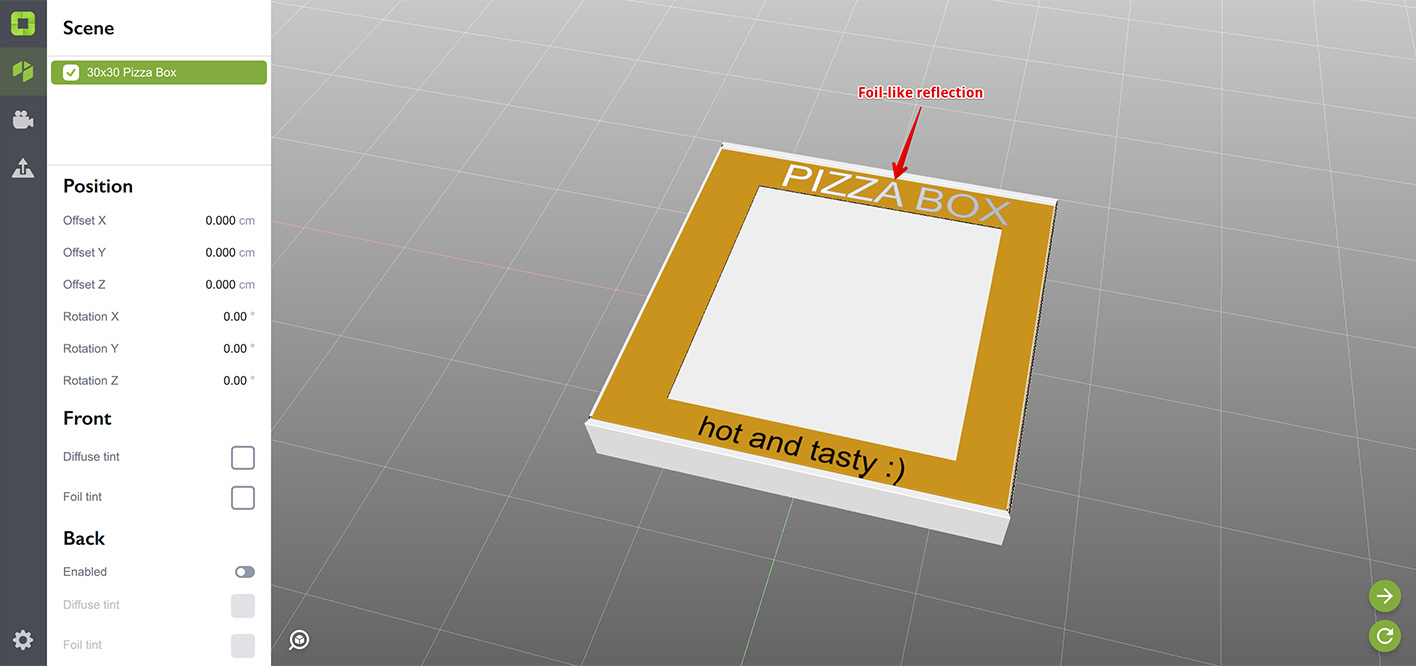
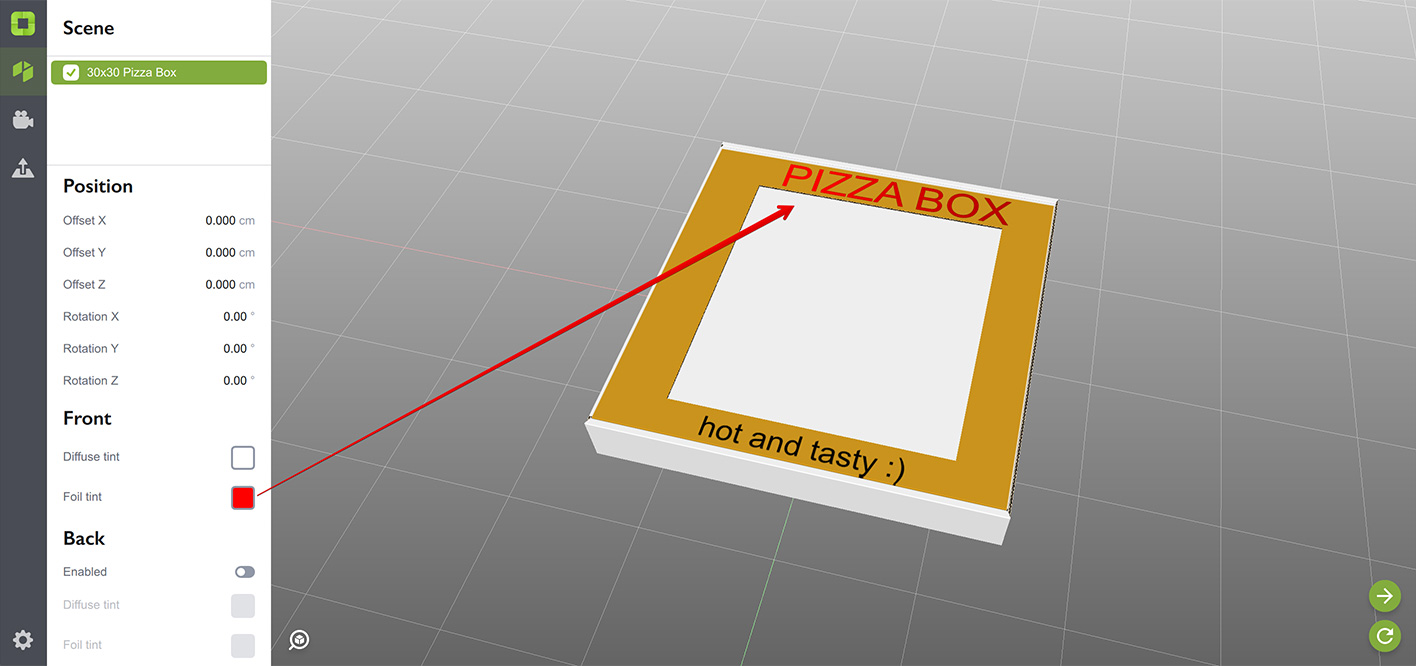
Rotate the camera and make sure the foil layer is now visible and the “PIZZA BOX” text reflects. The last thing to do is to change the foil color. Although you can do this by editing the params.json file in the export folder, the easier way is to do this in the user interface:
Do not forget to re–export the dieline with color foil to file package, so the json–file there gets updated. Otherwise you’ll get the foil color back to silver the next time you refresh the dieline from the file package.
What if I Already Have a Dieline?
Unless you can re–create all the files mentioned above yourself, you’d better start–off with a simple sample dieline in Origami. There is a sample called “Flat Sheet” there for that purpose. Make a sample dieline, export it to file-package, then completely replace the SVG dieline with yours one and load it back to Origami. Then you can re–export it again to get a proper artwork template and work from there.
That’s It
The only question you might have now is why it is that complex compared to the Illustrator workflow? There are two reasons:
- The vector editor is not that popular and there is not enough demand for us to make a special plugin;
- The vector editor does not support plugins, so even if we want we can’t make one.
A good example of the first case is Corel software, Affinity Designer falls into the second case. As soon as they start supporting plugins, we’ll most likely make one for them.
You can find more tutorials here.
Adobe and Adobe Illustrator are either registered trademarks or trademarks of Adobe Systems Incorporated in the United States and/or other countries.