Saving Screenshots in Koru HTML files
It would be nice to have a screenshot button in your Koru exported scene, so your visitors may save a snapshot of your model to their computer or mobile device. Koru doesn’t have a specific API for that, but you don’t really need one, as Koru operates a WebGL canvas that you access directly.
Let’s make an export template that provides a “Take Screenshot” button. You will need some HTML and JavaScript knowledge for further reading.
Creating a Template
When Koru exports a scene, it wraps it up in some HTML called “template”. Template decides whether the scene will be fullscreen or not, template customizes snapshot buttons and can do some other scene control. Finally, template may simply add your logotype to the caption of the page. Any time you need a custom HTML output in Koru, you make a template.
You can read more about templates here, but best of all you don’t really need to start from scratch. Koru comes with a couple of pre-defined templates that you can use to kick-start your own. Let’s clone one of the existing ones now.
Start Koru and click its File menu. In the drop-down list select Open Templates Library item. You will see a folder on your disk where Koru stores its templates. Find a folder called mini-widget and make a clone of it. On Mac you need to right-click it and select Duplicate, on Windows you can simply copy and paste it. Rename the new folder to screenshot and enter that folder.
You will see three files inside:
- _preview.png - the preview image displayed when you select this template in export window, you can leave it as is for now;
- _readme.txt - contains the text description of the template. You will need to edit it a bit;
- _template.html - the template itself, here we’ll be adding the screenshot button.
Open _readme.txt with your text editor and modify its first line, so it contains just one word “Screenshot”, then replace the rest of the file with a brief description of what this template is for. The end result should look like this:
Screenshot
This template adds "Take Sceenshot" button to the exported scene, so vewers may save an image of what they see.
Save the file, then switch back to Koru and make a simple scene. Then try to export it to disk. You should see your new preset in the list:

Note that the first line of the text file you edited became the name of the preset in the list, and the rest of the text file is now displayed at the right as a description. We didn’t change the preview image, so it is the same as for “Minimalistic DIV” template that we initially cloned, but you can later replace it with any square image you want.
Let’s Add a Button
If you export the scene with your new template, you’ll notice no differences with the standard “Minimalistic DIV” template we used as a source. In order to make it different you need to modify _template.html file that Koru uses to wrap up the scene. Open it in your HTML/JavaScript editor and let’s start.
Once again, you can read more about the contents of this file here, we will not focus on that in this tutorial. All we need for now is to add the downloading button. Locate the line:
<h1>{{KORU_TITLE}}</h1>
And add the following code right below that line:
<a id="screenshot" href="#" download="screenshot.jpg">Take Screenshot</a>
Then move slightly up to the style section and add a custom CSS rule right after the .parent one to make the link more visible:
#screenshot {
	display: inline-block;
	margin-bottom: 20px;
	font-size: 20px;
	padding: 10px 20px;
	border: 1px solid #ddd;
}
If you export a scene with this template now, you will see a button above the 3D model:
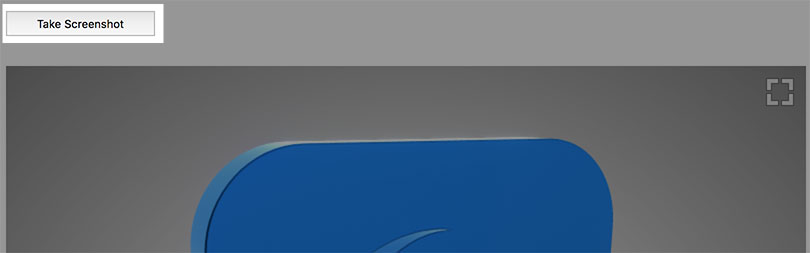
You can add more CSS rules to make it look completely different, you can put it below the 3D preview area - it doesn’t really matter. What matters is that you’ve just created your custom template, which is great.
However, if you click the button - nothing happens. Let’s add a handler for that button.
Let’s Add Some Code
Locate these two lines at the end of the template:
{{KORU_EXTRA_SCRIPT}}

</html>
Add some empty lines between these two and put the following code there:
<script type="text/javascript">
function koruInit(koru) {
	var btn = document.getElementById("screenshot");
	btn.onclick = function() {
		alert("Button Clicked!");
	}
}
</script>
The code adds a click handler to the button that displays a message. Save the template and re-export the scene, then click the button in browser:
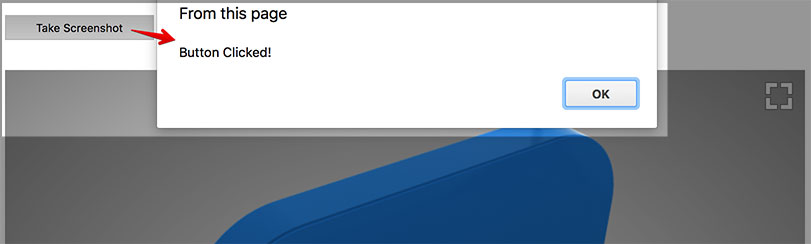
Perfect, we have a button and it does something when we click it, the rest is easy.
More Code
Well, actually the rest is easy if you know JavaScript, otherwise it may look slightly complex. JavaScript is essential if you want to get the most of Koru, so find a good tutorial if you get lost below.
Remove the alert line from your JavaScript button handler and replace it with the following code:
var el = document.getElementsByClassName("koru-viewport")[0];
el.koru.draw(16);
this.href = el.koru.canvas.toDataURL("image/jpeg");
These three lines do the job. The first one gets the first HTML elevemt with koru-viewport class. That’s the main Koru div and it knows about the Koru JavaScript object. The second line tells Koru to redraw the current frame 16 times to get a nice, smooth edges. Finally, the third line accesses the canvas and saves its contents to JPEG format. Then it assigns the saved data to the link, and as you are clicking it, you get the file downloaded.
So the final version of the script is as below:
<script type="text/javascript">
function koruInit(koru) {
	var btn = document.getElementById("screenshot");
	btn.onclick = function() {
		var el = document.getElementsByClassName("koru-viewport")[0];
		el.koru.draw(16);
		this.href = el.koru.canvas.toDataURL("image/jpeg");
	}
}
</script>
Update the template with the code above and re-export the scene. If something doesn’t work - check your browser’s developer console for errors that may help with finding the problem.
For the Lazy Ones
Here is a zip-file with the template described above. Unpack it to your templates folder to get the same result without typing a word.
That’s All!
As you may see, exported Koru scene is just another HTML with some JavaScript and WebGL inside. As with any other HTML page you can access its internals with JavaScript and retrieve extra data or add extra features. Just do some magic :)
- Decals — how to place images on objects as decals;
- Lightmaps — how to compute scene lightmaps and configure them;
- Floor reflection — how to add and configure floor reflection;
- Watermarks — adding 2D image overlays;
- Taking Screenshots — how to add "Take Screenshot" button to your Koru exports;
- Loading Images — how to upload your own images to exported Koru scenes;
- Automatic Rotation — how to make your scene automatically rotates when idle;
- Customizing Snapshot Buttons — how to customize snapshot buttons with CSS;
- Creating Snapshot Buttons — when CSS is not enough you can create snapshot buttons yourself;
- Drop–Down Snapshots Menus — convert snapshots to configurable options;
- Manual Snapshots Control — how to activate a specific snapshot;
- Customizing Background — replace that gray gradient for scenes with transparent background;
- Non-Interactive Scenes — can exported scenes ignore mouse clicks?
- Fullscreen Button — how to change the fullscreen button look?
- Materials — Koru materials explained;
- Partial Snapshots — making snapshots that affect just some scene elements;
- Using Metadata — add extra information to nodes and use it in browser.