Controlling Snapshots with JavaScript
Koru displays snapshots as a list of buttons at the top left corner of its viewport. Sometimes you don’t want to have them all there, but still want to activate them. The javascript buttons tutorial provides a sample template that replaces the built–in buttons with the custom ones. In this tutorial we’ll replace just a few buttons with our owns, leaving the rest by default.
Task Description
Imagine we have a scene with 5 snapshots: 2 of them control shapes’ positions and 3 control their colors:
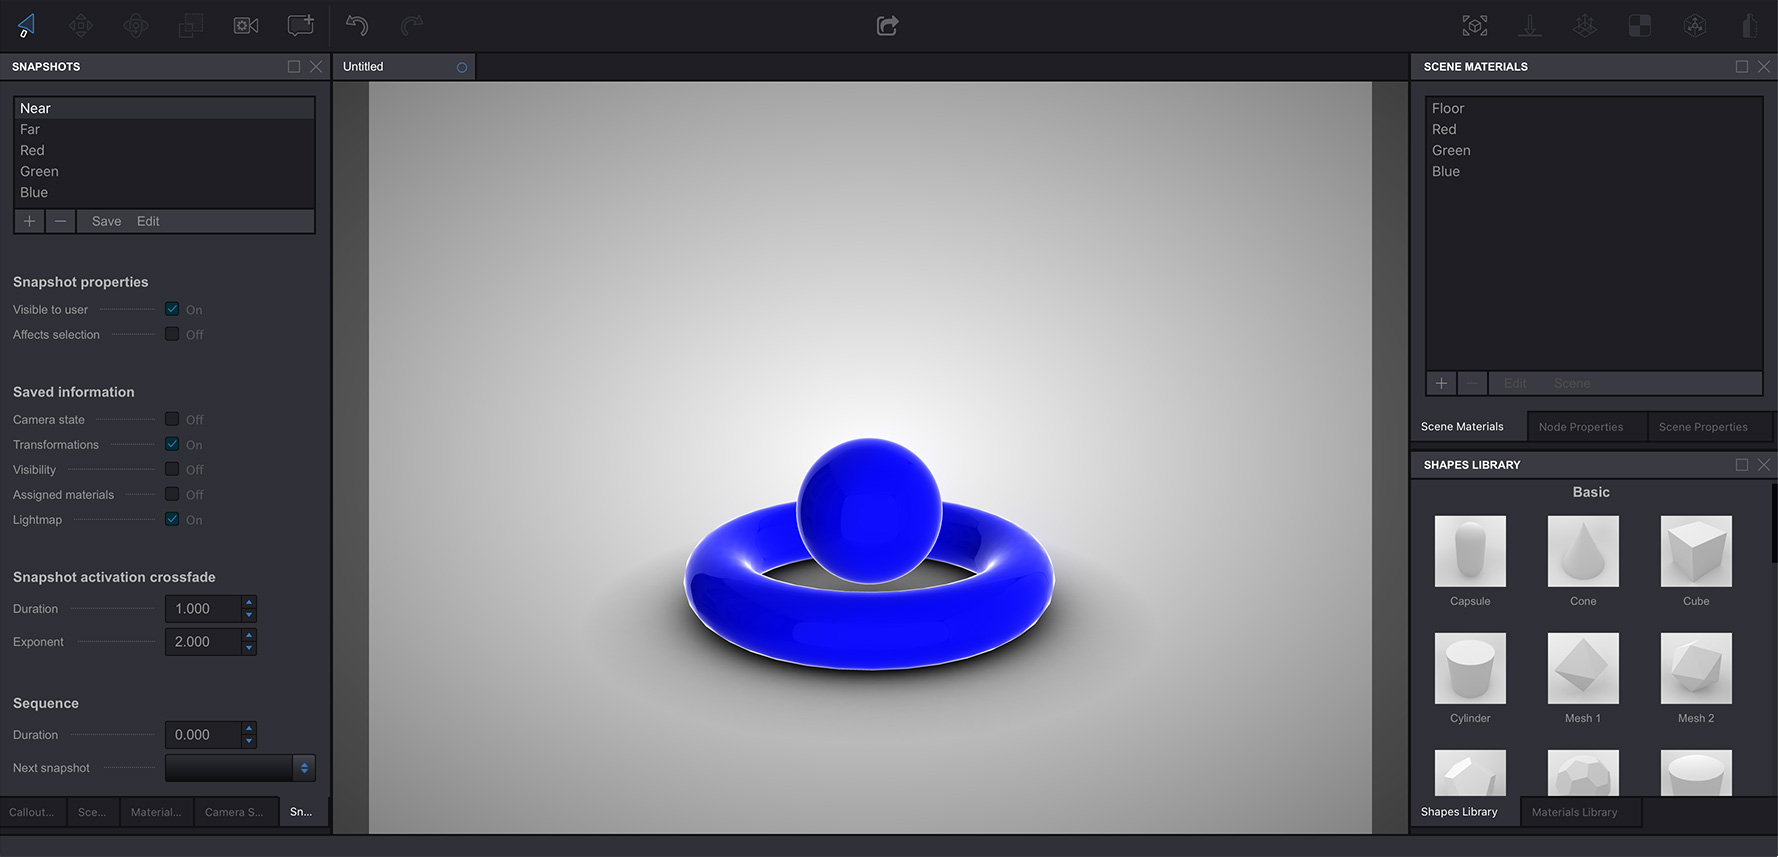
Note that Near and Far snapshots (the first two) have only Transformations and Lightmap boxes checked, so they don’t affect the visibility of the shapes and, most important, their materials.
The other three snapshots have only Assigned materials boxes checked, so they only affect shapes’ materials, not their positions.
The project can be downloaded here and when exported it shows five snapshot buttons, exactly as in the Koru snapshots panel.
Now what we need is to hide the first two buttons and leave just color selection buttons in preview. The shapes’ position should be controlled using separate buttons we’ll add to the page.
Hiding the Buttons
This is quite a simple task, all we need is to uncheck Visible to user buttons for first two snapshots. Re–export the scene and make sure you don’t see the Near and Far snapshots anymore, only three color buttons are now visible.
Manual Snapshots Control
Although hidden, the snapshots are still there and we can activate them with some javascript. In order to do that we need a custom template. Read more about them here. Click File → Open Templates Library… in the main menu and copy the folder named mini-widget. Name the copy as manual-snapshots-control, then open the _readme.txt file and replace its content with the two lines below:
Manual Snapshots Control
This template lets you manually control some snapshots.
You can also update the _preview.png image that is displayed in the export panel, if you like.
Now open the template html file in your favorite text editor and locate the following lines:
    </div>
</body>

{{KORU_SCRIPT}}
{{KORU_EXTRA_SCRIPT}}
Add these two lines right before the </body> tag:
<button id="btn-near">Near</button>
<button id="btn-far">Far</button>
Then locate the lines:
{{KORU_EXTRA_SCRIPT}}

</html>
And add the following code between them:
<script type="text/javascript">
function koruInit(koru) {
	var btnNear = document.getElementById("btn-near");
	btnNear.onclick = function() { activate("Near"); };
	var btnFar = document.getElementById("btn-far");
	btnFar.onclick = function() { activate("Far"); };
}
function activate(what) {
	var el = document.getElementsByClassName("koru-viewport")[0];
	var koru = el.koru;
	for (var i in koru.snapshots) {
		var snapshot = koru.snapshots[i];
		if (snapshot.name == what) {
			snapshot.apply();
			break;
		}
	}
}
</script>
The bottom part of the template should look like this:
        </div>
		<button id="btn-near">Near</button>
		<button id="btn-far">Far</button>
    </body>

    {{KORU_SCRIPT}}
    {{KORU_EXTRA_SCRIPT}}

	<script type="text/javascript">
	    ...that script above...
	</script>

</html>
Save the template, restart Koru and export the project with this template. You will see just three color buttons in preview and two more buttons under the preview area. All the buttons should control snapshots a similar way.
What’s in the Code?
The javascript block above has two functions. The first one — koruInit() runs at startup and simply adds handlers to the new buttons you’ve added. Both handlers call the second function — activate() that gets a snapshot name as a parameter and activates it.
The activate() function gets a Koru engine object and enumerates its snapshots. It compares snapshot names with the one it gets as a parameter and activates the first matching snapshot — pretty simple.
You can download the template here if you like.
More Options
This tutorial shows two important concepts of Koru:
- You don’t have to use (and see) the built–in snapshot buttons in order to use snapshots;
- You can start any snapshot with code.
This means you can completely hide the snapshots buttons and make your own ones (which is done here), you can replace just a few snapshot buttons with the custom ones as in this tutorials. You can run snapshots at startup, or by timer, or by any other event depending on your needs.
Addressing snapshots by name lets you add tags to them. Say snapshots may have names like “Red #colors”, “Blue #colors” and “Setup 1 #config”, “Setup 2 #config” and you can group them by the hash–tags to group “Colors” and “Configurations” for the user.
Koru provides quite a good API, so there is no need to limit yourself with just the built–in features.
That’s All!
Pretty simple, isn’t it? What about trying other tutorials below?
- Decals — how to place images on objects as decals;
- Lightmaps — how to compute scene lightmaps and configure them;
- Floor reflection — how to add and configure floor reflection;
- Watermarks — adding 2D image overlays;
- Taking Screenshots — how to add "Take Screenshot" button to your Koru exports;
- Loading Images — how to upload your own images to exported Koru scenes;
- Automatic Rotation — how to make your scene automatically rotates when idle;
- Customizing Snapshot Buttons — how to customize snapshot buttons with CSS;
- Creating Snapshot Buttons — when CSS is not enough you can create snapshot buttons yourself;
- Drop–Down Snapshots Menus — convert snapshots to configurable options;
- Manual Snapshots Control — how to activate a specific snapshot;
- Customizing Background — replace that gray gradient for scenes with transparent background;
- Non-Interactive Scenes — can exported scenes ignore mouse clicks?
- Fullscreen Button — how to change the fullscreen button look?
- Materials — Koru materials explained;
- Partial Snapshots — making snapshots that affect just some scene elements;
- Using Metadata — add extra information to nodes and use it in browser.