Using Lightmaps in Koru
Koru uses hardware accelerated graphics which doesn’t support realistic shadows like raytracing, so sometimes scenes may look too plain. Although relatime shadows algorithms exist, the end result is usually not that perfect. It may works for games, but not for visualization.
Another approach is to use pre-computed shadows, called lightmaps. The idea is to use raytracing to compute shadows for all the parts of the scene, then “bake” them into a texture and apply to the scene. This way you get realistic shadows that work perfectly fine for static scenes, which is the main case for Koru.
Let’s give it a try and compute lightmaps.
Let’s add some shadows
We need a test scene for this tutorial and here is a cup of coffe scene:
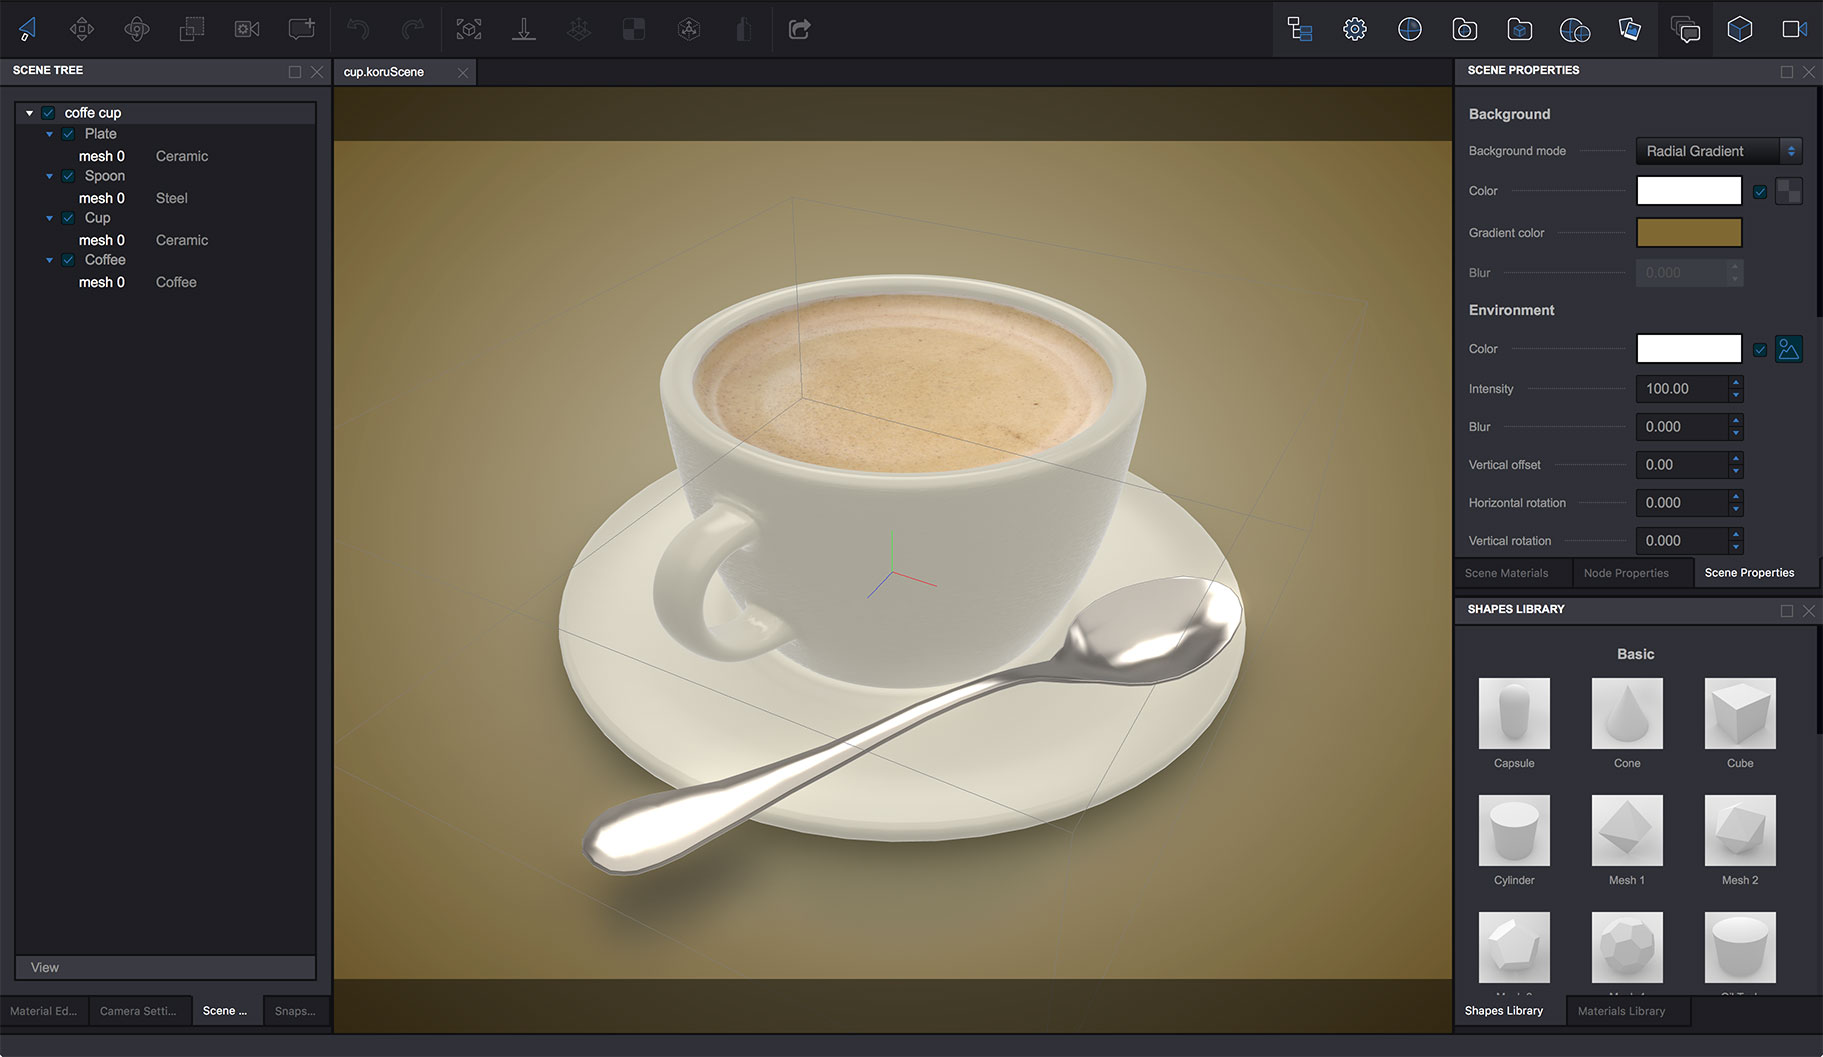
It looks nice, but definitely lacks some realism because of that plain texture of cup and plate, there must be shadows there. Let’s add some, open the Scene Properties panel and scroll down to the Lightmap button:
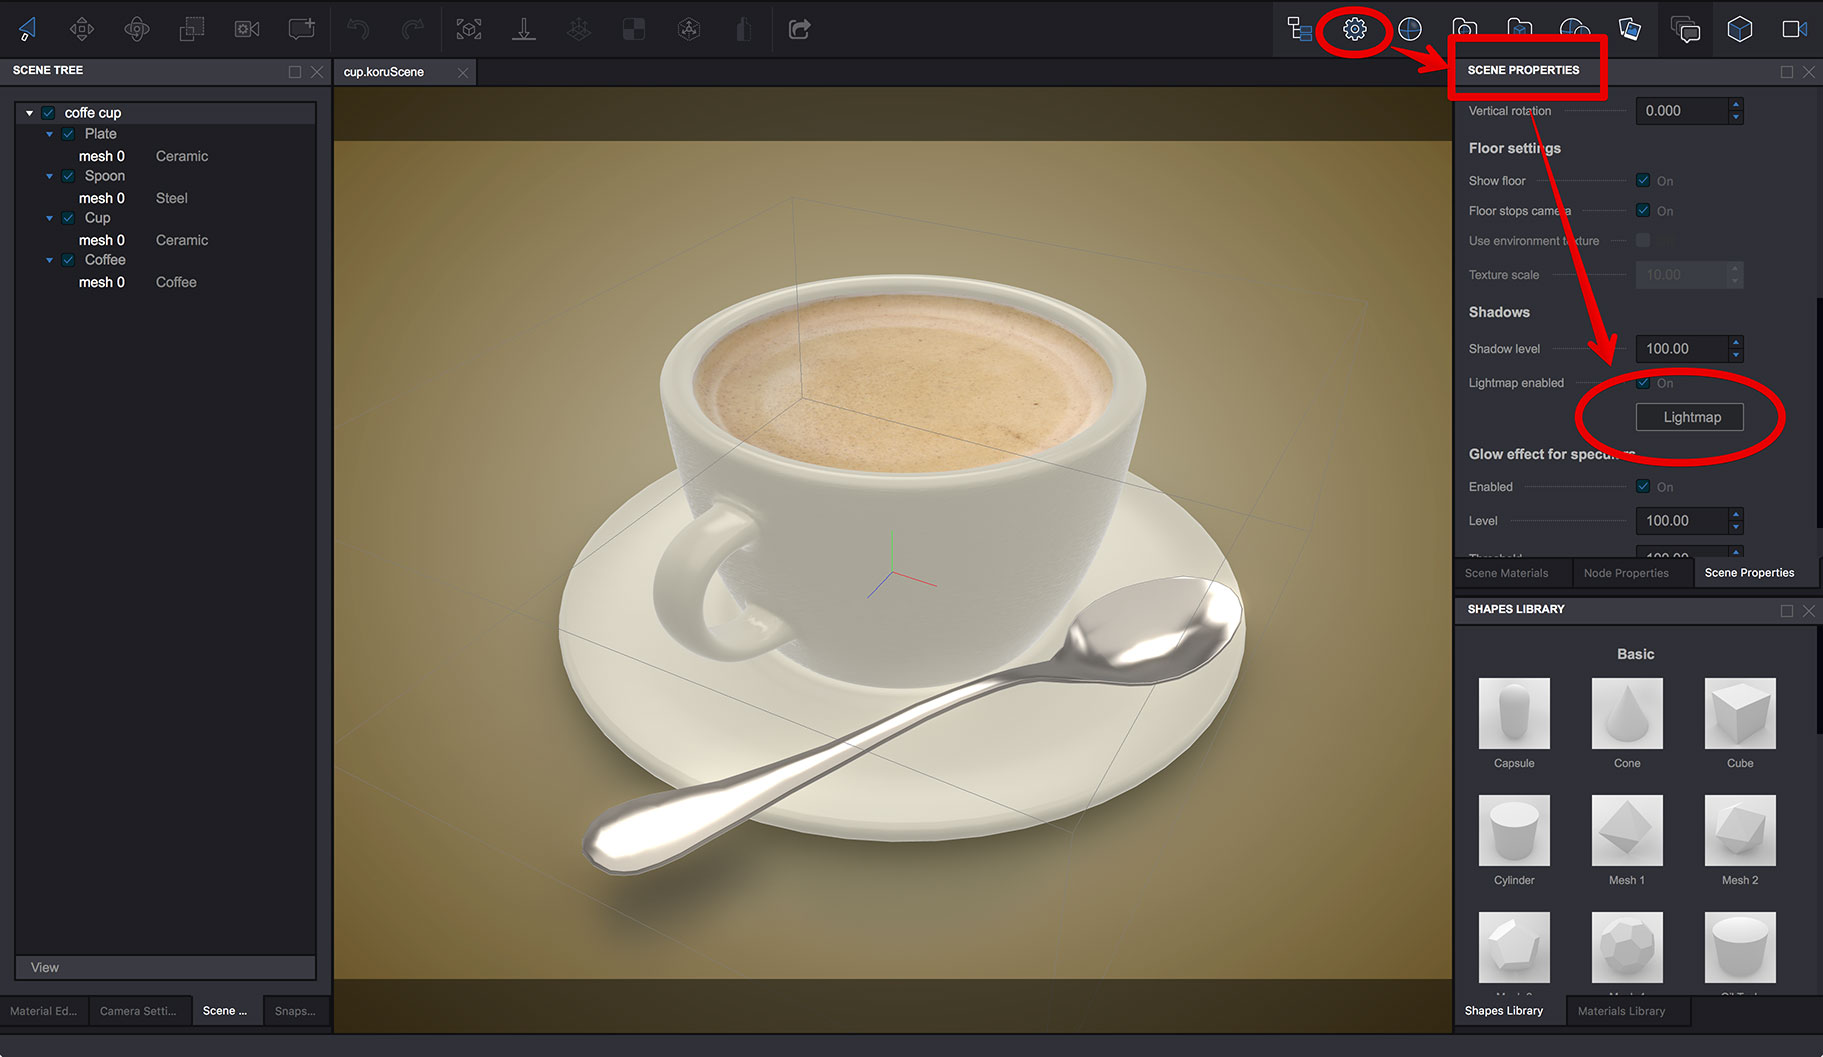
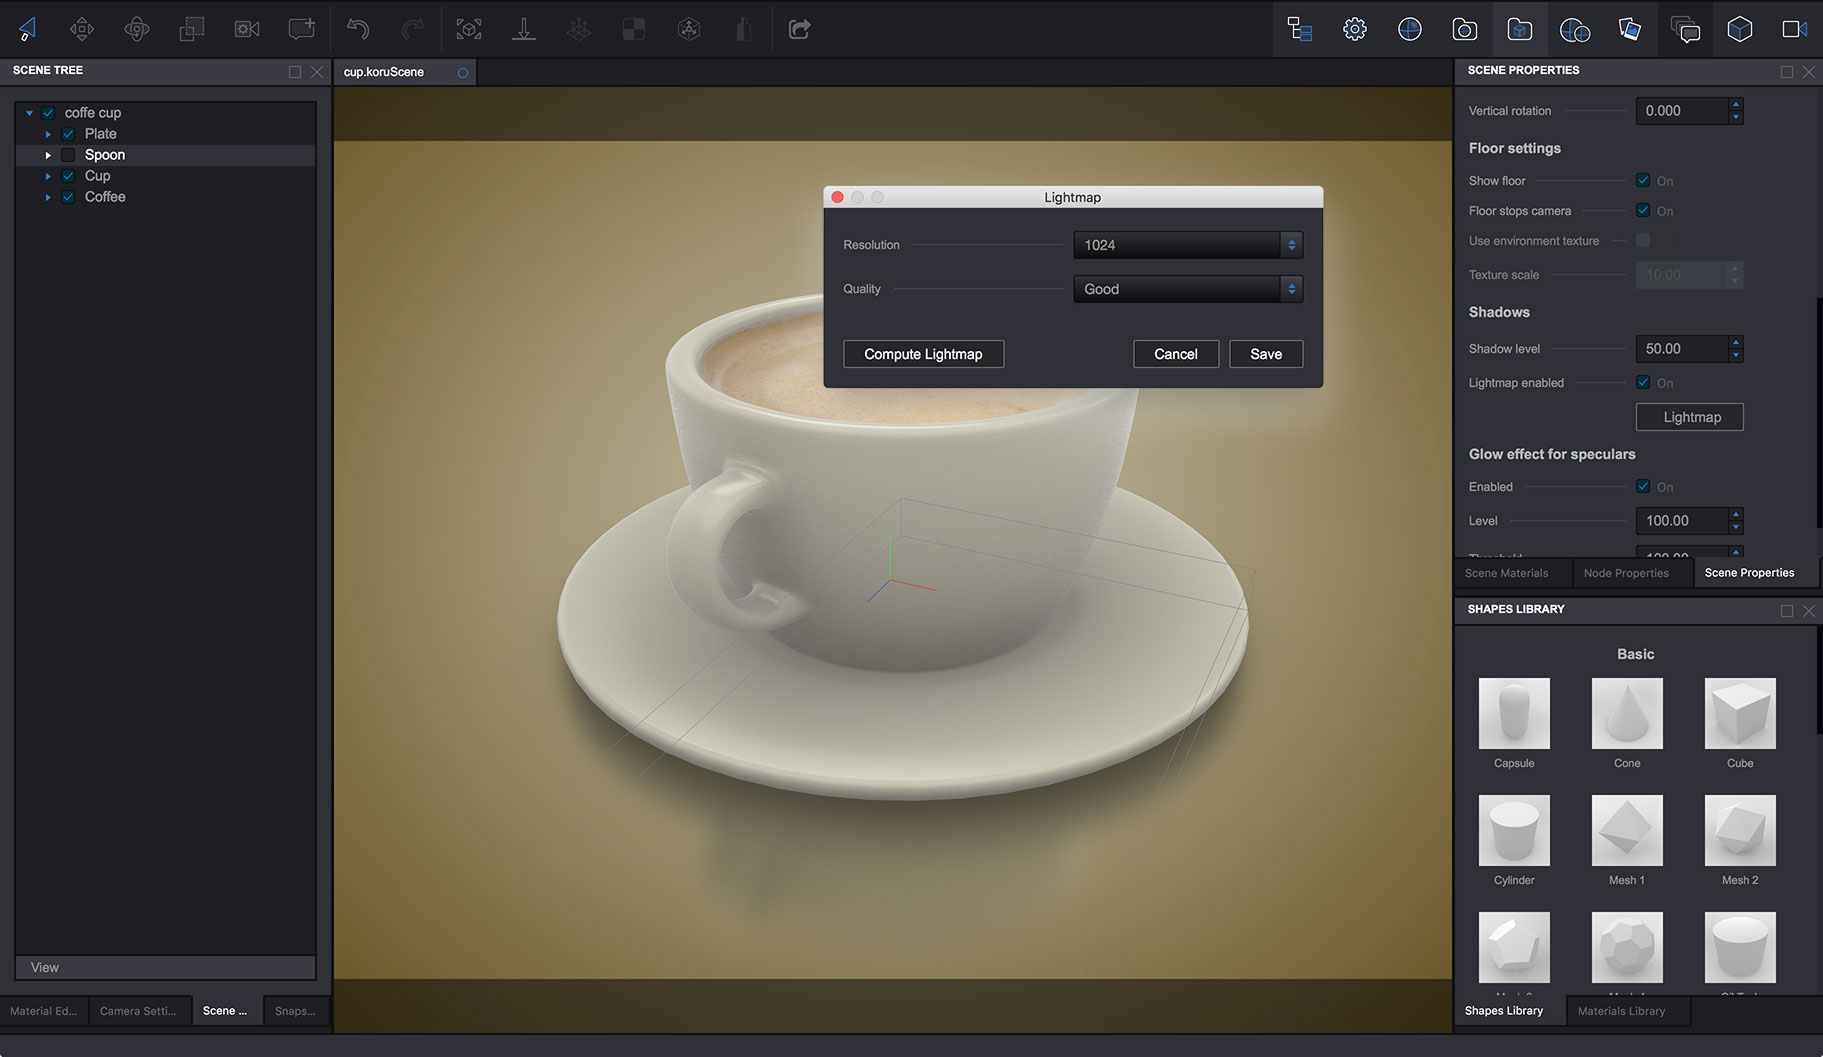
Click it to open lightmap generator window:
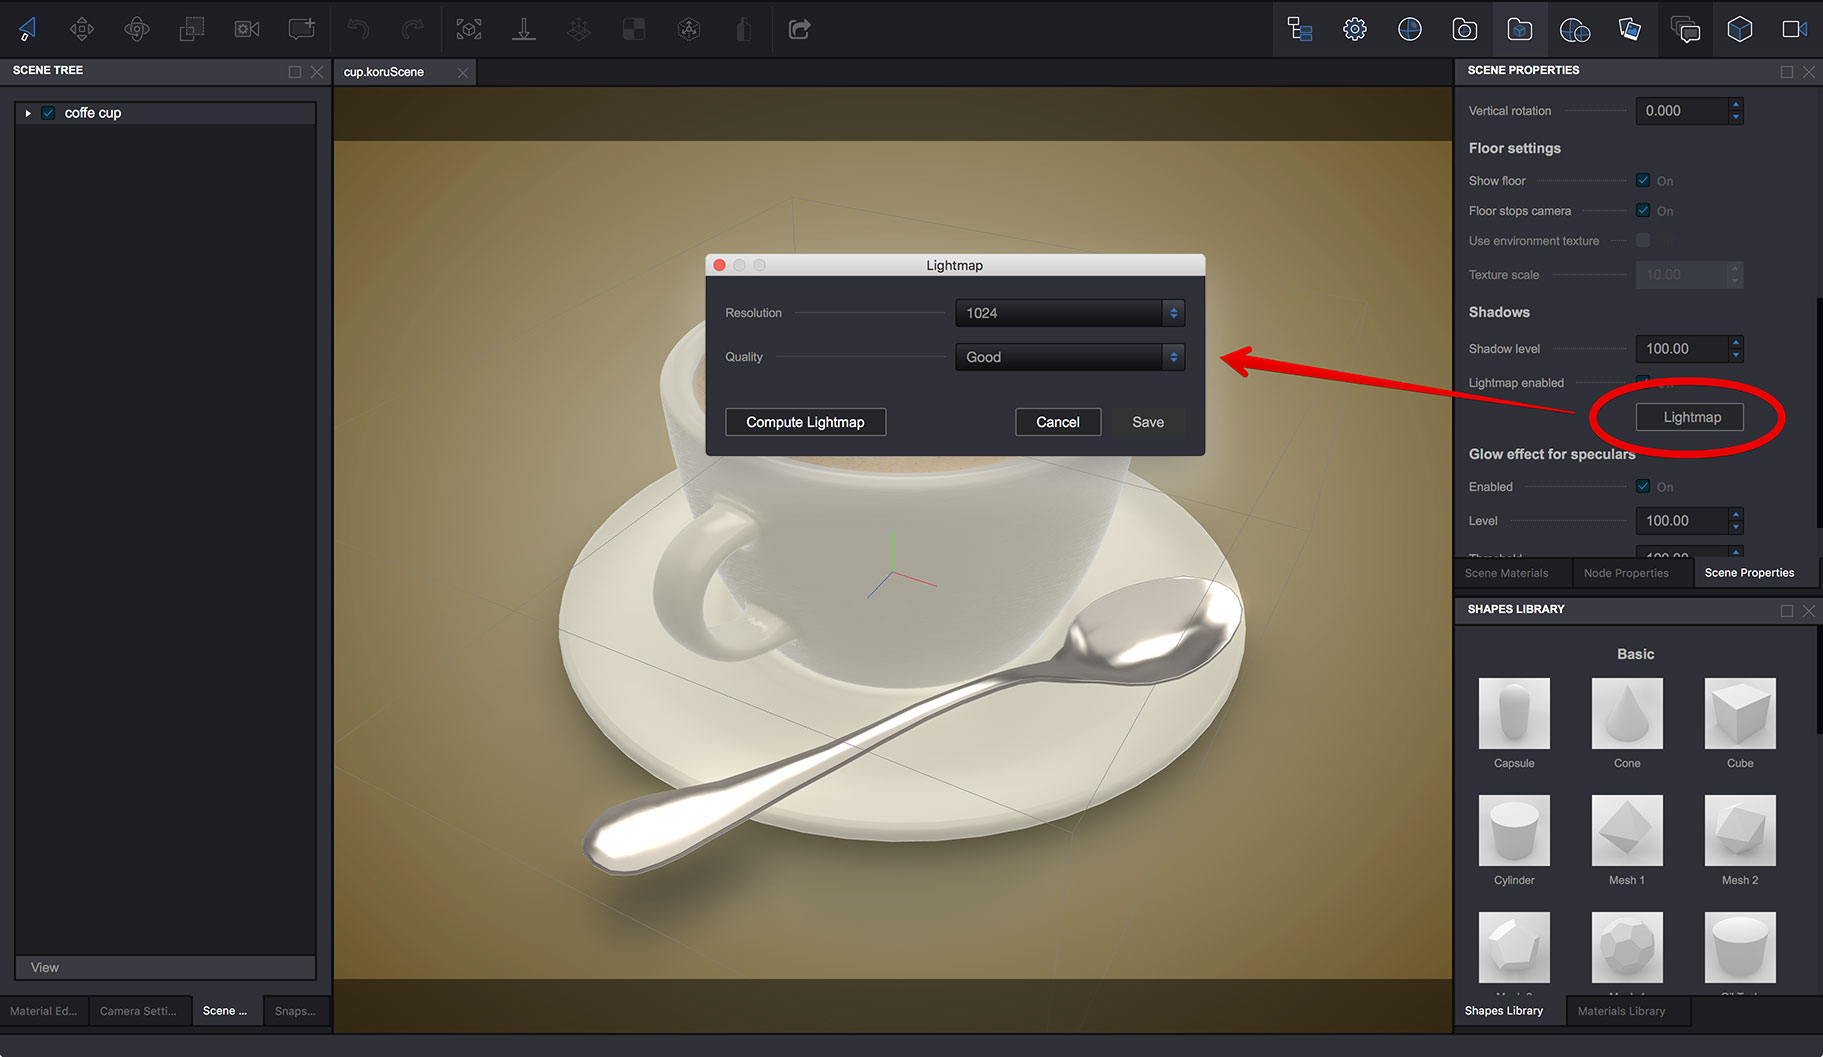
There are two options you can configure:
- Resolution - the resolution of lightmap texture to be generated. The more the better, but large textures take more space in output HTML, so it might be a good idea to use the smallest possible resolution as long as it provides an acceptable quality;
- Quality - this controls the quality of lightmap calculation. It doesn’t affect the HTML size, instead it affects the time used to compute lightmaps. Use “Draft” for preview, then “Good” or “High” right before exporting the scene.
We’ll leave everything by default for now and just click Compute Lightmap button. A progress indicator will appear and you will see the result in a couple of seconds (or minutes, depending on your scene):
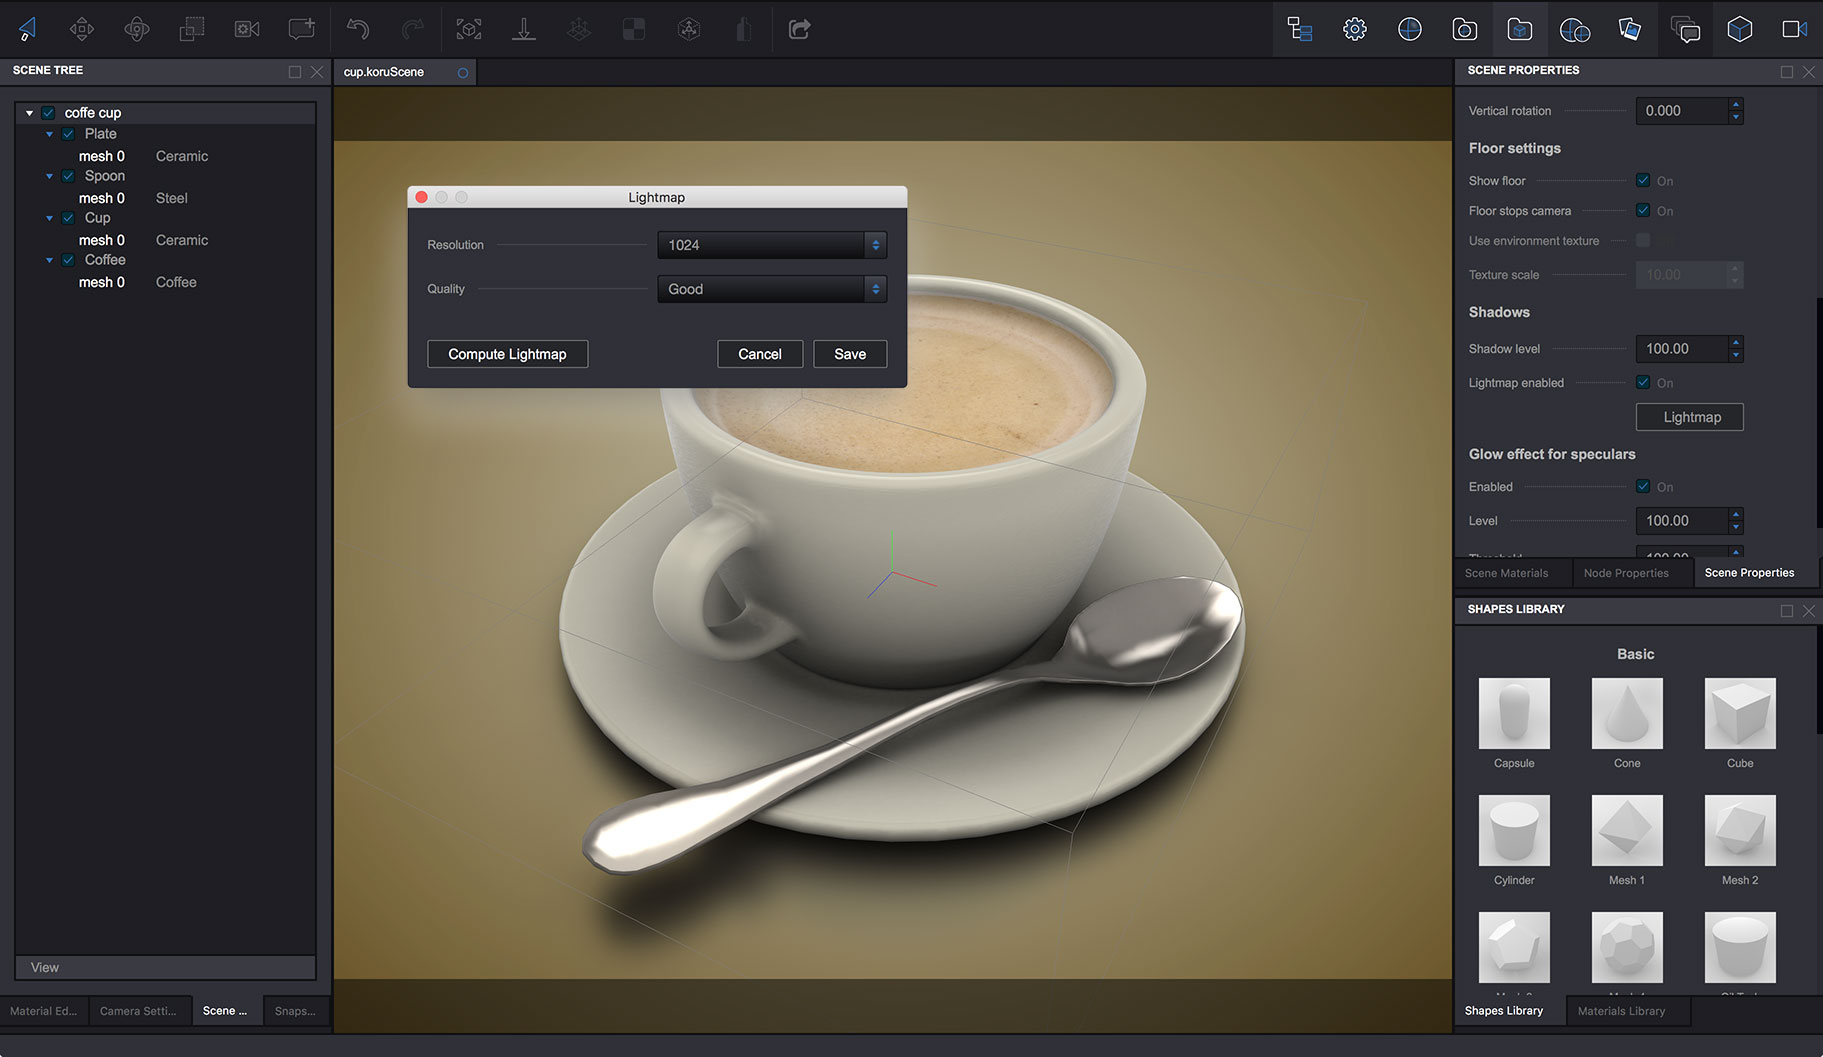
You see the difference? Good. Click Save to commit the changes and rotate the cup with your mouse. There must be shadows in all the corners of the scene and the overall look should be improved.
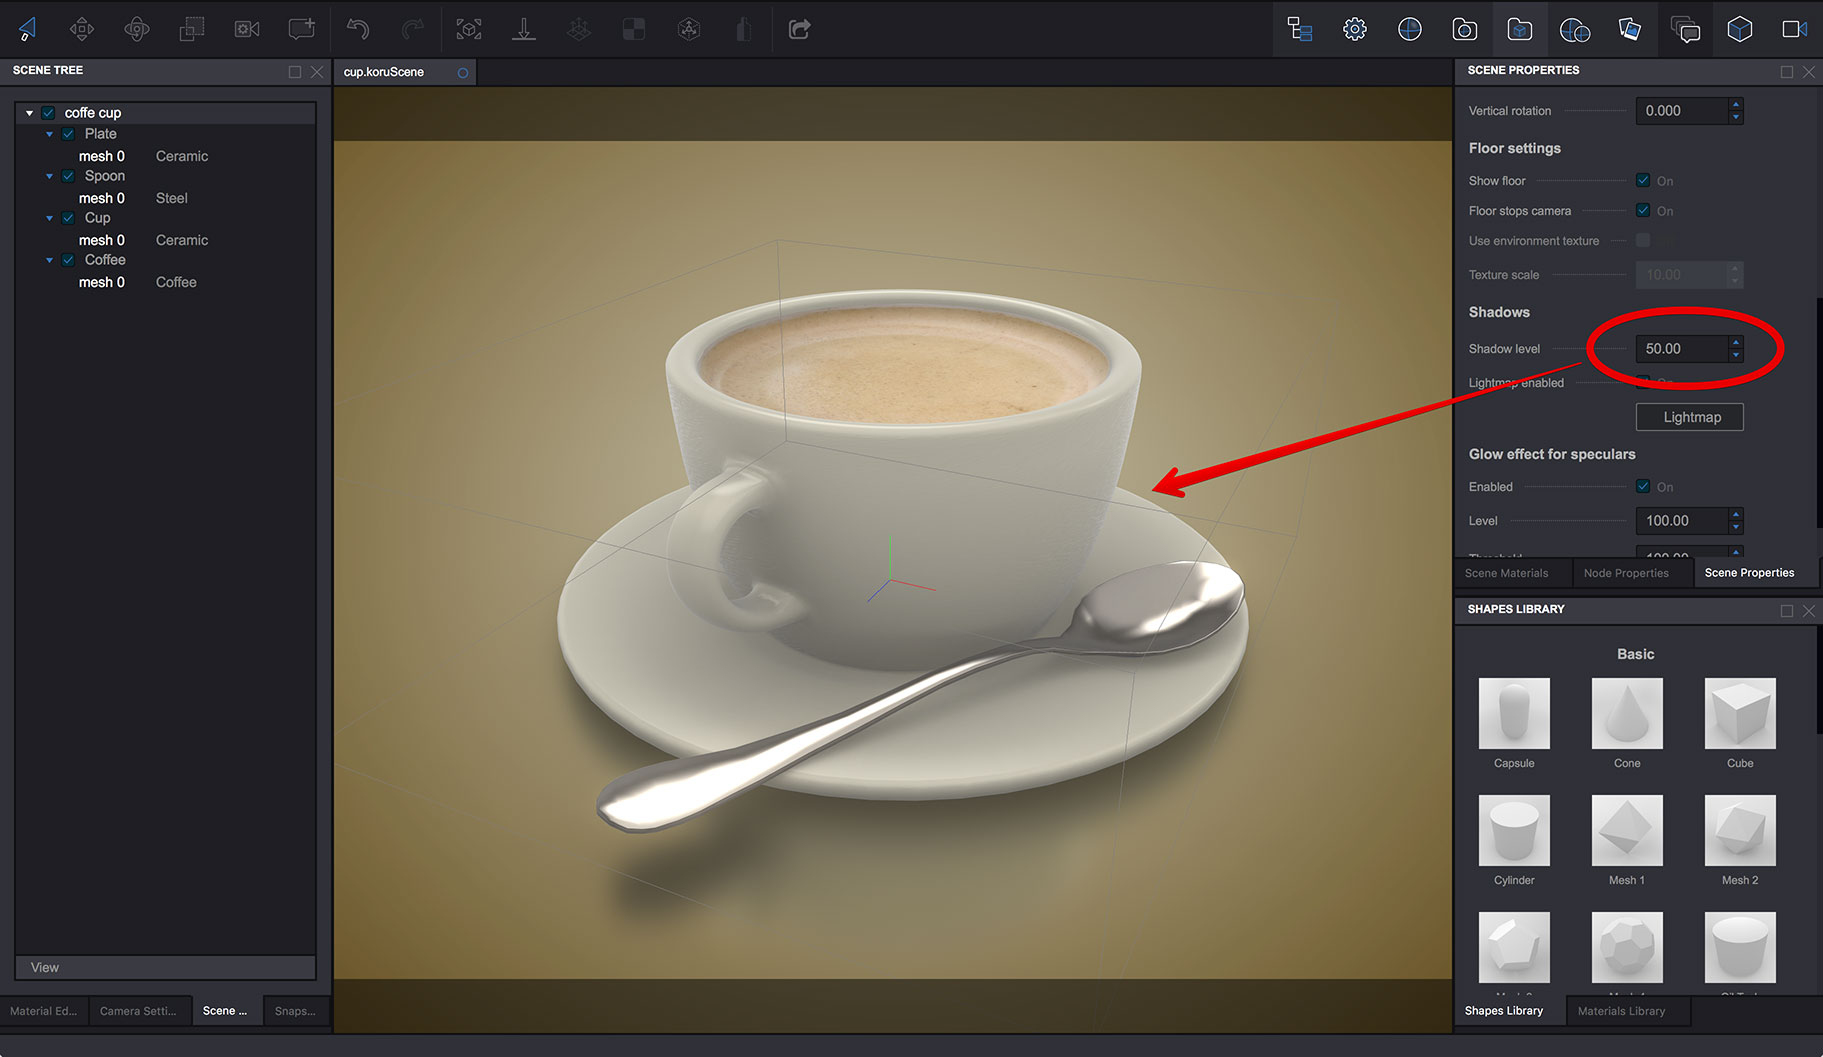
For this particular scene the shadows are probably too dark, so we need to ease them up a bit. To do so, locate the Shadow level parameter in the Scene Properties panel and change it from 100 to something about 50:
Much better! Great, done. You’ve made your first lightmap in Koru.
Lightmaps and scene modifications
Now let’s go to the Scene Tree panel and hide the spoon:
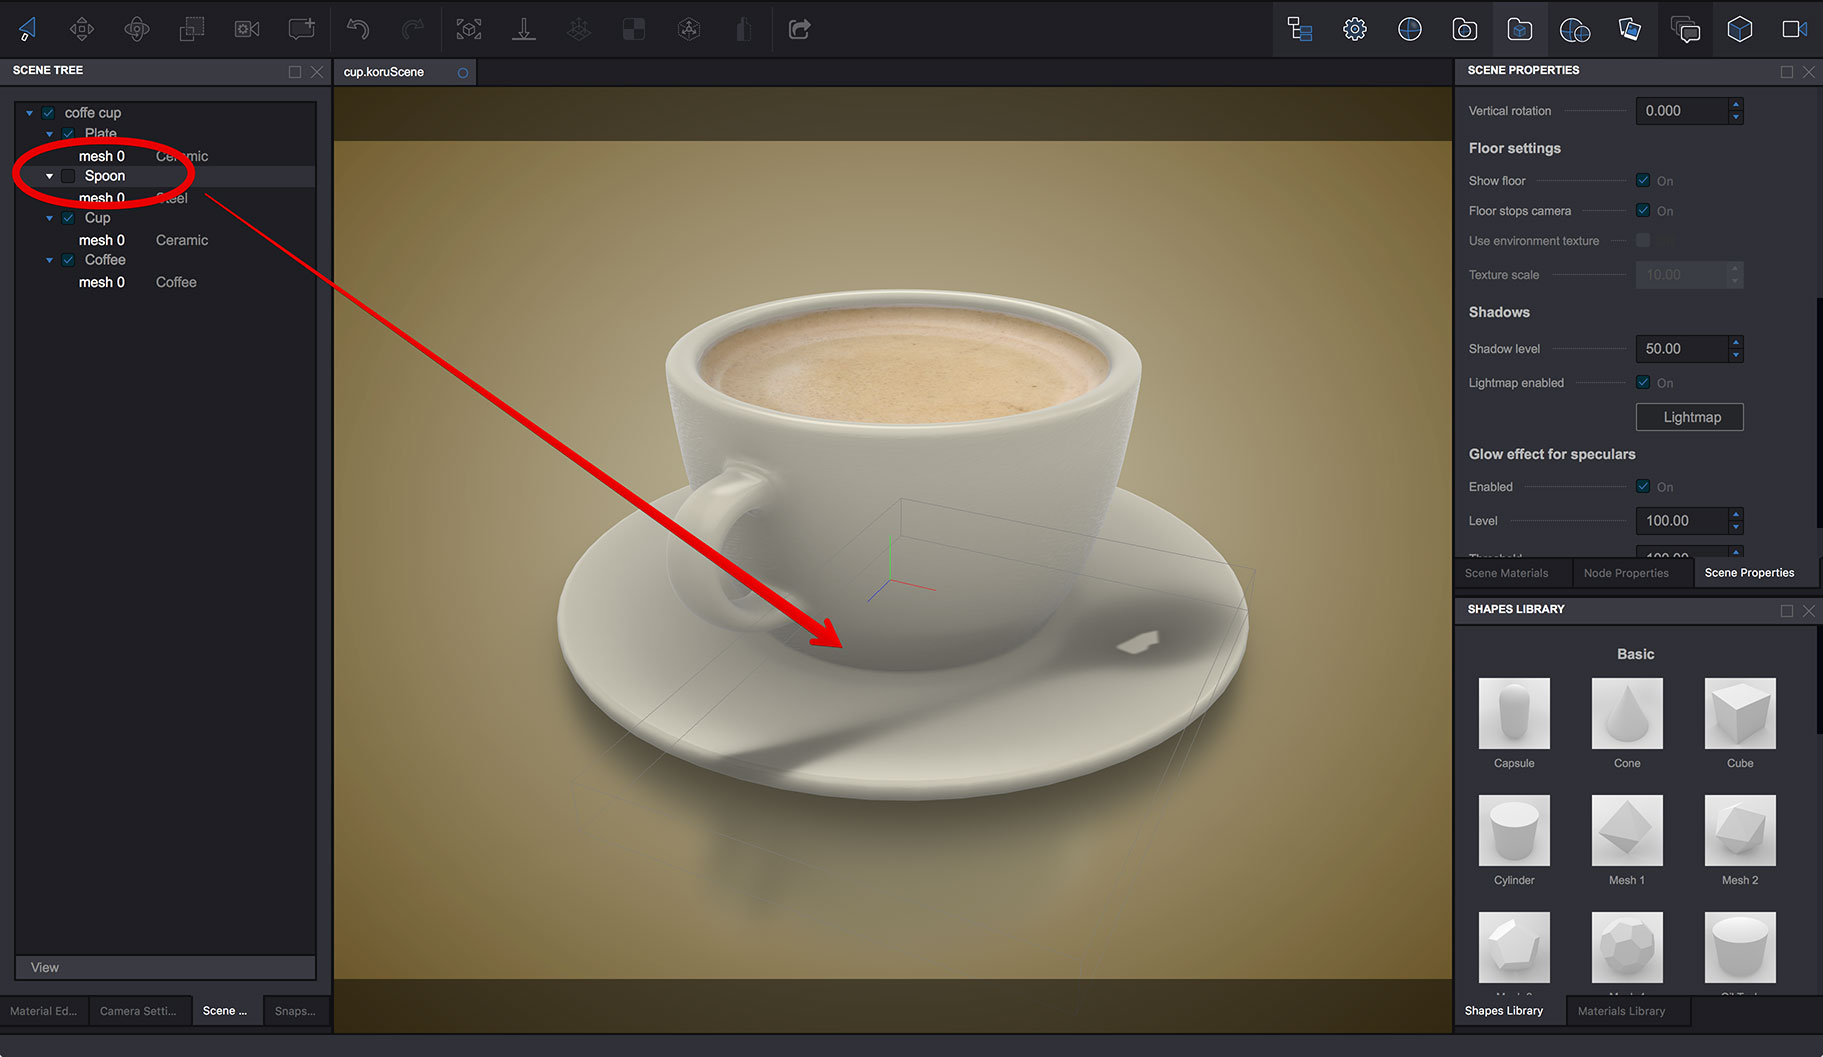
Ops, what was that? There is no spoon, but the shadow is still there. That’s because Koru does not automatically update lightmaps for you when you modify the scene. You need to do it yourself, so it might be a good idea to compute lightmaps when the scene is almost finished.
Let’s click Lightmap in the Scene Properties panel and re-compute them:
You see the cup looks good again.
Lightmaps and snapshots
You can have multiple snapshots in scene, each having its own visible objects at different locations. Koru computes lightmaps for all the snapshots in scene, so all of them have perfect shadows.
Note that your exported scene will have an extra lightmap texture for every snapshot which may increase the scene loading time in browsers. If you don’t need lightmaps for a particular snapshot, you can turn them off in Snapshots Parameters panel for that snapshot.
You also need to update lightmaps if you updated snapshots, exactly as you did above with the hidden spoon.
Disabling lightmaps
If you want a specific object to not cast or receive shadows, you can configure this in its Node Proeprties panel. There are two boxes there:
- Uses lightmap - if checked, this object will have shadows from other objects;
- Casts shadows - if checked, this object will cast shadows to other objects.
Use these options to fine-tune the lightmaps in scene.
There is no button in Koru that removes the lightmaps completely, but you can check the Lightmap enabled option off in the Scene Properties panel and Koru will not display lightmaps in preview and will not export them to HTML.
That’s All!
Now it is a good time to add lightmaps to one of your scene and see the difference :)
- Decals — how to place images on objects as decals;
- Lightmaps — how to compute scene lightmaps and configure them;
- Floor reflection — how to add and configure floor reflection;
- Watermarks — adding 2D image overlays;
- Taking Screenshots — how to add "Take Screenshot" button to your Koru exports;
- Loading Images — how to upload your own images to exported Koru scenes;
- Automatic Rotation — how to make your scene automatically rotates when idle;
- Customizing Snapshot Buttons — how to customize snapshot buttons with CSS;
- Creating Snapshot Buttons — when CSS is not enough you can create snapshot buttons yourself;
- Drop–Down Snapshots Menus — convert snapshots to configurable options;
- Manual Snapshots Control — how to activate a specific snapshot;
- Customizing Background — replace that gray gradient for scenes with transparent background;
- Non-Interactive Scenes — can exported scenes ignore mouse clicks?
- Fullscreen Button — how to change the fullscreen button look?
- Materials — Koru materials explained;
- Partial Snapshots — making snapshots that affect just some scene elements;
- Using Metadata — add extra information to nodes and use it in browser.