Floor Reflection in Koru
Koru supports floor reflection effect, but compared to Boxshot it doesn’t have a dedicated control for that in Scene Properties panel. Instead, floor reflection is configured in the materials editor. This tutorial shows how to do that.
Adding floor reflection
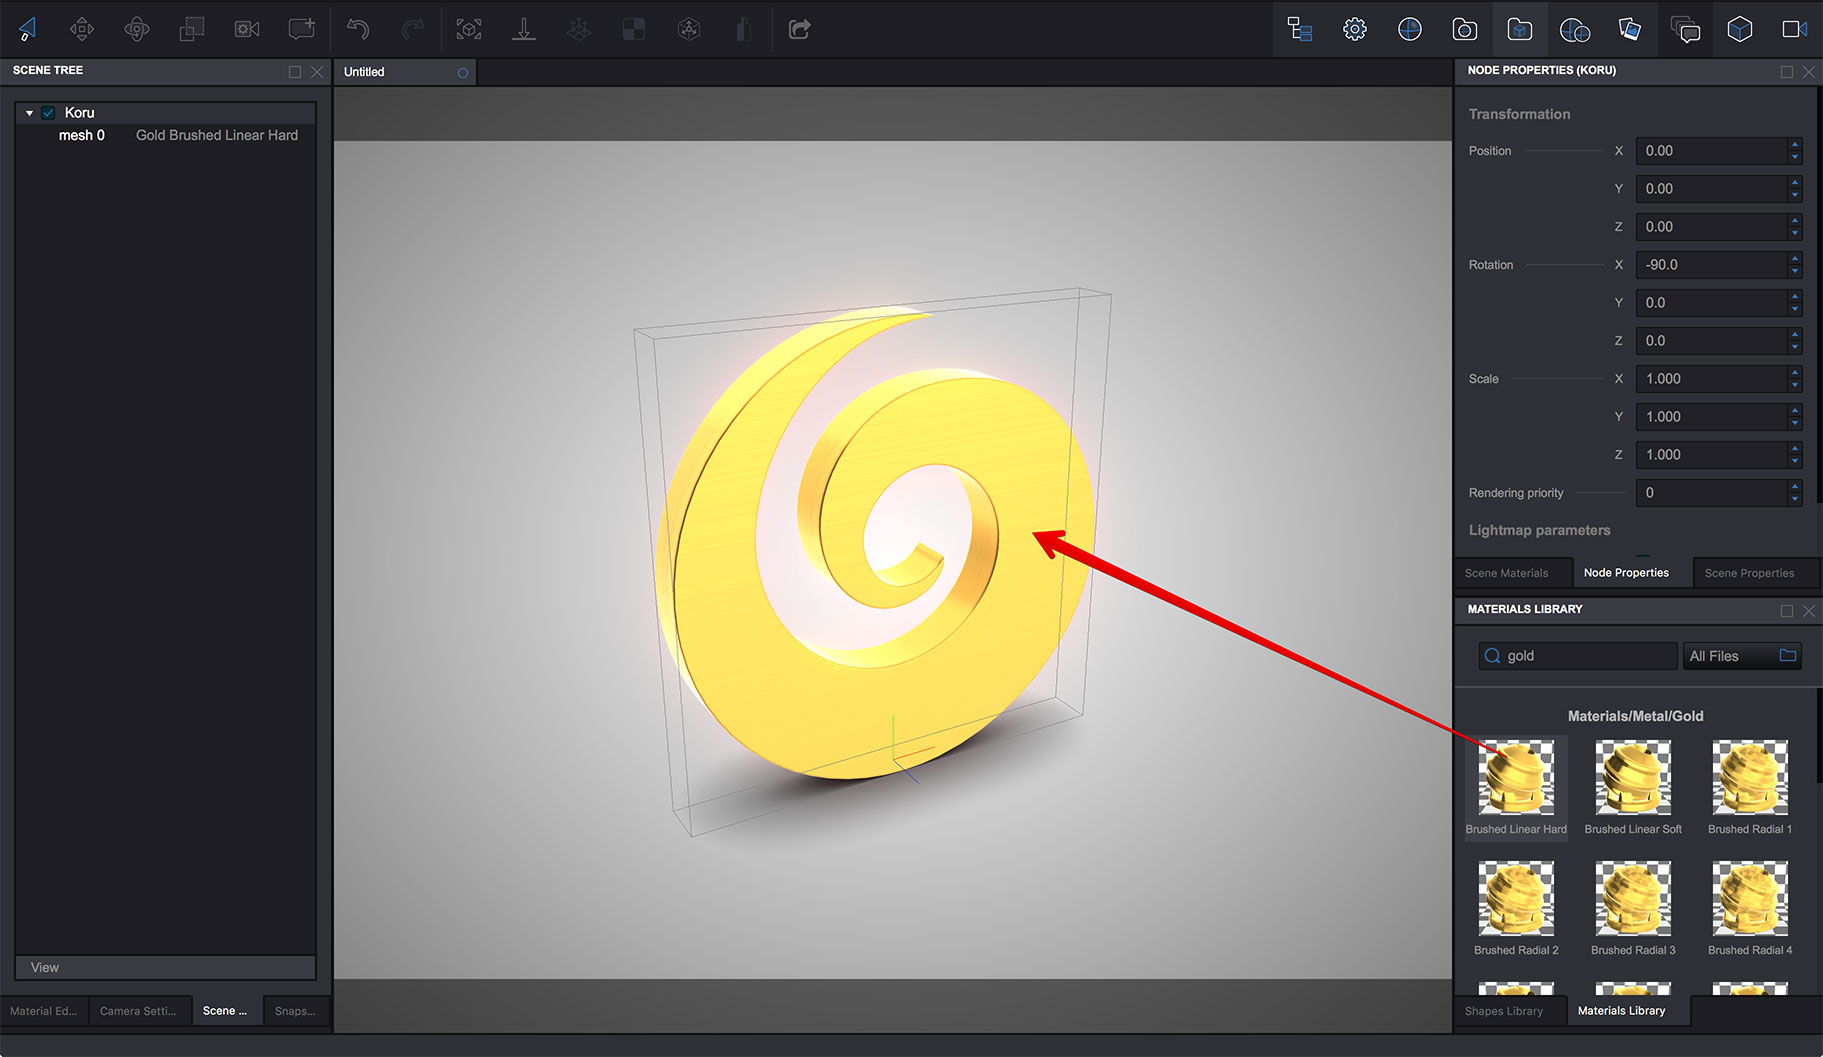
Let’s start with a simple test scene. Here I dragged a Koru object to the scene and then applied a gold material from the library:
Good, the scene looks nice and nothing is reflected in the floor. Let’s fix that. To do so, open the Material Editor and Scene Materials panels and click the “Floor” meterial in the Scene Materials list:
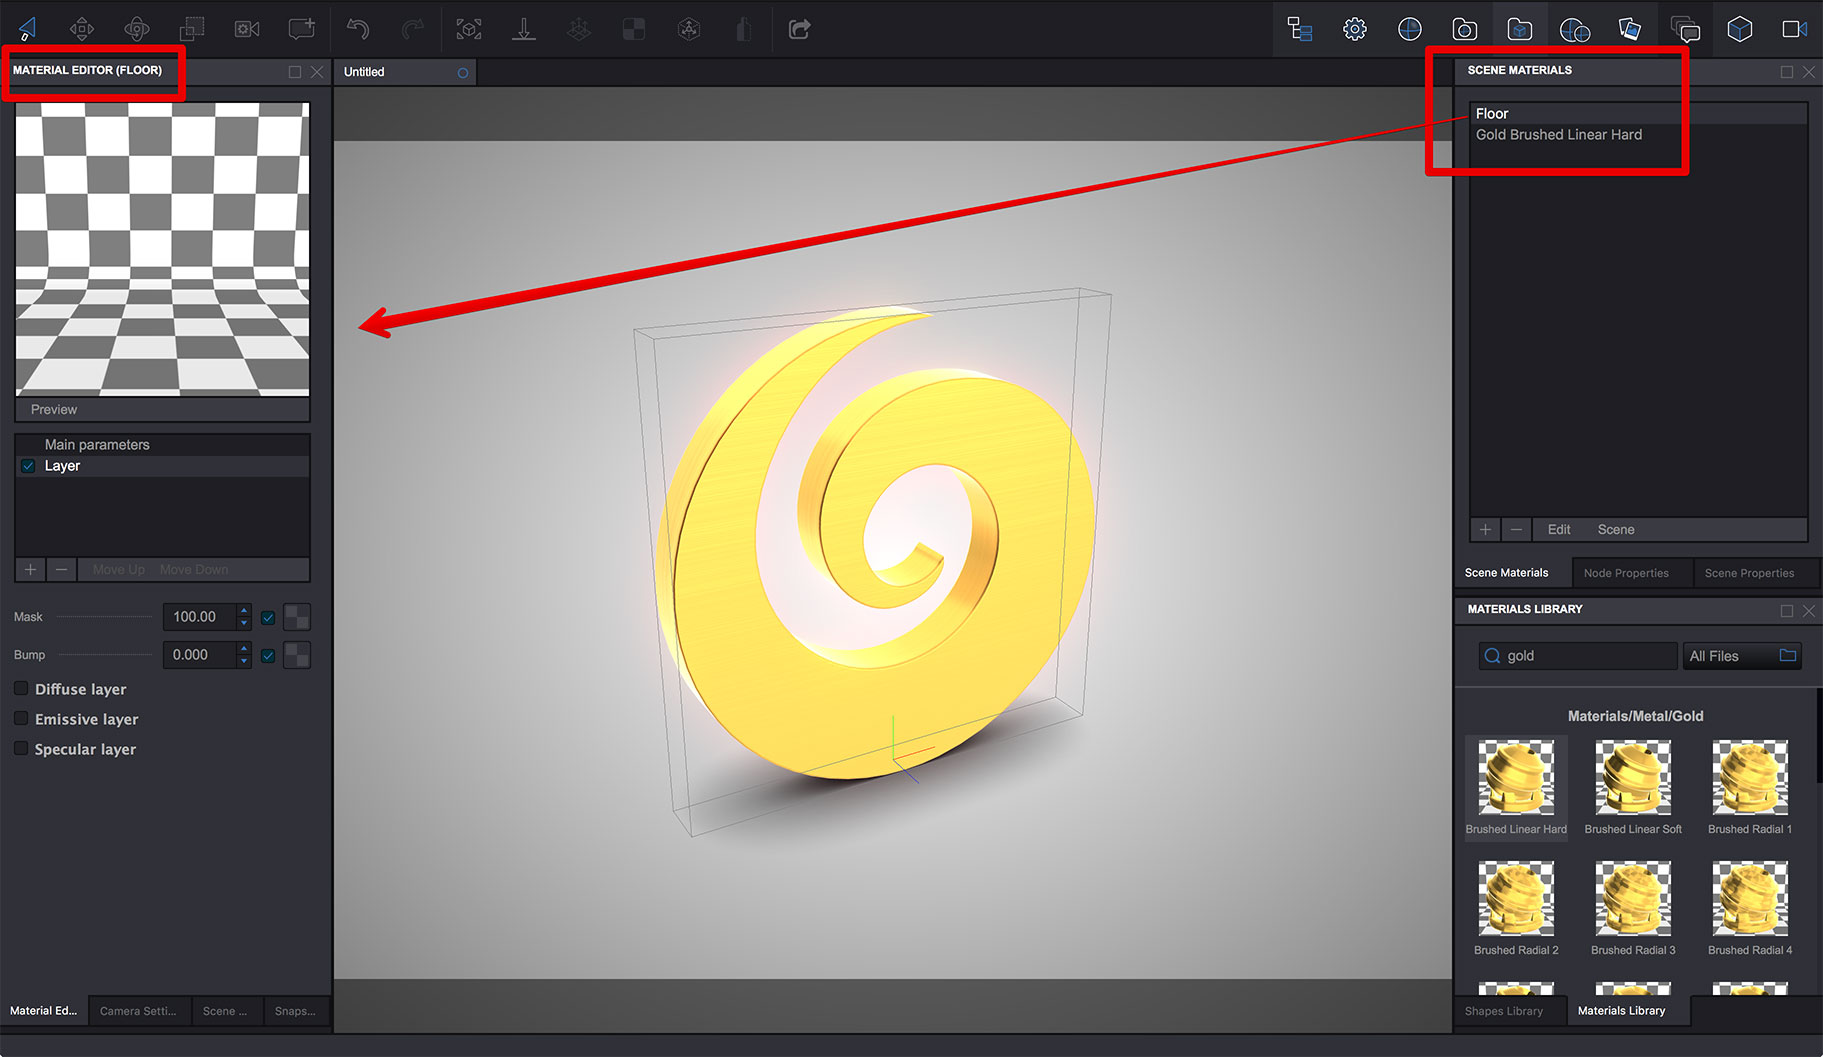
You see the floor material has no layers and effects enabled, so it looks transparent. To add reflection, check the Specular layer option and notice the reflection in the floor:
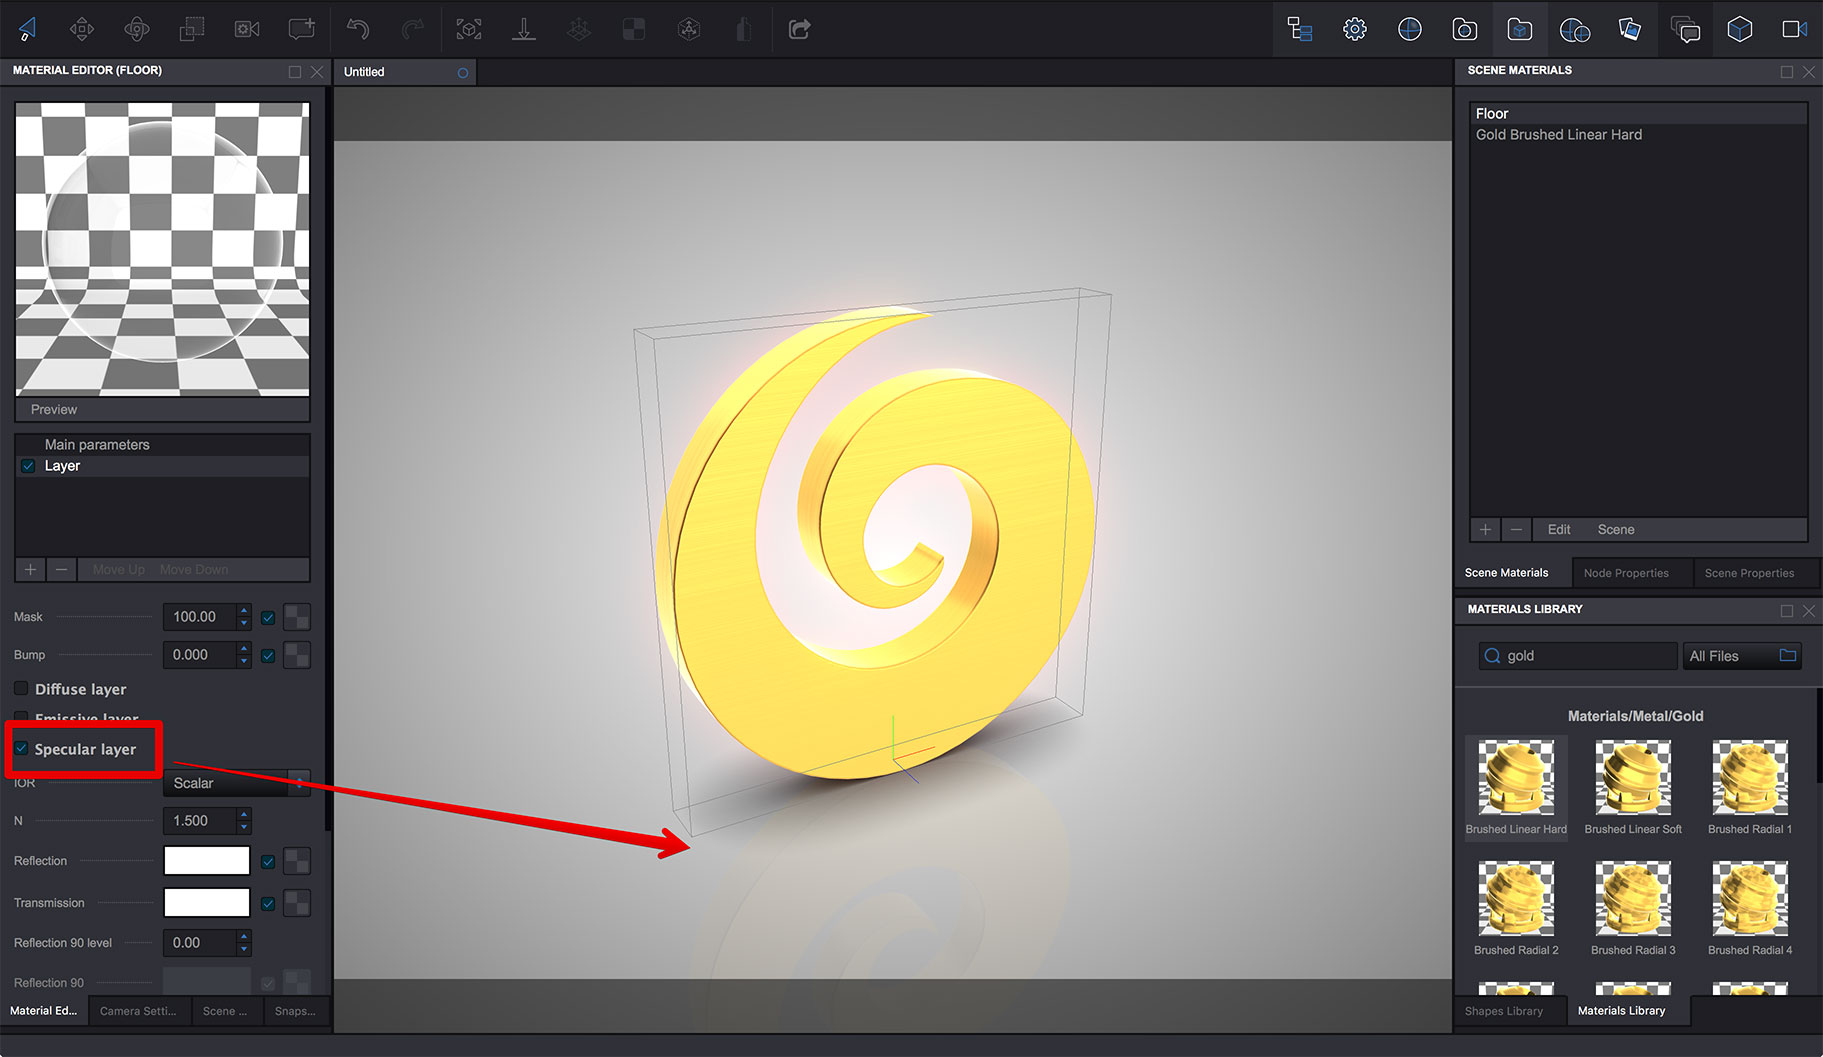
The reflection is barely visible, because the reflection level of the floor material is quite low. Let’s fix that. Scroll down to the N parameter of the Specular layer block and set it to 10:
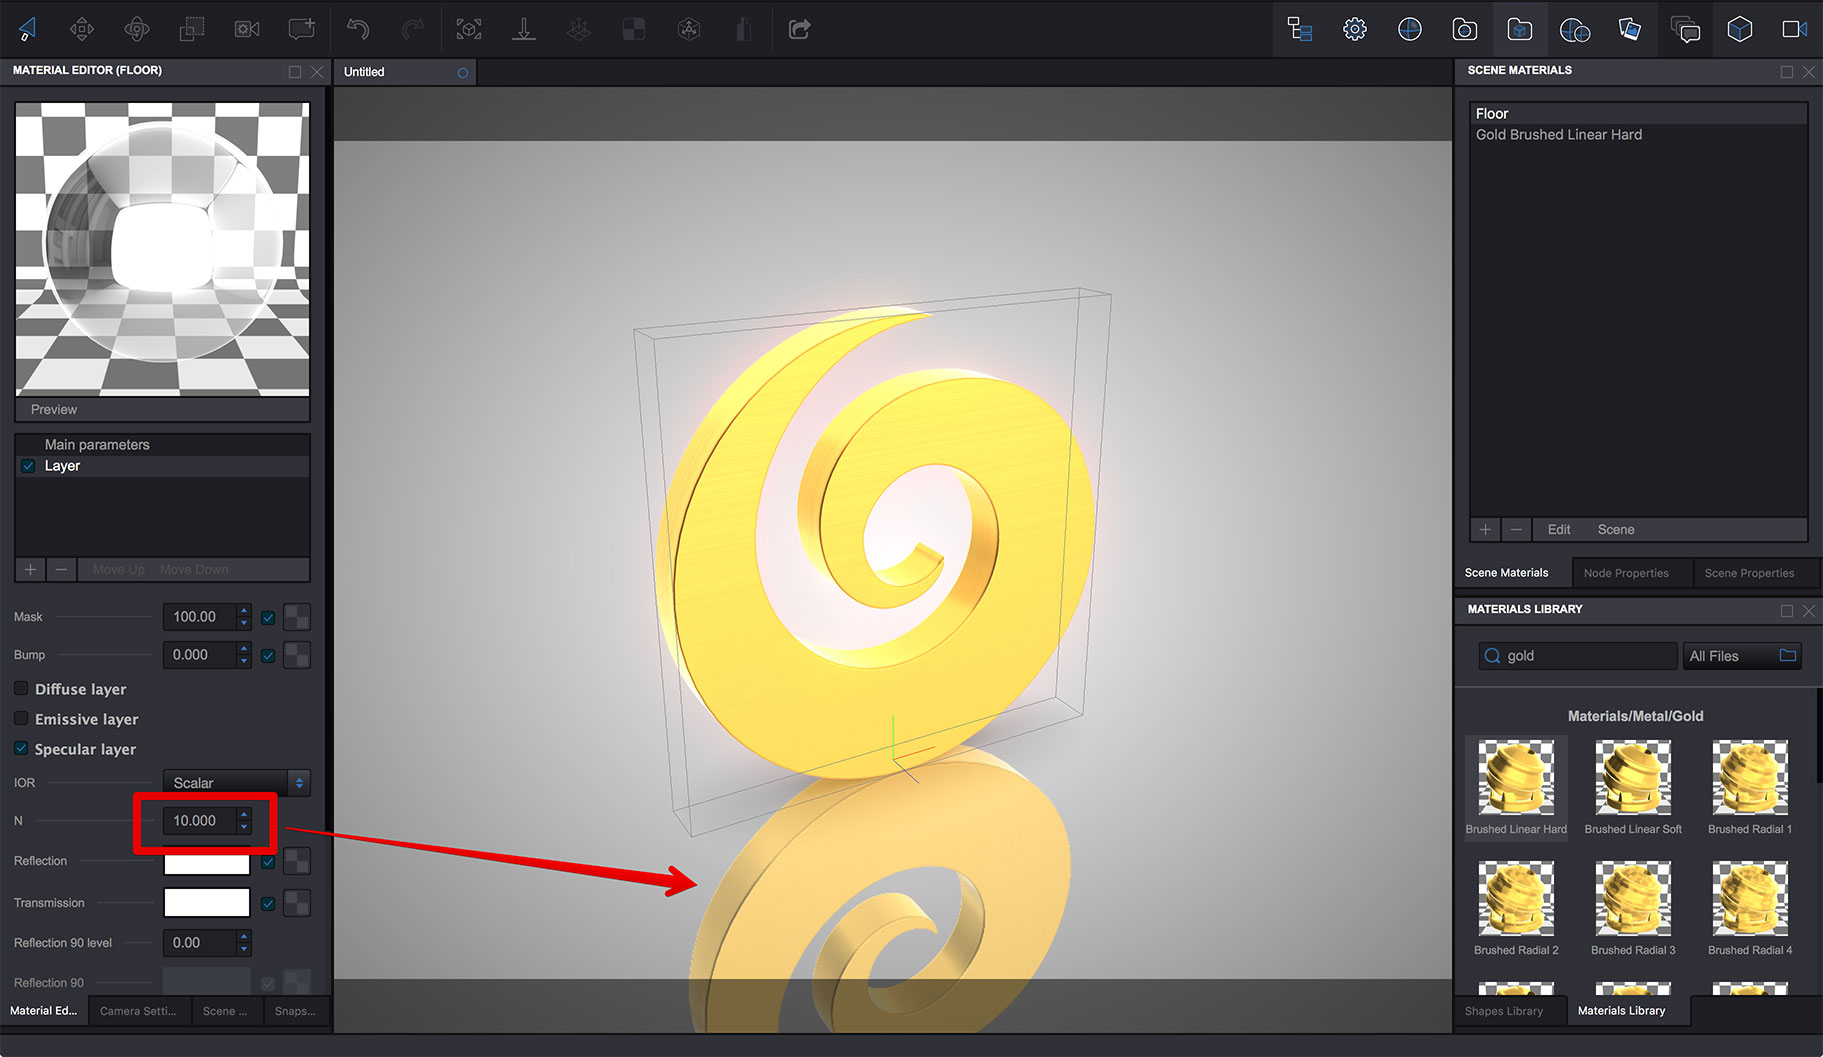
Now it is much more visible. Good, you’ve just added a reflection.
Additional reflection effects
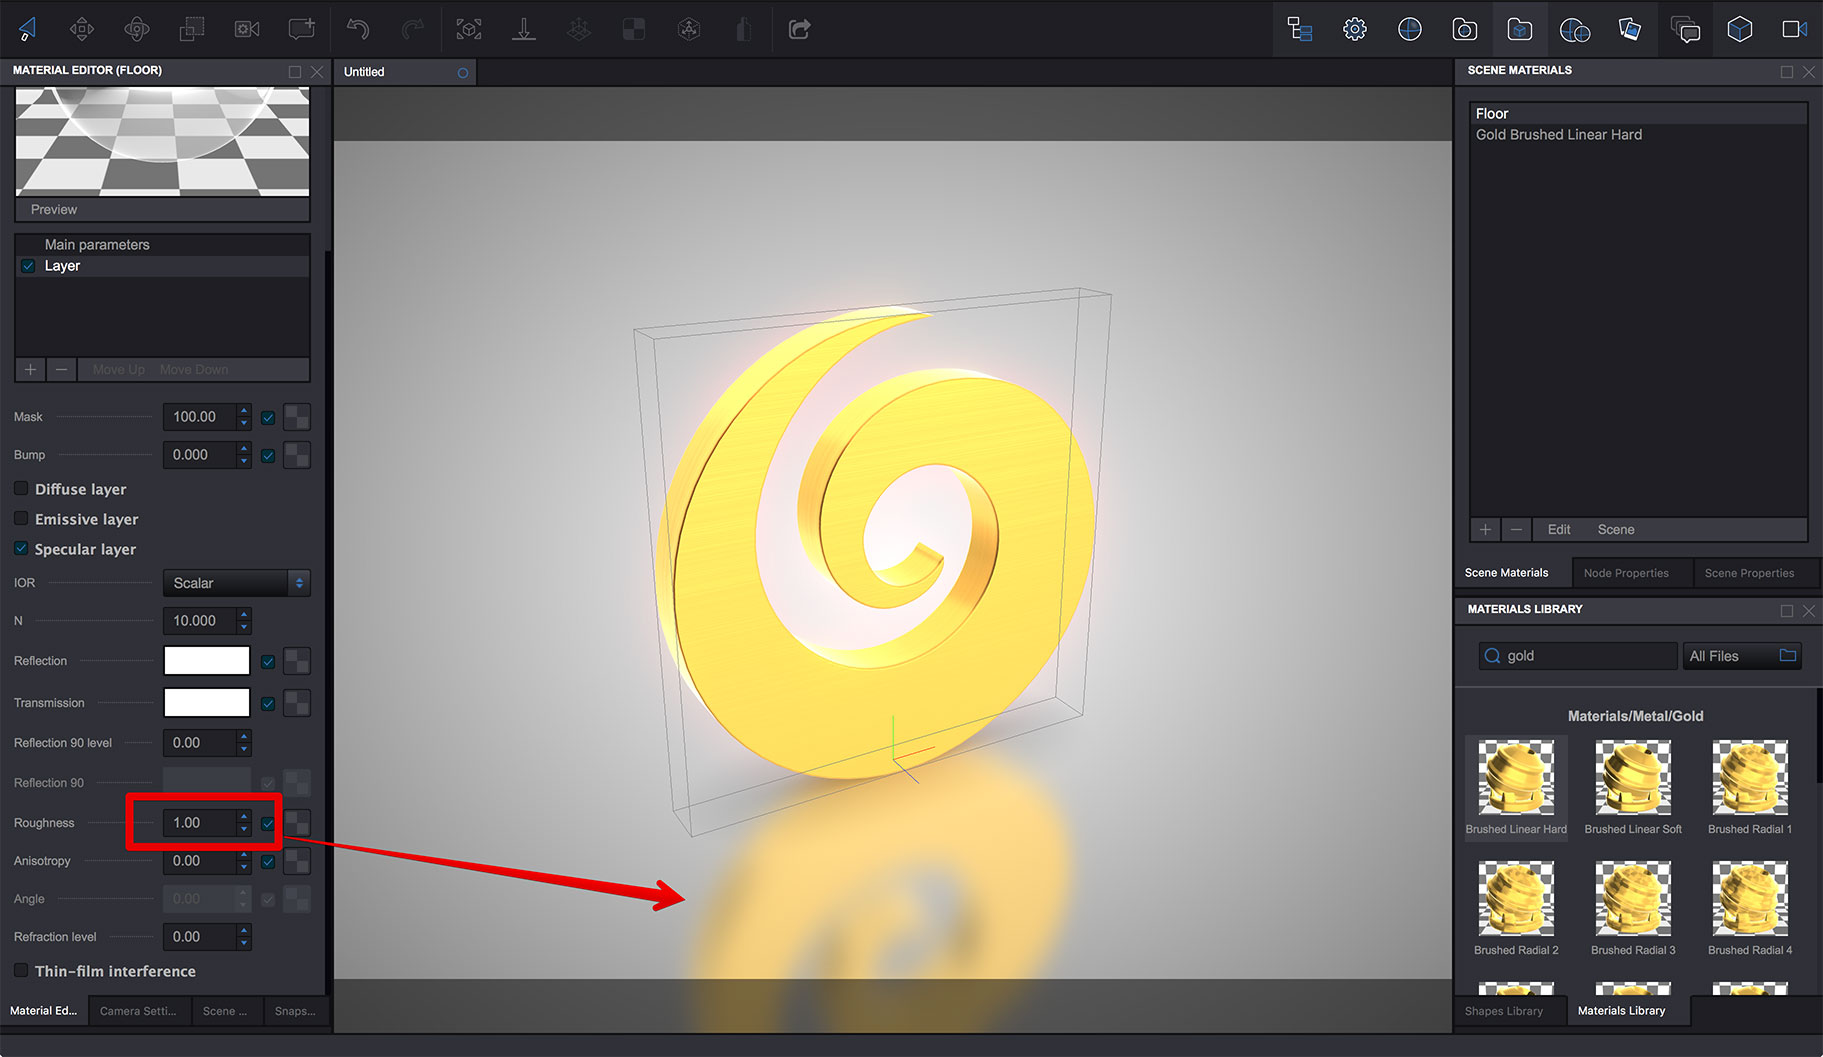
The main reason the floor reflection is done via the “Floor” material is that it allows you to configure the reflection in various ways. For instance you can blur it using Roughness parameter:
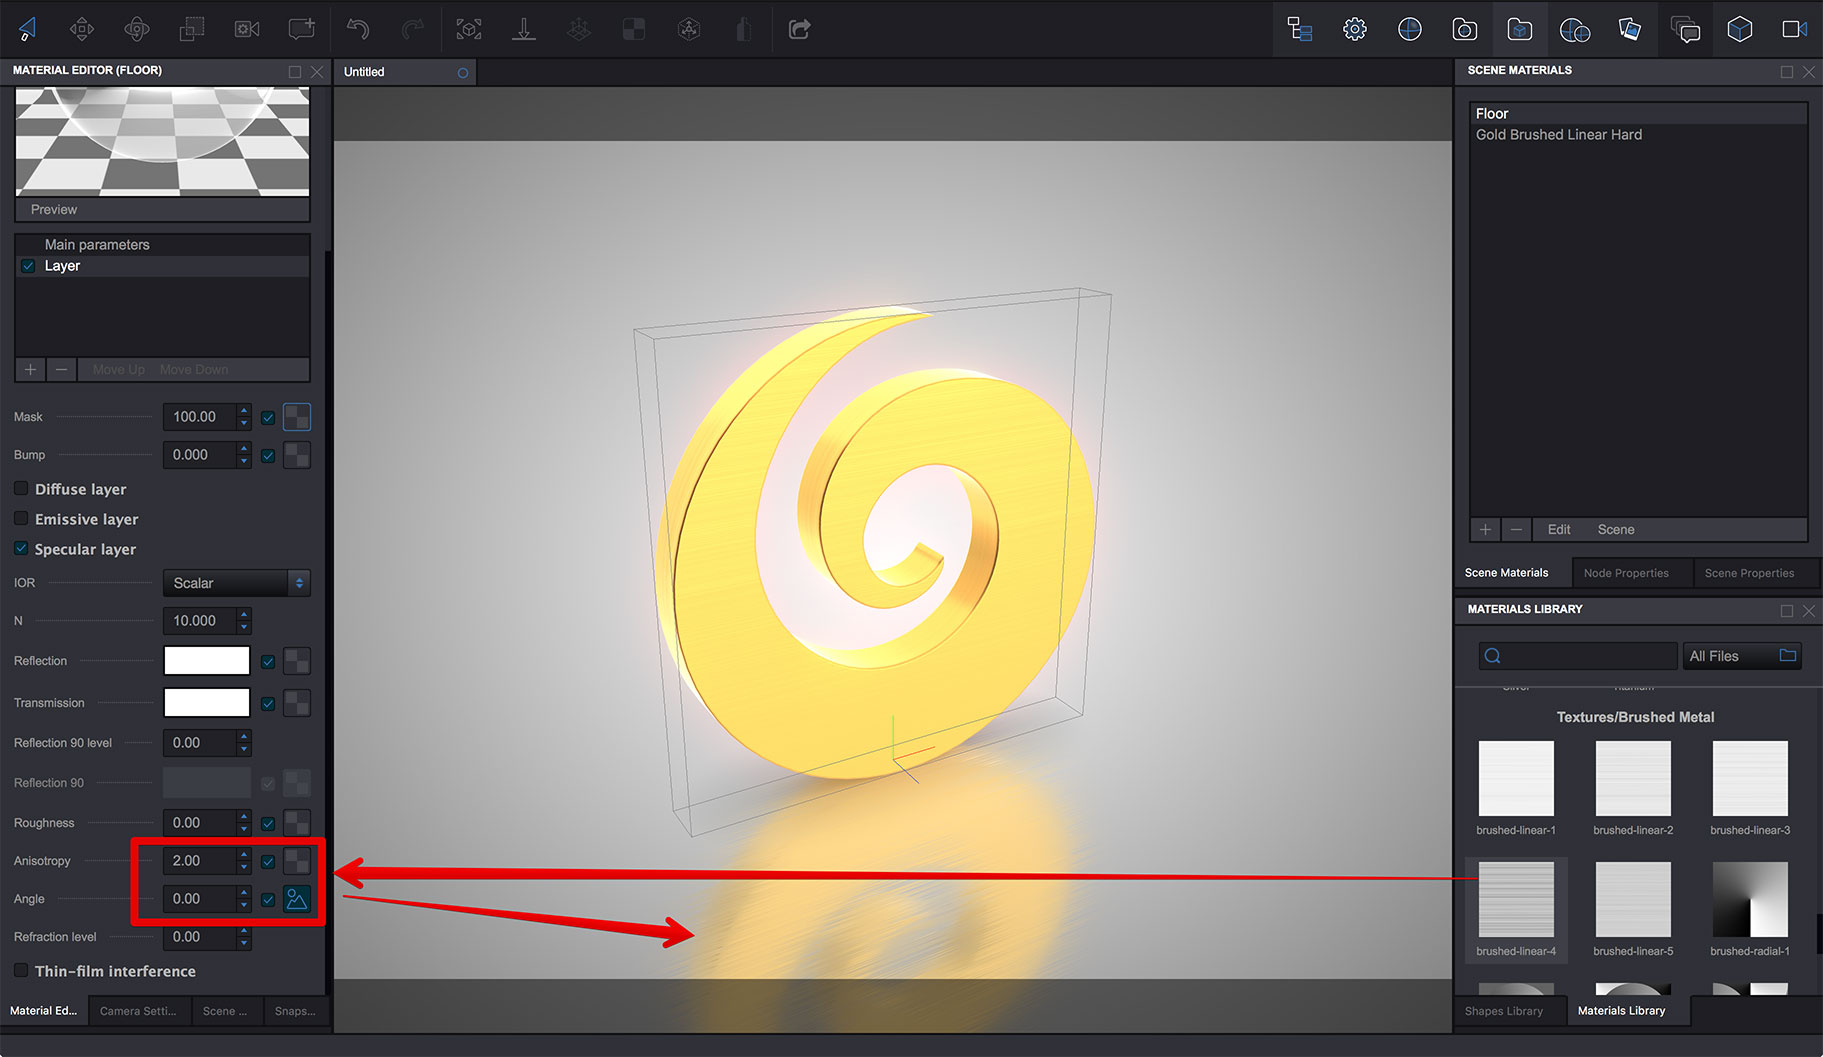
You can style it up with Anisotropy option:
You can apply reflection tint, mask, bump and so on. Everything that you do with normal materials for normal shapes also works for the floor reflection.
That’s All!
You learned how to enable and configure floor reflection in Koru, so why don’t you try it right now with your own scene?
- Decals — how to place images on objects as decals;
- Lightmaps — how to compute scene lightmaps and configure them;
- Floor reflection — how to add and configure floor reflection;
- Watermarks — adding 2D image overlays;
- Taking Screenshots — how to add "Take Screenshot" button to your Koru exports;
- Loading Images — how to upload your own images to exported Koru scenes;
- Automatic Rotation — how to make your scene automatically rotates when idle;
- Customizing Snapshot Buttons — how to customize snapshot buttons with CSS;
- Creating Snapshot Buttons — when CSS is not enough you can create snapshot buttons yourself;
- Drop–Down Snapshots Menus — convert snapshots to configurable options;
- Manual Snapshots Control — how to activate a specific snapshot;
- Customizing Background — replace that gray gradient for scenes with transparent background;
- Non-Interactive Scenes — can exported scenes ignore mouse clicks?
- Fullscreen Button — how to change the fullscreen button look?
- Materials — Koru materials explained;
- Partial Snapshots — making snapshots that affect just some scene elements;
- Using Metadata — add extra information to nodes and use it in browser.