Placing images as decals
In Koru you usually apply images to shapes using materials. Each side of a shape can have a material, where you can set a diffuse texture using the image you need. This works fine while the shape has proper UV mapping. Although you can setup a missed mapping directly in Koru, it doesn’t always work as expected, especially for complex shapes.
For such complex shapes or if you don’t want to tailor a special texture just to add a small label onto the shape, you can use decals.
Decal is basically a sticker that you can apply wherever you want. It takes the shape of the object, but also keeps its own proportions. Decals are perfect option for labels, stickers, tags and so on.
Adding a decal
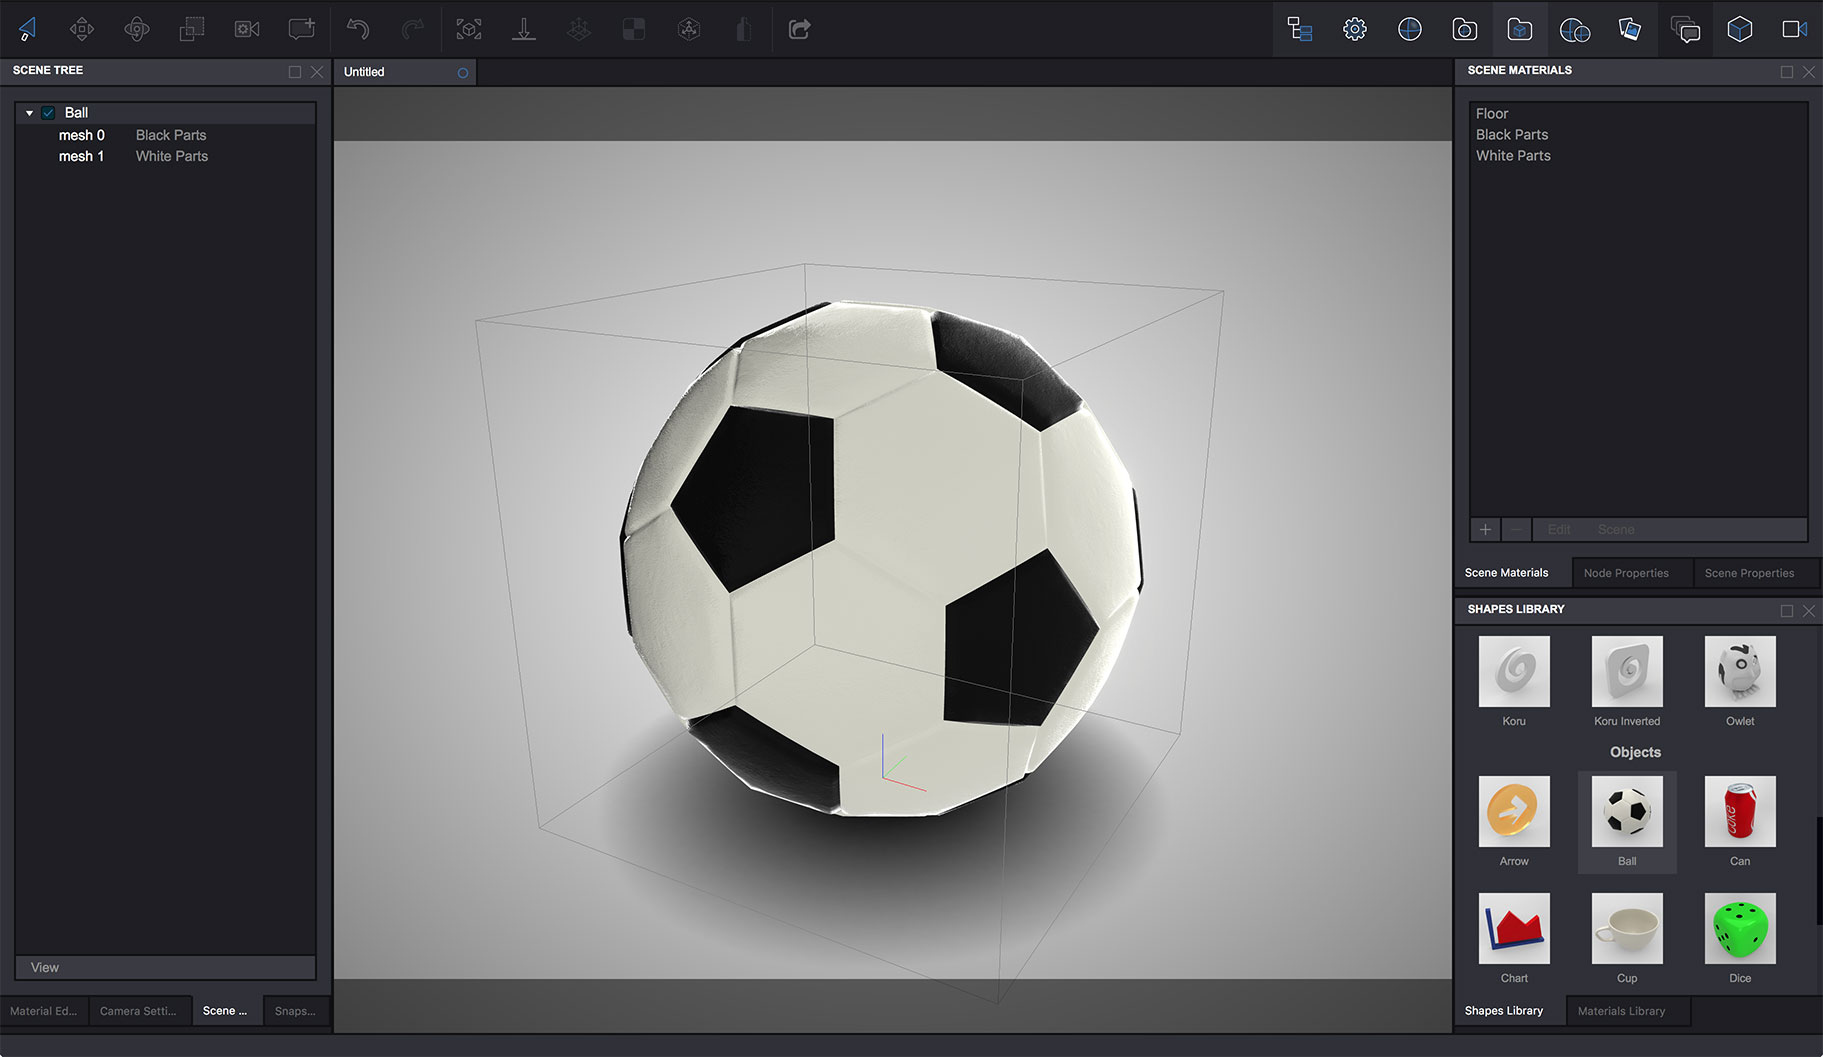
Let’s start with a simple shape of a ball from the built-in shapes library:
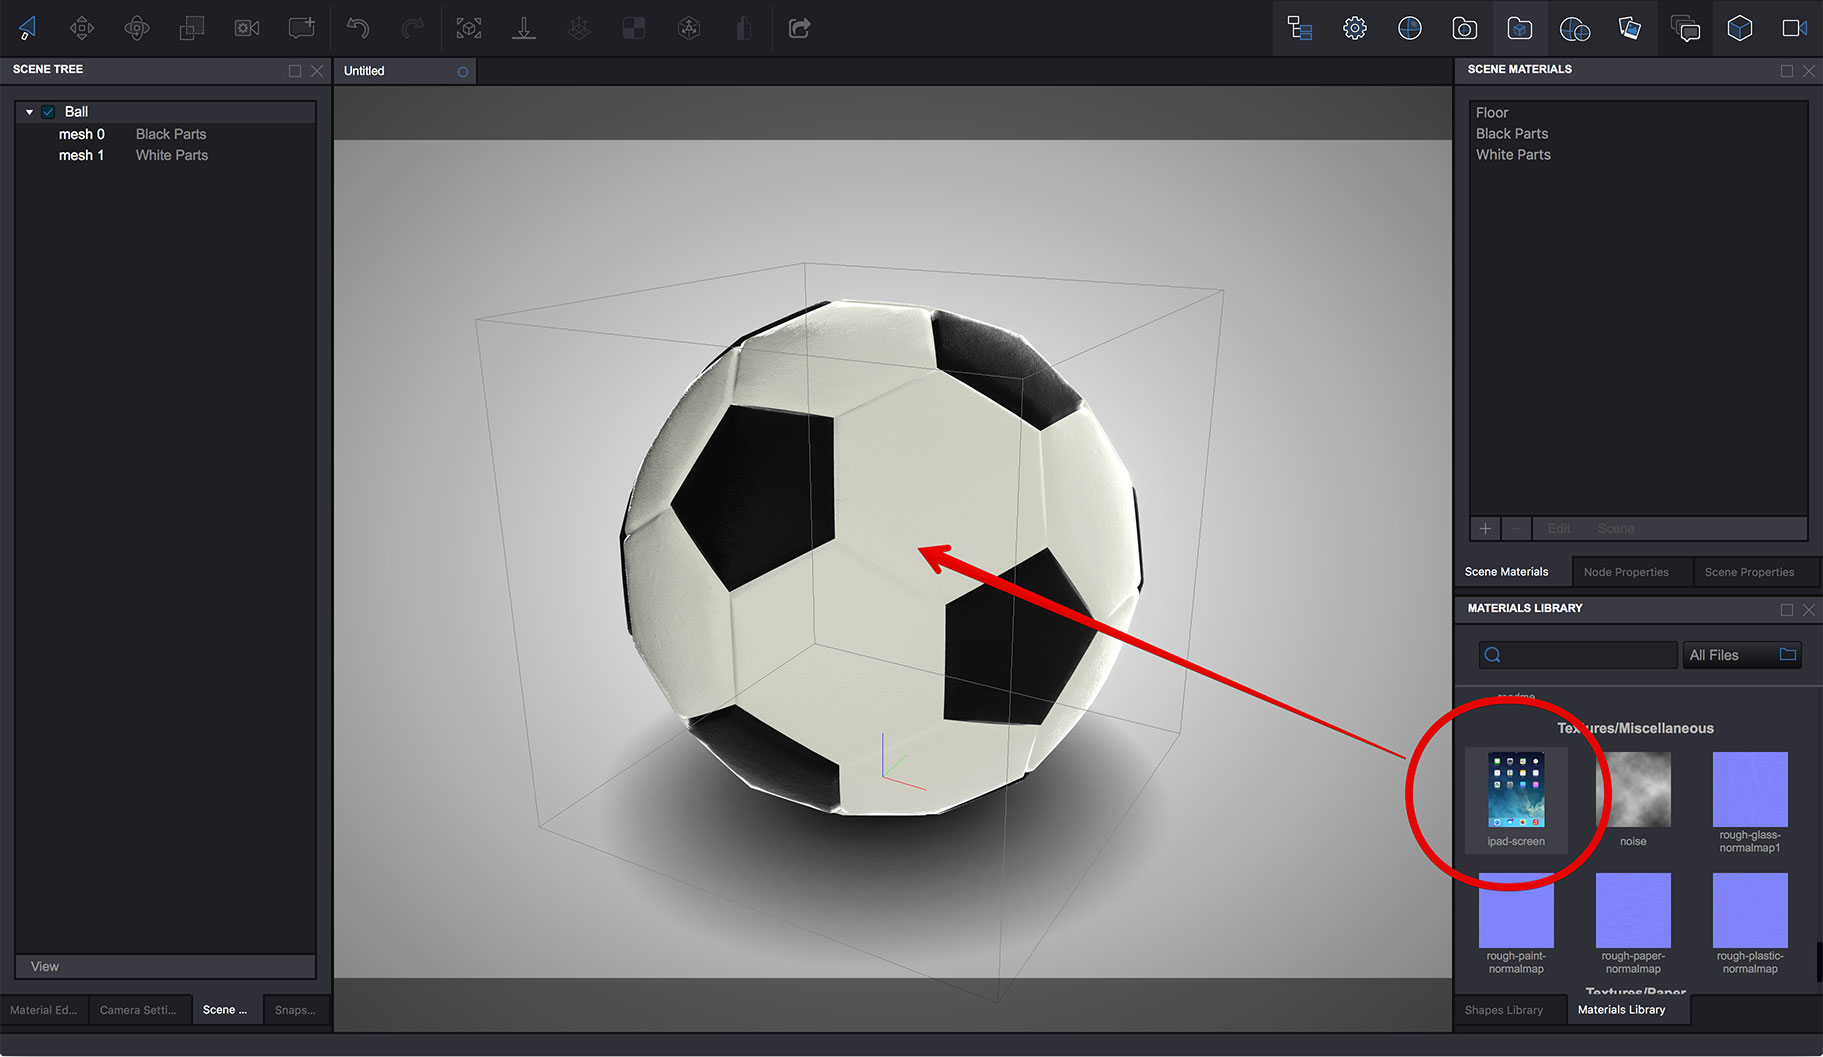
Now scroll down the materials library to the very bottom where the images are located. You can use any image you have, but in this tutorial we’ll use the built-in one for convenience. Select the iPad screen sample image and drag it onto the ball:
A popup-menu will appear that lets you either add the image as a decal or load it to the material:
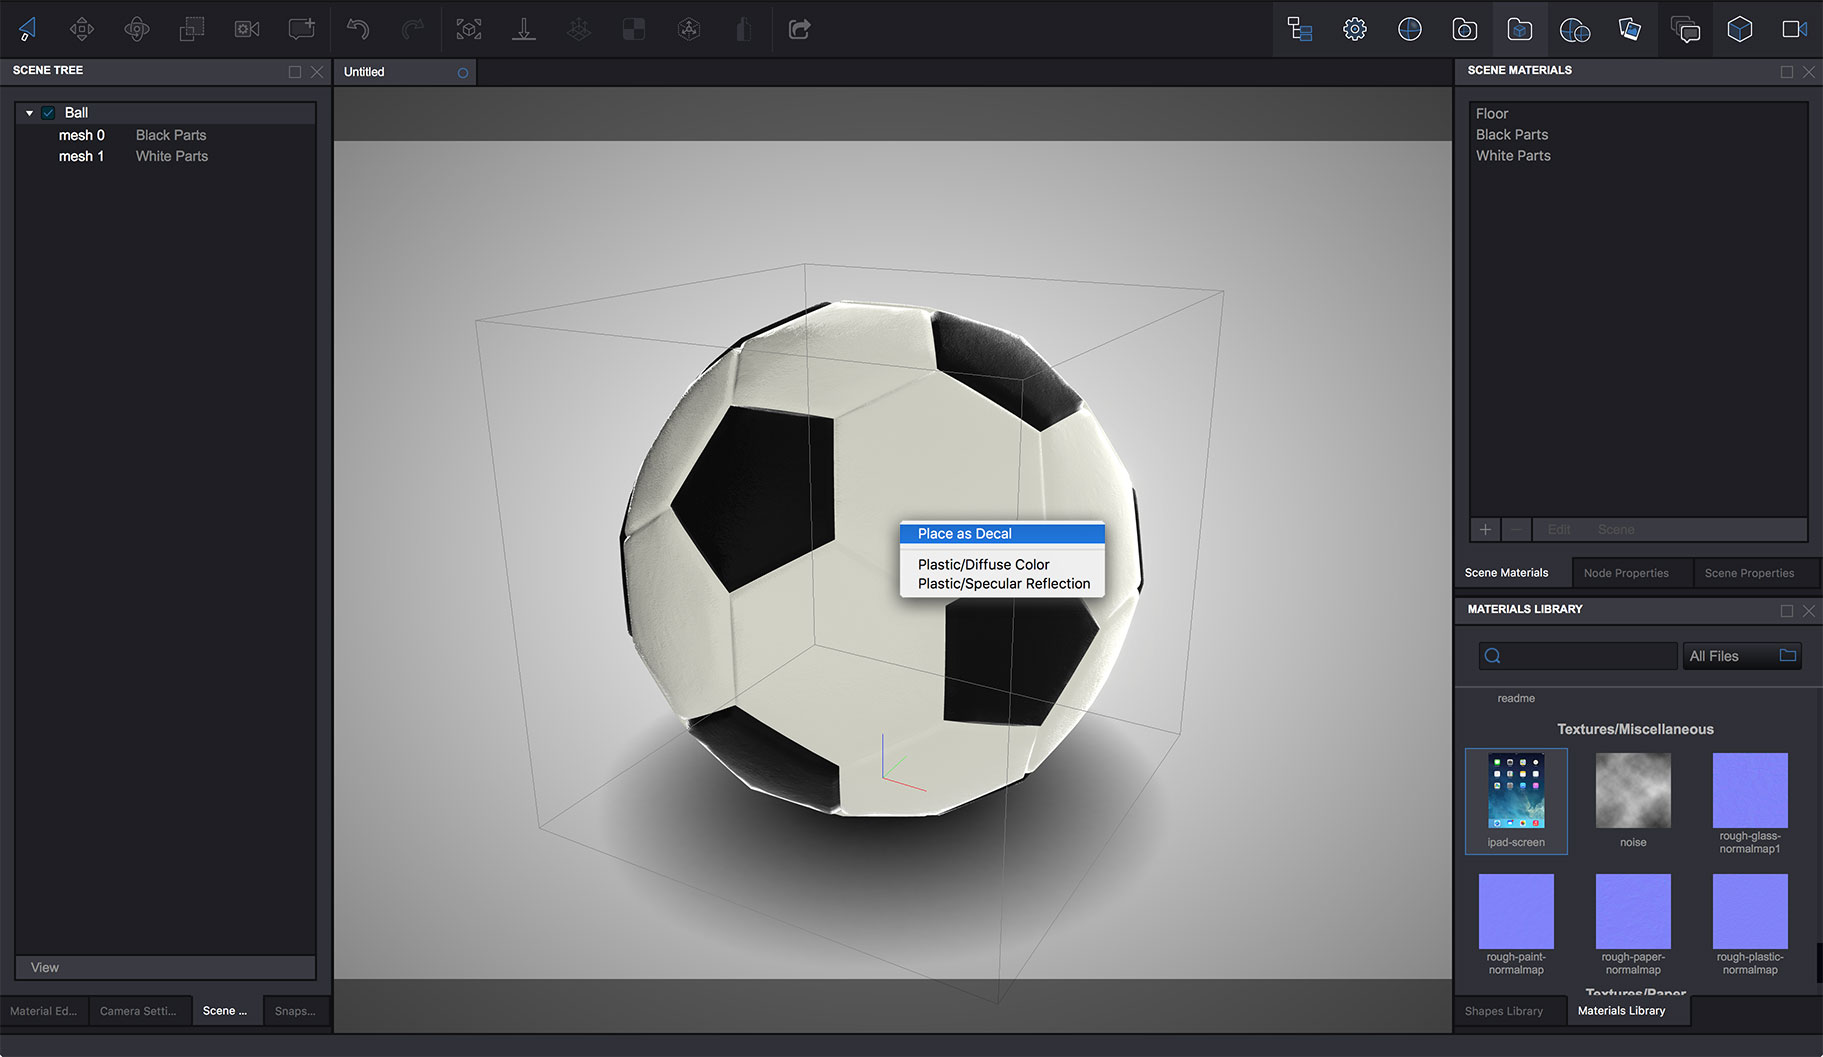
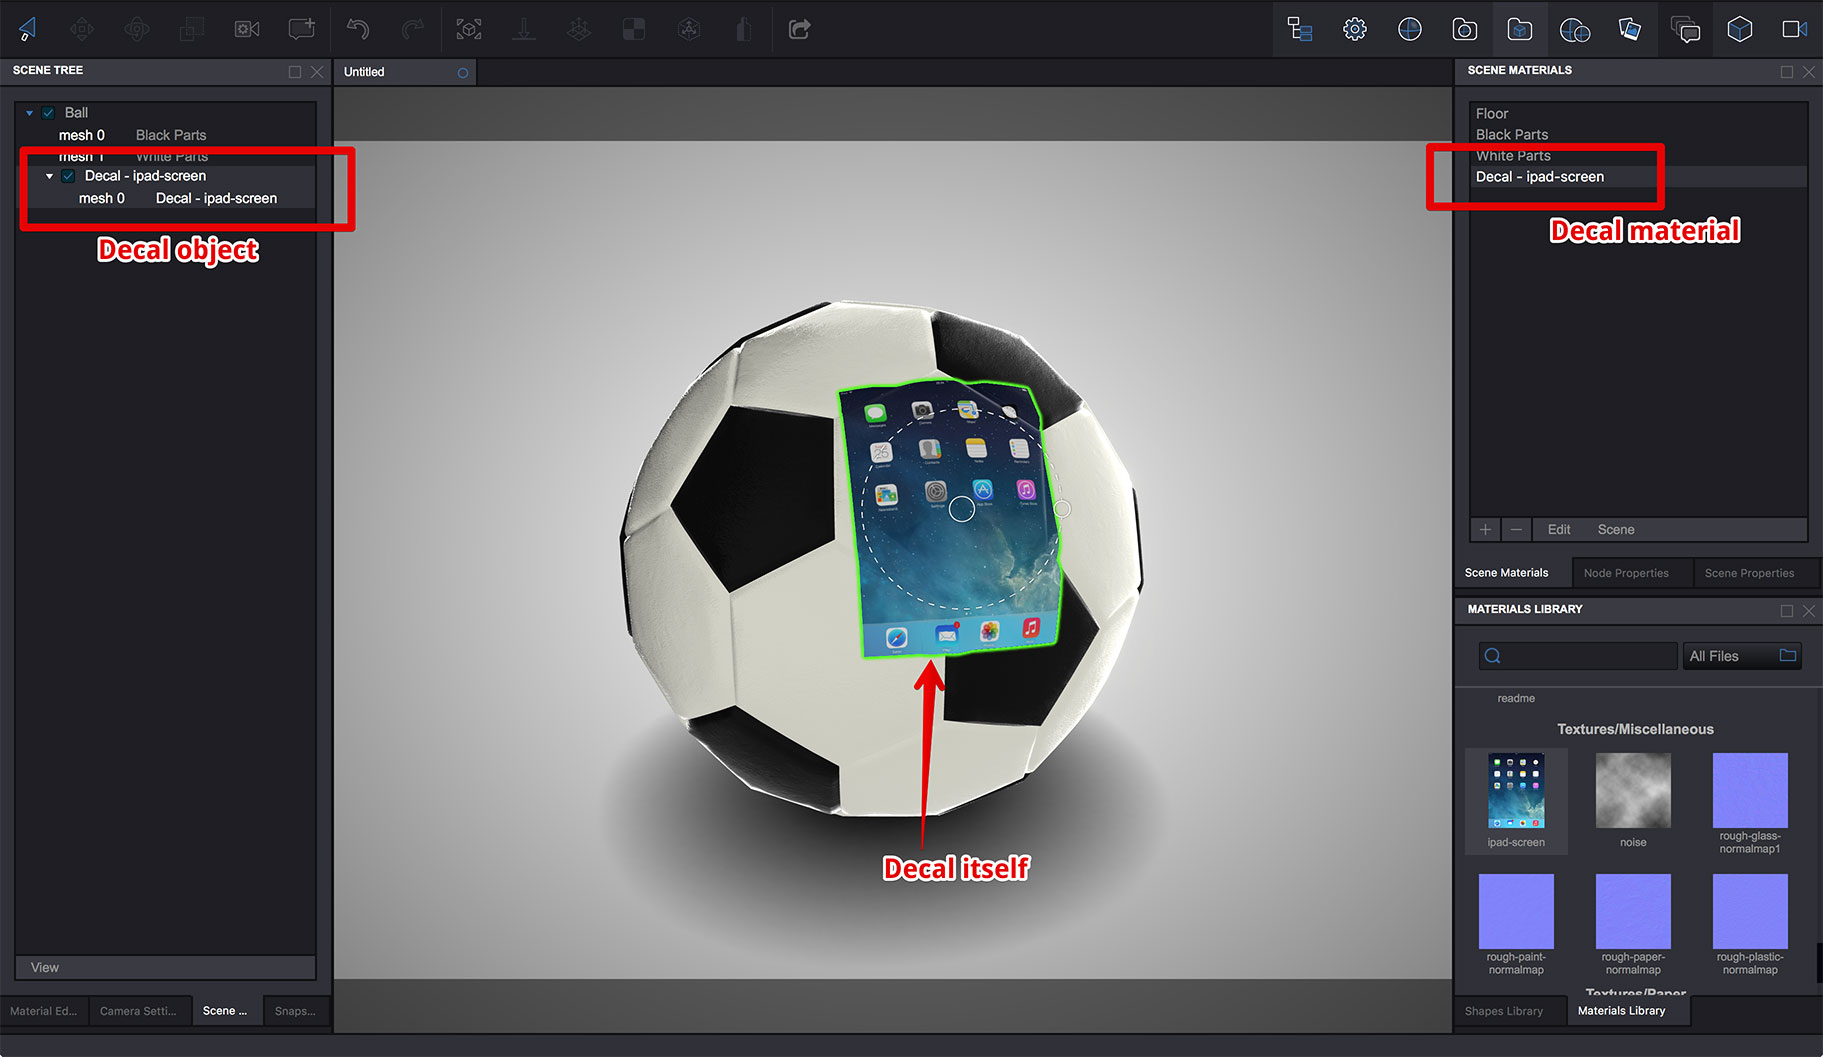
Select Place as Decal item to create a decal object with the image. You will see the image is applied to the ball as a sticker. Notice the new elements in the scene tree and scene materials list:
Congratulations, you’ve added your first decal in Koru!
Controlling decals
Notice the gray circle right in the middle of the decal. This is a decal gizmo that lets you control it with your mouse:

The center circle of the gizmo lets you drag the decal along the shape. The side (smaller) circle lets you rotate and scale the decal to better fit it onto the shape. Give both handles a try to see how they work, this is easy.
As you may also noticed, decal added a node to the scene tree. For more decal options you need to select this node and check the Node Properties panel:
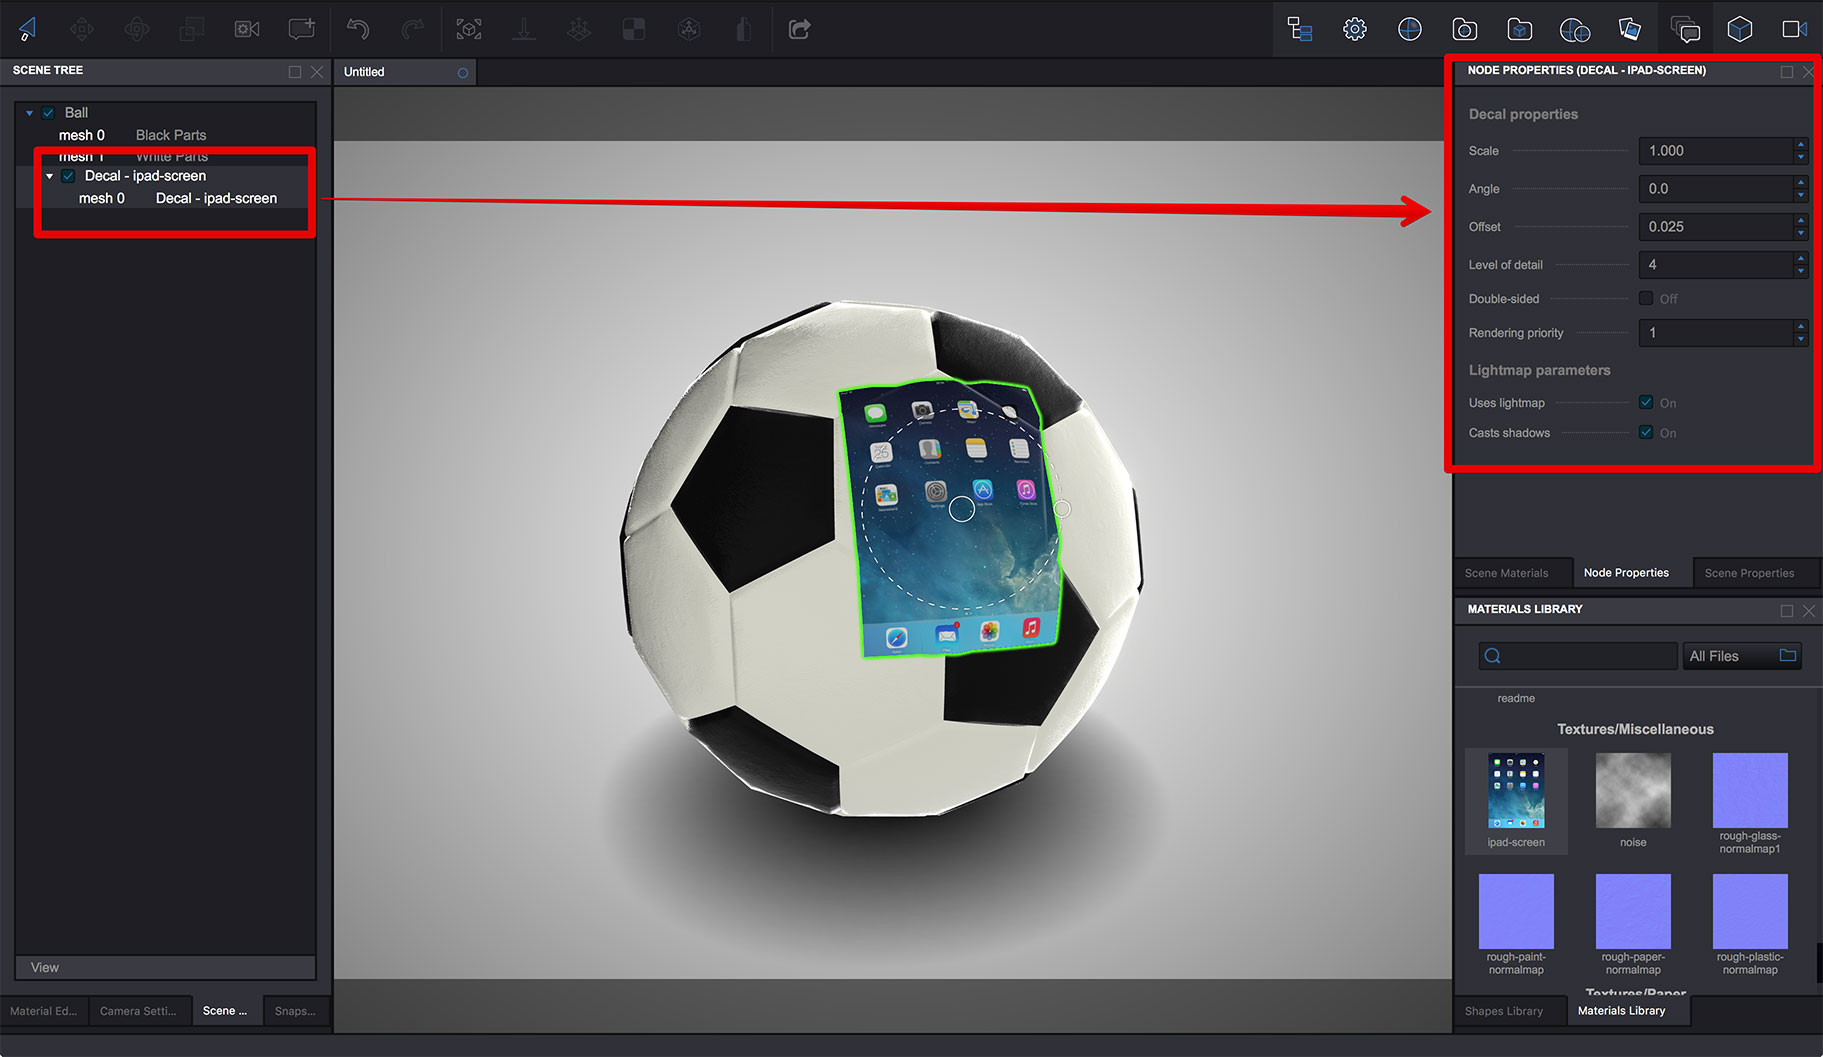
The Node Properties panel has some special parameters for decals:
- Scale - controls how big is decal. Use it to make sure the decal size matches the size of the shape;
- Angle - controls the rotation of the decal. Sometimes it is placed at the wrong angle, so you can fix that here;
- Offset - controls the distance between the surface and decal. You need this to have two or more overlapping decals and to fix z-fighting, if any. In other cases you can leave it as is;
- Level of details - increase this if decal looks broken or some its parts are missing. Otherwise - leave as is;
- Double-sided - by default decals only have front-facing geometry, which works fine for opaque surfaces. If you apply decal to glass or other transparent surface, you may want to see it from behind. Then you need to check this option;
The rest parameters are exactly the same as for other nodes.
Note that Scale and Angle parameters can be configured using the gizmo and fine-tuned in the properties panel.
Decal node and geometry
If you look at the scene tree, you’ll notice that decal is just another node, the child node of the object it is applied to. Decal node may have one or two meshes, depending on the Double-sided option mentioned above. You can’t delete or detach decal meshes, they are controlled by the decal itself.
You also can’t drag decal node to another node or apply decal to another decal. This is done to ensure the internal decal management works fine.
What you can and should control is the materials of the decal meshes. After all, decal node is just a node and decal geometry is just another geometry for Koru, so you can apply materials exactly the same way, as you do for standard objects.
That’s All!
Decals are dead simple to add and manage, and they are the good option to add artwork to the model that doesn’t have UV mapping.
- Decals — how to place images on objects as decals;
- Lightmaps — how to compute scene lightmaps and configure them;
- Floor reflection — how to add and configure floor reflection;
- Watermarks — adding 2D image overlays;
- Taking Screenshots — how to add "Take Screenshot" button to your Koru exports;
- Loading Images — how to upload your own images to exported Koru scenes;
- Automatic Rotation — how to make your scene automatically rotates when idle;
- Customizing Snapshot Buttons — how to customize snapshot buttons with CSS;
- Creating Snapshot Buttons — when CSS is not enough you can create snapshot buttons yourself;
- Drop–Down Snapshots Menus — convert snapshots to configurable options;
- Manual Snapshots Control — how to activate a specific snapshot;
- Customizing Background — replace that gray gradient for scenes with transparent background;
- Non-Interactive Scenes — can exported scenes ignore mouse clicks?
- Fullscreen Button — how to change the fullscreen button look?
- Materials — Koru materials explained;
- Partial Snapshots — making snapshots that affect just some scene elements;
- Using Metadata — add extra information to nodes and use it in browser.