Exporting 3D scene to Koru Cloud
Koru Cloud is the easiest way to publish your 3D scenes online. You don’t mess with HTML and Javascript and simply get a shareable link with your 3D model - everything is managed by us.
Koru Cloud Limitations
There is always a trade-off between simplicity and flexibility and Koru Cloud is designed for simplicity. This means “no templates” - you get a link to a page with “full screen” 3D scene with default snapshot buttons and no extra scripting. Consider server export instead if you need all these features. On the other hand, in most cases simple solutions work better. And you still can embed your full-screen scene onto a web page!
The second thing is the storage time: we only store your scenes for a month, regardless of your license status.
The third thing is that Koru Cloud is only available to the licensed users of the application. The demo version users are not able to upload to the Koru Cloud and should use server or disk export instead.
Finally, fair usage policy applies. You can share and embed exported 3D scenes the way you want, assuming that it will not create significant load on our servers. If your audience is quite large and you think it may affect other users, please contact us to arrange the better options.
So, Let’s Start?
We need a sample scene for our tutorial, so let’s make one. You can make your own, or follow the steps below.
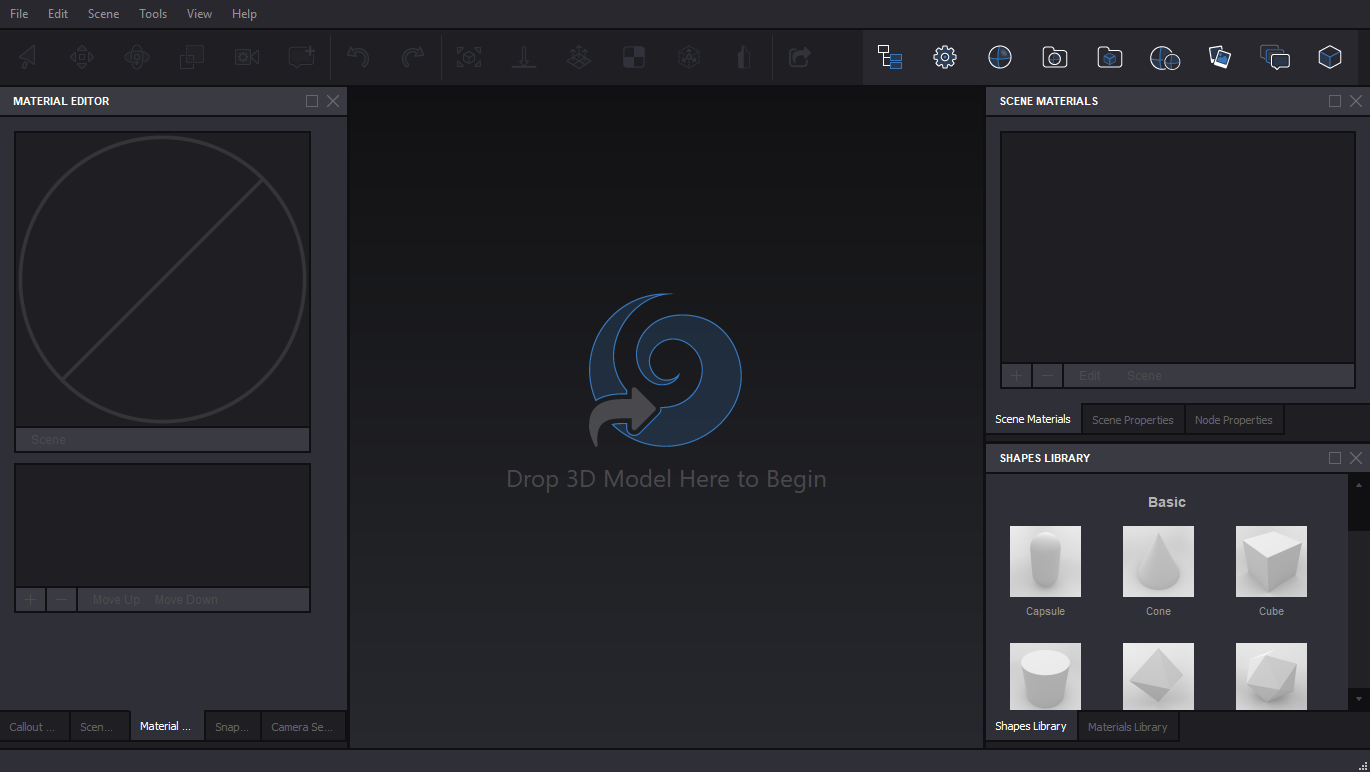
Run Koru and open its Shapes Library panel (click images to see them in full resolution):
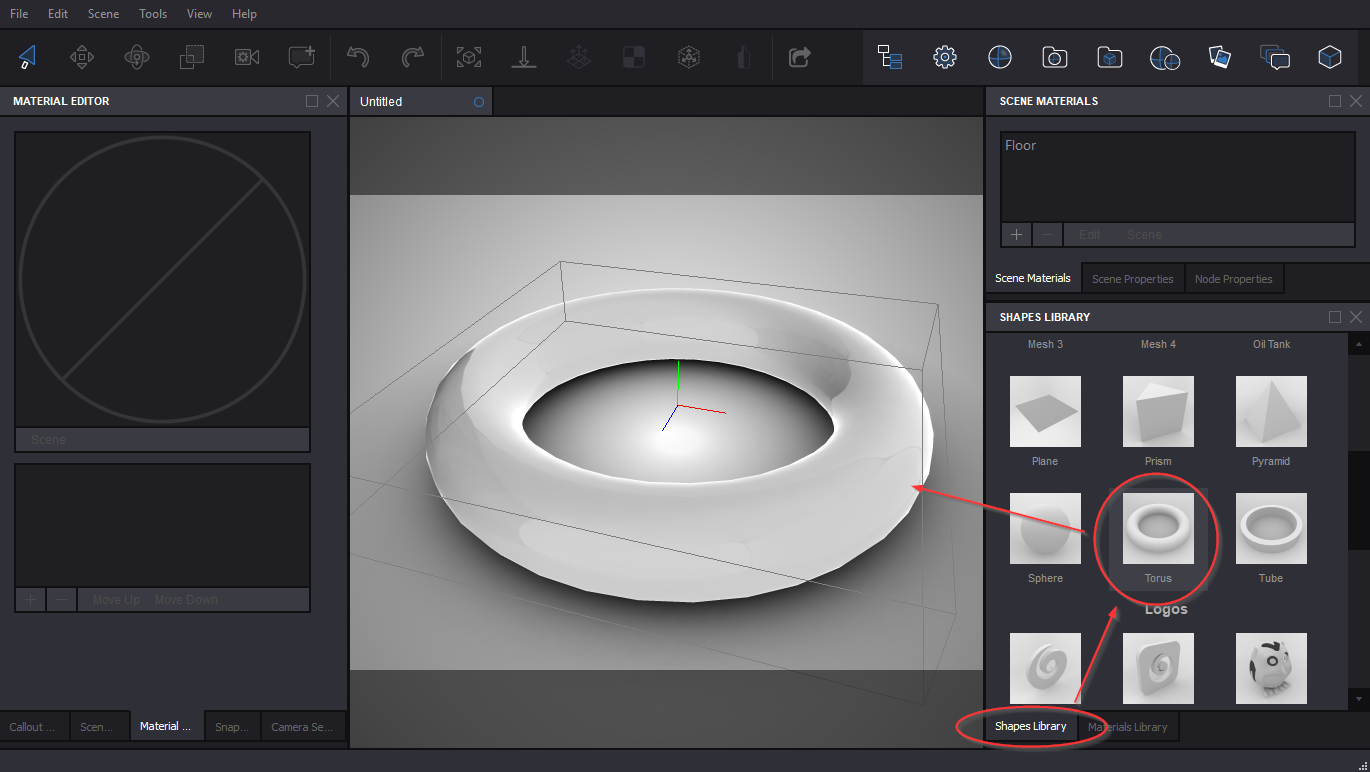
Drag any shape into the working area to make a test scene:
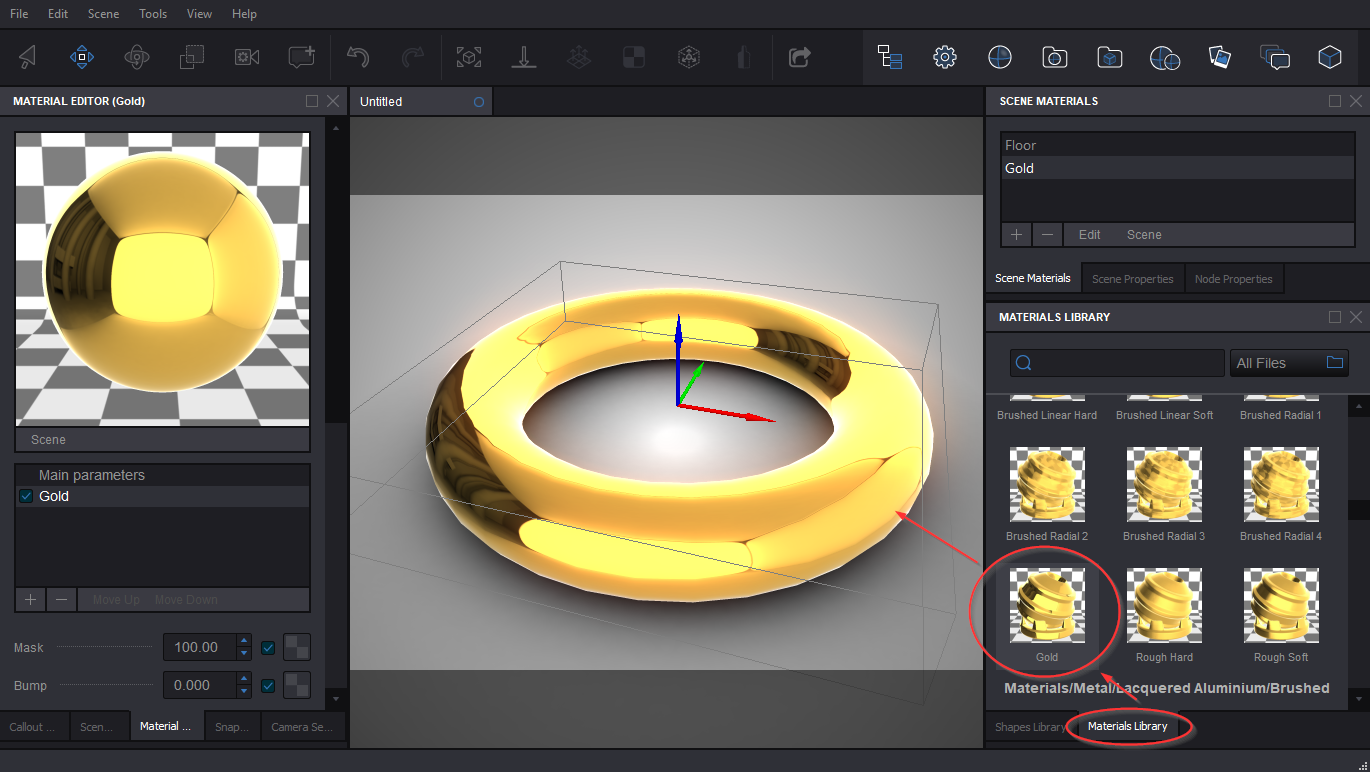
Now switch to Materials Library panel, select a material and drag onto the shape:
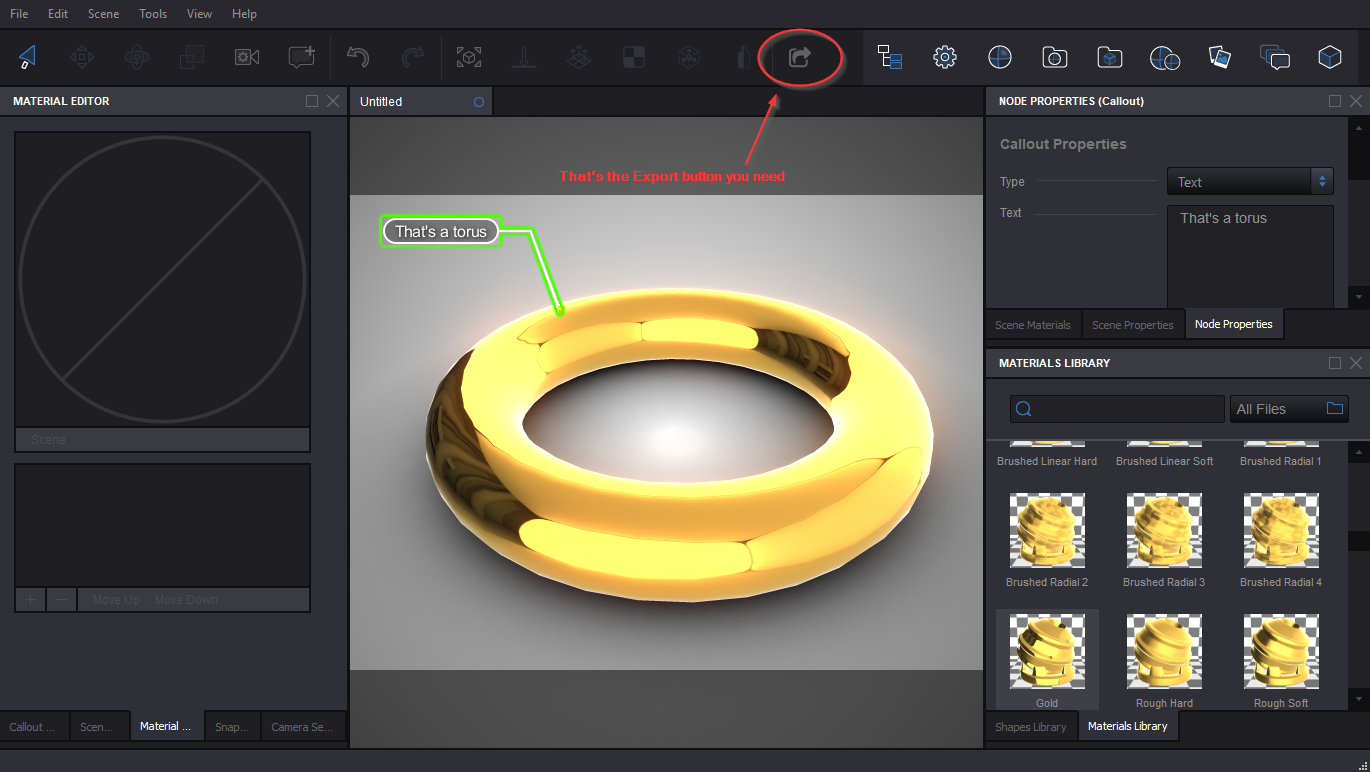
Finally you can add some extra details to your scene like snapshots or callouts:

Rotate the scene around with your mouse in Koru and make sure it looks exactly the way you need. Leave the camera in the “default” position that you want the exported file to show and click the Export button:
You will see the Export Wizard window.
Export Wizard
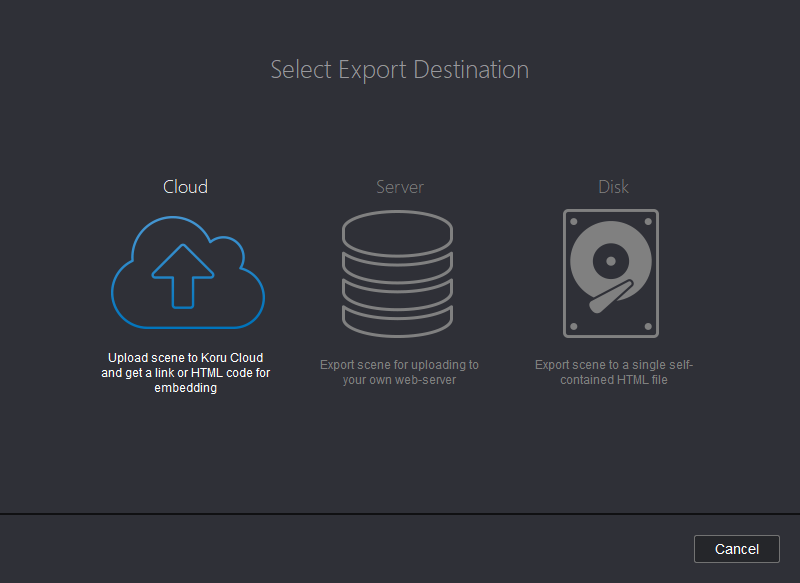
At the first step of the Export Wizard you will be asked to select the export target. As we exporting to Koru Cloud, click the Cloud option.
Then you will see the export options window:
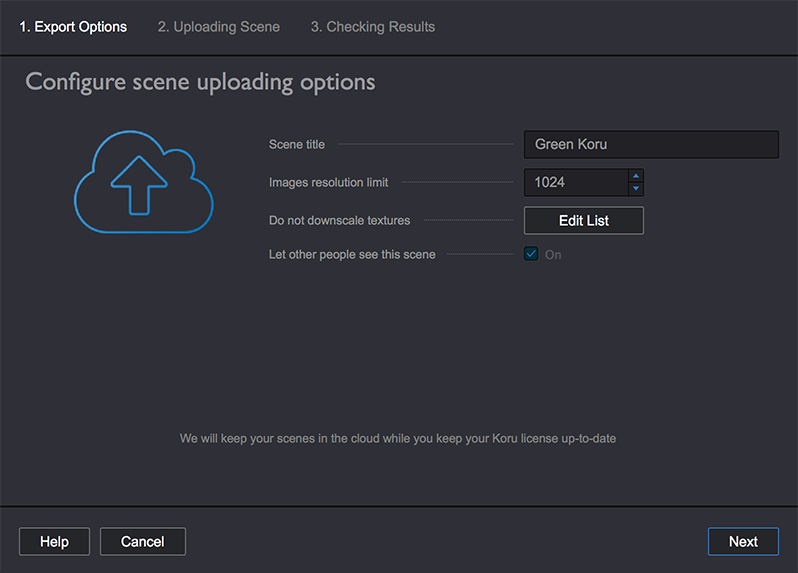
You can define the scene title and also decide if you want the scene to be visible to other people. If checked, we may put your scene to public galleries or staff-pick them to promote the Koru features. You need a Koru license to keep your scenes private.
You can also configure textures downscaling options here if you have a Koru license.
Set the options you want and click Next to start publishing:
Once the export is done, you’ll see the results page:
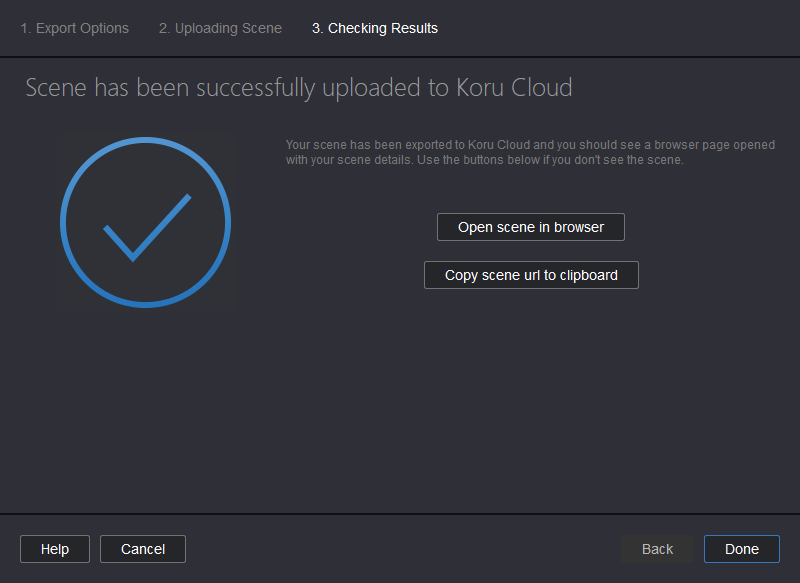
You should also see the scene control page opened in your browser. There you can get the scene link, get HTML code for embedding, see some stats and finally delete the scene if you don’t need it.
If you have a Koru license, you will also receive an email with the link to your exported scene to make sure you don’t lose it.
Scene Control Panel
The page you get in the browser (and optionally by email) is the key to your online scene. Everyone who knows this link may delete the scene, so it is a good idea to keep it private.
Here is a sample scene control panel:
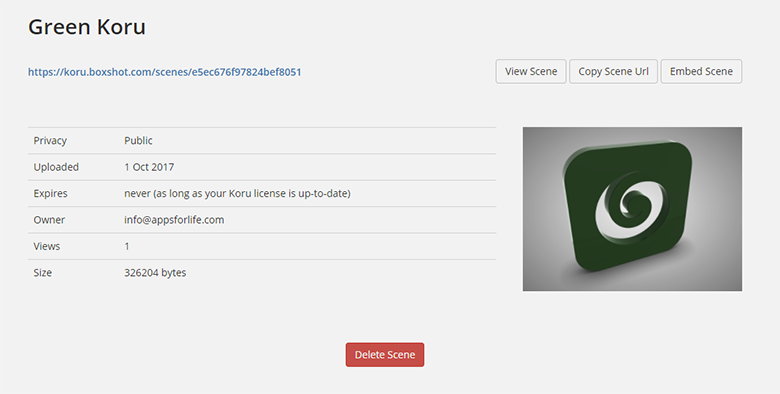
At the top of the page you see the scene title and there is a scene link below. This link displays your scene in full screen and that is the link you can safely share or publish online. This is a “read only” link and everyone who knows it can see the scene, but can’t see stats or delete the scene.
There are View Scene and Copy Scene URL buttons for your convenience. The last button there is Embed Scene that lets you embed the exported scene to your own page. Let’s click it:
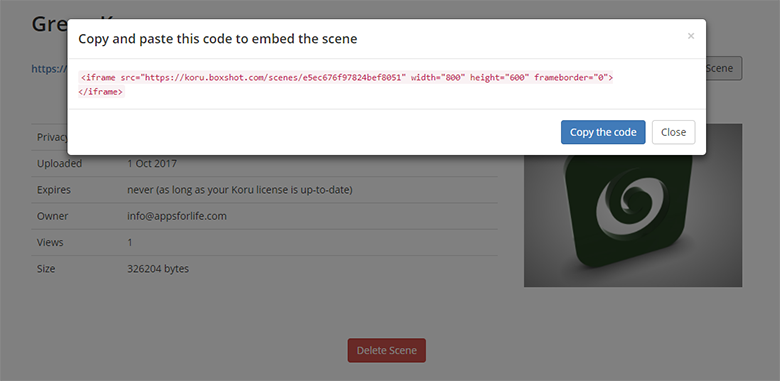
You will see the code you need to put to your web-page to embed the 3D scene. Here is the code from the screenshot above:
<iframe src="https://koru.boxshot.com/scenes/e5ec676f97824bef8051" width="800" height="600" frameborder="0">
</iframe>
If you have some HTML knowledge you’ll find it dead simple. If not, these two lines let you “embed” some other page into your own. The src parameter defines the page to be embedded (and that’s the link to our exported scene), the width and height parameters define the dimensions of embedded objects (and the scene will follow them) and the last frameborder parameter sets the width of the border around the embedded object to zero to hide it.
Paste these two lines to your own web-page and see it in action. Below is the interactive 3D model you should see:
Note that it misses the “full screen” button at the top right corner. That’s because browsers don’t let embedded pages to become fullscreen by default. In order to enable that you need to modify the code a bit:
<iframe src="https://koru.boxshot.com/scenes/e5ec676f97824bef8051" width="800" height="600" frameborder="0"
		allowfullscreen="true" webkitallowfullscreen="true" mozallowfullscreen="true">
</iframe>
The new code has some new fullscreen-related attributes that return the button back.
Finally, you can delete the scene if you don’t need it anymore. Just click the Delete Scene button and confirm the deletion. Think twice as the deletion cannot be undone.
Possible Embedding Issues
If you pasted the code, but the scene does not appear on your site, there must be some kind of security restriction in your content management system. The code you pasted has HTML tags and some CMS prevent you from entering “unsafe” tags. If that is the case, you’ll probably see the code itself (or parts of it) on your page.
The further steps depend on the content management system you use, but the overall idea is to tell the system that this code block is safe. There are two most common ways to do so:
- Switch to HTML editing mode - most “site editors” have HTML button that gives you access to good old low-level HTML code behind your page. Click this button, find the code you tried to embed, replace it with the proper copy and switch back to the site editor. This usually fixes the problem;
- Use special IFRAME option of your editor - if your site editor does not let you edit HTML directly, it could probably has an option to embed some other page using IFRAME. Look for such option in your editor, and if you find one - simply enter the scene URL from the control panel there.
If none of these options work, try googling for “embedding iframe in your site editor” and follow the instructions there, replacing the iframe-code with the one you get from us. Contact us if you get it done, so we can share it here. If it still doesn’t work it looks like you can’t embed the scene to the page. Consider using simple scene link instead.
That’s All!
Koru Cloud is the easiest way to share your Koru scenes online, but there are some other options you may want to try:
- Single File Export — when you need a single HTML file containing everything;
- Export for Server — when you want to upload 3d models to your website;
- Publishing Scenes — drag-and-drop your exports to get a public link;
- Export for WordPress — running a WordPress website? Have a look here;