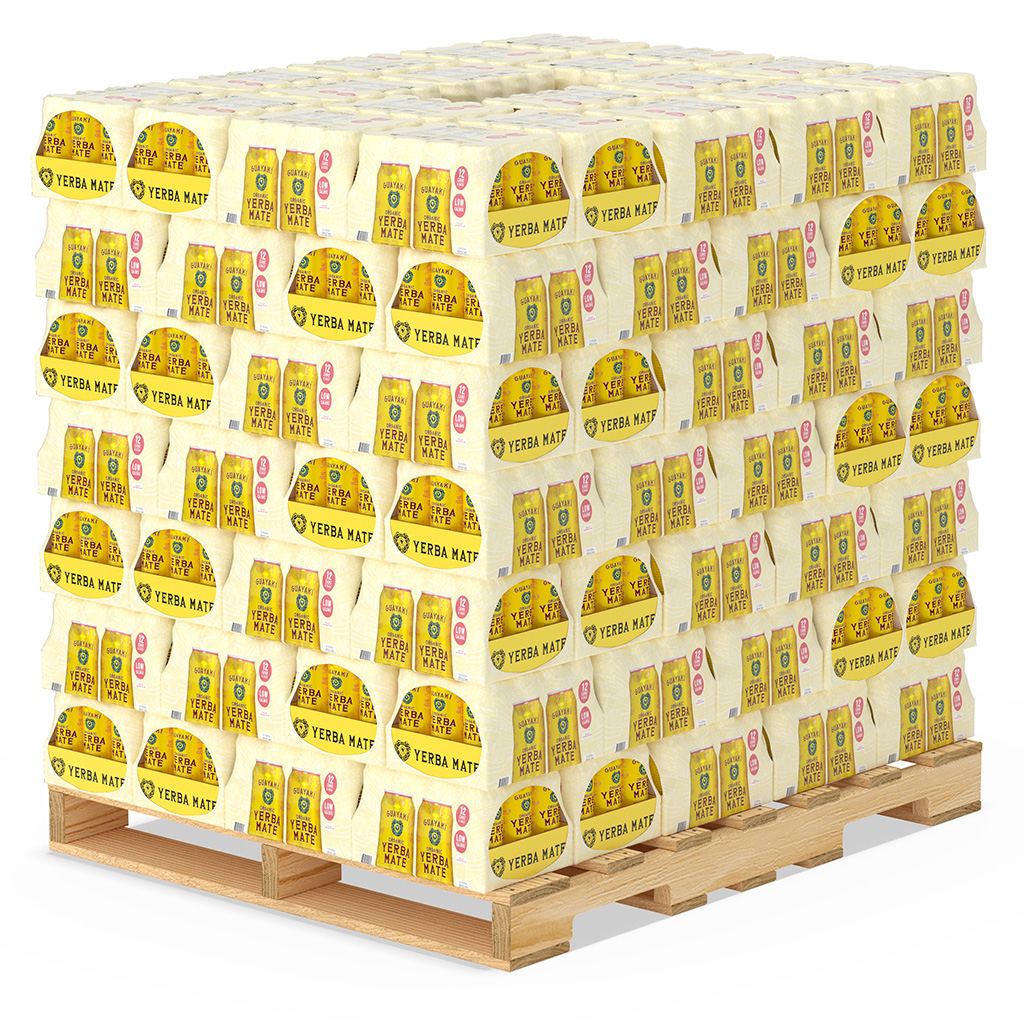
Pallet of Cans Mockup
Here’s a nice example of a complex scene made by our customer (thanks, Greg). Let’s have a closer look and learn how to make one.
Cans
There’s plenty of boxes filled with cans and wrapped up. You can make one with a single can with step and repeat in a few clicks.

Make sure you use instances to keep the scene light–weight. Boxshot uses instances by default, just keep it that way.
You can then add some randomness with the Scatter tool. It lets you randomly shift and rotate the shapes a bit to simulate the real life block of cans.
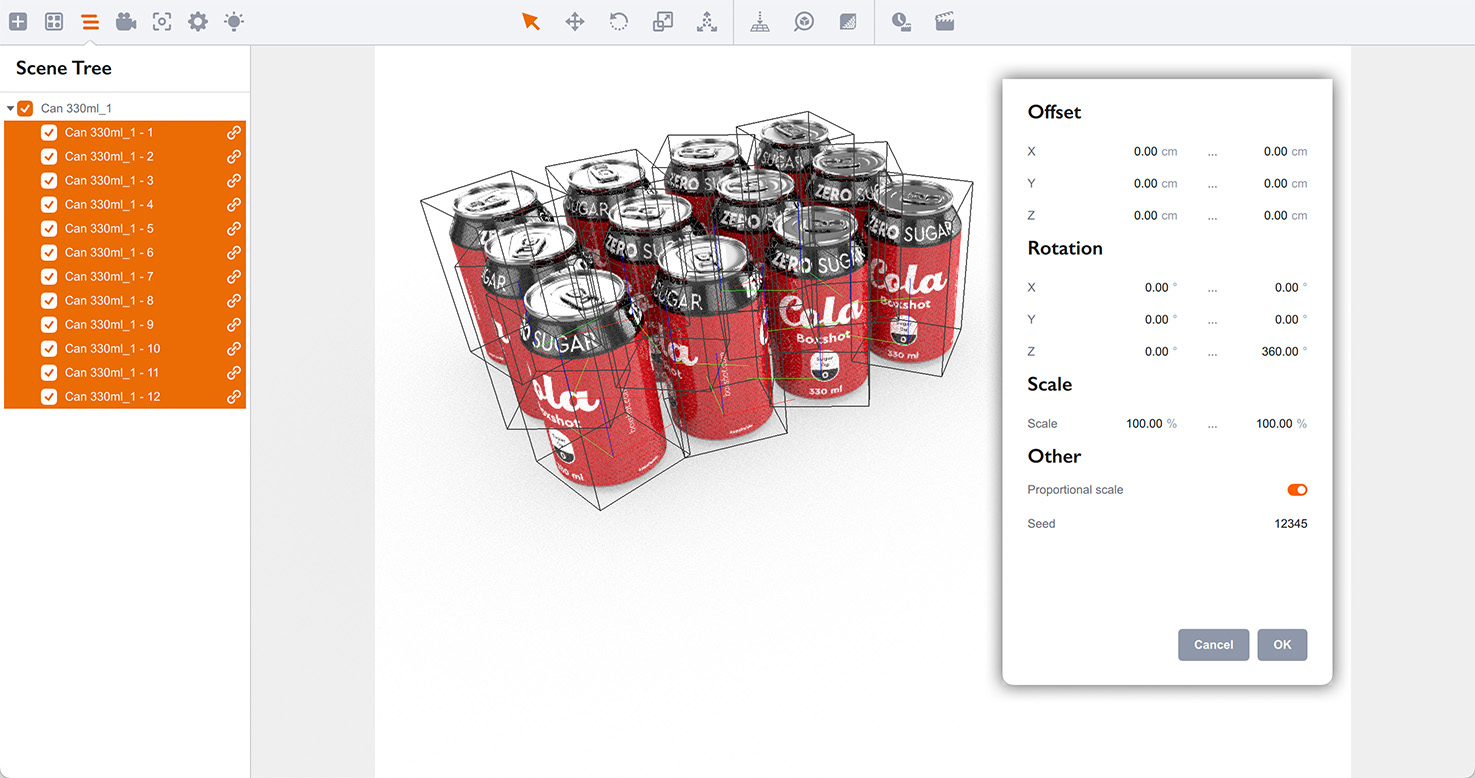
Here I randomly rotated the cans by up to 360° around the vertical axis.
Make sure you select the cans themselves, not their parent group when using the Scatter tool, as otherwise the random transformation will be applied to the whole group at once. You don’t need that.
Paper Tray
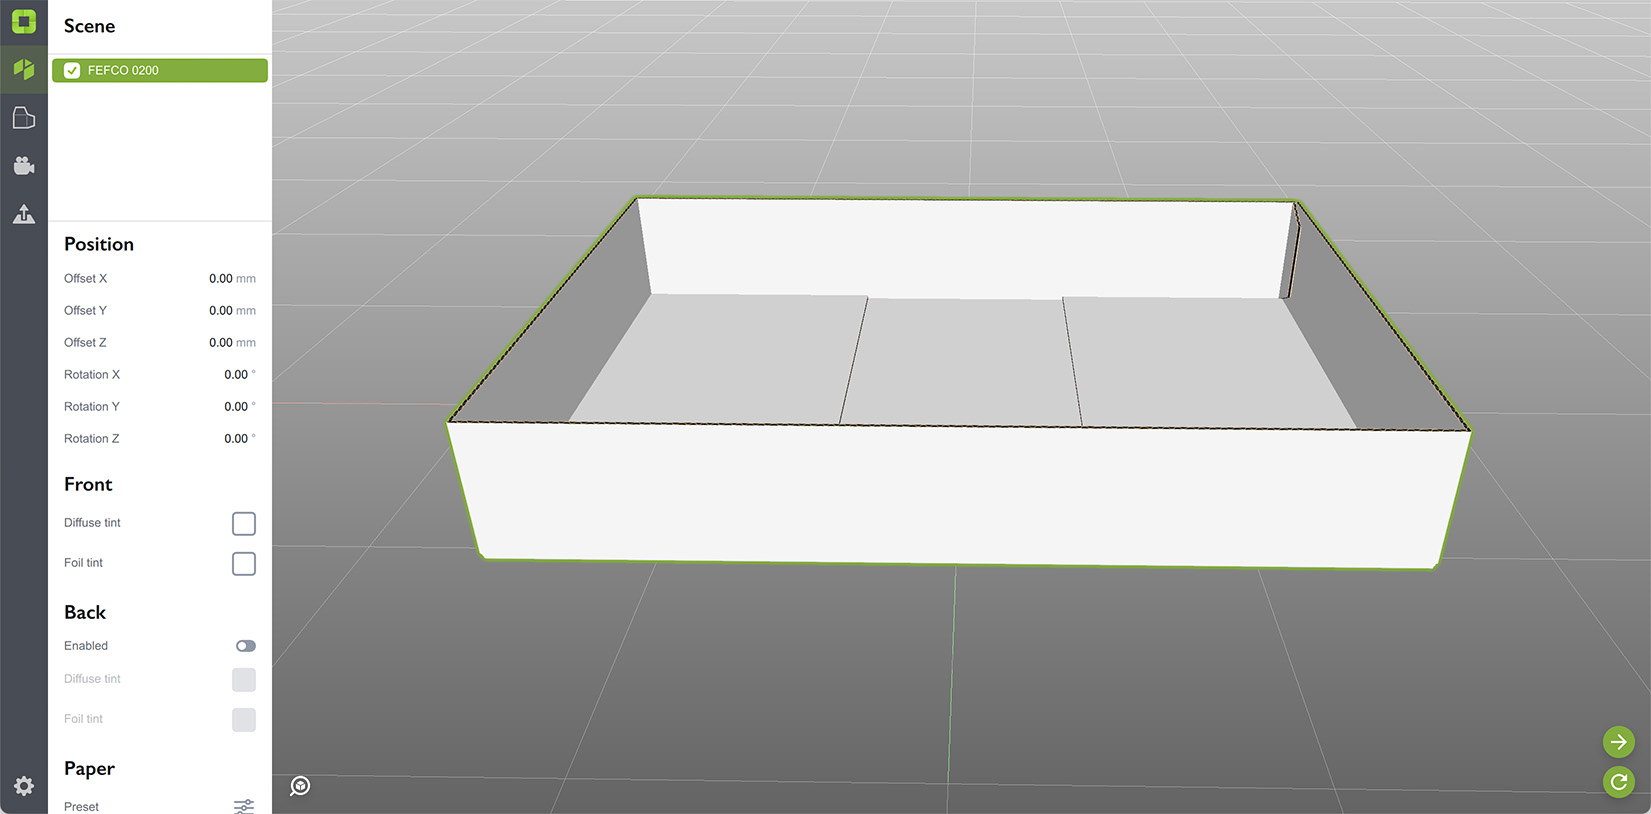
There’s a few options for the cardboard tray. You can make one in Origami and import as a 3D model.
Or you can use the built–in box and make the top part transparent by adjusting the materials.
Finally, you can even compose a simple tray using some flat elements like extruded rectangle or the “Image” shape. The bottom part of the tray is covered anyways, so it doesn’t really matter.
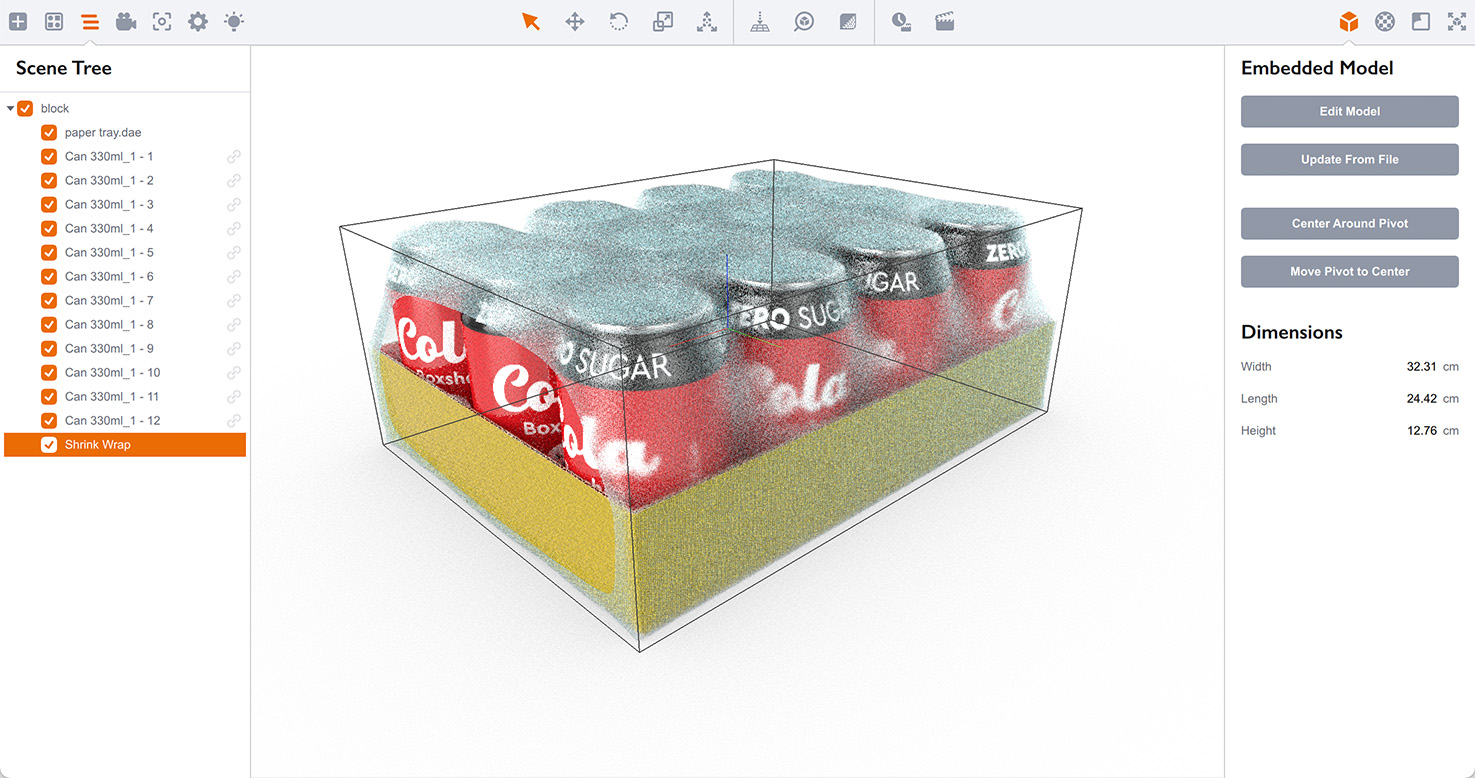
We’ll be using the Origami box, so here I imported the one shown above and aligned it with the cans.
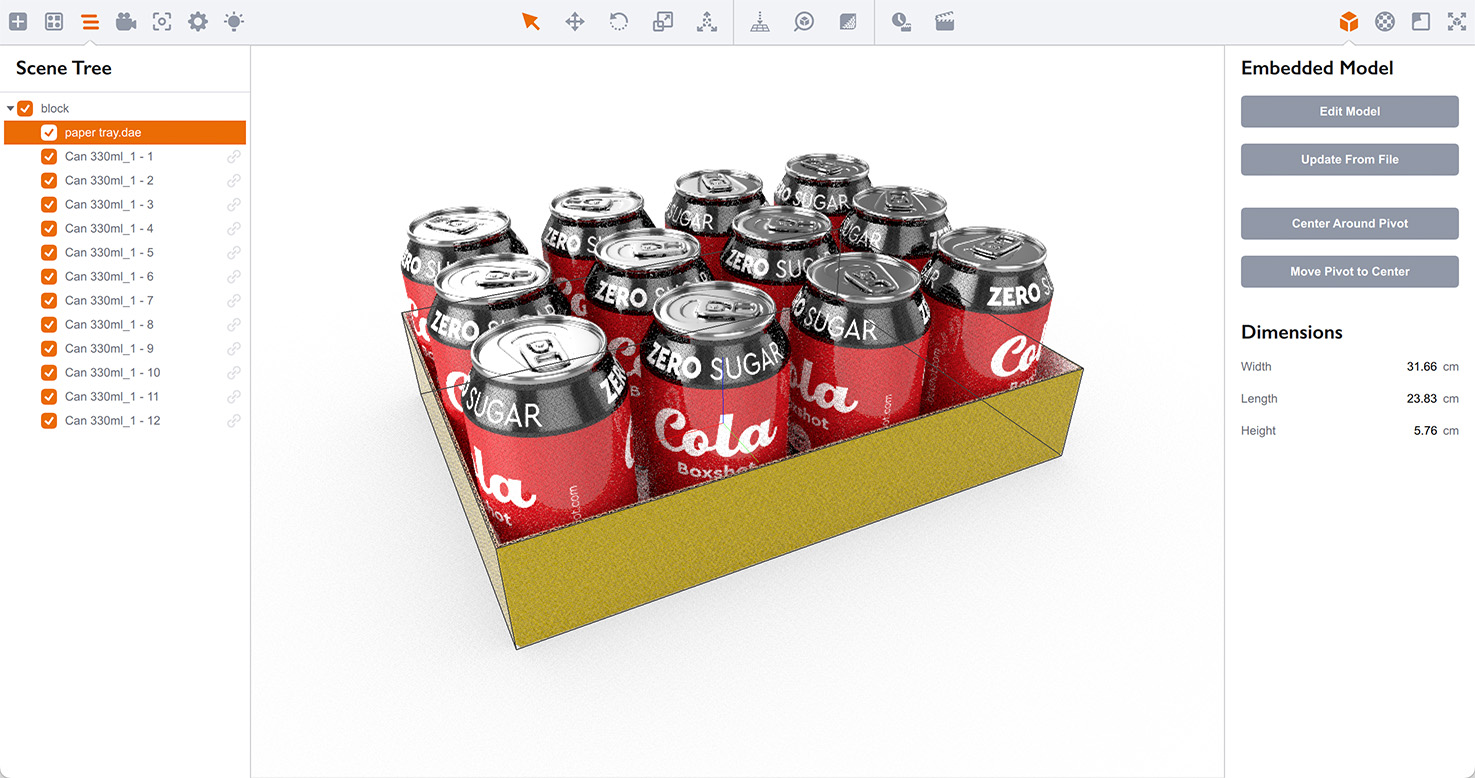
You will need to align the tray with the cans after importing and put it to the same group as the cans. See the scene tree on the left: I made a single group called block which includes both the tray and cans. Now you can move them all together as a single element without shifting something out.
Shrink Wrap
Once we have a cardboard tray of cans, it is time to wrap it up. Select the group and use Shrink Wrap tool to do the job:
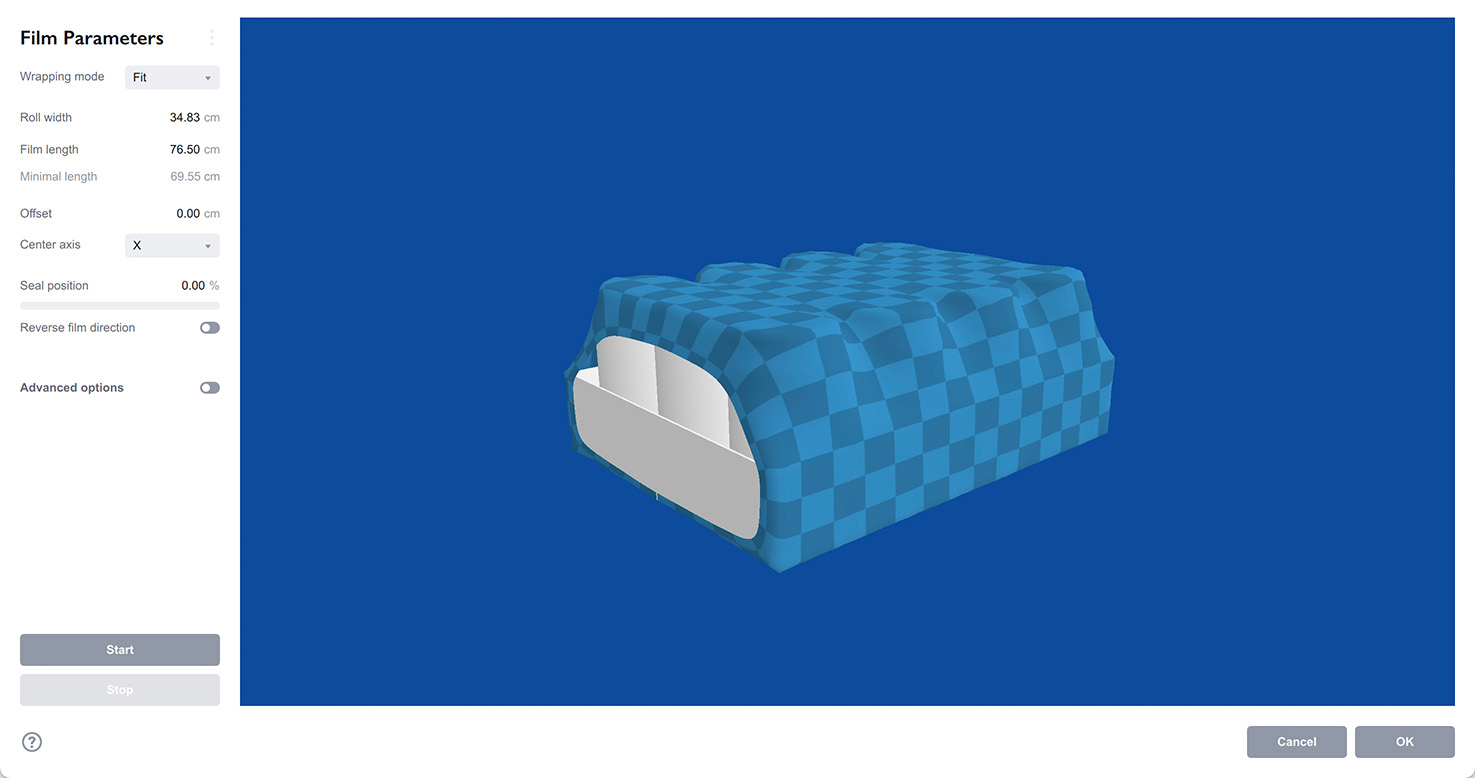
After about a minute of shrink wrap simulation and some film material editing you’ll end up with something like this:
Again, make sure the film model is a part of the “block” group, so everything moves as a whole.
Stacking It Up
Boxshot now has the Palletize tool that automates the tedious job of arranging items for the pallet.
You can use that tool to stack the boxes and skip to the Adding a Pallet section, or see below how to arrange the boxes manually.
Building a Layer
The pallet is filled up with boxes in a non–regular way. We cannot do this with step and repeat in one step, so let’s break the task apart. First, we’ll make enough instances of the box using the step and repeat tool:
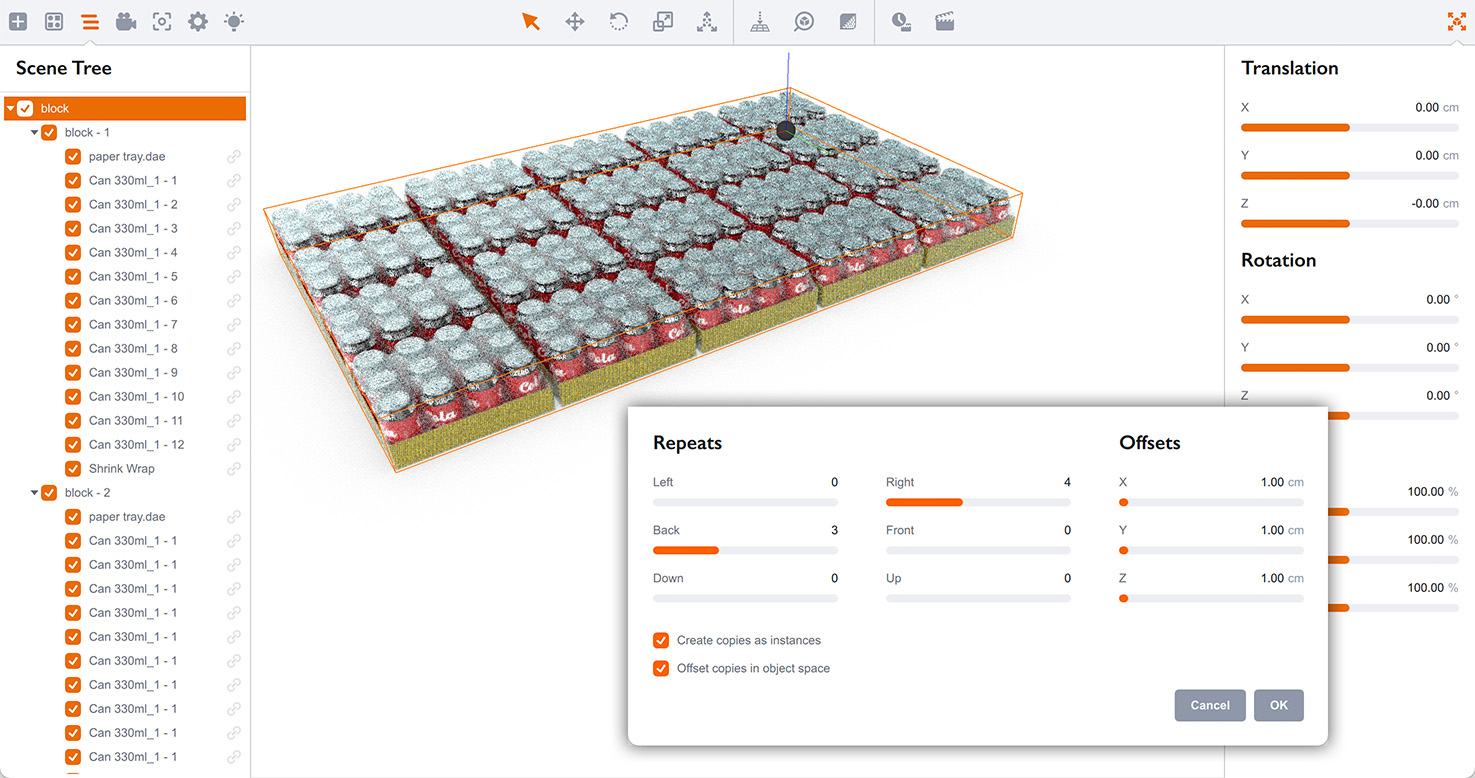
Make sure you have the snapping option enabled in the Scene menu, so the boxes stick to each other.
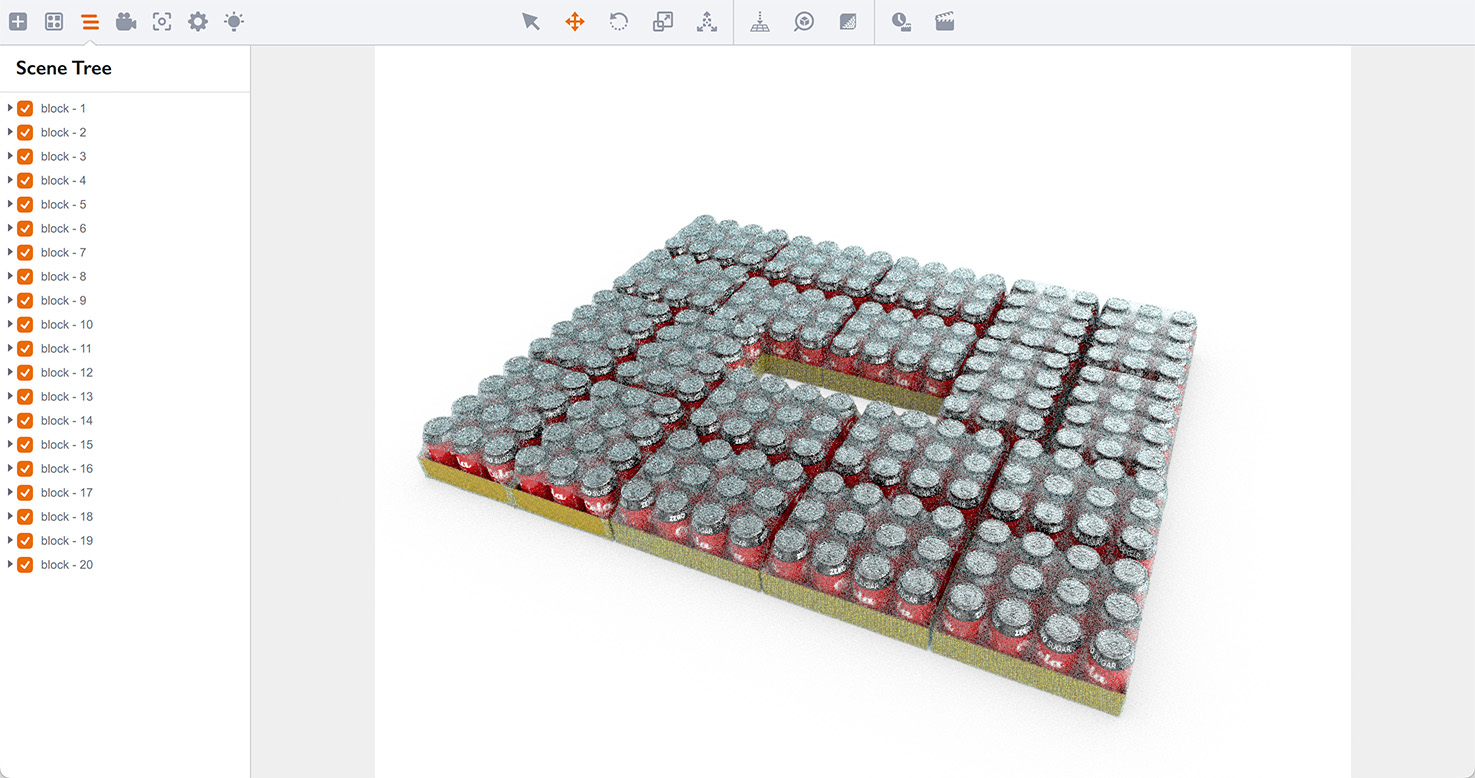
Then start arranging the boxes one by one to make the proper layer. It helps to move them out of the group, so you can easily pick one or another (see the scene tree on the left):
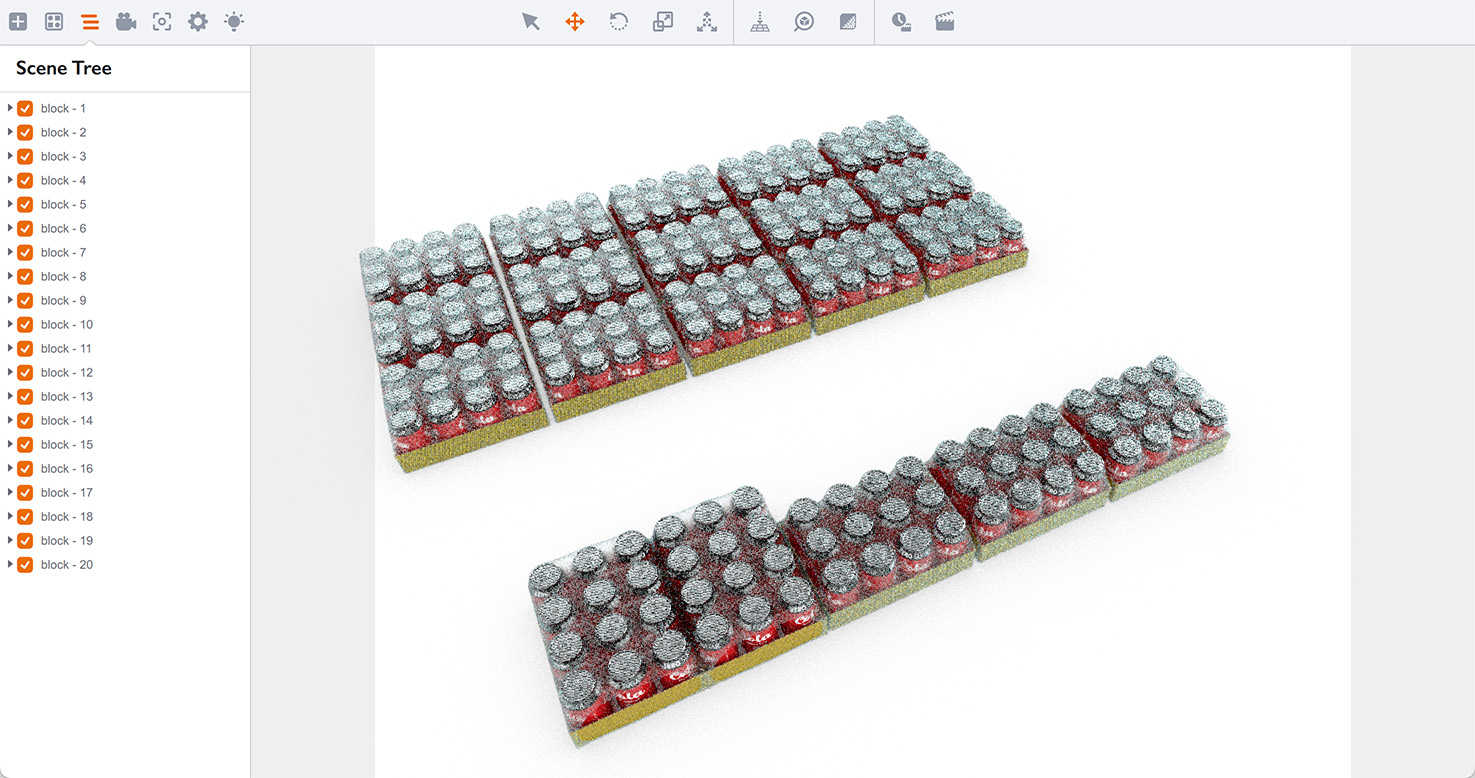
Once done, you’ll end up with a layer of boxes like this:
The original scene has two types of layers, so the boxes holds better to each other, so you might need to group the boxes back, make a copy and re–arrange the boxes for another layer. You should end up with this:
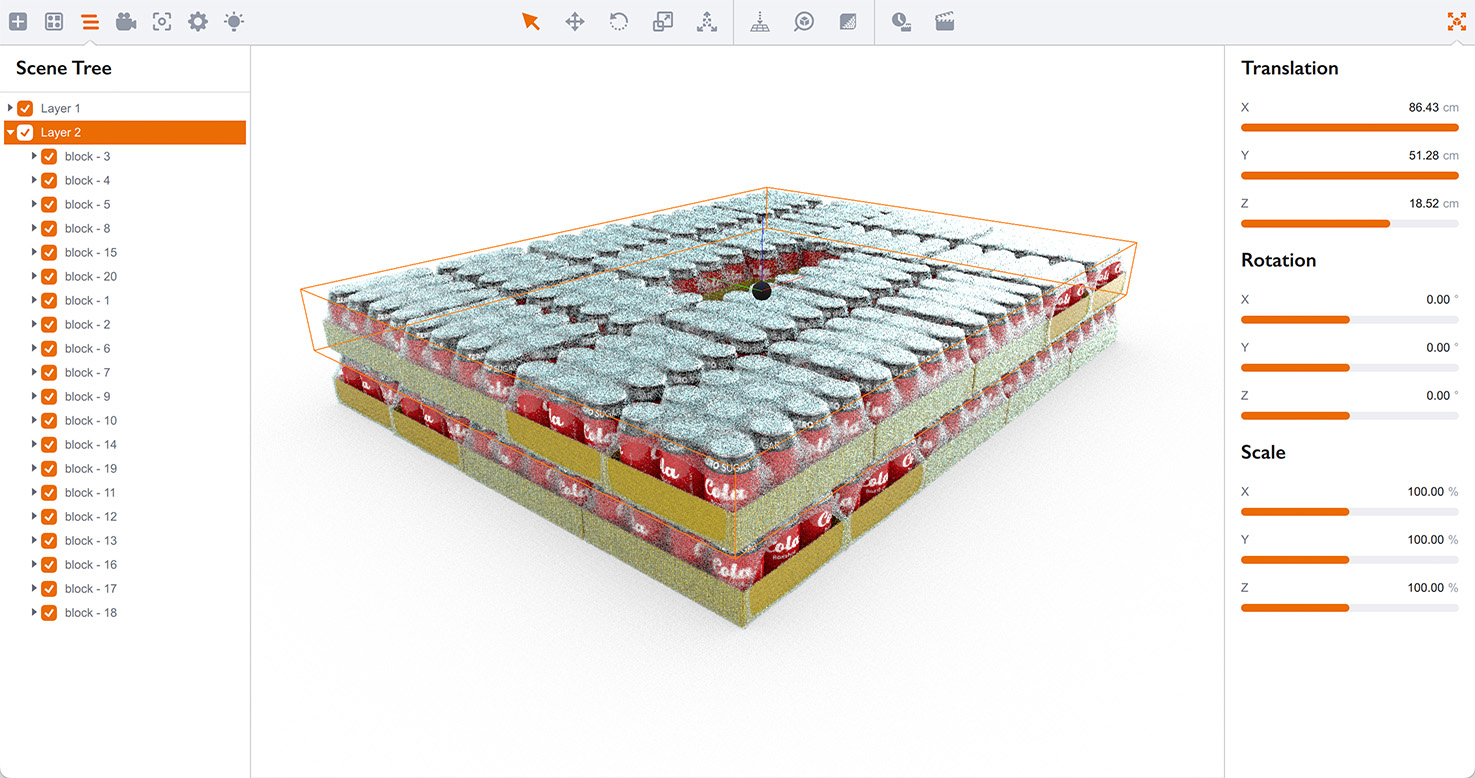
Good, we’re almost done!
Making a Stack
Although you can copy and paste the layers a few times to make a stack, it is better to again use the step and repeat tool. Make sure the layers are right one above another and there is no gap between them, then group them into a single “double layer” object and open the step and repeat tool:
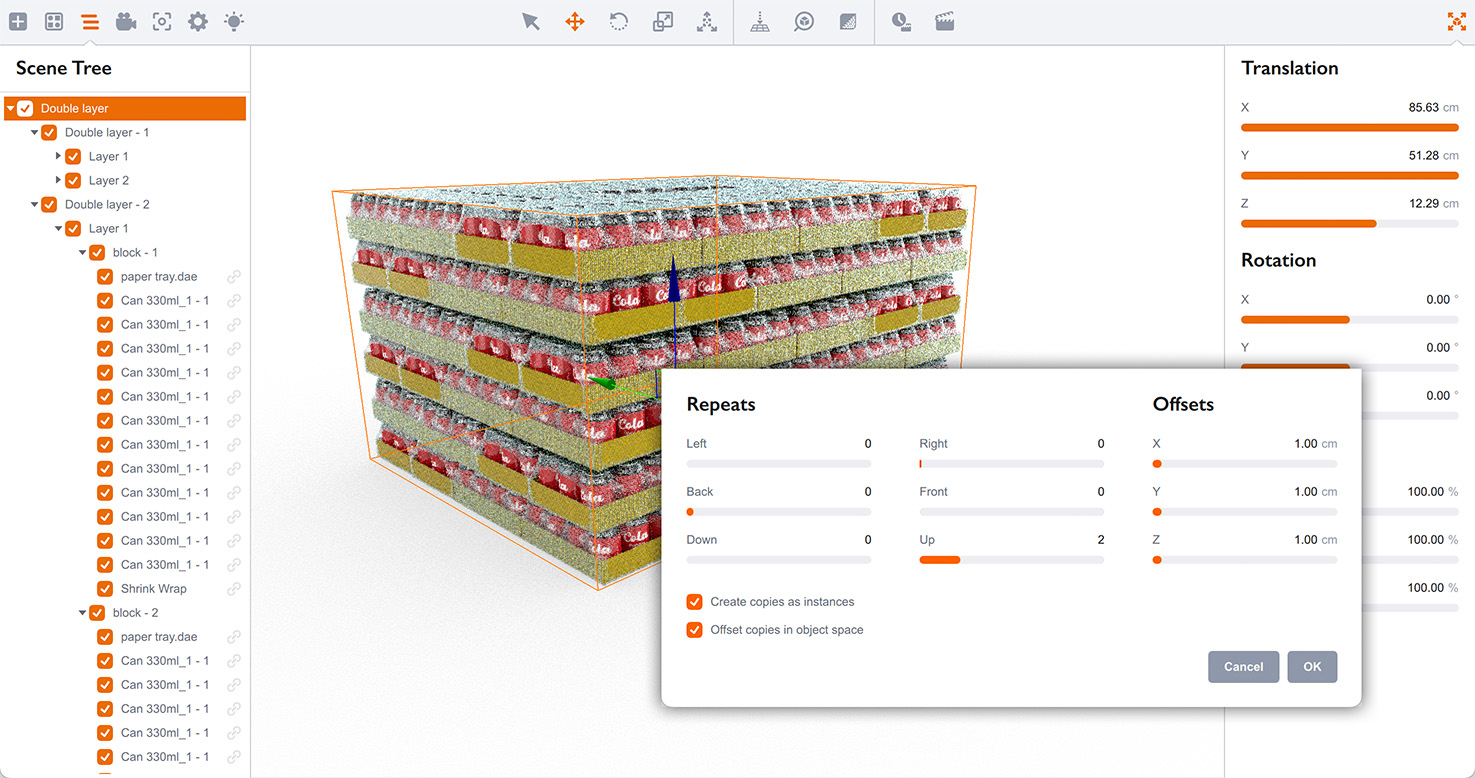
Add two more copies of the layers above the existing ones and click OK.
Adding a Pallet
This one is simple. Drag the pallet from the left panel and align it to the boxes. You might need to move the boxes a bit up, so the pallet fit below them.
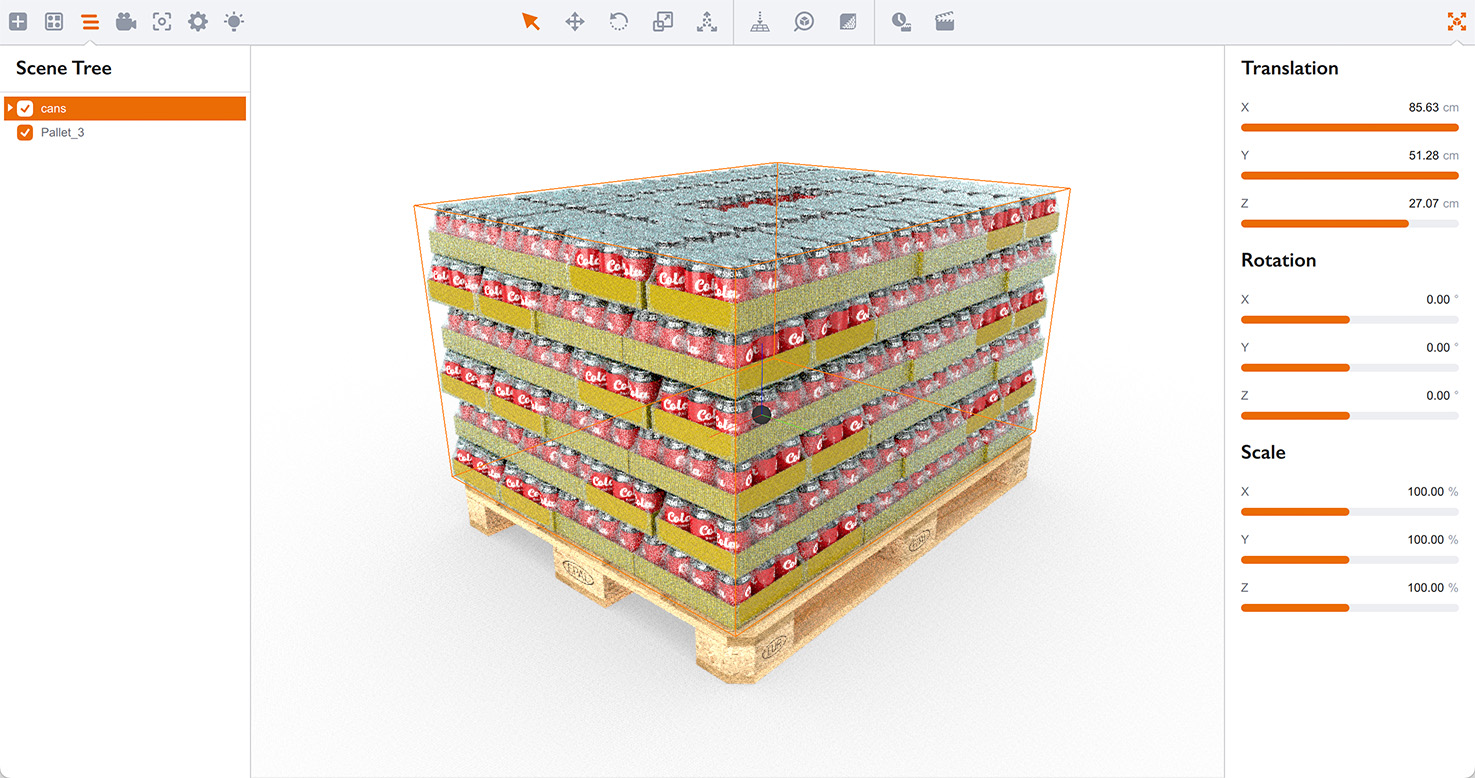
Done! We did it! Of course it doesn’t look as fancy as the Greg’s one, but its structure is exactly the same. I bet yours will be even better, so feel free to share it with us!
Other Mockup Tutorials
- Book Mockup — making a 3D book cover from 2D artwork;
- Box Mockup — making a simple 3D box mockup;
- Pallet of Cans Mockup — a complex scene of can boxes on a pallet.