Bump Decals
Boxshot lets you add relief to decals, so you can simulate local relief elements where needed. This tutorial covers the advanced usage of decals, so if you never used them before, consider reading the decals tutorial first.
Plastic Materials
Let’s start with a simple plastic sphere and a black and white heightmap image with text. Drop the image onto the ball and select Place Relief Decal in the popup menu:
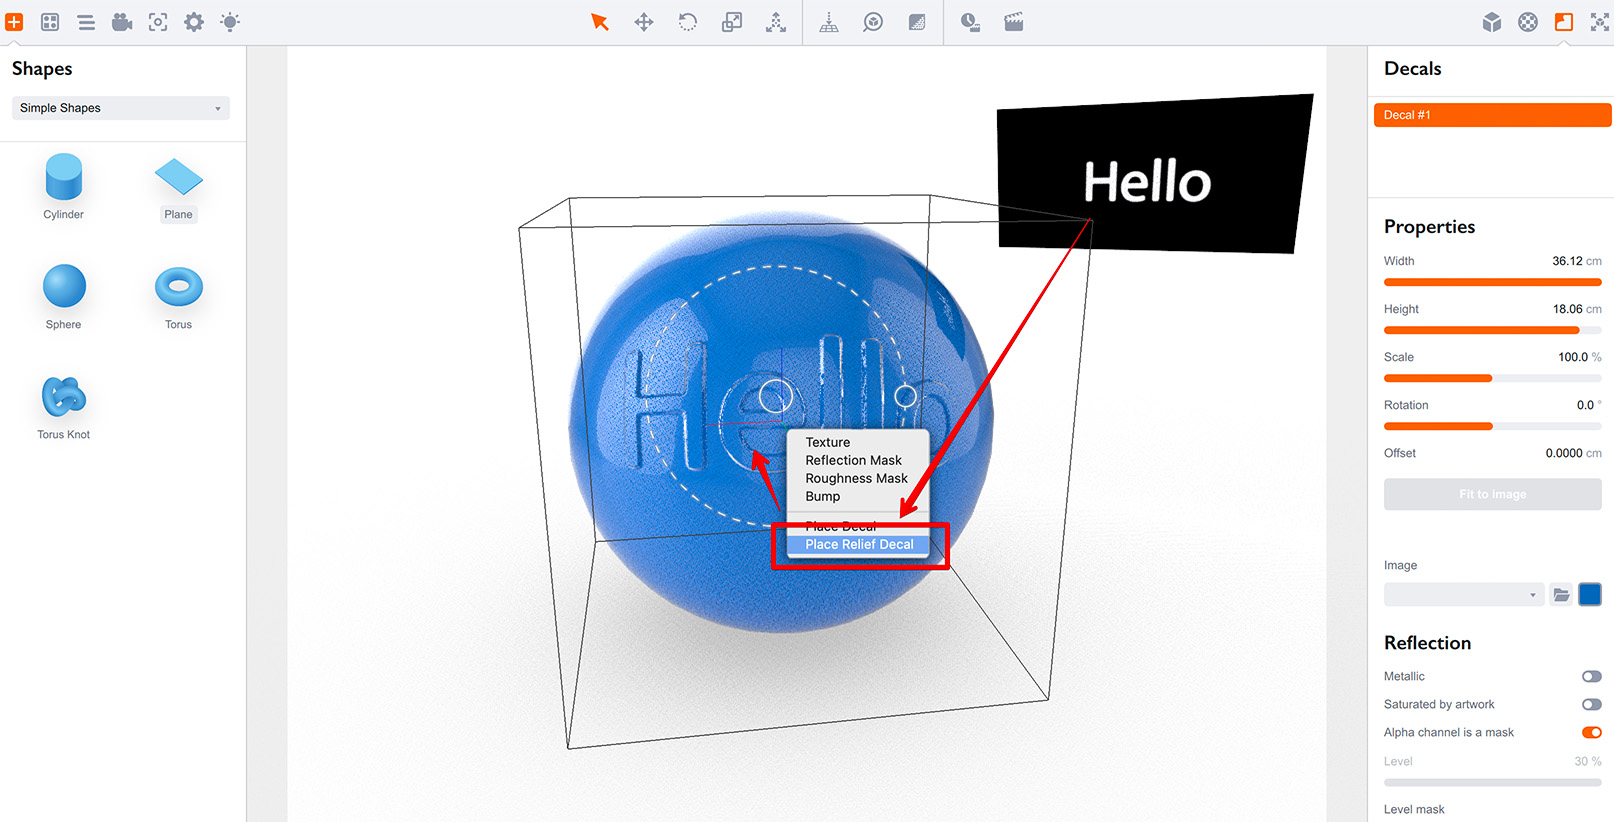
You can drag the decal around as usual and see that the relief is changed locally to simulate the text.
Let’s now have a closer look at the decal’s parameters. First of all, scroll down to the Relief section and adjust the bump effect to be more visible:
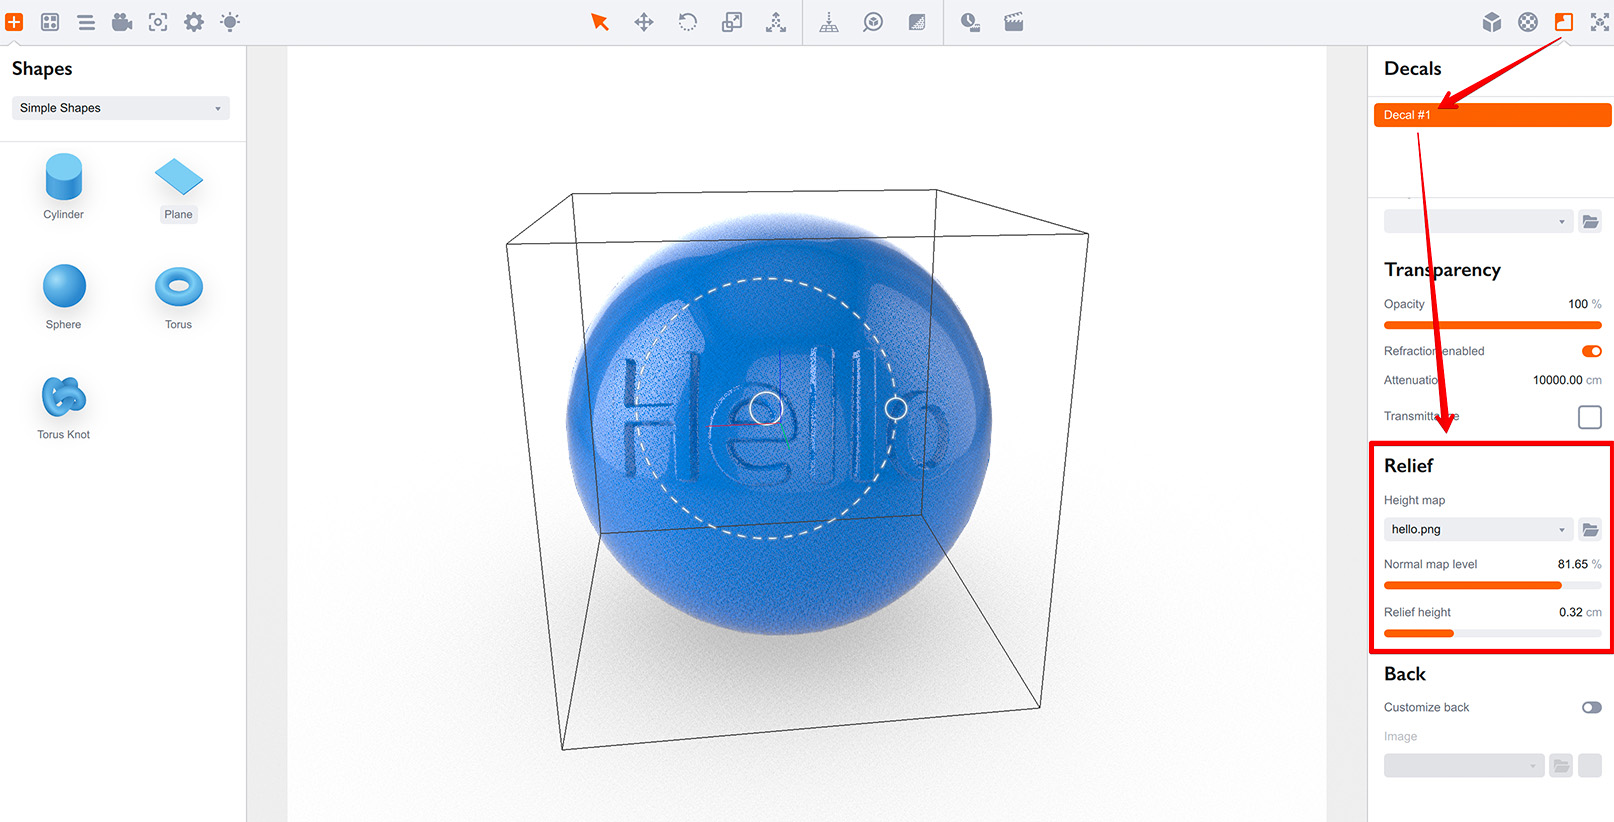
It works pretty much the same way as bump in materials, except for you can’t select the bump type. Boxshot always use Relief (pop) mode for decal bump.
Now if you check the other parameters of the decal and compare them to the parameters of underlying material of the sphere, you’ll see that there is no difference there and the decal material is exactly the same as the sphere material, except for the bump.
Here we come to a very important note: Bump decal is just a decal with bump. There is no magic there, it just a mesh placed on top of your object with the material that tries to simulate the underlying one.
Actually, the Place relief decal option does almost the same thing as the Place decal one. The difference is that it places the image into the bump slot of the decal, copies some of the underlying material properties to the decal and set the decal offset to zero as it works better in most cases. That’s it. You can easily make a bump decal yourself by loading the artwork to the bump slot of the normal decal, removing the decal artwork and adjusting the material parameters of the decal.
Bump Decals on Textured Objects
As bump decal is technically a decal, it might be tricky to place it on top of another artwork as it covers it. Let’s try adding a checkered texture to our sphere:

The sphere has changed, but the decal we placed earlier hides the sphere texture. Unfortunately, there is no way we can place the same texture on the decal so it matches with the underlying surface (and there could be multiple different materials under the decal), so we have to adjust the decal instead.
What we can do is try making the decal transparent, so it acts like a relief translucent element on top of our plastic sphere. Let’s try that:
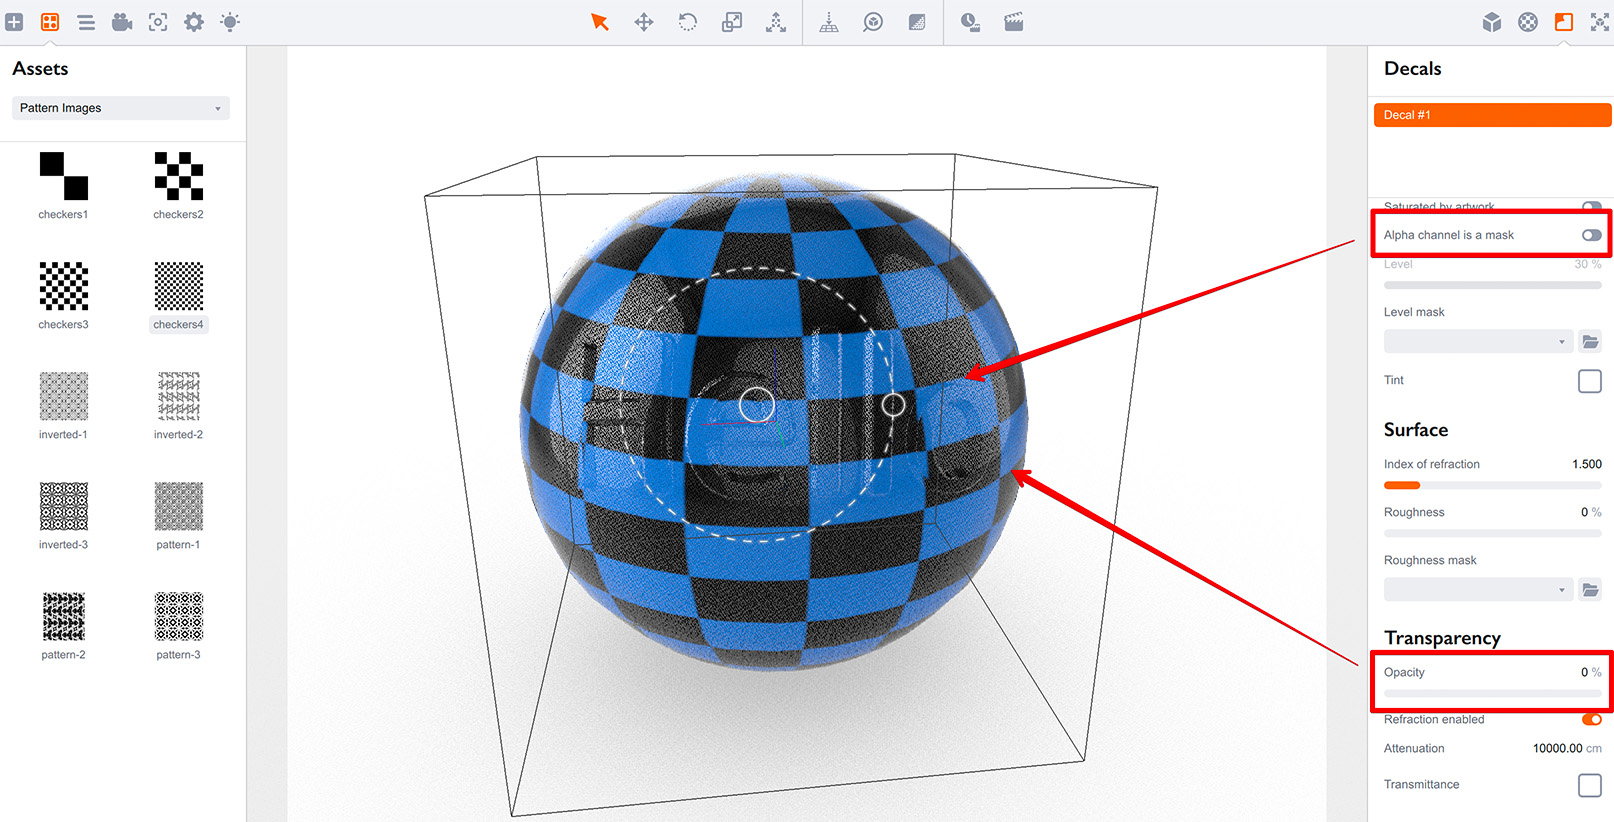
Make sure you unchecked the Alpha channel is a mask option before setting Opacity to 0, as otherwise the transparent element of the decal (the whole decal at 0% opacity) will not be displayed. Another important parameter to adjust is the decal offset: set it to 0.01cm to avoid visual glitches below the decal.
Now the relief is back and the texture is visible behind it.
If the texture on the main surface is not that complex, you can try using the main image of the decal and load a piece of the texture there to be displayed on the decal. This could work if you need to add a relief and graphics element to the surface covered with a solid color.
Bump Decals on Glass
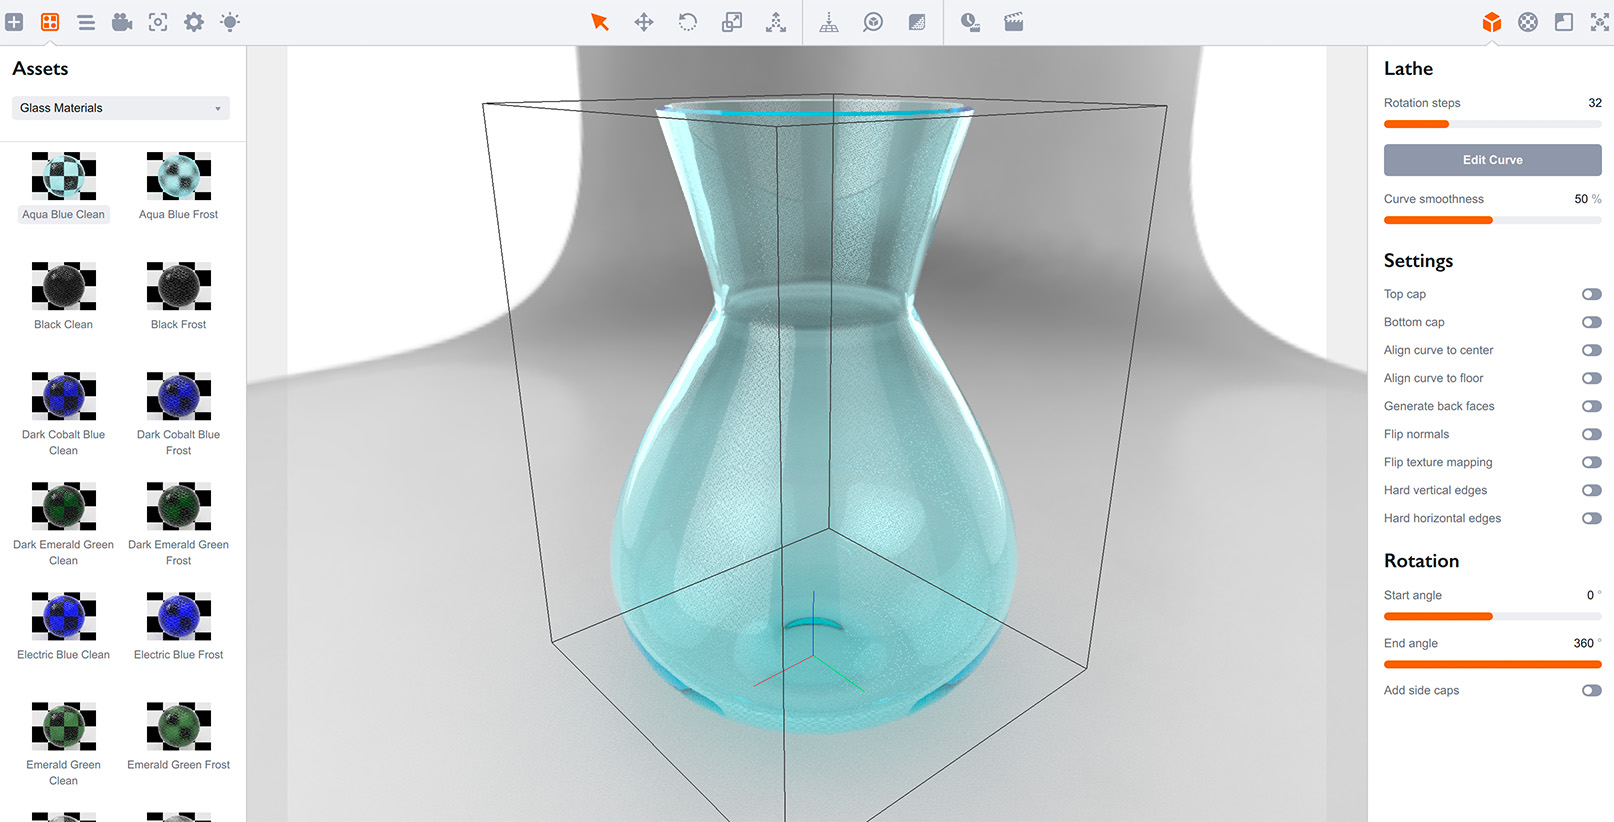
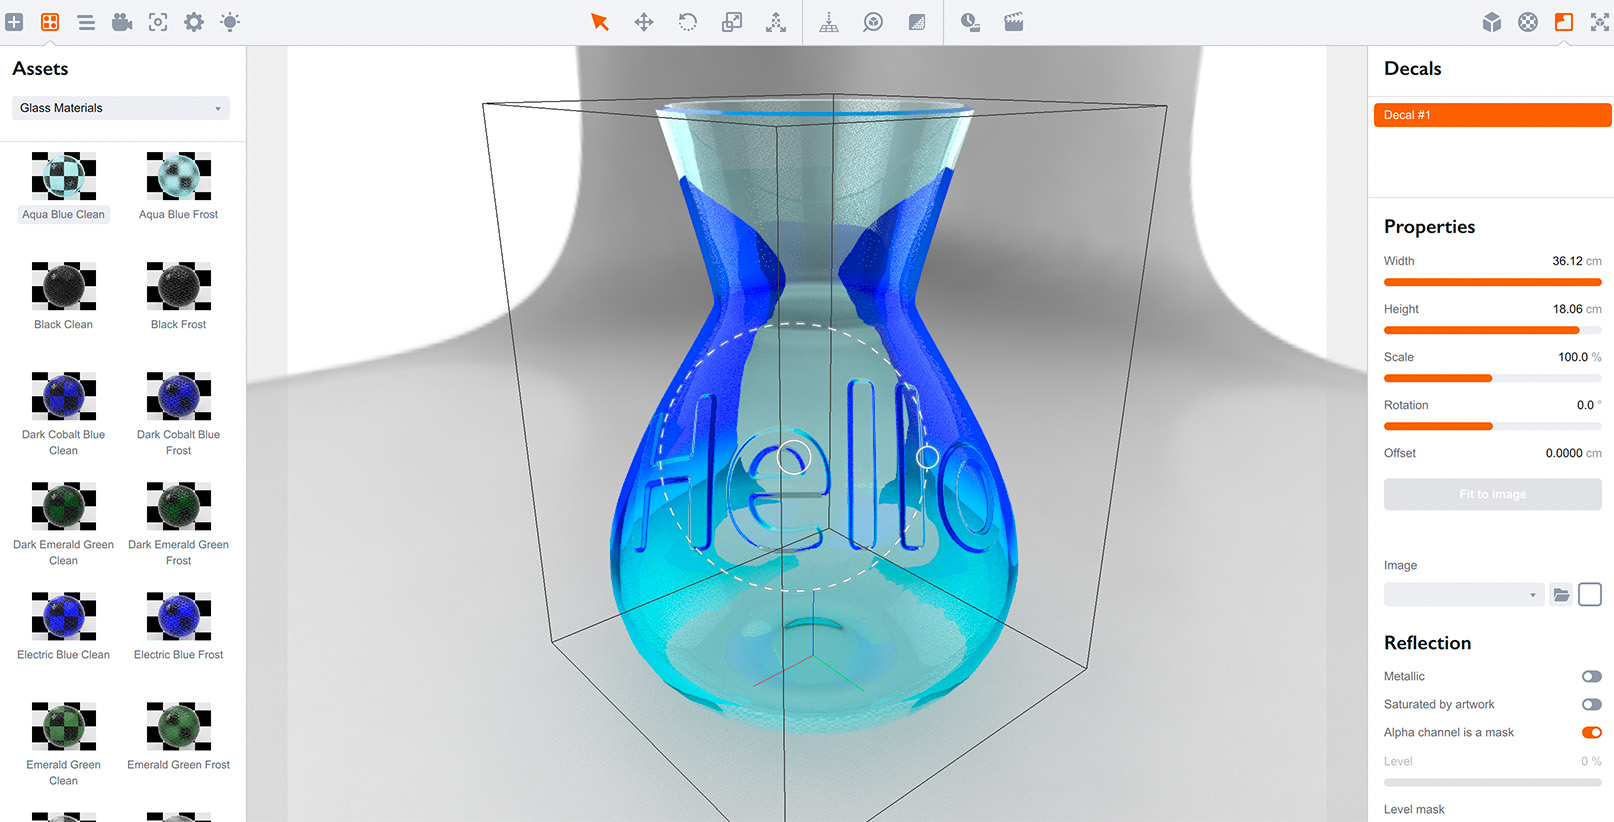
Make a new project and add a Lathe object there, then apply the blue glass material to the Lathe object and switch the background mode to display environment. You should end up with this:
You can use any other shape, just make sure you applied a glass material with refraction and maybe transmittance color to better see the relief effects. Once done, drop that heightmap image on the glass and select Place relief decal in the popup menu. You will get this:
We’re almost there, but so far it doesn’t look well. Unfortunately, Boxshot does not support the proper rendering of wrapping around translucent decals, so we need to make sure the bump decal is a local feature of the object.
In order to do so, crop the decal image, so it mostly contain the text and just a bit of border (border is needed to reserve the space for the relief effect). Then scale the decal down, so it doesn’t wrap around the shape:
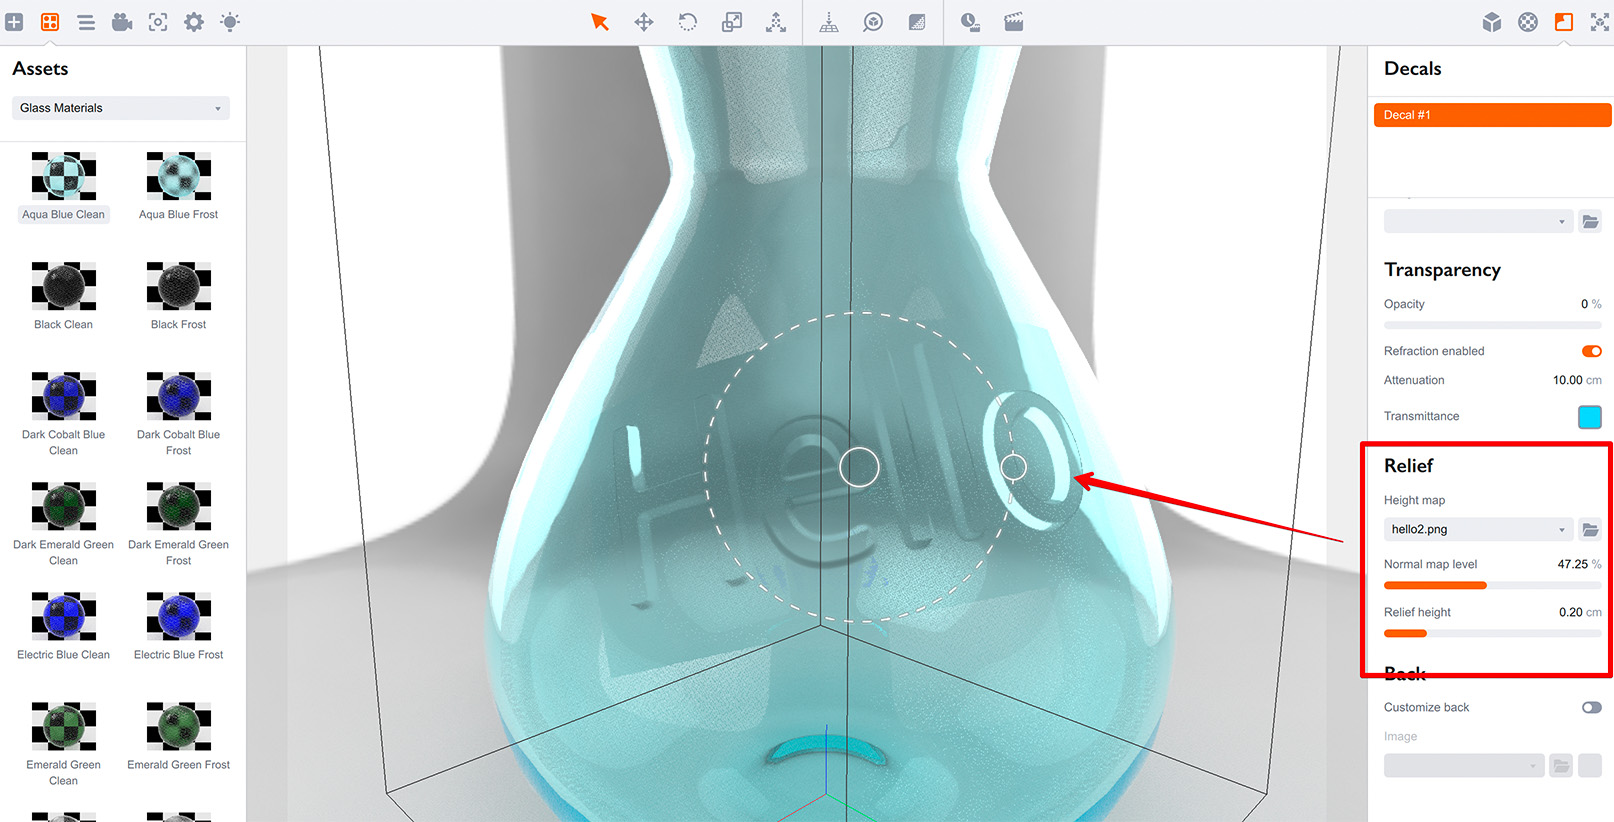
That’s better. One last thing to do is to uncheck the Alpha channel is a mask option to hide that square frame marking the decal on the glass surface:
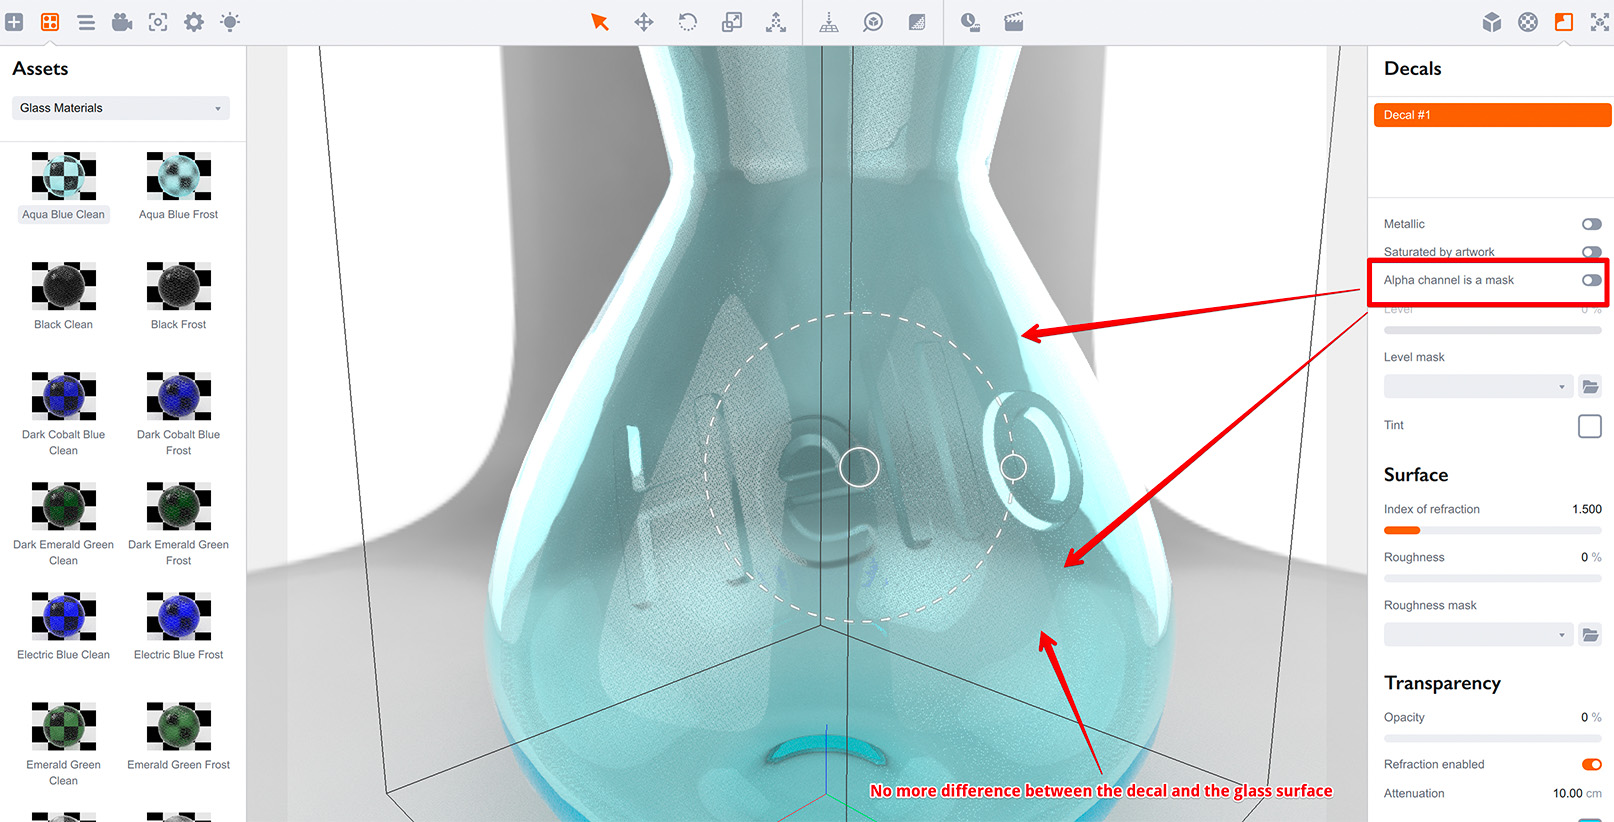
Done. You might also want to adjust the normal map level parameter if you see the over–saturated areas of the relief bump.
To Sum It Up
Bump decals are tricky, but if kept local to the object and not wrapped around, with some patience, luck and magic they can greatly visually enhance your scenes.
More Tutorials
Rendering
- Realistic Rendering — improving scenes visual appearance;
- Lighting — control environment and directional lighting;
- Saturated Reflection — make "rich" colorful reflections;
- Floor Reflection — reflecting scene objects in the floor;
- Job Manager — rendering jobs later;
- GPU Rendering — rendering scenes faster on GPU;
- Rendering Time and Quality — getting more control on rendering;
- Simple and Realistic Lighting — speeding up scene rendering.
Materials
- Texture Slots — how to use texture slots in Boxshot;
- Glass Materials — how to make semi–transparent objects look attractive;
- UV–Spot — how to make a UV–spot effect easily;
- Foil Effect — how to add foil–finishing to your shapes;
- Bump — adding relief to your materials;
- Copying Materials — how to copy materials to other shapes;
- Custom Materials — extend the materials library with your own ones;
- Semi–Transparent Labels — making semi–transparent and partial labels;
- Boxshot Materials — more details about Boxshot materials.
Features
- Boolean Operations — combining and subtracting shapes, making holes;
- Decals — applying decals and configuring them;
- Bump Decals — applying bump where it is needed;
- Depth Of Field — adding more realism to your renderings;
- Tools — read more about Boxshot tools;
- Managing Images — how to manage image files used by Boxshot projects;
- Shapes Instances — creating lightweight copies of other shapes;
- Model Editor — edit embedded models in many ways;
- Shrink Wrap — heat–shrink film simulation for objects wrapping;
- Physics Simulation — applying gravity to your scene;
- Palletize — arrange scene objects for the pallet;
- Snapshots — save scene state to re–use it later;
- Translation — teach Boxshot to speak your language;
- Vector Artwork — how to maintain the quality of vector artwork.
Shapes
- Lathe Objects — making symmetrical objects using revolving curves;
- Loft Objects — making custom objects with 2D cross–sections;
- 3D Text — making 3D text objects in Boxshot;
- Extruded Objects — how to make thick 3D object of your flat 2D curve;
- Conical Labels — making conical labels with distorted artwork;
- Dieline Box — a very realistic dieline–based box;
- Custom Shapes — adding custom shapes to the left panel;
- Solid Shapes — create boolean-friendly shapes;
- Script-Based Solids — create complex solid shapes with code;
- Third Party Shapes — importing third party shapes to Boxshot.