Book Editor
Boxshot features highly customizable book shapes with plenty of parameters to configure, but sometimes you may need a very custom book shape. Here comes the book editor.
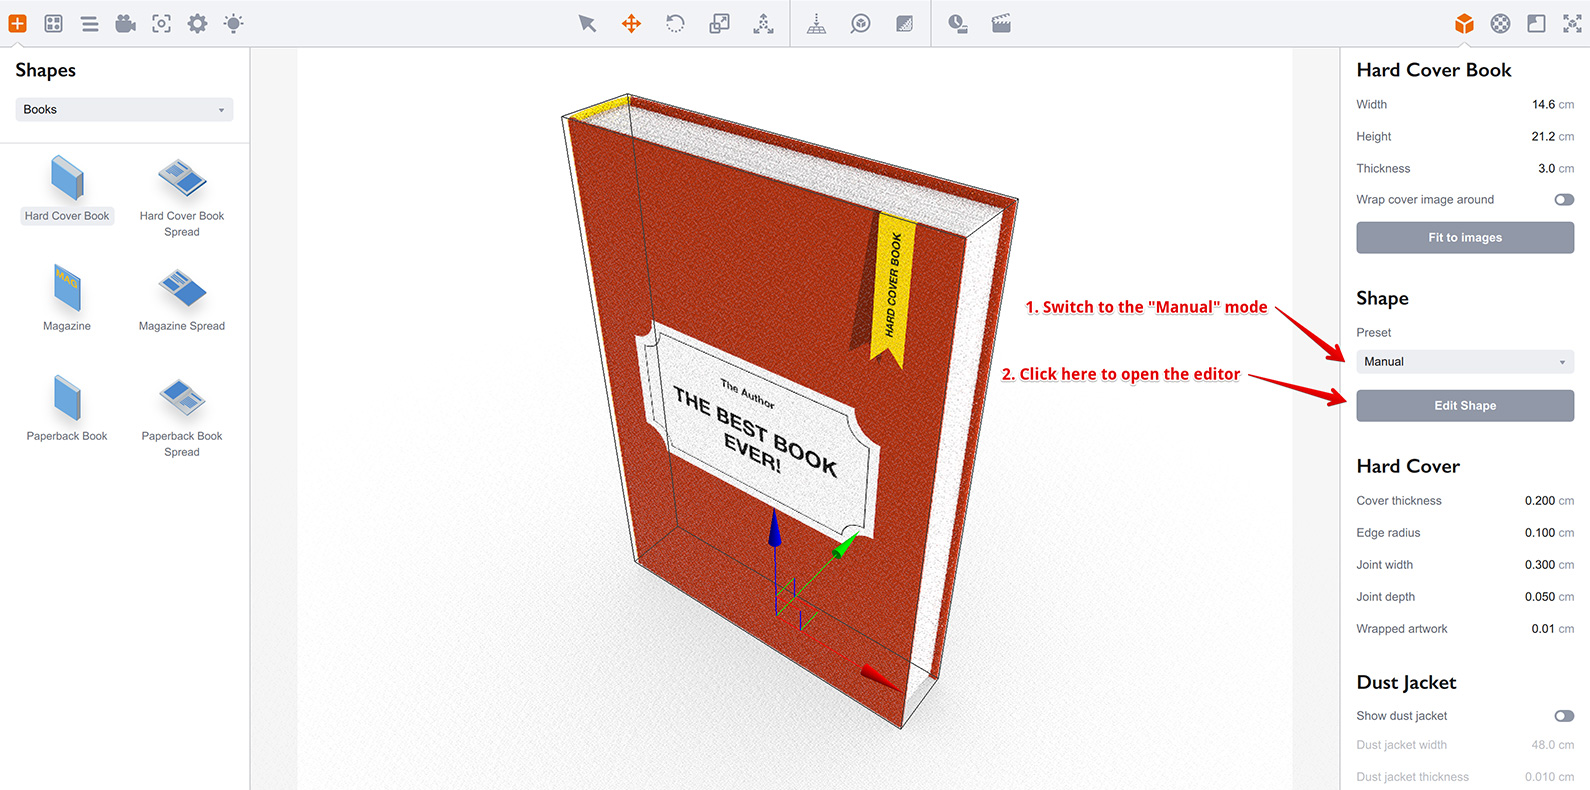
To use the editor, you need to switch the book shape preset to the Manual mode and then click Edit Shape:
Before You Start
There is an important note before you start customizing your books. Boxshot does a good job on automatically fitting shapes to the artwork you use. This also applies to books, but not in the “manual” mode we are going to use. When you make significant changes to the book shape or layout using the book editor, Boxshot might not be able to properly resize some elements of the book, so the rule of thumb is:
- You start with some “standard” book preset, which is close to the custom shape you need. Say a closed book;
- You upload the artwork and make sure it looks fine;
- You click Fit to images or adjust the size manually and make sure that everything is correct;
- You switch to the manual mode and start editing the shape.
Changing book dimensions after you make changes in manual mode might not work as expected. You can still fix it in the editor, but it is not that convenient, so use the manual book editor only when the book artwork and dimensions are already configured.
Starting the Editor
Now you are ready to click the Edit Shape button. Do this and see the editor pops up:
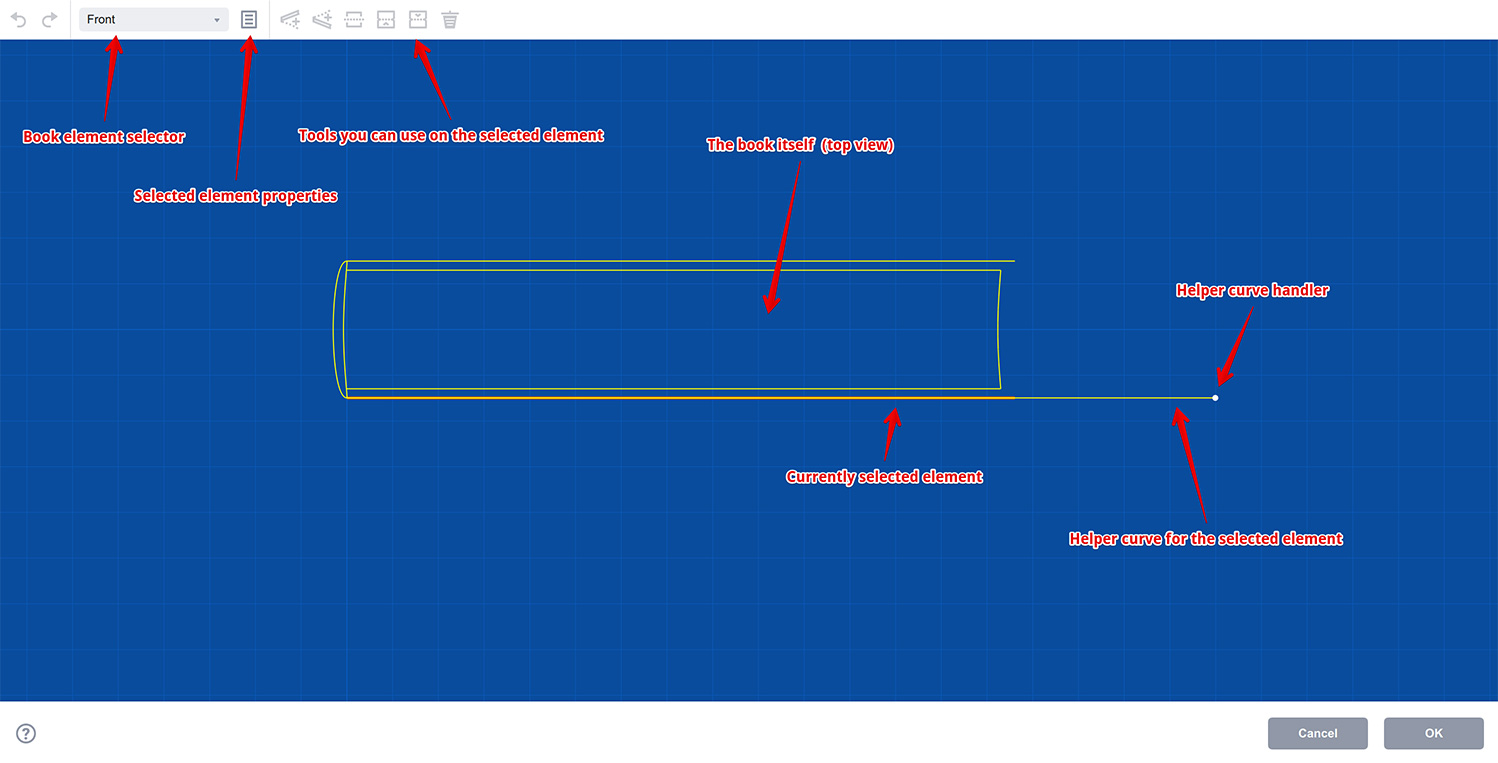
At the top of the window there is a toolbar with all the tools for selecting and editing the book. Then goes the 2D scheme of the book (top view for standing books and bottom view for spreads) and finally there are confirmation and cancel buttons at the bottom.
You can click book elements in the drawing to select them, or select using the drop-down list in the toolbar. Then you can edit the elements the way you need and commit the changes once done. The undo and redo buttons at the left of the toolbar can help if something goes wrong.
How The Editor Works
A book is quite a complex shape if you want more than just a simple closed one. The leaves and cover may bend, there could be multiple blocks of leaves, or a separate leaf, or two bent a different way. The editor needs to handle it all to make the book configurable. The main idea behind the Boxshot book editor is that you define the curve and Boxshot runs leaves along the curve you define.
This lets you configure spreads by adjusting the curve the block runs along. This lets you make a curly standalone leaf or two, if needed. Everything is done by adjusting the curve shape and then Boxshot runs a leaf geometry along it, making sure the dimensions are correct.
Some book elements are special. For instance the covers of the hard cover book are obviously hard and stay straight. That’s why on the screenshot above there is just one handle there that controls the opening angle. Another special element is paperback spine: it has to be of a fixed length (to match the book thickness), so the editor makes sure the leaves block starts at the proper position on the spine, not just at the end of the curve. Same for the headband of the hard cover books.
Overall, you will notice that some of the book elements have less controls or handlers than others. This usually means that this element is special and depends on something else to work.
Let’s Make Some Changes
Now let’s open the front cover of the hard cover book. Find the only front cover handle displayed on the screenshot above and drag it down:
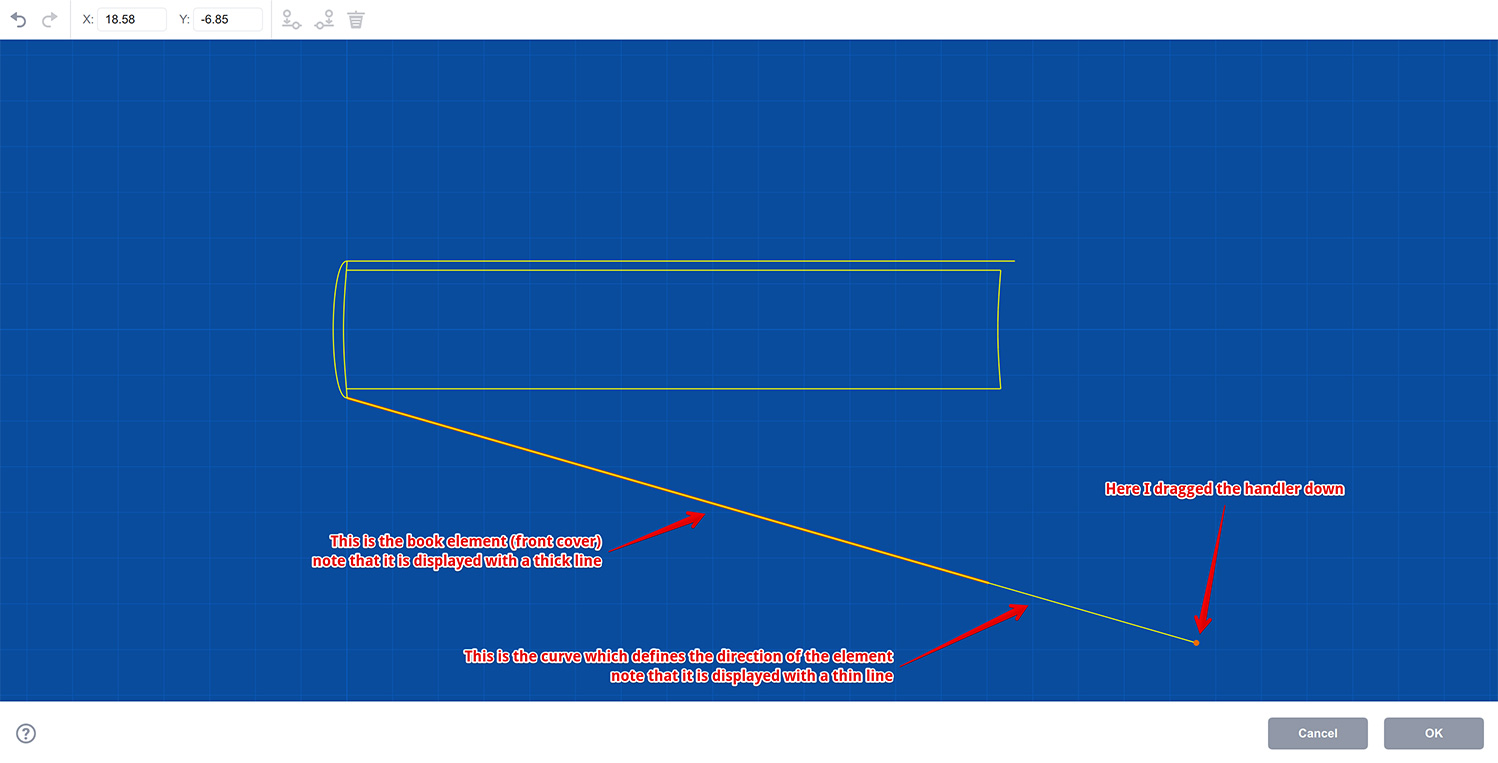
If you look closer to the yellow line we’ve just moved, you’ll notice that it consists of two parts: a longer thinner yellow line and a shorter thicker orange line. The thin yellow line is the curve you define to tell Boxshot where you want the leaf, block or cover to go. The thick orange line is the real leaf, block or cover element that Boxshot runs along the line you provide. Boxshot uses the width, thickness and other parameters of the book you configured in the book parameters panel to compute the real leaf dimensions in the editor. This is the main reason behind the requirement to configure the dimensions first before editing the book.
Try moving the handle around, making the thin line longer or shorter and see how Boxshot adjusts the orange line to fit the book dimensions.
Now click the back cover on the drawing or select it from the drop-down list in the toolbar and move it the same way to get something like this:
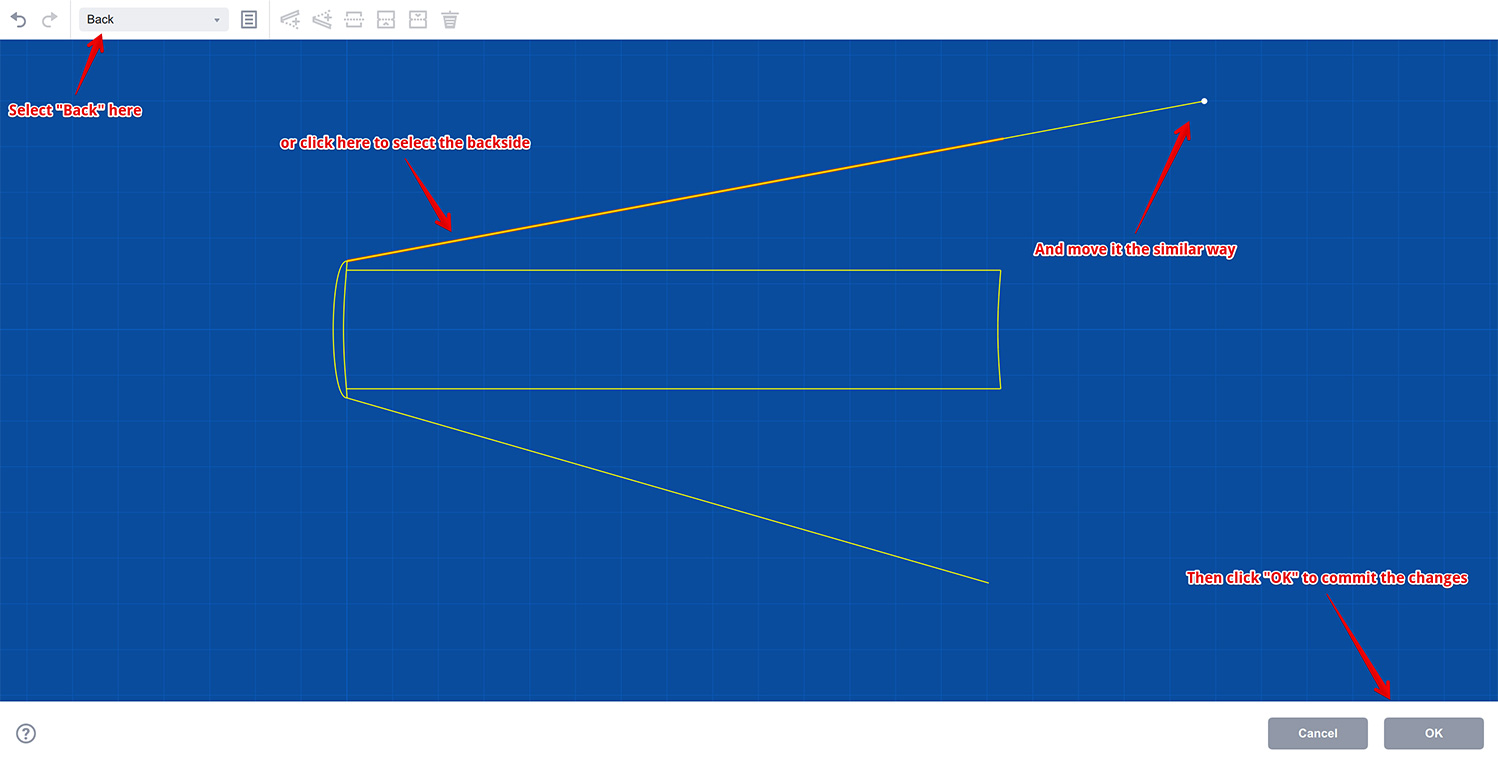
You should get the idea of the editor by now. Once finished, click the OK button to commit the changes and see what happens to the book in the scene:
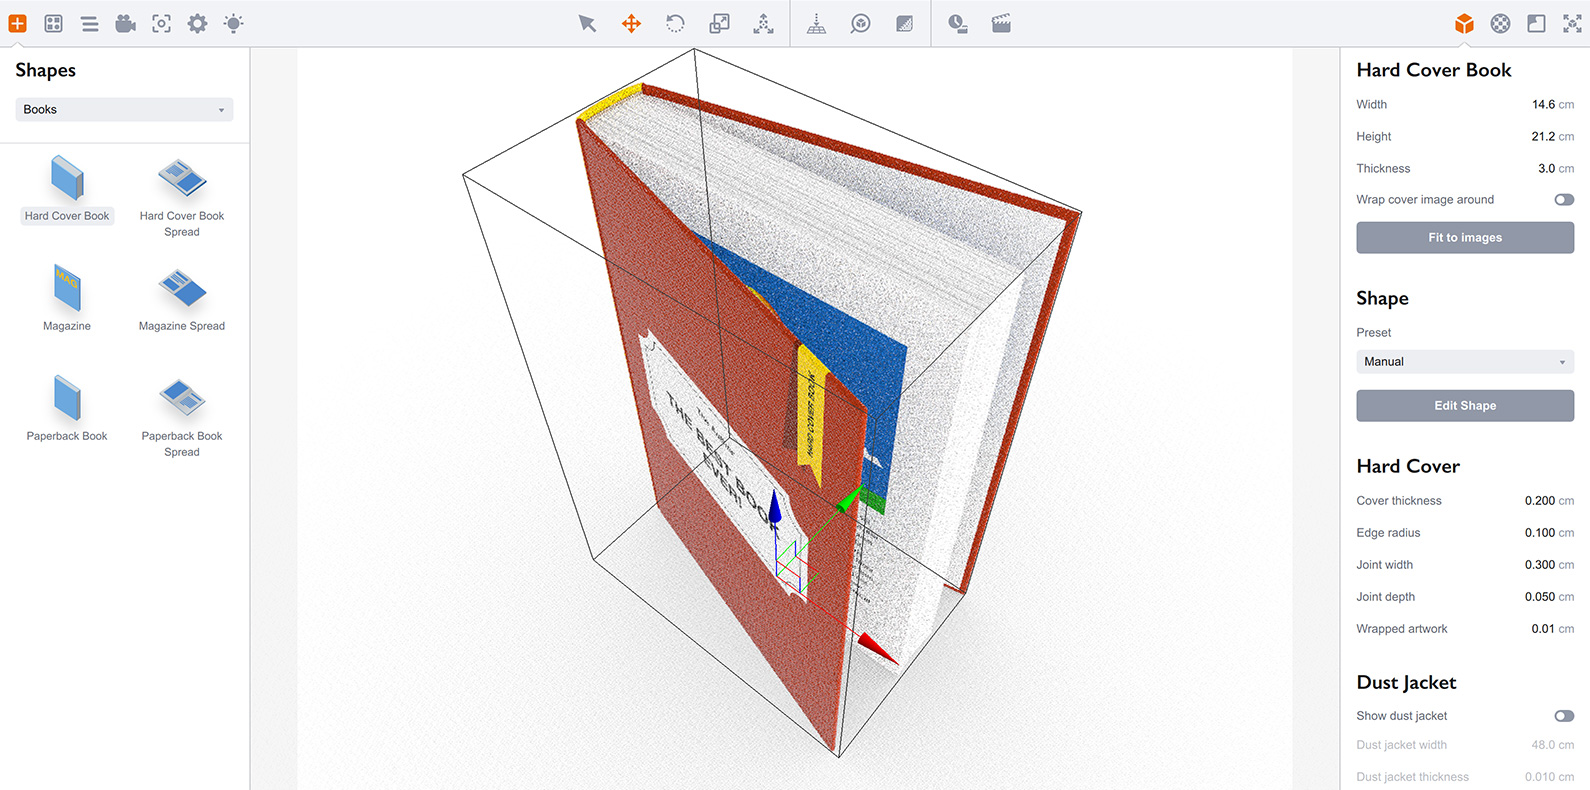
So that’s how it works: you edit the book elements in the editor, then click OK and get a new book in the scene. Simple!
Let’s Touch The leaves
We’ll be using the same scene. Click Edit Shape again to go back to the editor and now click the leaves block in the middle:

Once you clicked the block, it becomes orange which means it is selected. Note that the block has two thin yellow lines at its sides, which control its shape. As this is just a simple block of leaves, not a special one, there are more handlers on the control curves, so you can modify it almost in any way you need. Let’s try moving some handlers:

Here I made the block a little bit open, let’s now click the OK button again and see what happens to the book:
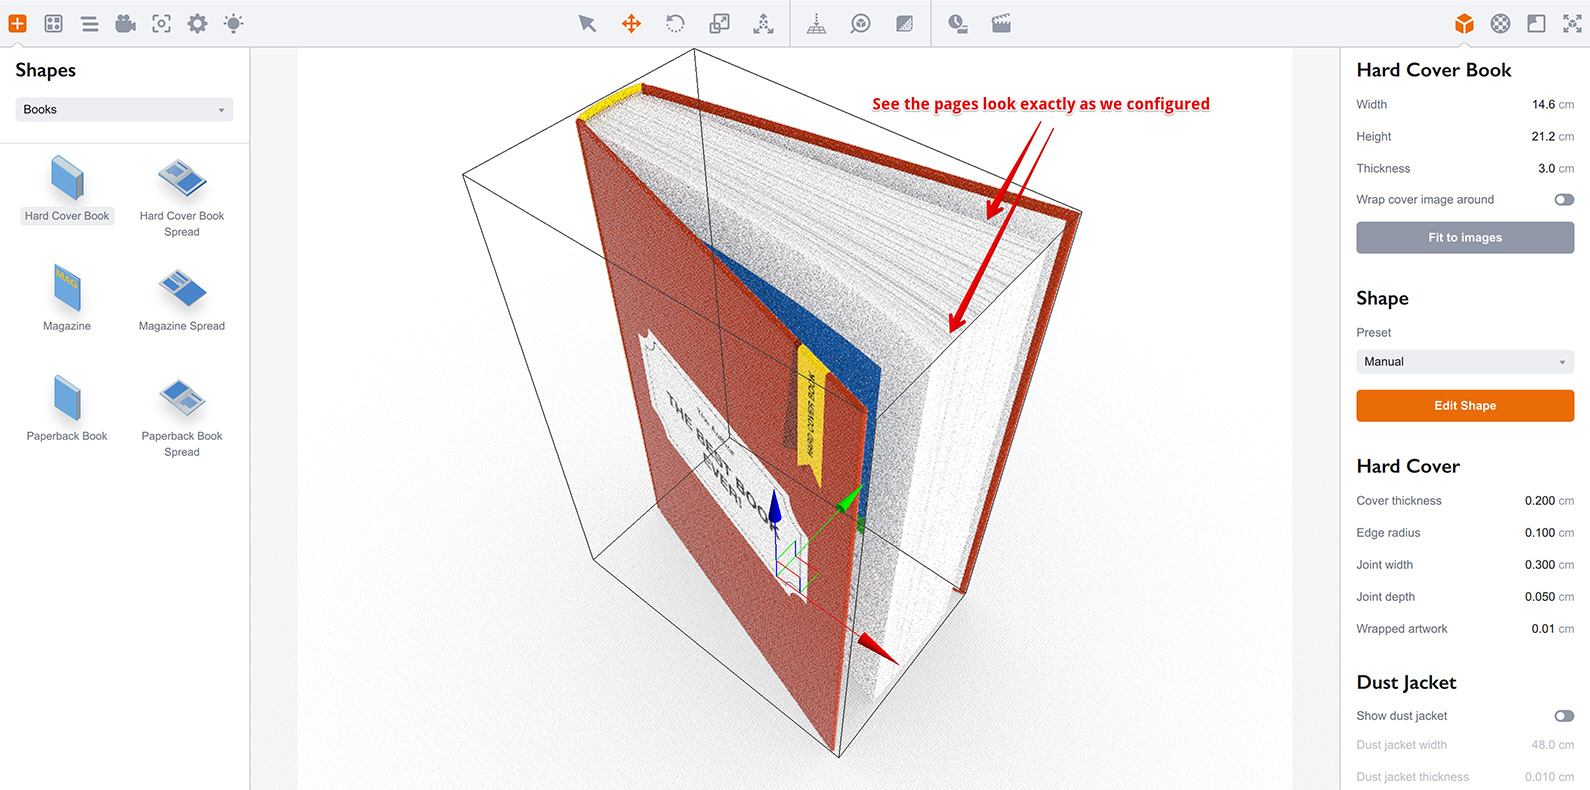
So that’s how the editor works: you select a book element, modify the curve it runs along and get a new book. Simple!
Splitting The Block
What if you need more than just a single block of leaves? Say for a spread you need at least two blocks. Boxshot lets you split the blocks and merge them back. It is pretty similar to opening a book somewhere in the middle.
Let’s give it a try. Open the editor back, click the one and only block of leaves and then click the Split button in the toolbar:
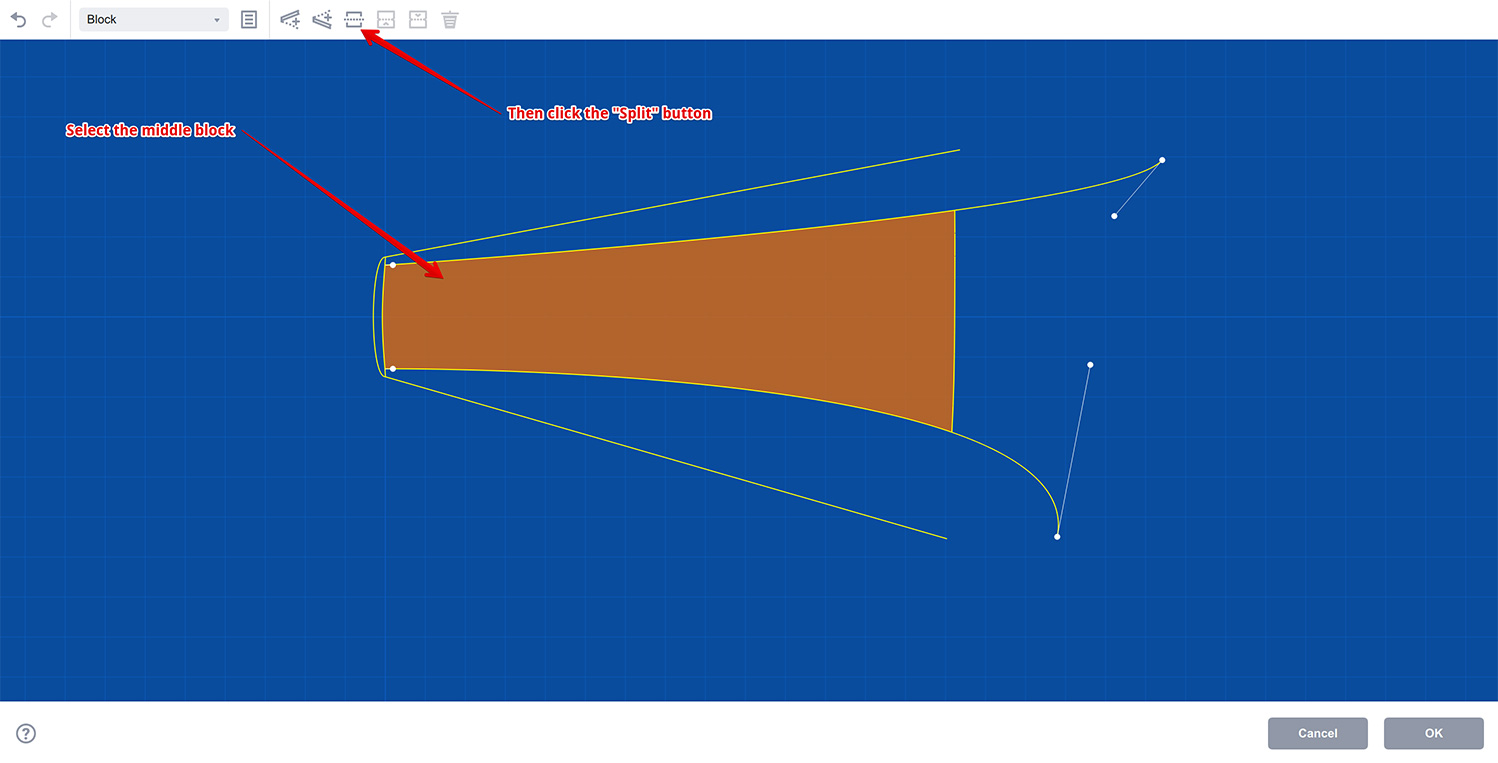
The button splits the block exactly in the middle and you get two blocks instead of one. The blocks occupy the same space, so the book thickness is not affected. You can then configure each block separately:
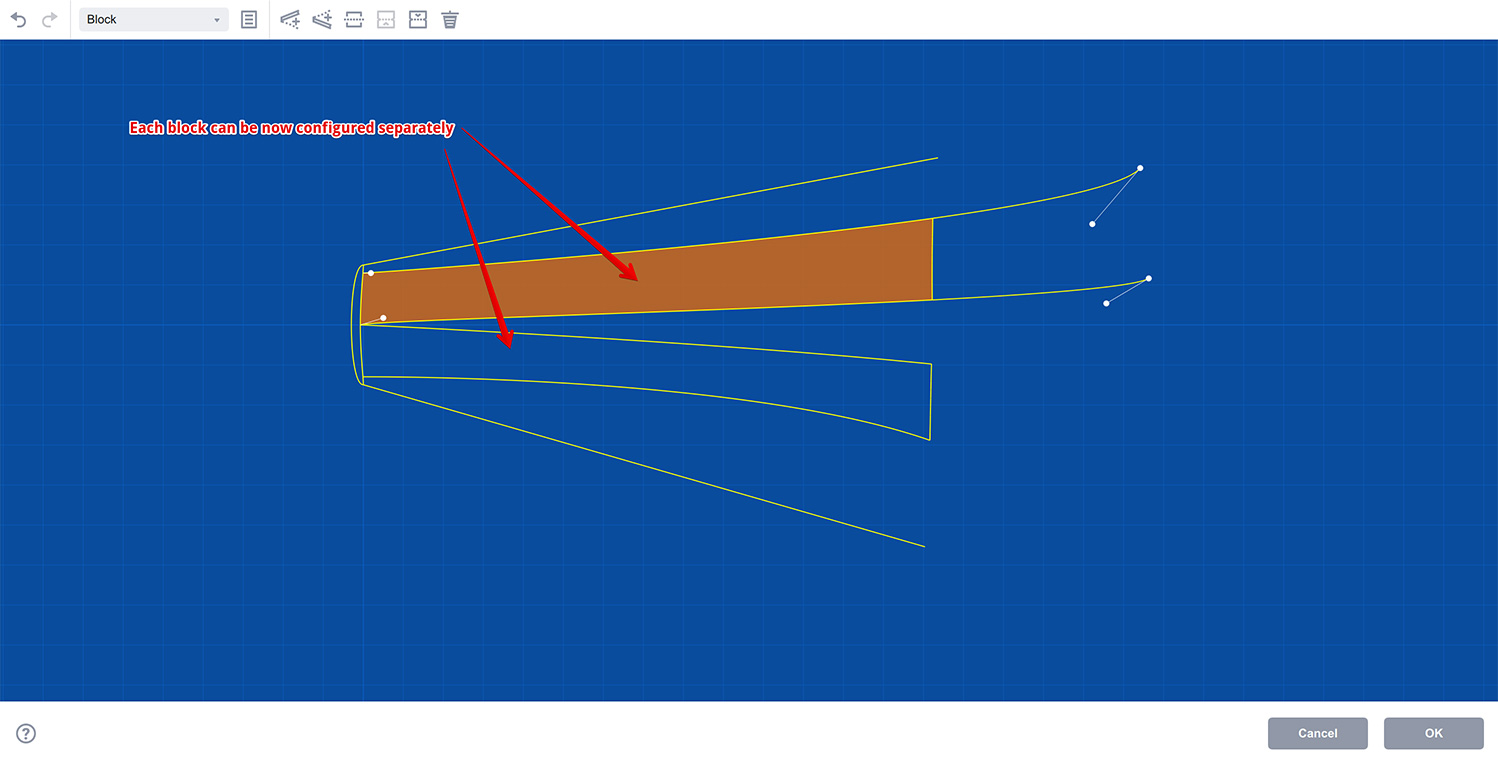
Try editing the blocks or splitting them more, try clicking the OK button and see how the model is updated, in other words try to get used to splitting and editing the blocks.
Splitting In Different Proportions
You may not want splitting the block 50/50, sometimes you may need just a thin part of the block to be separate. In Boxshot each block has its own weight and when the model is generated, Boxshot sums all the weights up and spreads the thickness proportionally between the blocks according to their weights.
If you need a different block thickness proportion, you need to modify the block weight. You can do this in the properties panel of the selected element:
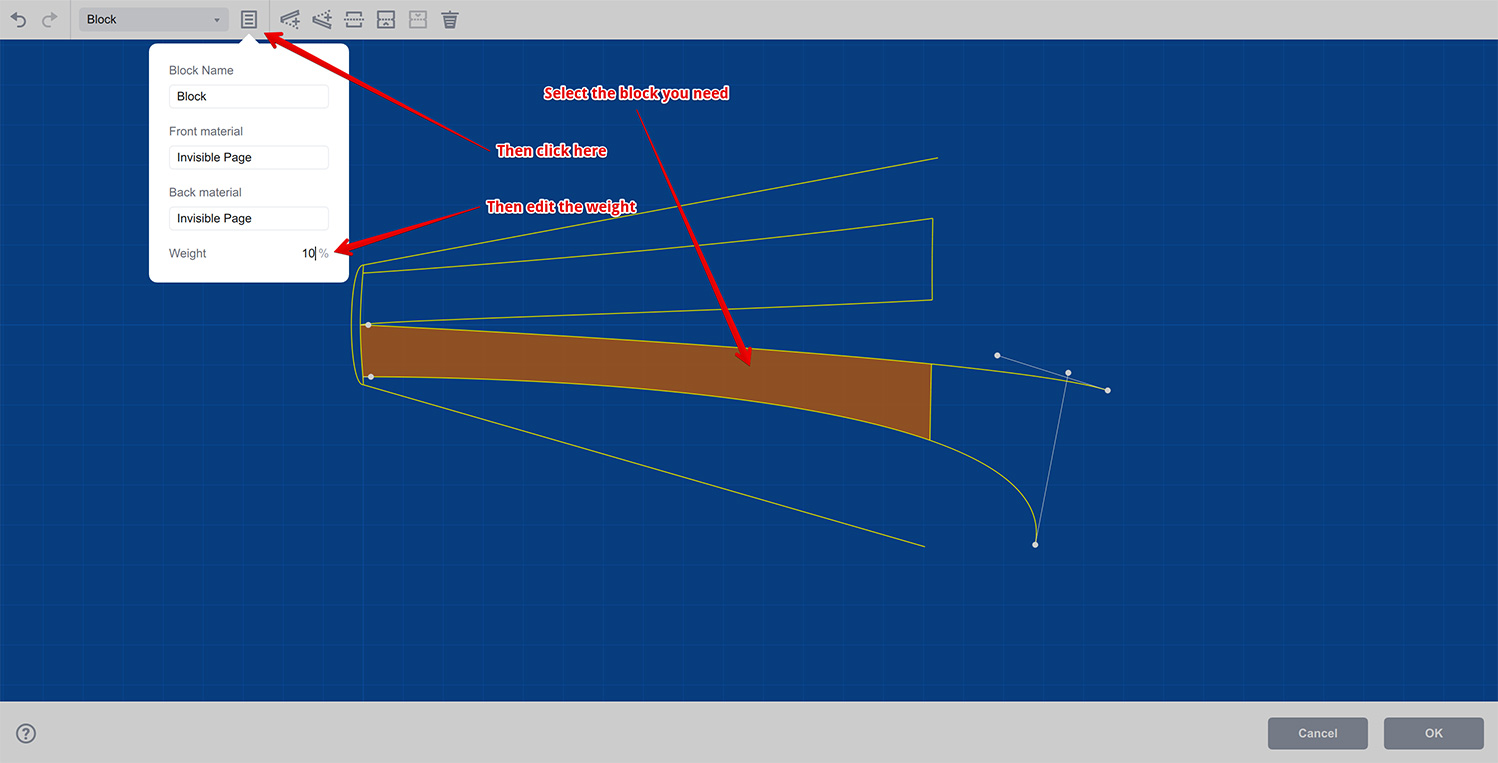
At the bottom of the panel there will be a Weight parameter that you can change. On the screenshot above we set the weight of the front block to 10%, then we set the weight of the back one to 90% and here is the new layout:
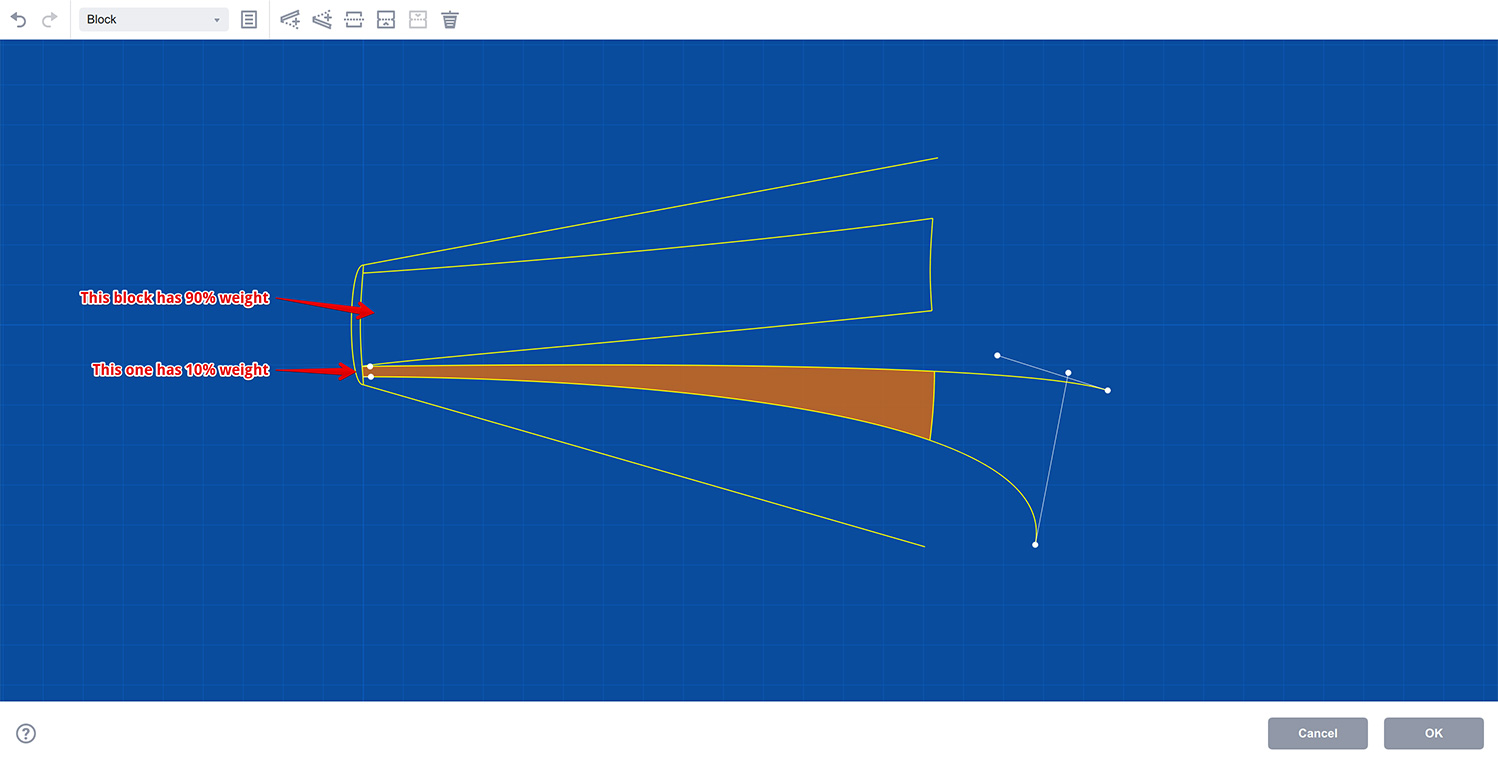
This way you can configure multiple blocks, not just two of them.
Merging Blocks Back
If you don’t need a block anymore, you can just delete it using the Delete button in the toolbar, but sometimes you may want to keep the outline of the blocks and simply remove the gap in–between. You can do this using the merging buttons in the toolbar. Note that the merging is not possible if there is something between the blocks, like a single leaf. In that case you need to remove the element between the blocks first and then merge them.
In order to merge the blocks, you click one of them and then use the merging buttons in the toolbar:
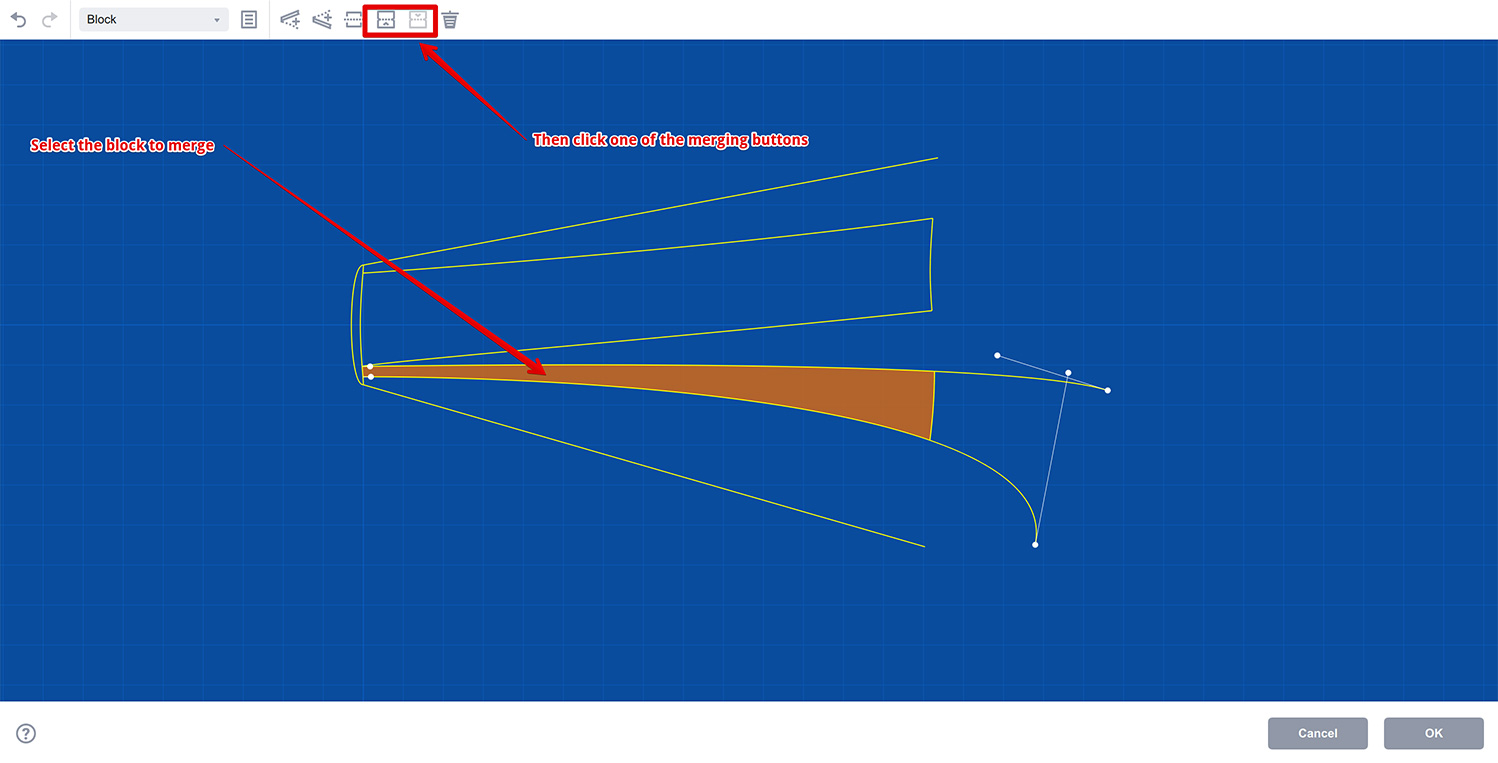
There are two merging buttons called Merge with the one at the front and Merge with the one at the back. This makes sense if you think about three blocks in a row with the middle one being selected. Boxshot needs to know if it needs to merge the middle block with the first or with the last one. That’s why you have two buttons.
Boxshot runs blocks from the front panel of the book down to the back one. So “merge with the back” means the selected block will be merged with the block that comes after it towards the back of the book. In a similar way, “merge with the front” means the block will be merged with the one closer to the front of the book.
On the screenshot above we selected the block next to the front cover, so the only block it can be merged with stays closer to the back cover of the book, so the only enabled button is the one that merges a block with the one at the back. Here what happens if we click it:
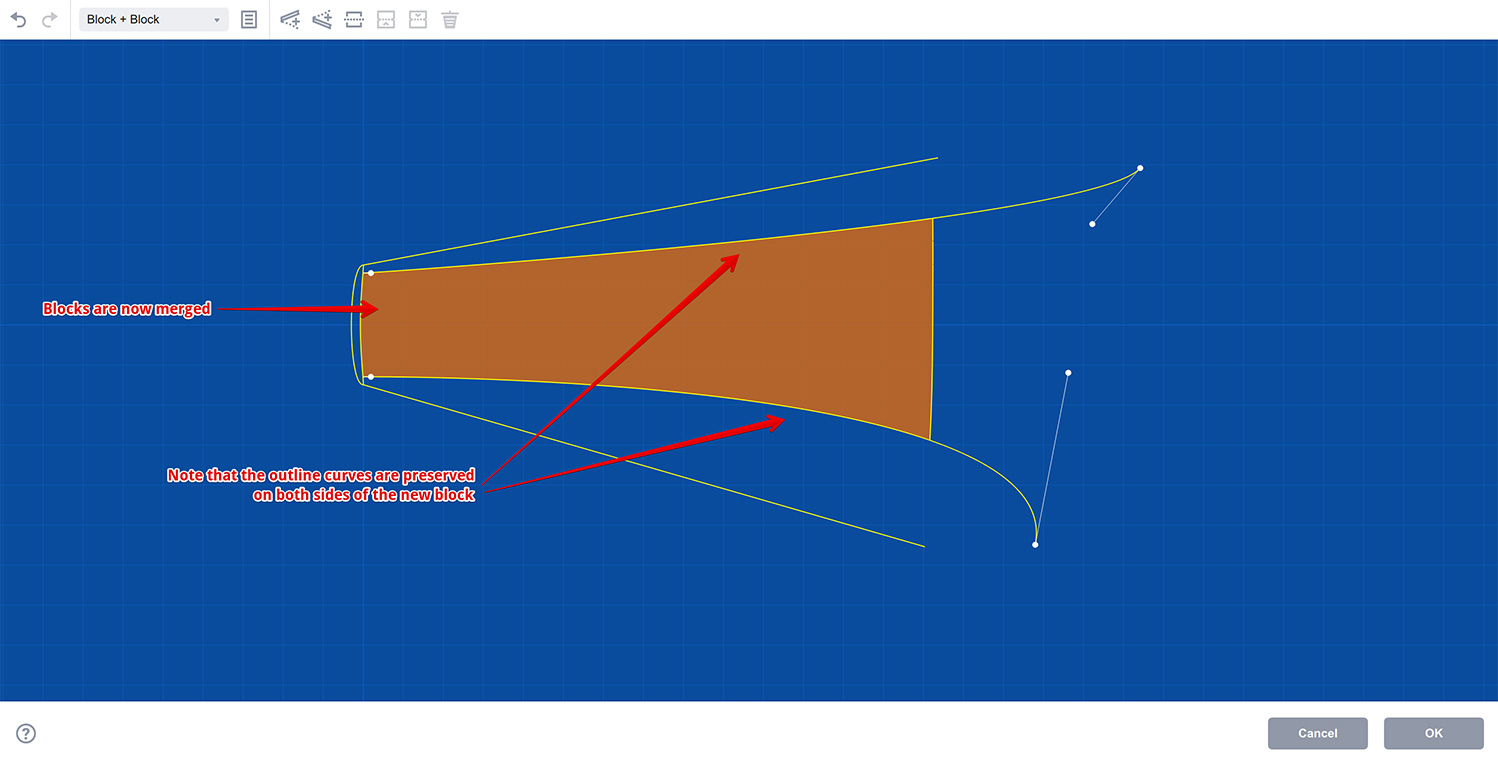
If you decide to simply delete the block, the result will be slightly different. Click the Undo button in the toolbar and then delete the thin block instead, using the Delete button:
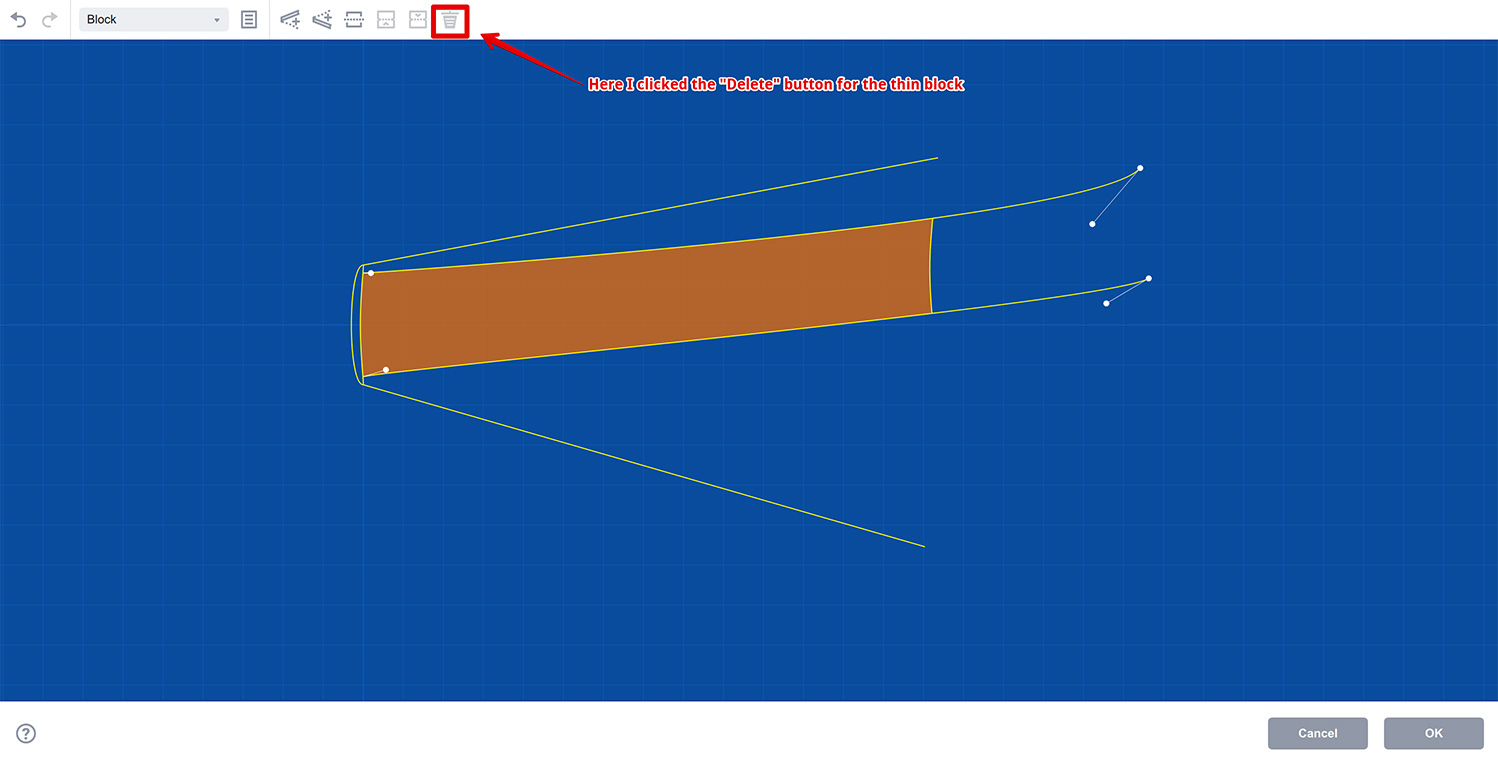
Note that in this case the other block keeps its shape and the selected block simply disappears. Boxshot re–balances the blocks weights so the book thickness doesn’t change, but we recommend using merging instead of deleting for blocks, exactly as you open and close a real book.
Adding leaves
Sometimes you may need just a single leaf to pop out of the block. You can do this easily with Boxshot book editor:
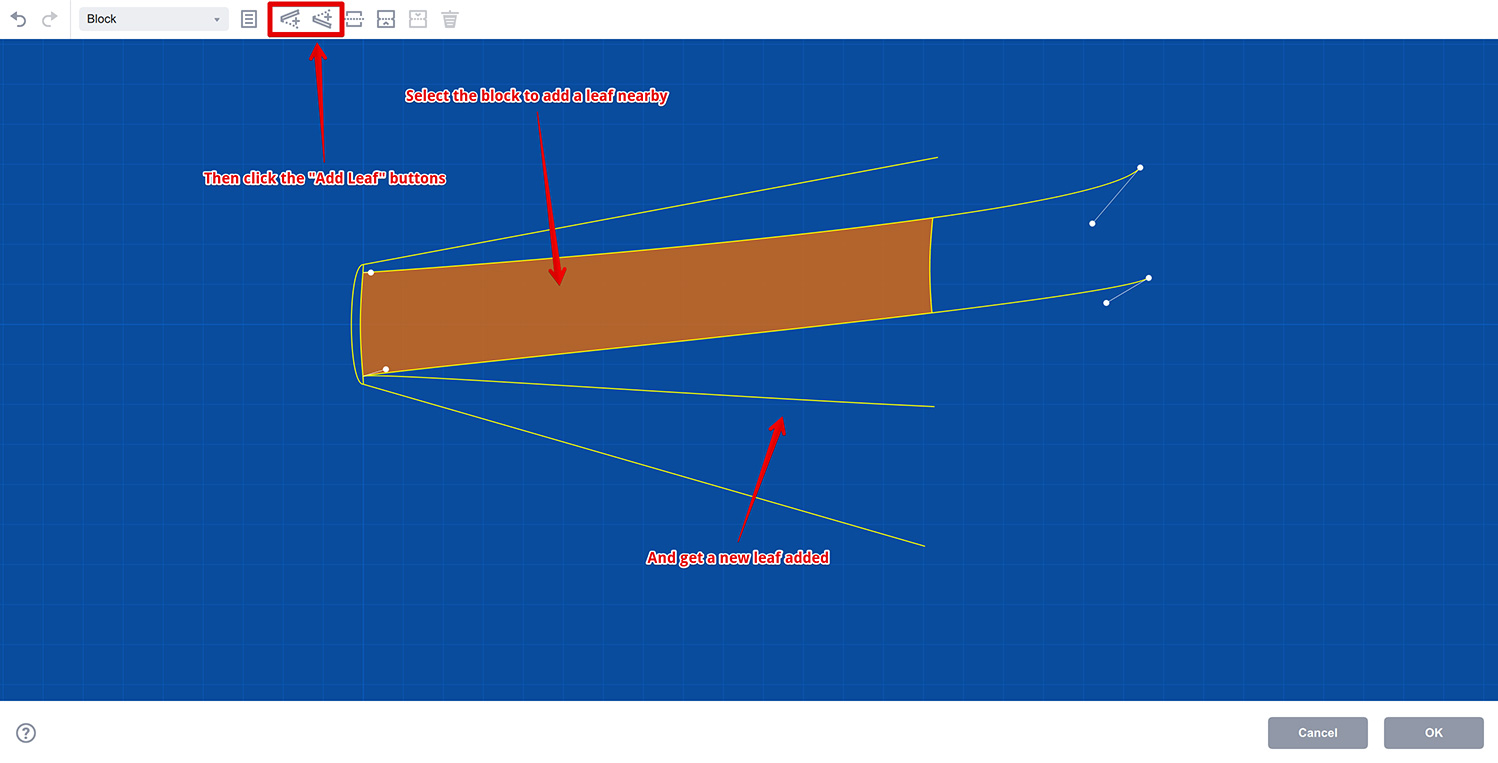
In order to add a leaf you need to select a block or leaf where you want to add a new leaf. Then you need to click one of the Add leaf buttons in the toolbar. Exactly as with merging blocks, the buttons let you add a new leaf either before or after the selected element.
Once the leaf is added, you can select it and modify its curve the way you want the leaf to look:
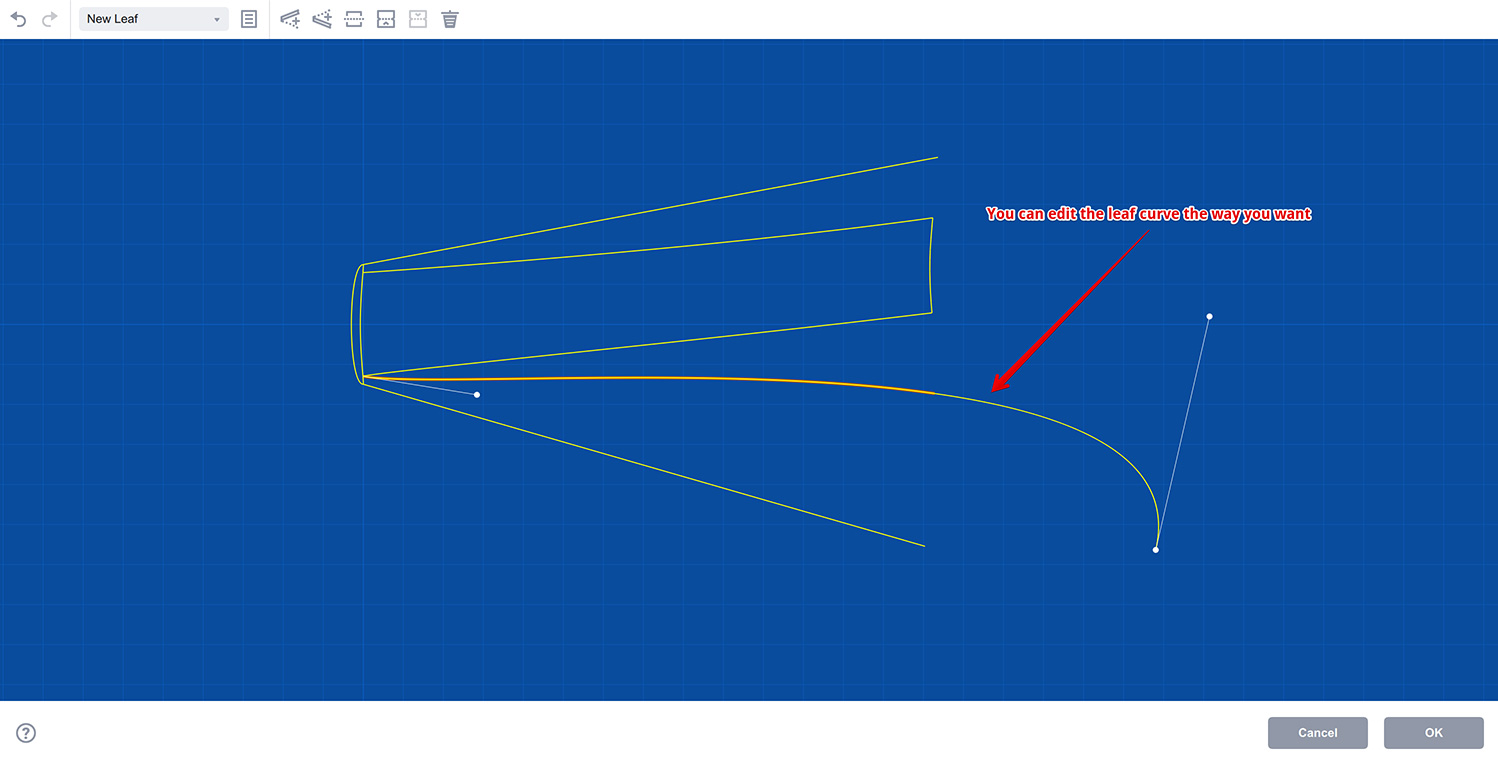
You can add as many leaves, as you need. There are some limitations on adding leaves, like you can’t add a leaf before the front cover of a paperback or magazine and same for the back covers. That makes a perfect sense, though.
If the leaf is not needed, you can delete it using the Delete button in the toolbar.
More Control Points
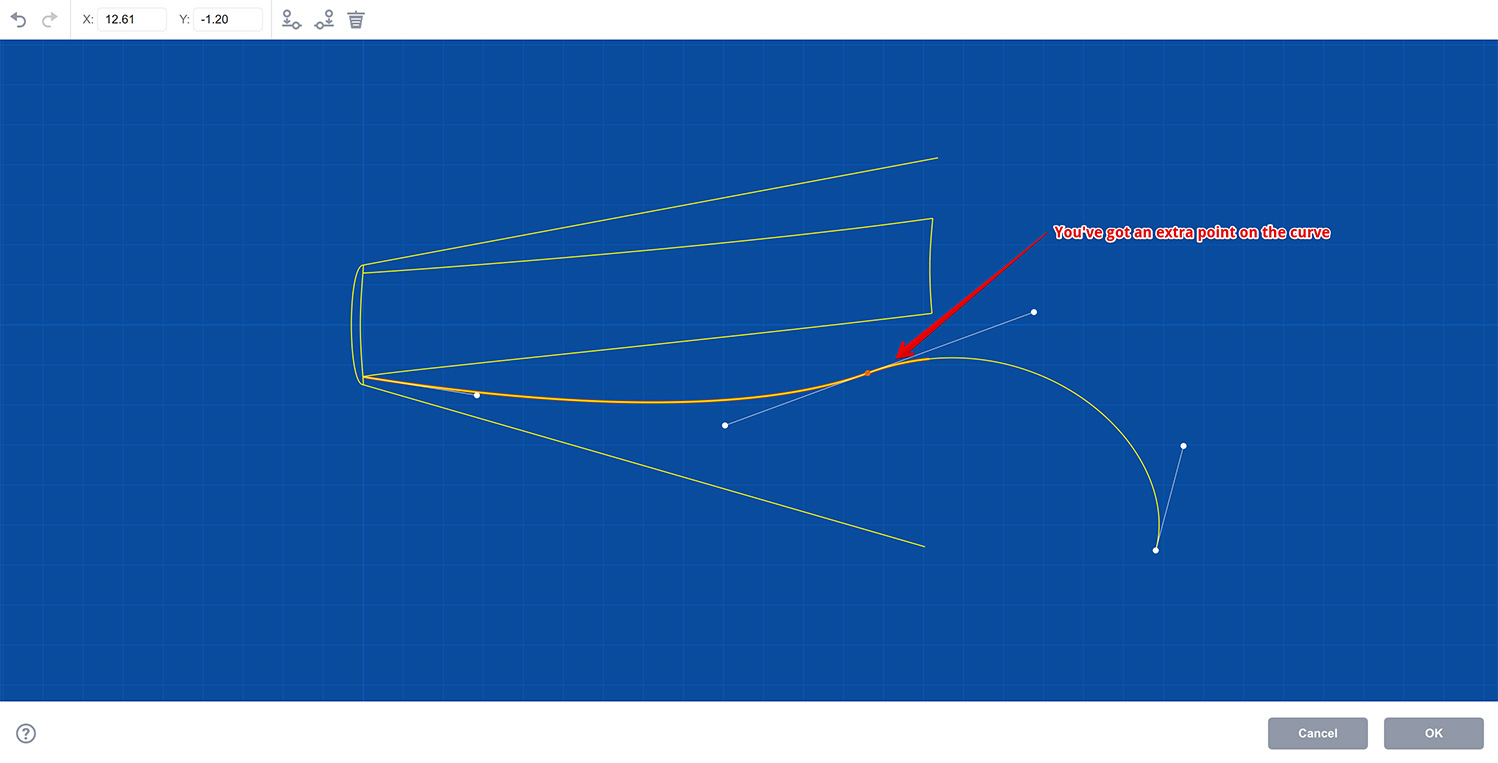
By default you get just two control points for leaves and blocks: one at the beginning (at spine or headband) and another at the end. It is enough in most cases, but sometimes you may want more. In order to add more control points, select a point on the curve (not the tangent one) and click the Add point button in the toolbar:

You can add a new point either before or after the currently selected point. You can’t add before the first or after the last points, but adding in the middle is allowed. Here I added a new point:
If the point is not needed, you can select and delete it using the delete button in the toolbar.
Note that if you add a point to a leaves block, the point is added to both curves at the sides of the block.
Assigning Materials
You can assign front and back materials for each leaf or block of the book by selecting it and then clicking the properties button in the toolbar:
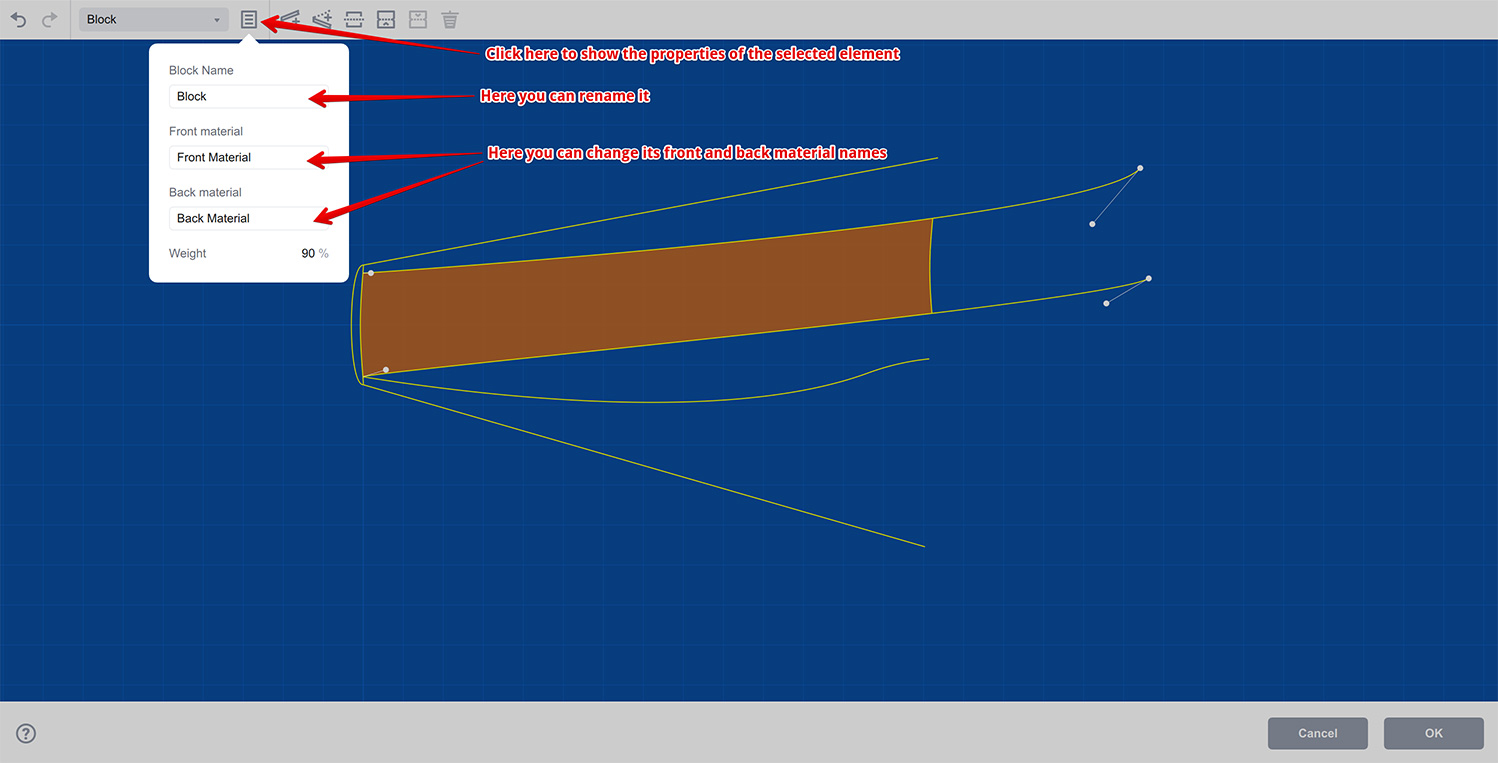
The popup lets you change the block name (which is used mostly for identifying blocks in the drop-down list) and its front and back materials. Boxshot assigns some default materials to the blocks and leaves, but if you want a page to have a unique look, you need to assign a custom material to it and then adjust it in the materials panel of the book shape.
That’s It!
Done, good for you. You can now make your own very custom books using the book editor. It might save you some time to start with a proper preset and then switch to the manual mode and configure on top of that preset.
For presets and other book properties, have a look at this books basics tutorial.