Boxshot User Interface Layout
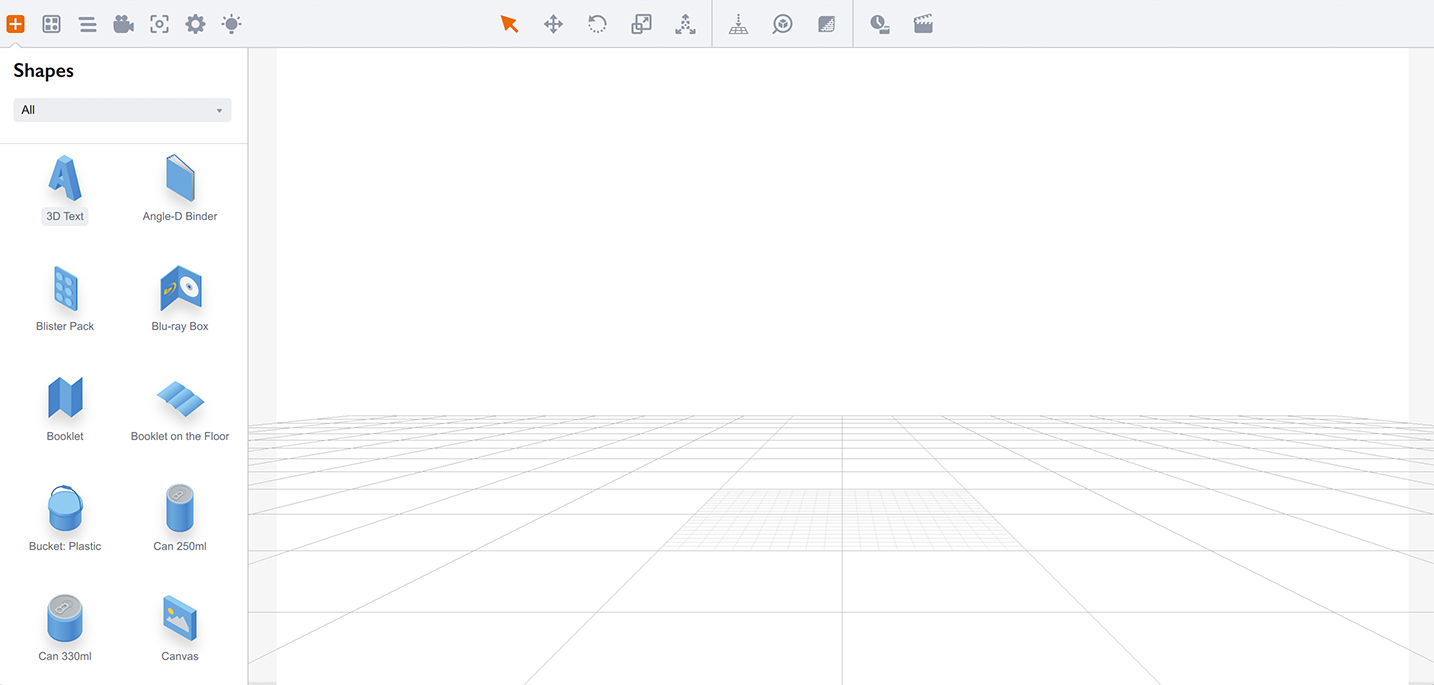
When you start Boxshot the first time you will see the default main window (you may also see the demo–version notification, but this tutorial is not about the demo). You will probably see something like this:

Boxshot looks and works absolutely the same way on Windows and Mac, so all the information you get here works for both platforms.
Boxshot Toolbar
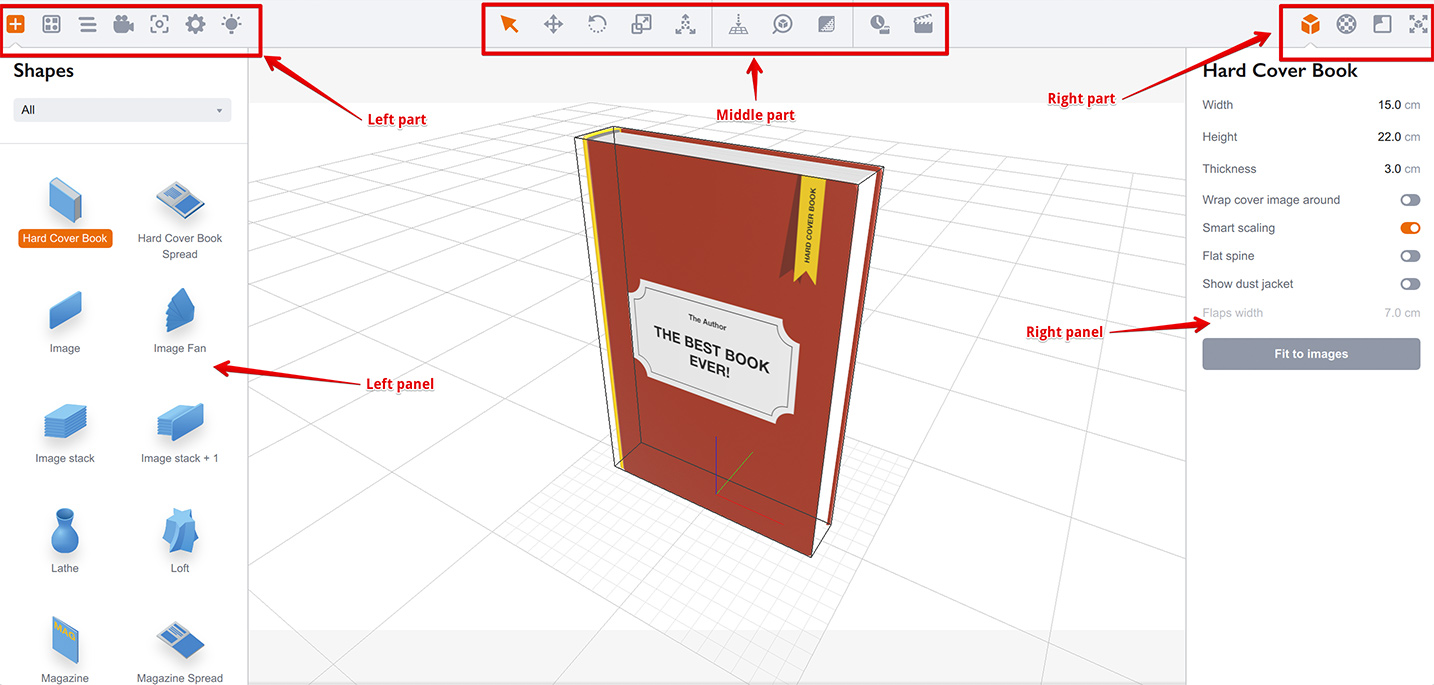
The toolbar is at the top of the window and has three parts. The left part controls panels on the left, the right part controls panels on the right and the middle part controls the mouse cursor mode and provides some shortcuts.

By clicking the left and right icons you switch the panels on the left and right sides of the window. If you click the active icon, you toggle the panel on or off. The right panel may hide automatically when nothing is selected. It will appear again when you select something. However, if you hide the panel first, it will not reappear automatically.
The left set of icons is permanent. You may see fewer icons depending on your Boxshot edition, but they never change while you work in Boxshot. The right icons depend on the current selection and may change if you select, for instance, a light object instead of a shape.
Panels on the Left
From left to right, the icons at the left part of the toolbar give you access to these panels:
- Shapes — this displays the most important panel on the left. The panel contains a list of the shapes which you may drag into the scene. There is a filter at the top, so you can just display the shapes of a specific type;
- Assets — this panel contains a list of predefined materials and images that you can use in your scenes. There are some useful background and gradient textures, checkerboards textures and some cool materials. The filter at the top allows you to find what you need faster;
- Scene tree — displays the node tree for the current scene. Basically, you can see all the shapes from your scene in the tree. If something is missing or hidden, this is the first place to look. You can rearrange items there, group them and do other things. In most cases with simple scenes you will not need this panel;
- Camera — this panel, where you can adjust the camera parameters (see the camera tutorial for more details);
- Snapshots — this panel allows you to make a “shot” of the current scene and keep it for future use (read more about snapshots here);
- Scene properties — this panel contains various scene–wide properties like background parameters, floor visibility and rendering settings. You usually go here to adjust the floor and background options;
- Scene lighting — the last panel controls directed (sun) lighting and undirected (environment) lighting. Use these parameters to setup the scene lighting the way you need.
Panels on the Right
Buttons in the right part of the toolbar are visible only when something is selected. The number of buttons depends on the type of the selected object. For shapes you will see up to four buttons; for objects like lights or groups you will see fewer buttons, as not all the properties are relevant to them.
From left to right, the icons at the right part of the toolbar on the screenshot give you access to these panels:
- Parameters — this panel displays the settings of the currently selected object. This is the panel you will be using most of the time in Boxshot, as it displays parameters like width and height;
- Materials — this is also a very popular panel, which holds the list of materials you have applied to the currently selected object;
- Decals — you can apply additional elements — “stickers” to objects in Boxshot, say to place a label or a sign somewhere. All the applied elements are listed in this panel;
- Transformation — this panel allows you to precisely move, rotate and scale the currently selected object. You can generally perform all these operations with your mouse, so you rarely need to work directly in this panel.
Buttons in the Middle
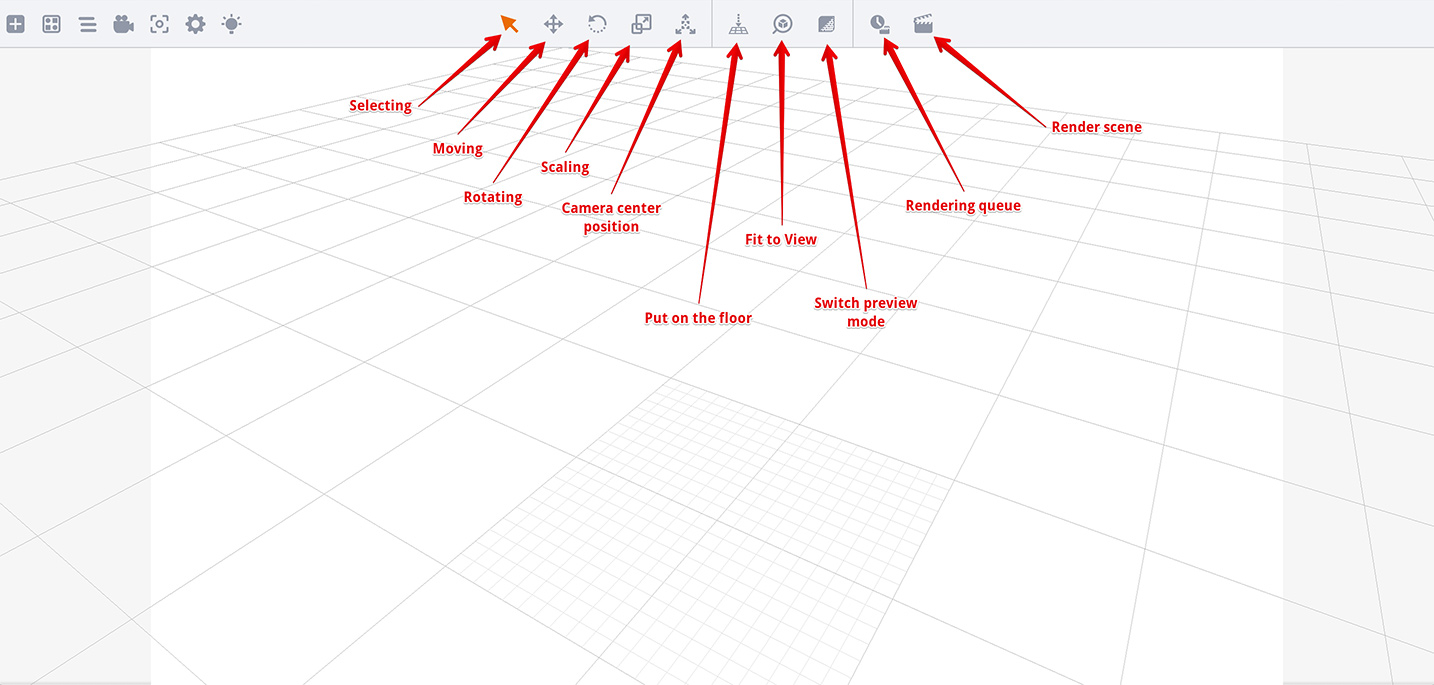
The middle part of the toolbar has three parts. The left part controls the mouse cursor mode, the middle part has some shortcuts to most used functions, and the right part has rendering buttons. Here is what the buttons do:

Note that there is no book in the scene anymore, nothing is selected and the right part of the toolbar is empty. You see buttons on the right side only when something is selected in the scene.
The labels of the buttons describe their functions. Read more about these functions in these tutorials:
Conclusion
You have learned about the Boxshot toolbar, its left and right panels and what is available there. You also learned what the middle buttons mean in the toolbar and where to look for more details about them. Now please continue to the following topics:
- Adding Shapes — learn how to add shapes to the scene;
- Moving Shapes — how to move and rotate the shapes;
- Editing Shapes — learn how to edit shapes parameters;
- Editing Materials — change shapes appearance by editing materials;
- Using Camera — how to control the scene camera;
- Rendering Scenes — how to render your completed scene.