Rendering Scenes
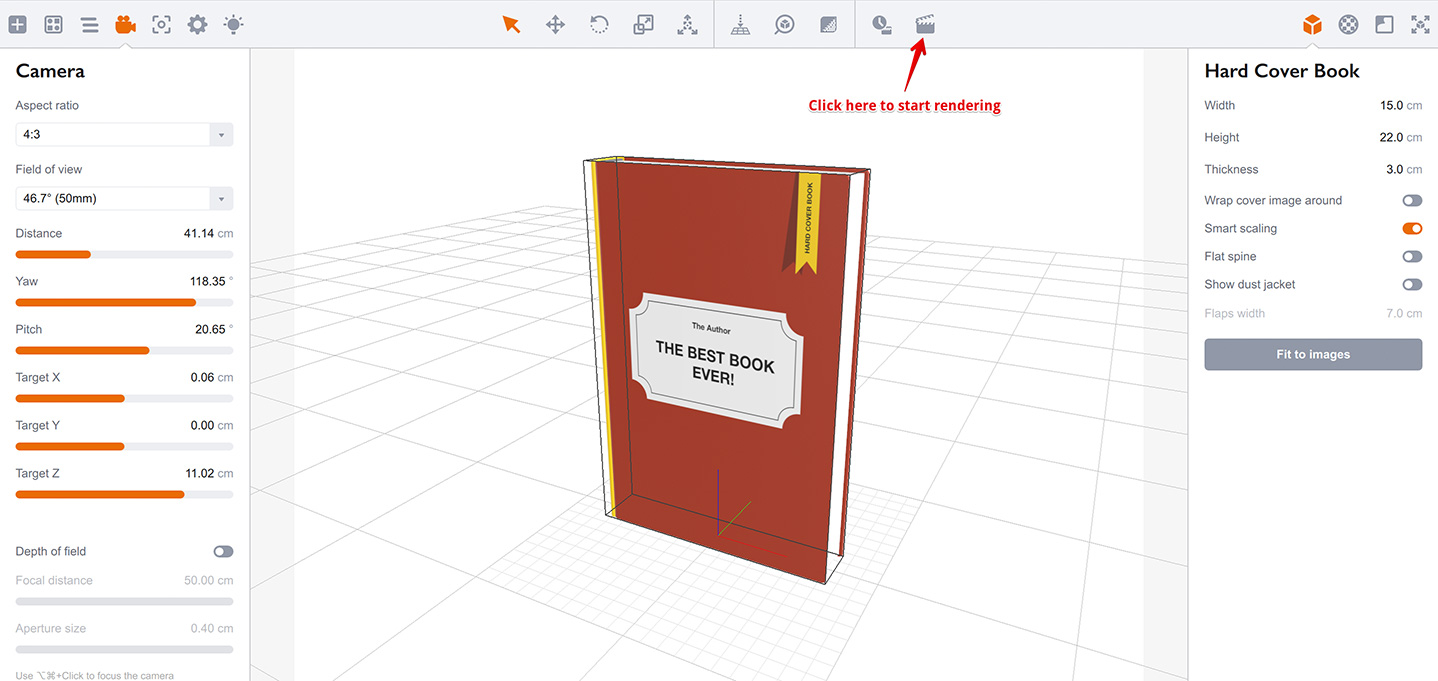
To start, let’s make a simple scene by dragging a shape to the working area and adjusting the camera so we see the scene the way we want. When everything is ready, click Render:

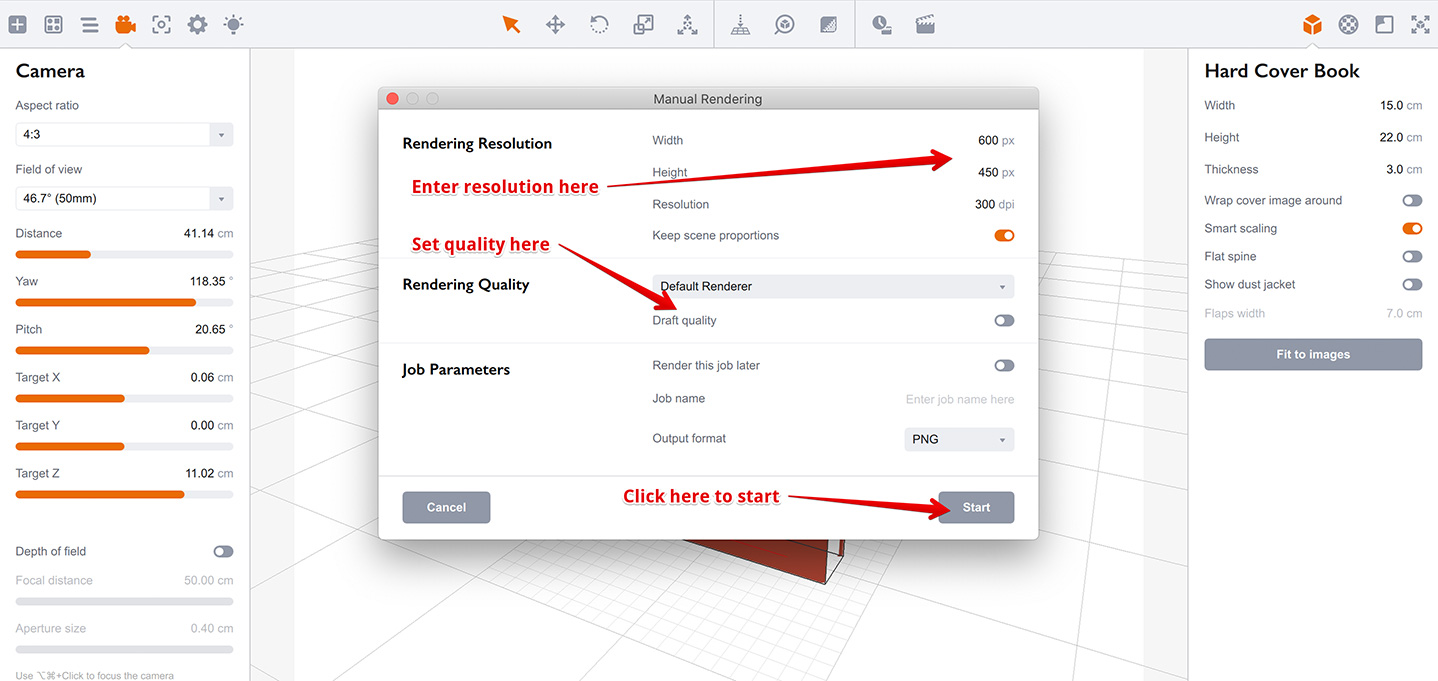
The rendering window appears, and you can adjust some of the parameters. The most important ones are resolution and quality.

Boxshot features a powerful path–tracing renderer, so your images will look like real photos. However, high–quality rendering may take a while, so Boxshot has a special “draft” mode for rendering preview images. This mode takes significantly less time, so we recommend using it until you are ready to render a high–quality image.
Resolution and Proportions
In the camera tutorial you learned about the viewport proportions. You choose 4:3, 16:9 and so on. Boxshot uses this information to compute the rendering resolution. You may change width or height and Boxshot will update the other field according to the scene proportions. You may turn off automatic updating using a check–box below the resolution fields.
Note that large resolutions take longer to render. The amount of time depends on the area of the image, so doubling both the width and the height of a scene may increase the rendering time four times. It is more efficient to do your preview renderings using a lower resolution, but keeping the scene proportions, to save yourself a lot of time.
There are some limitations on rendering resolution. The demo version of Boxshot doesn’t support resolutions higher than 1024 pixels. You will get a warning if you try to enter higher values. The registered version of Boxshot allows resolutions up to 16384x16384 pixels.
Rendering
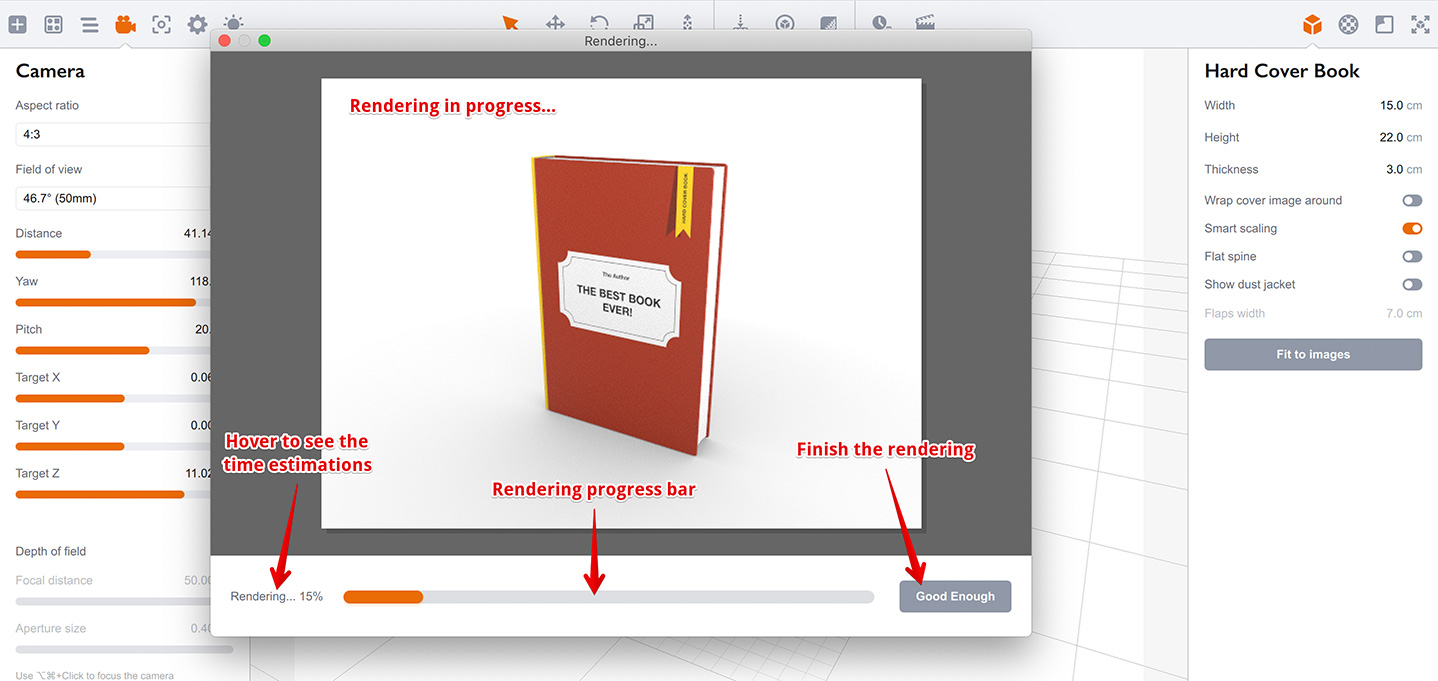
When you finish with the settings, click Start to run the rendering engine. You will see the rendering process with a progress bar showing how long you need to wait. Hover your mouse above the percent number to see the estimated rendering time remaining. If you feel that the image is already good enough and doesn’t need further rendering, you can click Good Enough button to stop the rendering and go directly to the results.

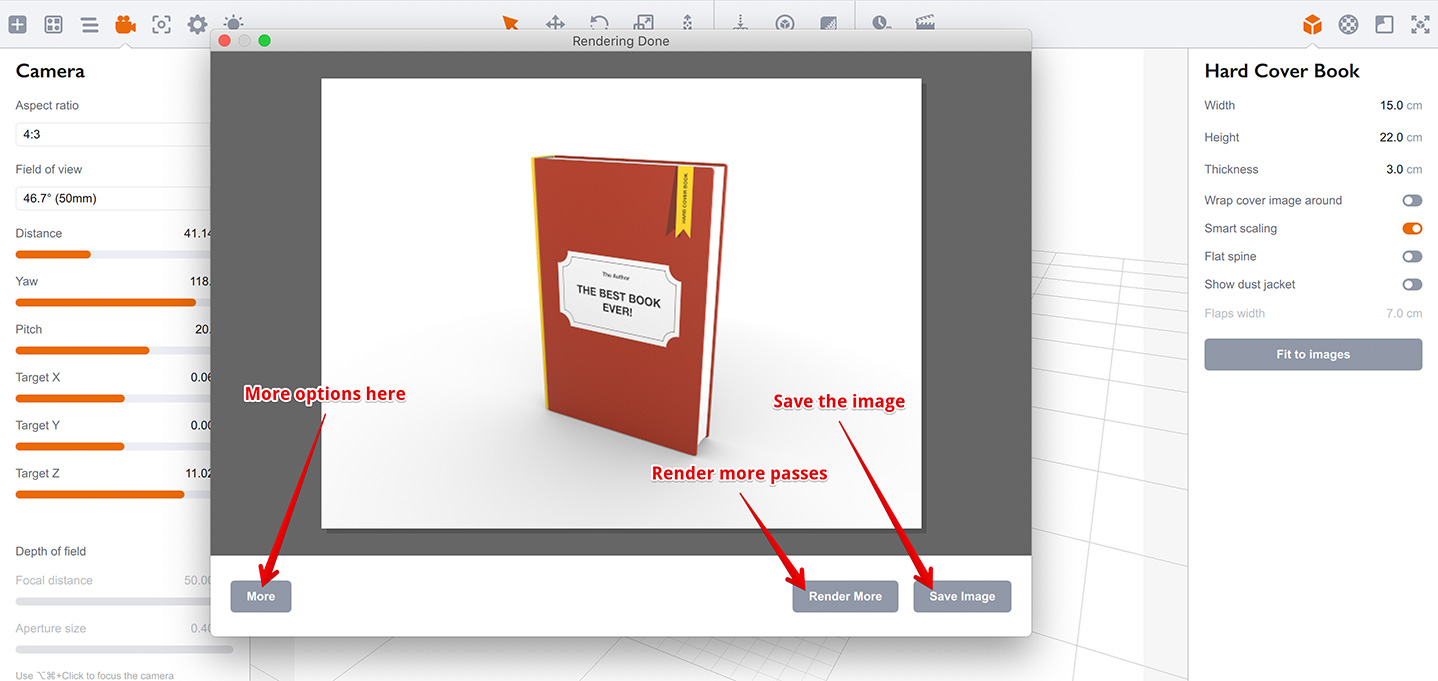
When the rendering is done, you will see buttons allowing you to save the results. Boxshot supports saving to many graphics formats. Only some of them support transparency, so choose PNG or TIFF when you render transparent scenes.
If you think that the image would benefit from more rendering, you can do some extra passes by clicking Render More button.
Note that on Windows transparency may not survive when you copy a rendering to the clipboard, so consider saving transparent images instead.

Save your image and close the rendering window. You will return to the editing mode, where you can do another rendering or make another scene.
That’s All
You have learned how to render your scenes, how to do both fast previews and high–quality production renderings. That’s all you need to know to start using Boxshot. You have learned all the basics! You can return to the tutorials list to pick more advanced topics, or even try to make something yourself!