Working with Materials in Boxshot
Boxshot provides a sophisticated, yet straightforward materials system. You can make paper, glossy surfaces, plastic, metal, glass, mirrors and much more, without spending months learning how to do it. Let’s get to know the materials step by step.
One Click Image Assignment
Boxshot encourages you to use drag and drop. You drop shapes into the scene, then drag them to move or rotate them to where you want them. You can do exactly the same for materials. When you drop an image onto a shape, you see a popup asking how to use the image:
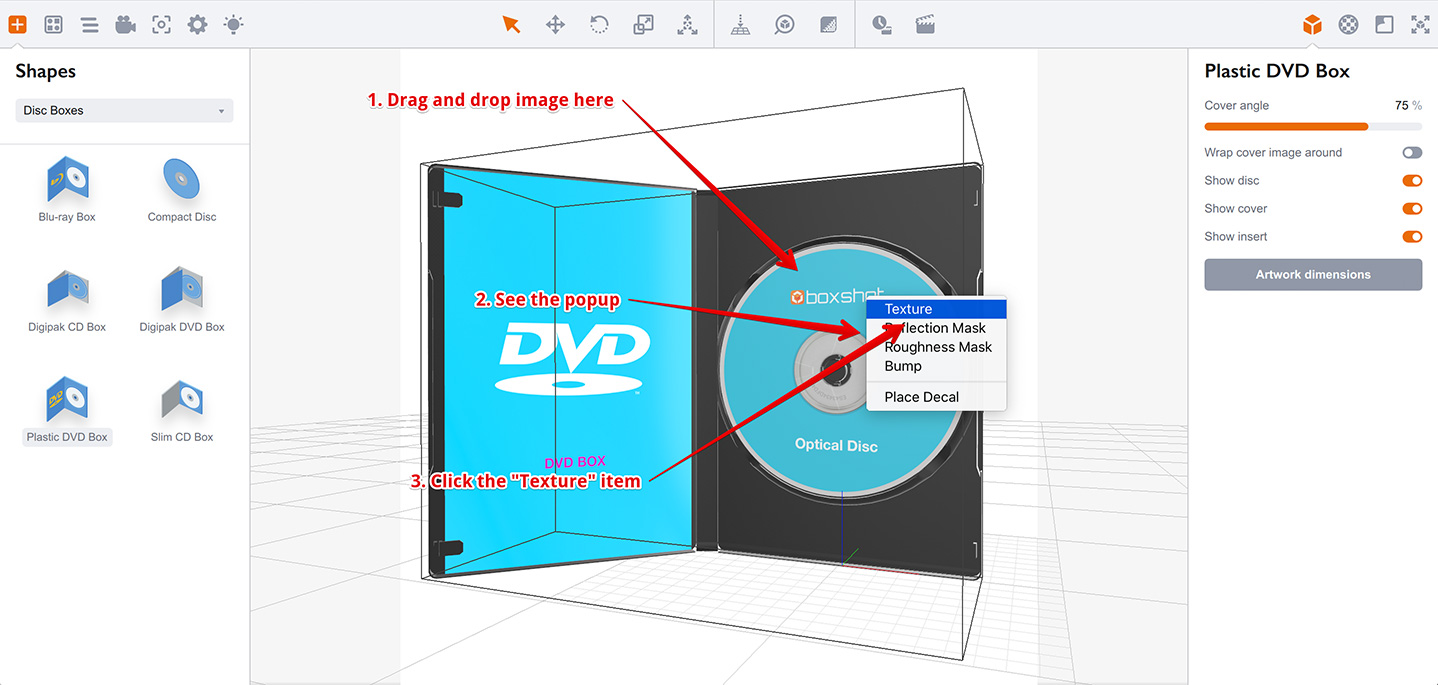
Boxshot provides several options for how to use the image. Pick the top one — Texture — to put the image onto the shape. You will use this option almost every time you assign images.
Using Pre–defined Materials
Boxshot comes with a set of pre–defined materials like glass, metal, and plastic. You can find them in the left panel:
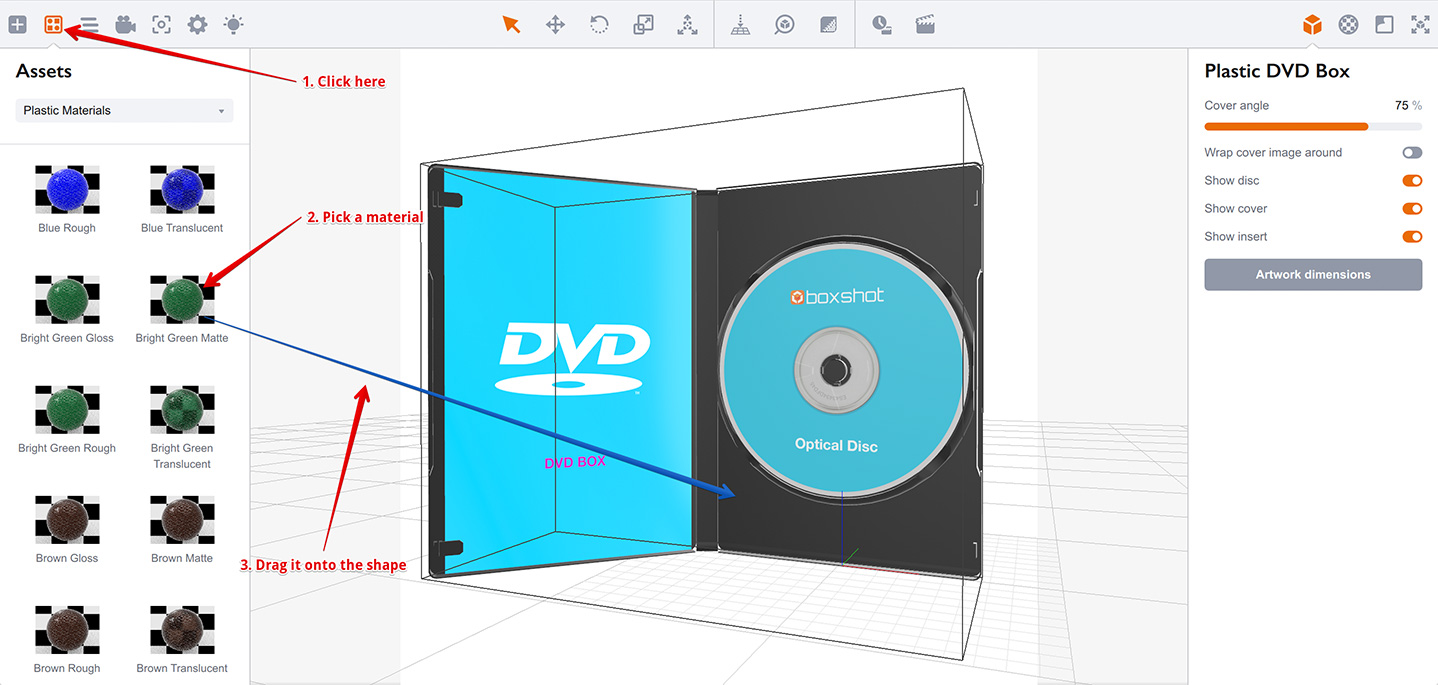
Click the Assets panel icon, pick a material and drag it to the shape where you want it to be applied. This time Boxshot asks you nothing, as materials provide all the necessary information to be applied.
Configuring Materials
Materials are applied to a shape’s sides. Each shape has its own set of materials, so changing one shape doesn’t affect others. It is a good idea to use pre–defined materials and drag–and–drop as a starting point; but when it comes to fine tuning, you will end up using the materials panel on the right. Let’s have a look:
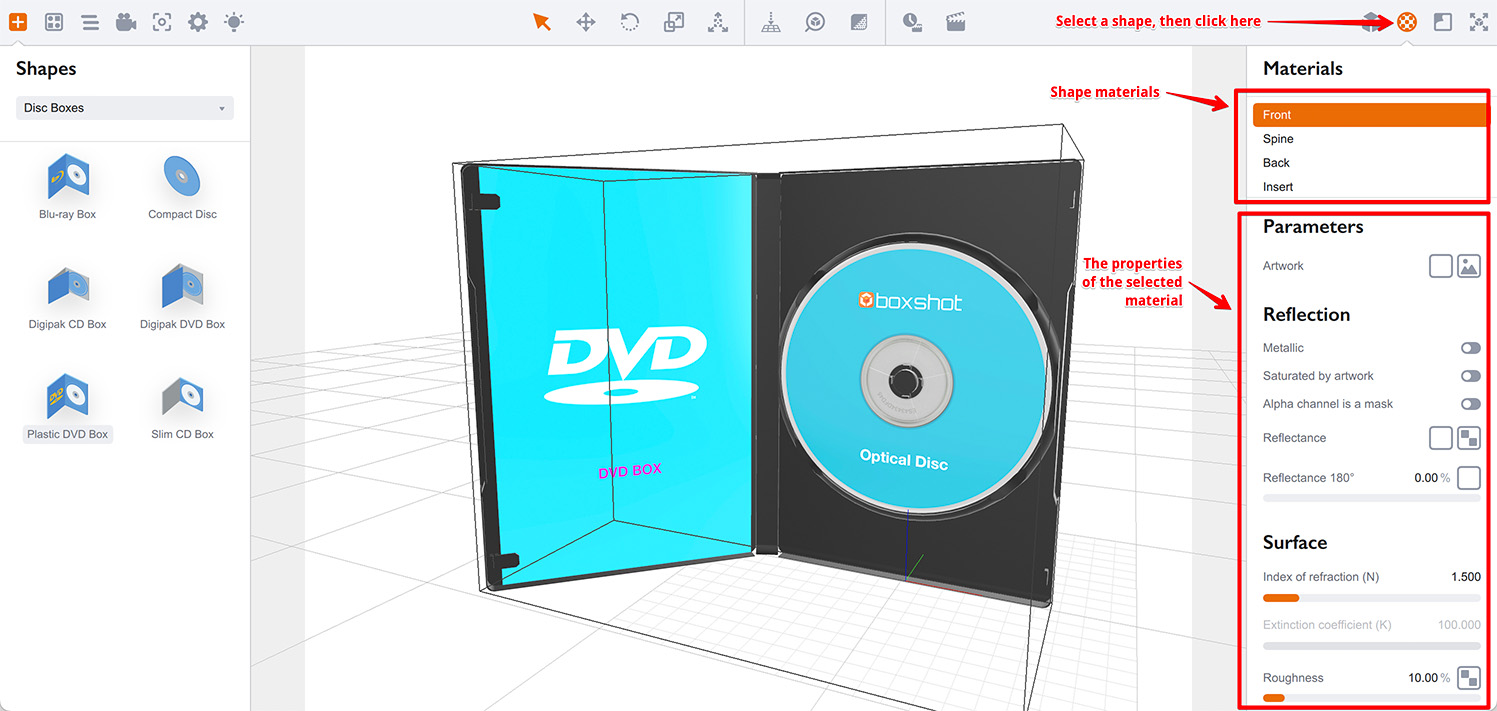
Select a shape, then click the Materials icon on the right to see the list of materials of the selected shape. Below the list you see the properties of the selected material in the list.
Texture Slots
Material in Boxshot are configured by using parameters and textures. Each texture can be also configured in a number of ways, so Boxshot offers a convenient method of doing this by using texture slots. Texture slot is a texture with its parameters like repeats, rotation, wrapping, cropping, optional tint and so on.
You can see the texture slot at the very top of the material properties panel:
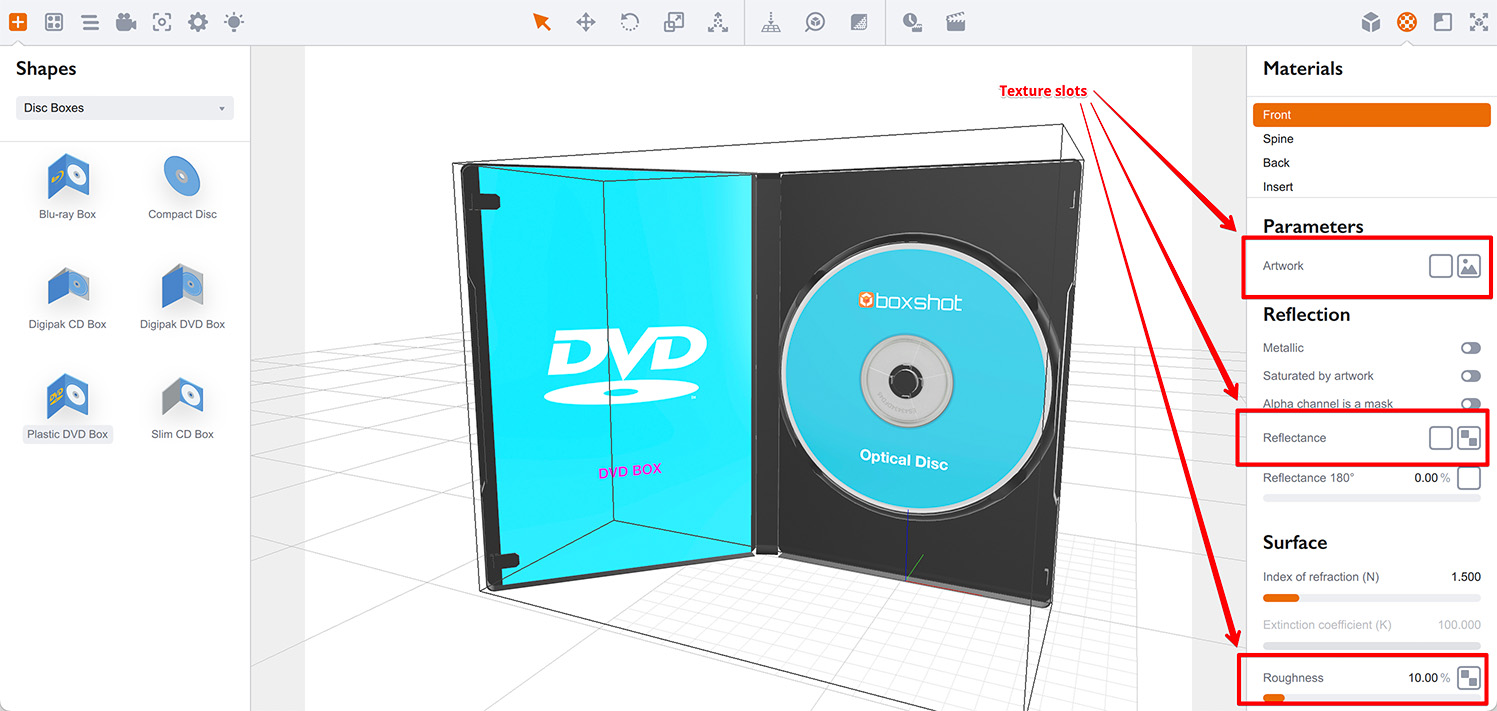
When the texture slot is closed (or folded) you only see the name, the texture indicator and also the optional tint and/or the slider value. The image above has white tint for both “Artwork” and “Reflectance” slots and a slider value for the “Roughness” one.
You can adjust the color tint by clicking the color picker, you can drag and drop textures directly onto the slot and you can adjust the slider value (if any) without seeing the details of the texture. However, if you open (unfold) the slot by clicking it, you will see much more parameters:

You can see the boundaries of the texture parameters are marked with a gray frame. The color tint (and slider if it is there) stays on top, then goes the file selector. You can use the drop-down list to select the image which is already loaded, or use the browse button to open a new one. You can also drag and drop images directly onto the file selector to load them.
The bottom part of the texture slot contains all the other texture parameters: uv repeats, offsets and wraps, texture cropping and rotation, texture filtering options, color correction and inversion parameters. The number of options depends on the particular slot, so some slots may have less parameters.
You can re–use texture slots by dragging them onto another ones, or by copying them using the right click on the texture indicator on the right. A menu will pop up with some options to copy the whole slot or some of its parameters. You can also reset the slot to defaults using that menu.
Clicking outside the slot and clicking the texture indicator closes (folds down) the slot to save your screen space.
Read more about texture slots here
Cropping Images
Boxshot lets you load an image which contains all the artwork for all the sides of an object. You can’t apply such an image directly, as Boxshot doesn’t know where to put each part of the image. That’s why you may need the cropping button. This button shows a window that allows you to define which part of the image to show on that particular side.
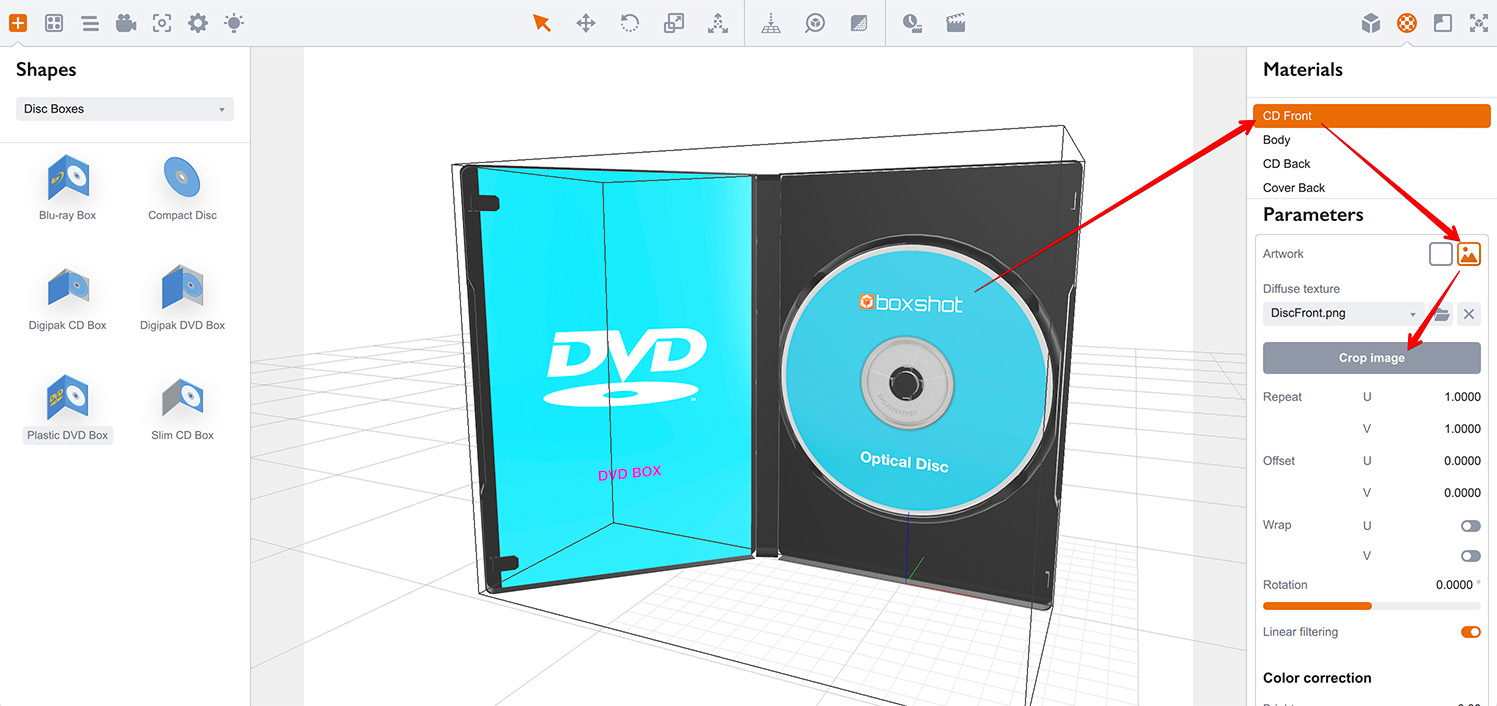
If you pick a CD Front material, as in the image, open its “Artwork” texture slot and click the Crop image button:
You will see the image cropping pane with the selected texture loaded. You may need to click the zoom buttons at the right side of the popup window to see the whole image. Drag the cropping frame to select the part of the image you want to see on the shape. In the following example we’ve selected just the Boxshot logo on a disc.
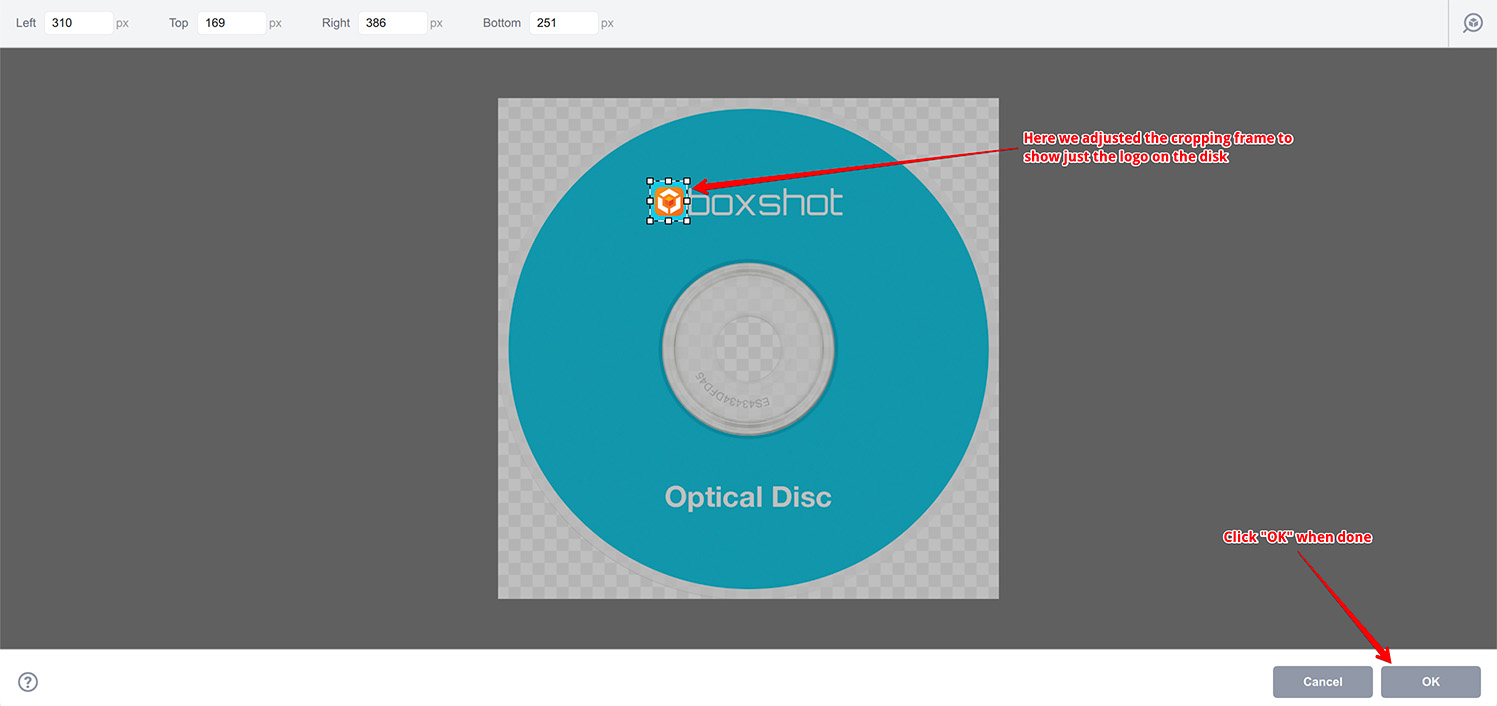
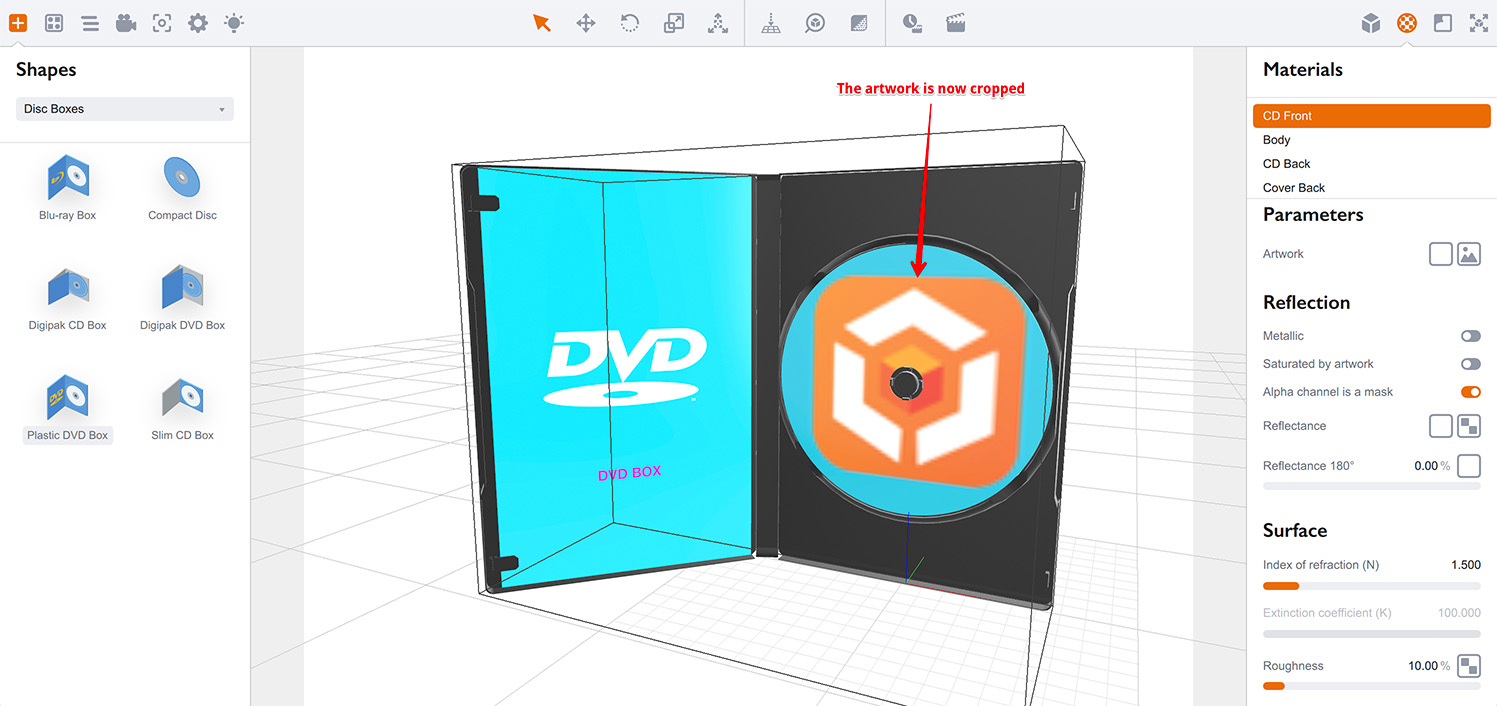
To apply your selection, click OK. As you can see, the disc now shows just the logo, not the whole image as before. You can crop large images or bleeds, or pick pages from spreads.
You can read more about materials in the materials tutorial.
Conclusion
You have learned how to drag and drop images and materials directly onto a shape, how to see the material’s properties and how to crop images. You are almost ready to make amazing scenes in Boxshot. You just need to review a few more topics:
- Using Camera — how to control the scene camera;
- Rendering Scenes — how to render your completed scene.