Using Camera
Boxshot features a very simple yet powerful turntable camera. Basically, the camera rotates around the center of your scene. You can change the distance from the center, and move the center itself. This gives you enough flexibility, while keeping the camera under your full control. The turntable feature means that the top of your viewport is always looking at the top of your scene, so you won’t accidentally roll the scene or encounter other issues.
Basic Manipulations
Move the camera by clicking a shape or the background, then holding down the left mouse button and dragging the mouse. If you click the gizmo, you’ll be dragging the gizmo instead.
Change the distance from the center by rotating the mouse wheel. You can adjust the distance changing direction in the settings, if necessary.
Moving the Camera Rotation Center
The easiest way to move the camera rotation center is to hold down the SPACE key and drag the mouse, exactly as you do in Adobe products. This allows you to easily adjust the center of the current view.
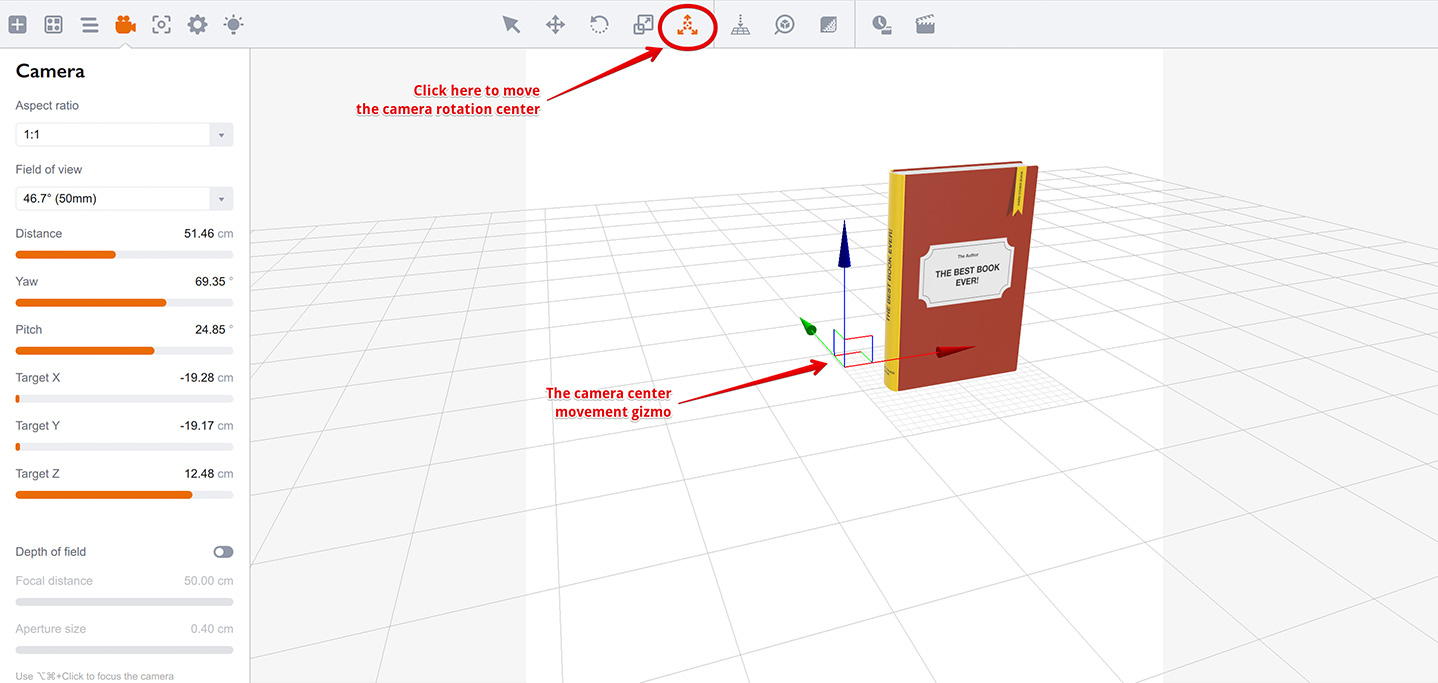
There is also an option to move camera center using the gizmo, as with any other shape in Boxshot. Boxshot provides one more gizmo for the camera center, so you simply move that gizmo to the place you need and the camera will follow.
Drag the gizmo to the right of the book and see how the camera follows it. You should end up with something like this:
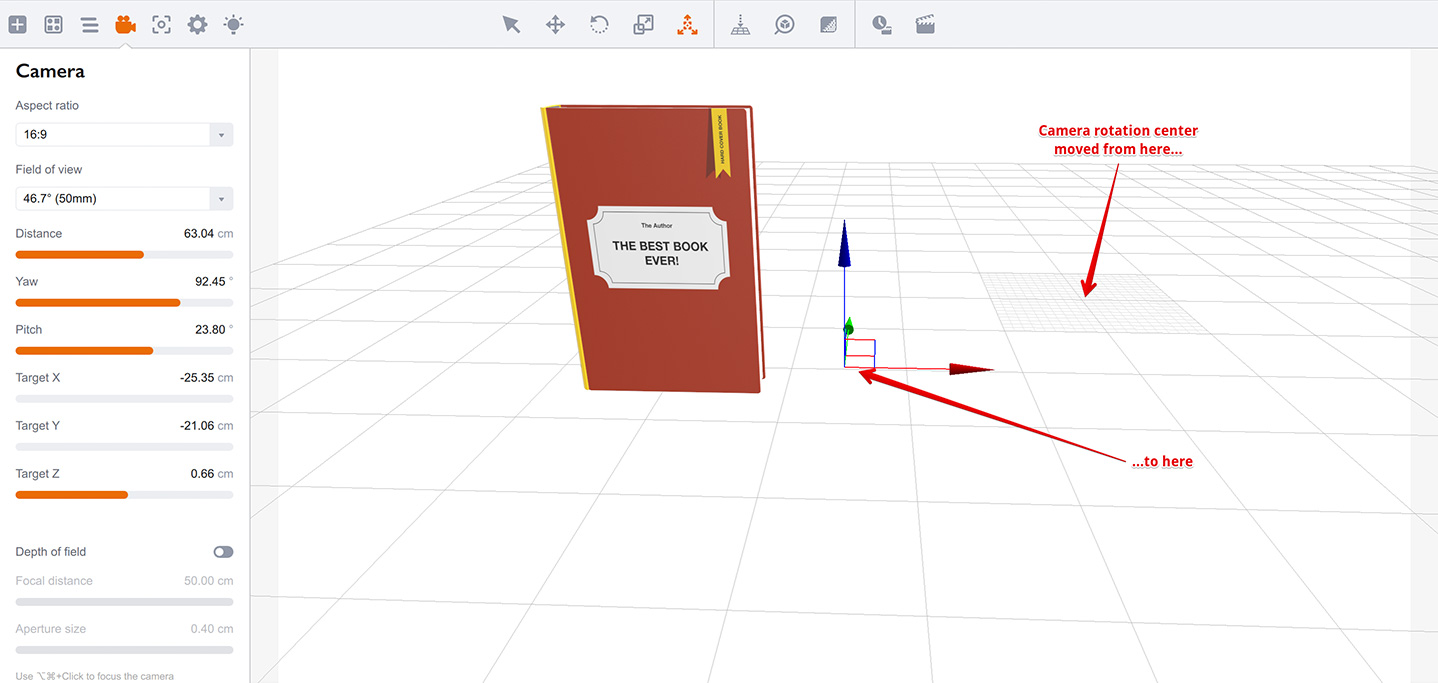
Now if you rotate the camera using your mouse, you’ll see that it rotates around the new center. Again, this is a very simple, but powerful, way to adjust the camera. Just place the center where you need and then rotate the camera to get a pleasing angle on the scene.
Camera Settings Panel
There is a camera settings panel at the left that lets you control the camera by entering numbers in the various fields. You usually don’t need this for rotation or distance, but sometimes it really helps to be able to set angles, distance or positions directly.

The parameters at the bottom are the ones you change with your mouse. Drag the camera and see how the numbers change. Now change the camera distance or the scene center, and see a similar change in the parameters. You rarely need to change them manually.
The most interesting parameters here are FOV (Field of View) and Aspect (viewport proportions). Let’s talk about them now.
Scene Aspect
You may have already seen that Boxshot sometimes draws the sides of the scene with a gray semi–transparent color. This is how it shows the area that will be rendered. In these two images, notice the different aspect values at the left panel:
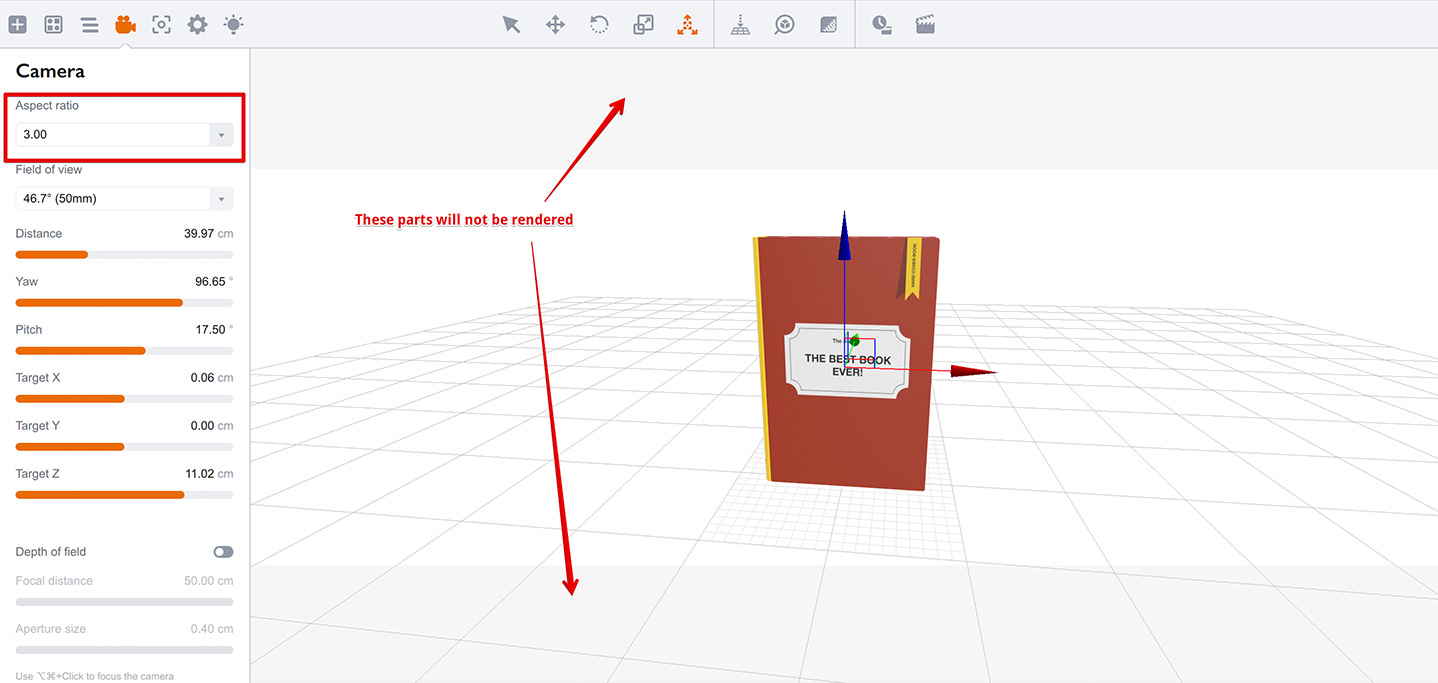
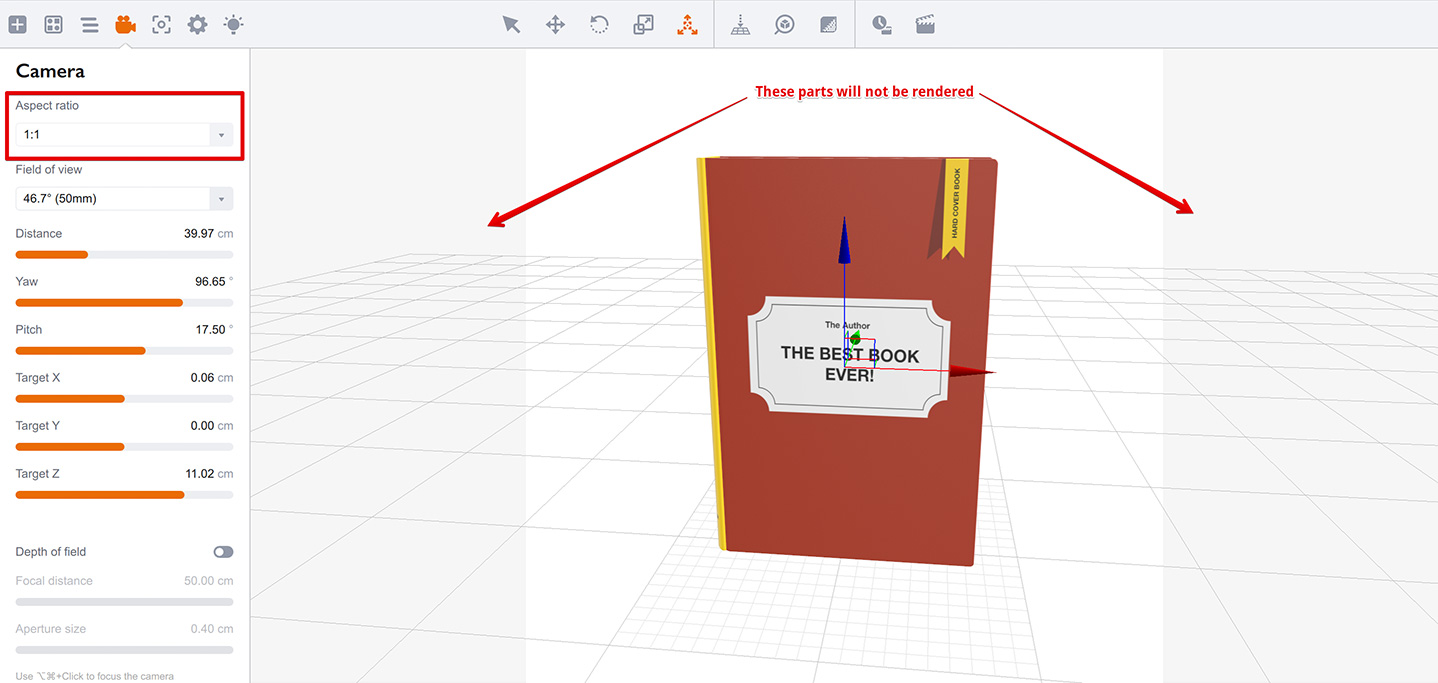
The top image has and aspect ratio of 3:1, while the bottom one has 1:1. Boxshot tries to fit the scene in the current window, which has a completely different aspect, so it has to render slightly more of the background and mark these areas with the gray color.
As you will see in the rendering tutorial the aspect affects rendering resolution, so when you change one, think about the other.
Field of View
Read this Wikipedia article about FOV if the concept is new to you. You may also want to read some general articles about photography, as otherwise it may be a little bit difficult to use FOV in Boxshot.
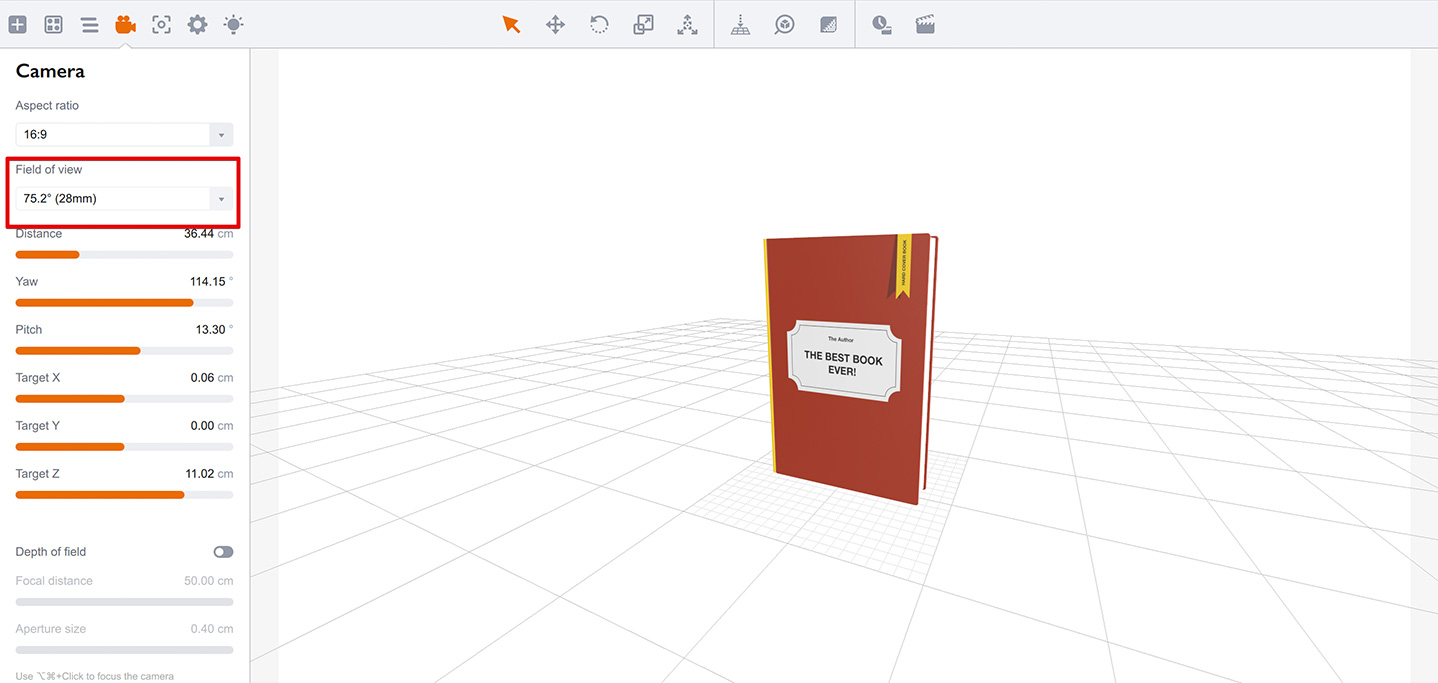
Compare these two images, to see the effect of a change in FOV, while all the other parameters are the same.
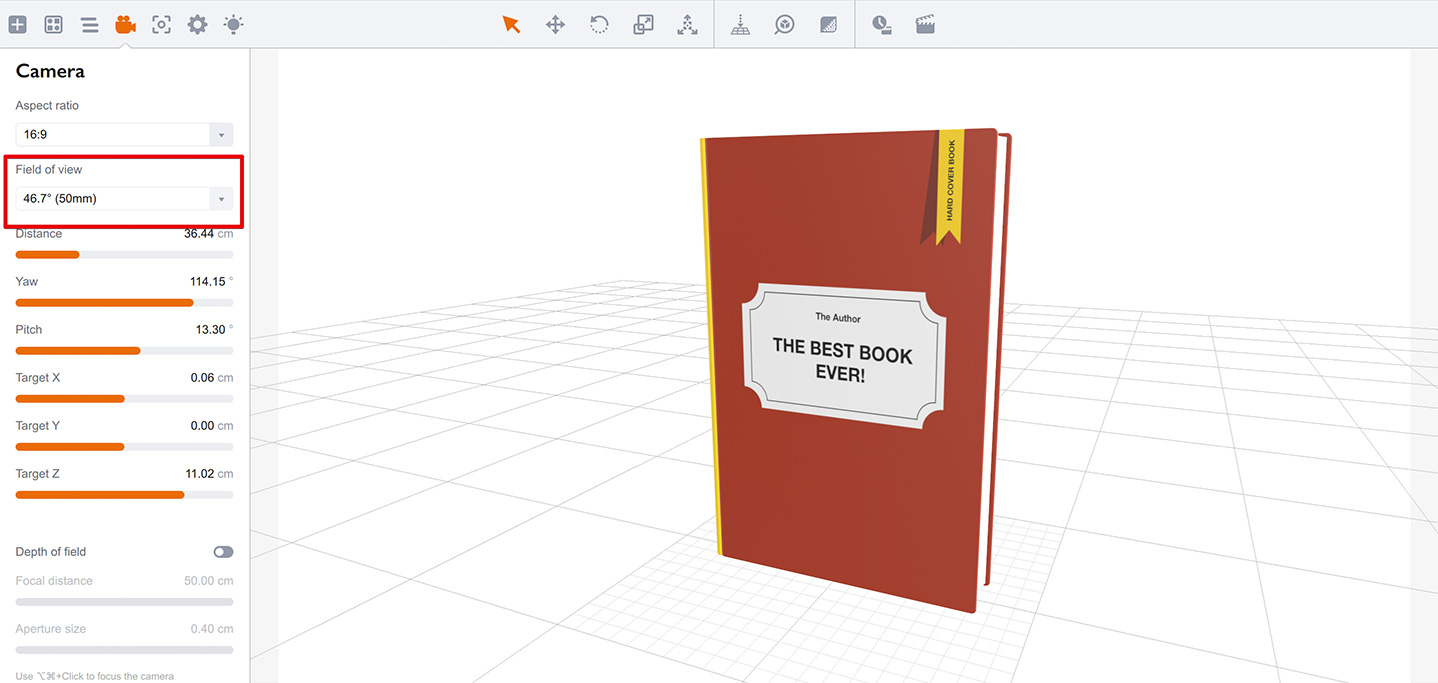
The top image has smaller field of view of about 47°, while the bottom one has wider field of view of about 75°. The difference is obvious: the bottom image “fits” more space and the book looks smaller because of that. Notice that the distance is the same, so the change is not because of the distance.
You can now try to compensate the book size by reducing the distance, but please note that higher FOV values lead to a “perspective” effect, shown below:
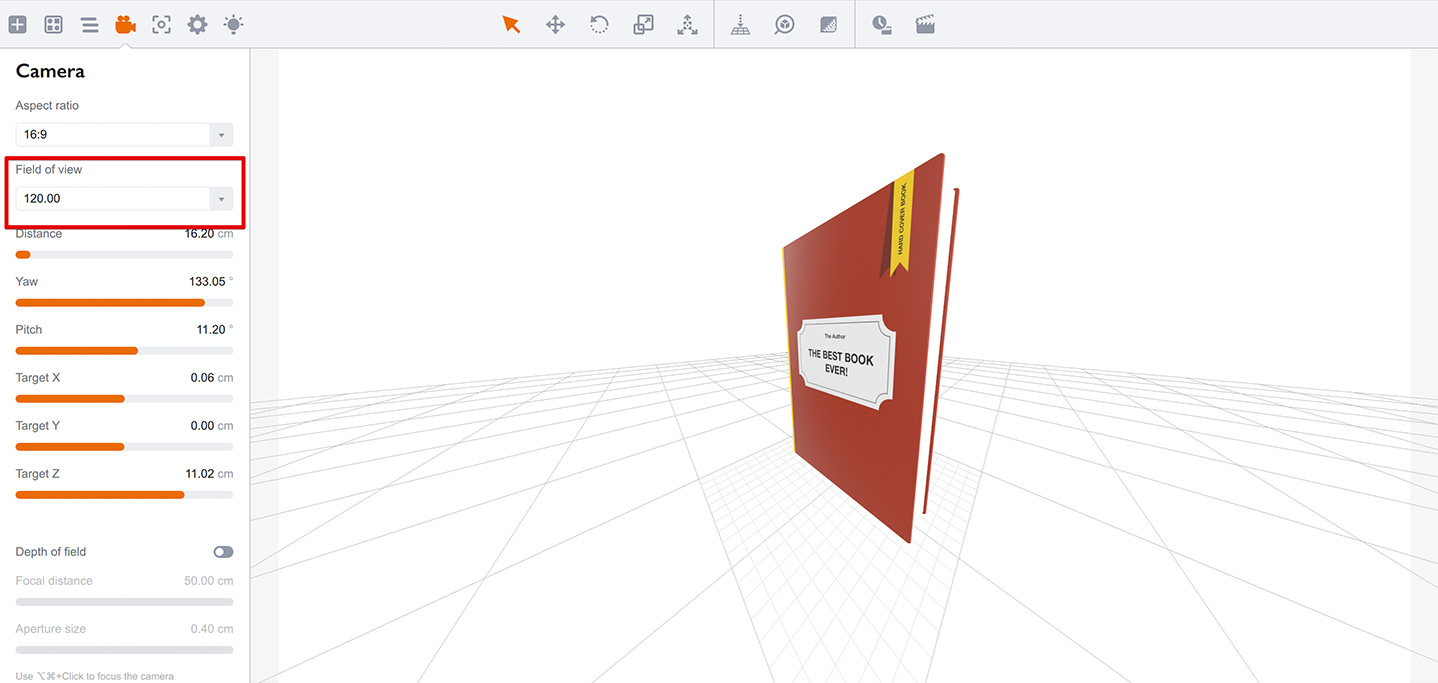
This is a very artificial example, as the FOV is 120° here, but it shows the effect well. The effect is stronger for higher pitch angles of the camera. Unless you want to add dramatic perspective, you can avoid this effect by keeping the FOV around or below 40°.
Smaller FOV values give “flat” images and you usually need to use a larger distance to see the shape well. On a positive note, the vertical sides usually stay parallel in that mode. See an example:
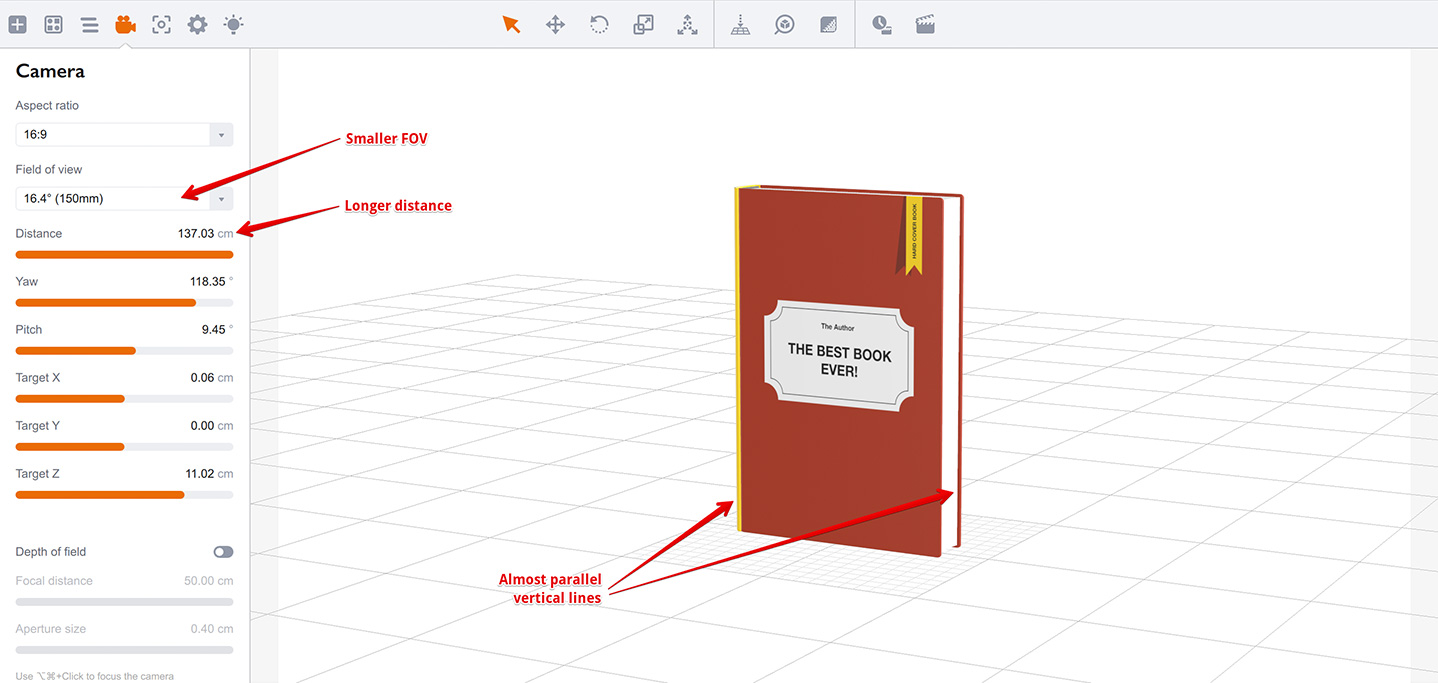
Such small FOV angles are often used for rendering books and boxes, because they keep vertical lines more parallel, exactly as we see them in real life. Really, you never saw such a “perspectived” book as on the previous picture, right?
Conclusion
You have learned how to control the camera in Boxshot. You also learned about scene proportions and field of view. You are almost ready to use Boxshot yourself. There is just one more topic:
- Rendering Scenes — how to render your completed scene.