Texture Slots
When you open the material properties panel in Boxshot, you will not see many texture options by default for the main artwork or any other texture or mask. That’s the most that you get by default:
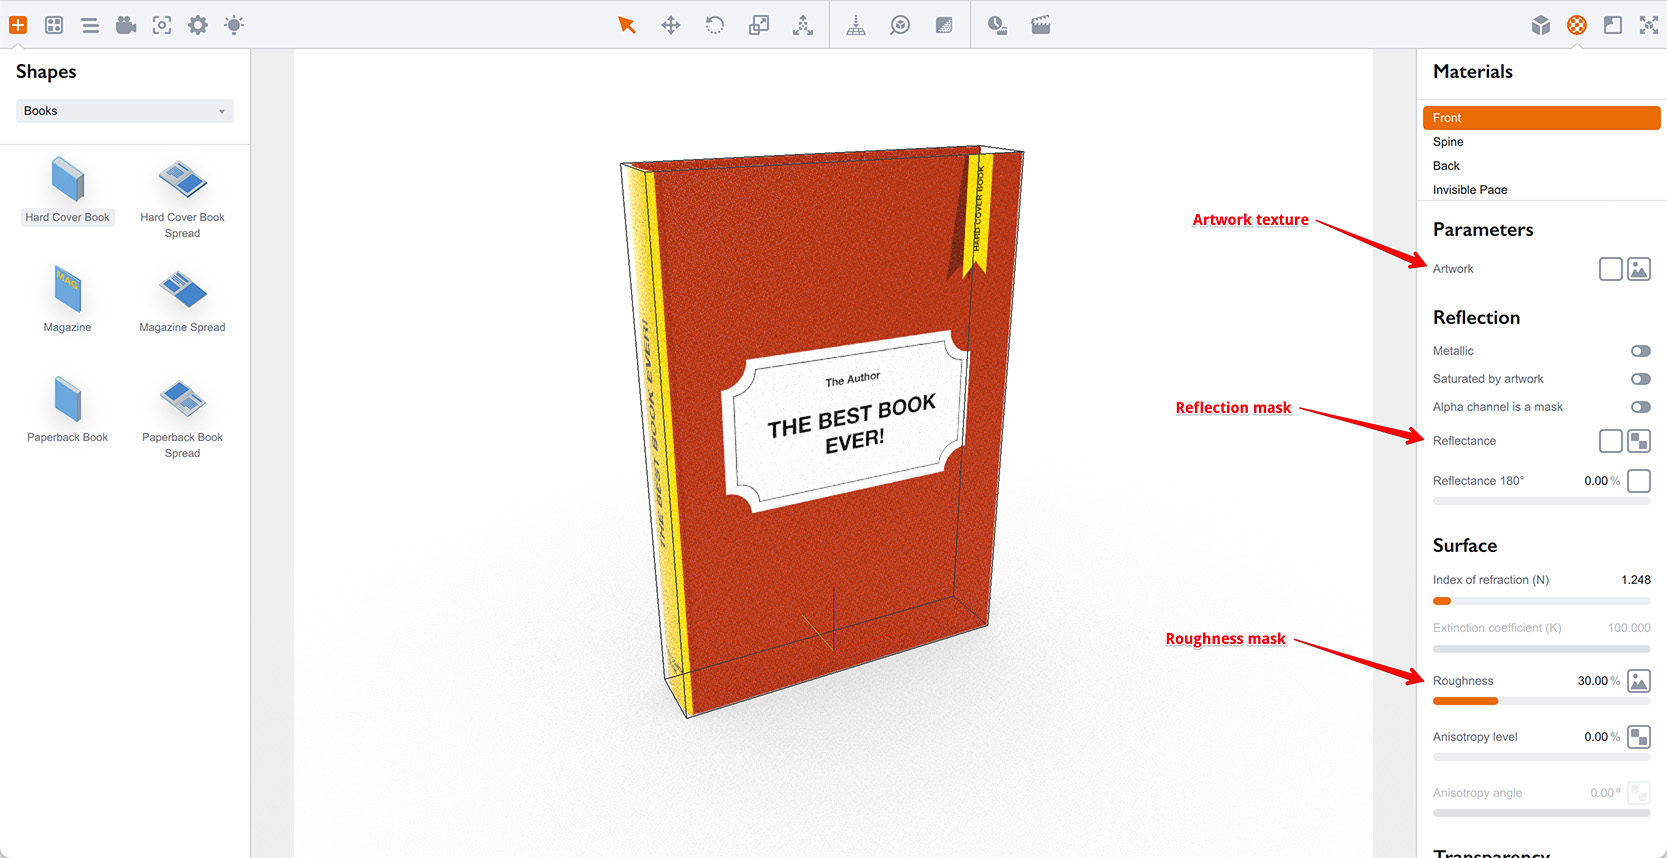
The user interface elements pointed by arrows are texture slots. A texture slot is a combination of the texture itself and its parameters like color tint or level, repeats and offsets, wrapping and rotation, color correction, inversion, cropping and so on.
However, most of the parameters are hidden by default. To see them you need to click the texture slot, here’s what happens:

You get the same number of parameters for most of the material textures and also for environment map and background image in scene settings on the left. This tutorial explains the parameters and provides some information for better understanding of the texture slot concept.
Top Part
The top part of the texture slot is always visible. It consists of a slot name, texture icon and optional color tint and level parameters:
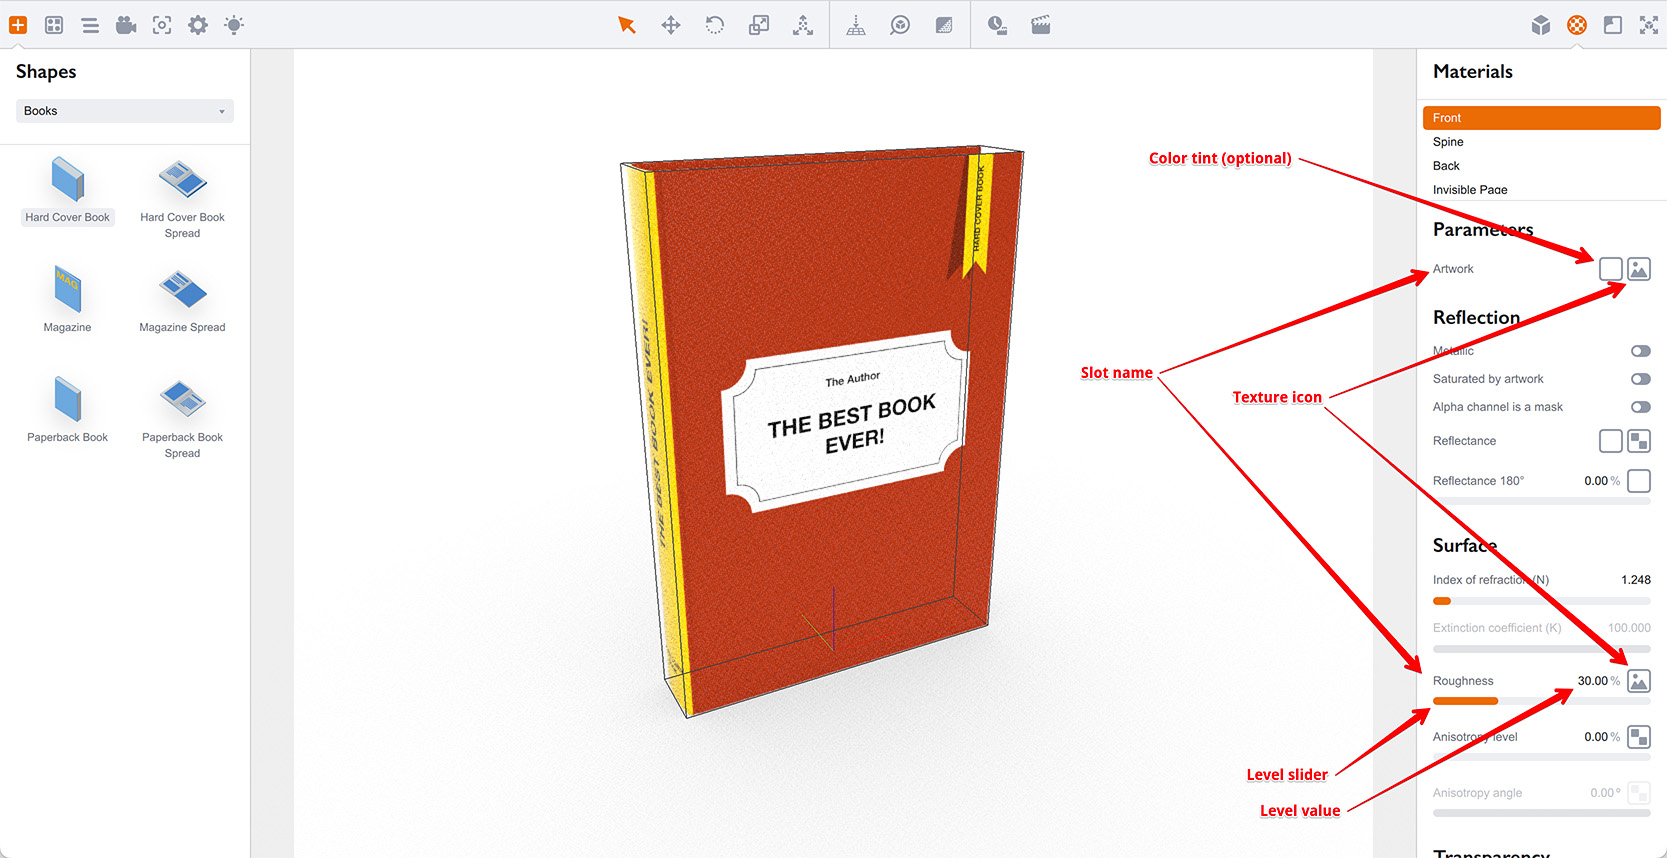
The image above shows these elements for two texture slots: artwork and roughness. The former has a color tint option, the latter has level parameter configurable with a slider or as a number in percents.
You can click the texture slot name or the texture icon to expand the texture slot panel and see its other options, but if all you need is to apply an image or change the color tint or level — you can use the slot as is, in its collapsed state: say you can click the color tint control to adjust the color tint, or drag the level slider to adjust the texture level. You can also drag and drop the image file onto the texture icon to get that image loaded to the slot.
Right–click the texture icon shows the popup menu with some common actions you can do to the slot:
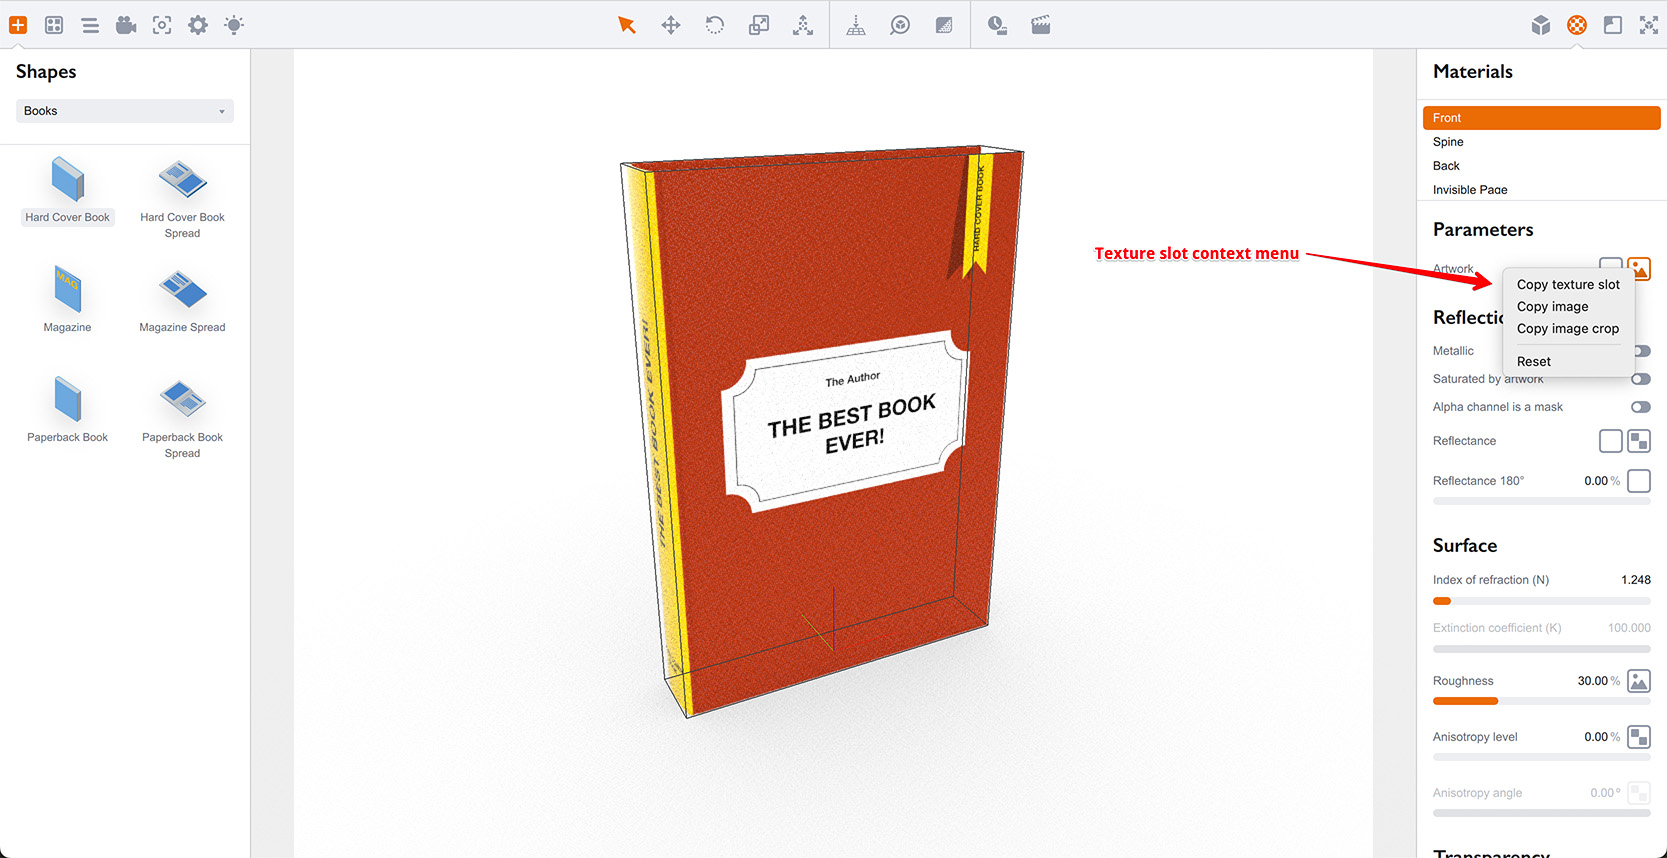
The menu lets you copy and paste texture slots, or just their images or cropping information. You can also reset the texture slot to its default state (no texture, all the parameters by default). Finally, you can drag and drop texture slots onto each other by dragging the texture icon.
Expanded Texture Slot
Now click the texture icon or the texture slot name to expand it and let’s see what is inside:
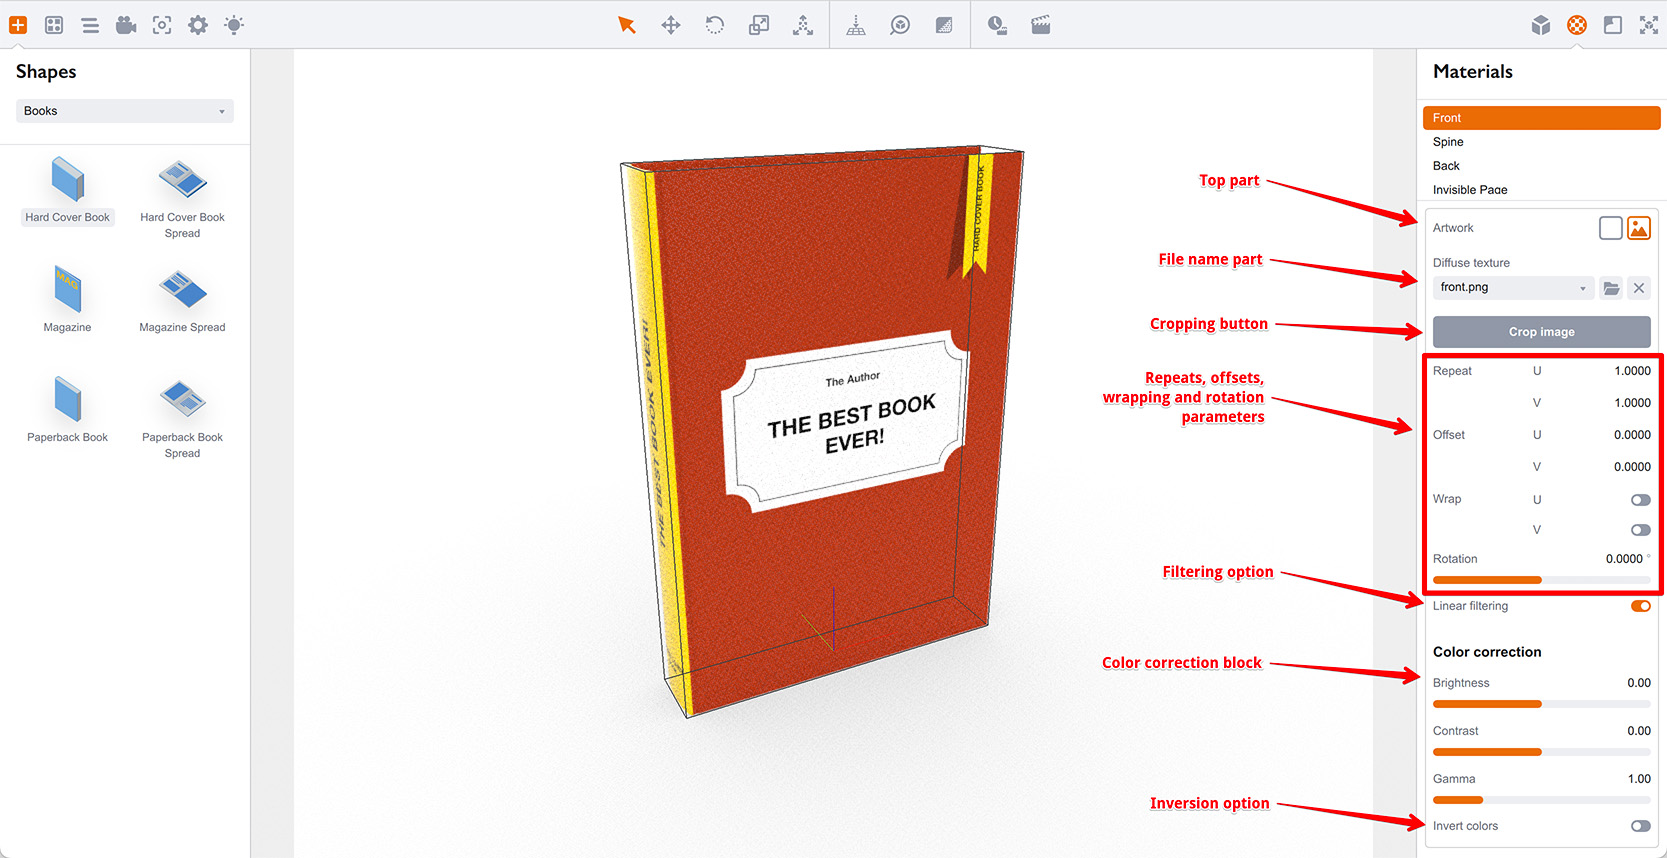
At the top you see the top part, unchanged. It is the same as in the collapsed mode and you can click it again to close the slot.
Below goes the file selector. It has a texture name (“Diffuse texture” on the screenshot above), the drop-down control with the list of already loaded images for quick access, the browse and clear buttons on the right. You can use the browse button to select the file you need, or you can drag and drop it onto the file selector to load the new image to the slot.
Cropping Images
Next goes the “Crop Image” button that lets you select the part of the image to use for the slot. If you click it, you’ll see the cropping editor where you can adjust the visible area of the image:
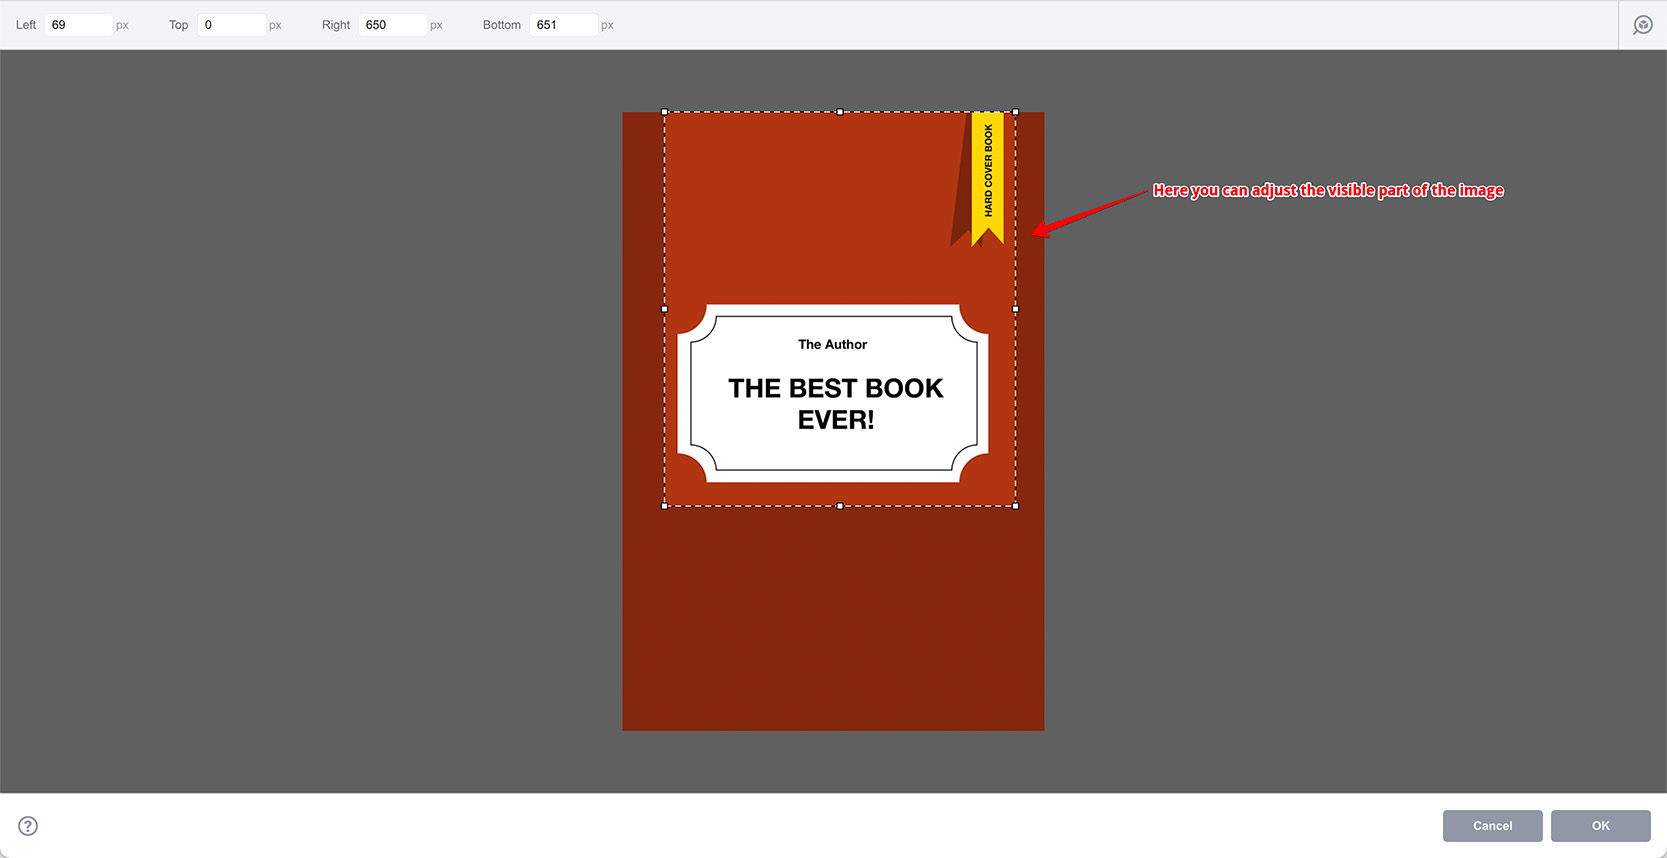
Once you adjusted the frame and clicked OK, Boxshot will update the selected material with the new artwork:
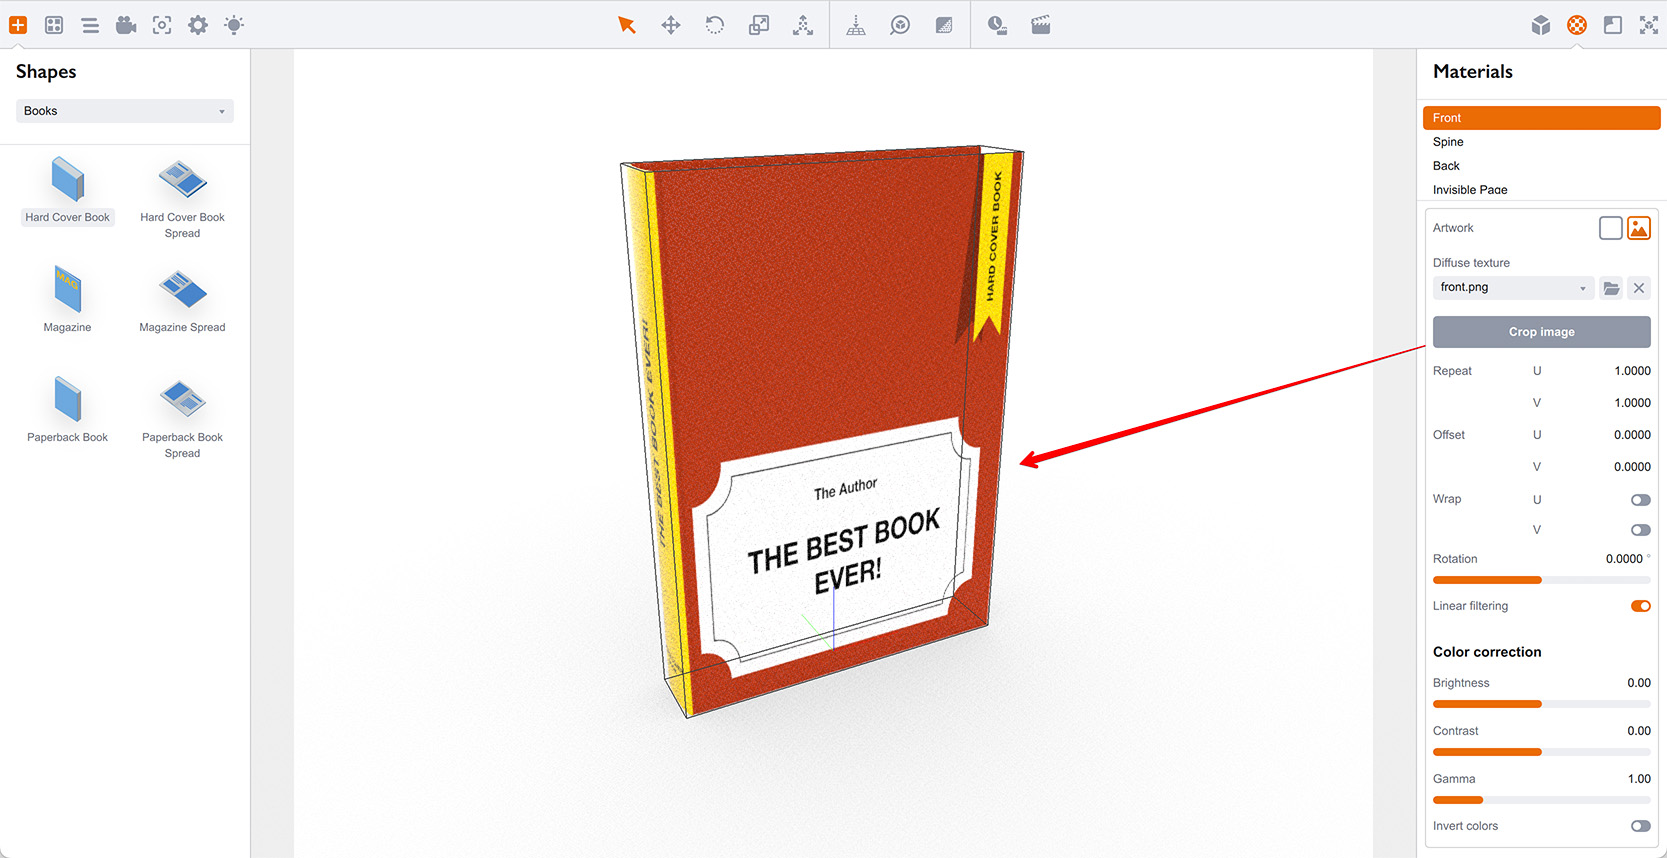
You see, the front cover of the book now displays just the top part of the original image.
UV Mapping Parameters
Then goes the texture mapping adjustment block. It lets you control repeat, offset, wrapping and rotation options of the texture. By default most of Boxshot materials come without repeats, offsets, wrapping and rotation, so the images are used “as is” with the texture mapping provided by the shape. But we can change that here:
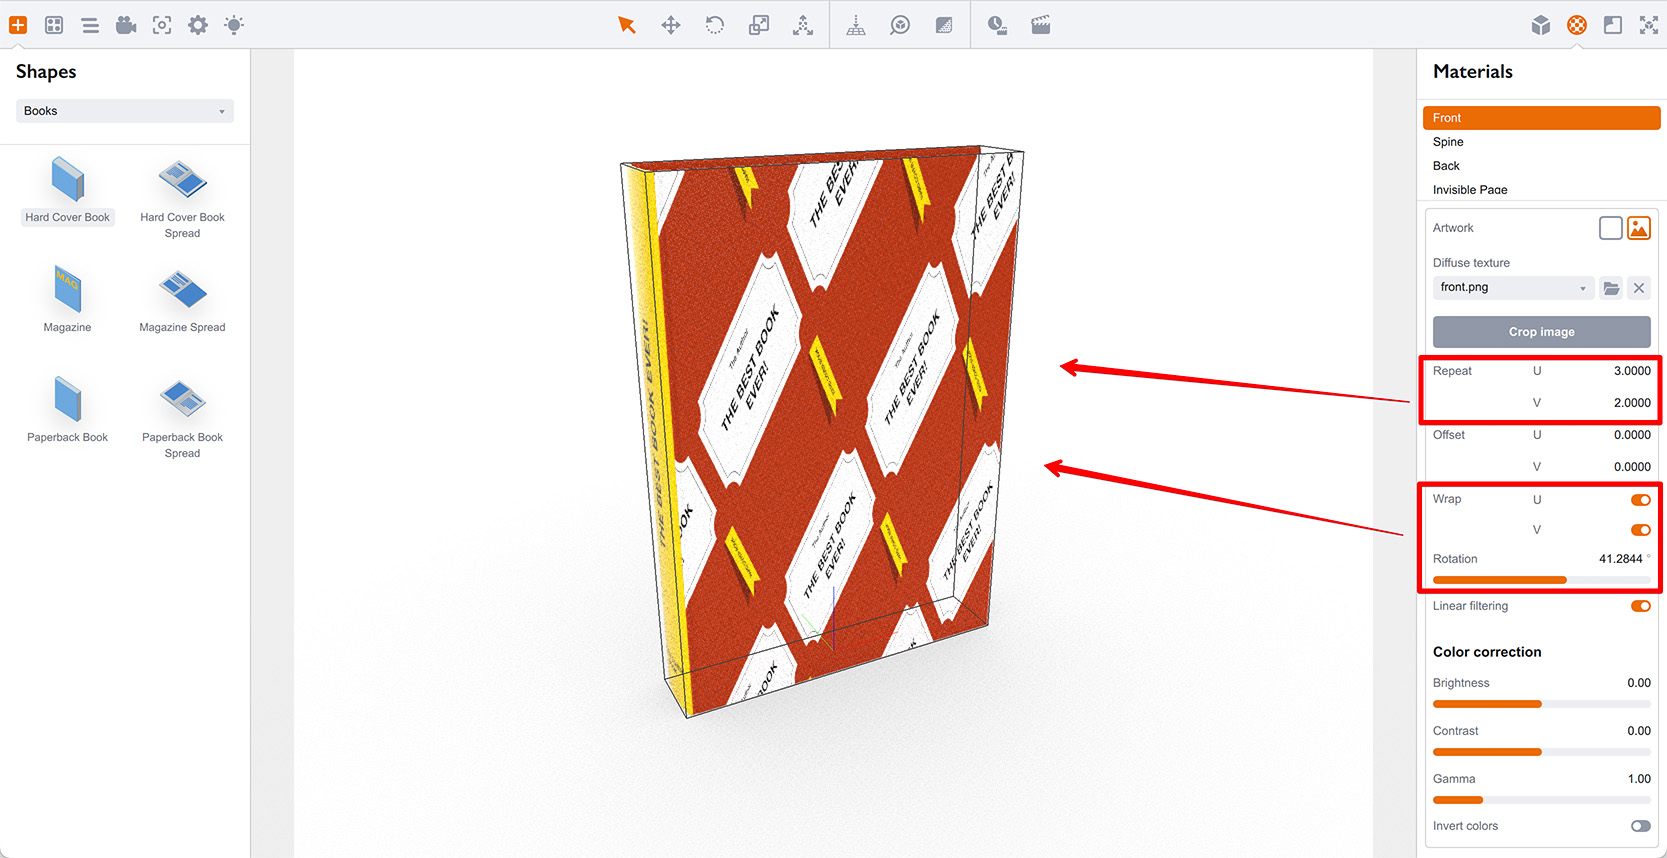
Here the repeats and wrapping along both U and V axes were changed and the texture was rotated as an example.
If you change repeats of offsets parameters and see no effect or the texture “disappears”, make sure that UV wrapping is enabled, as otherwise the new texture might lay outside of the visible part of the mapping, and you basically can’t see it.
Mirroring Artwork
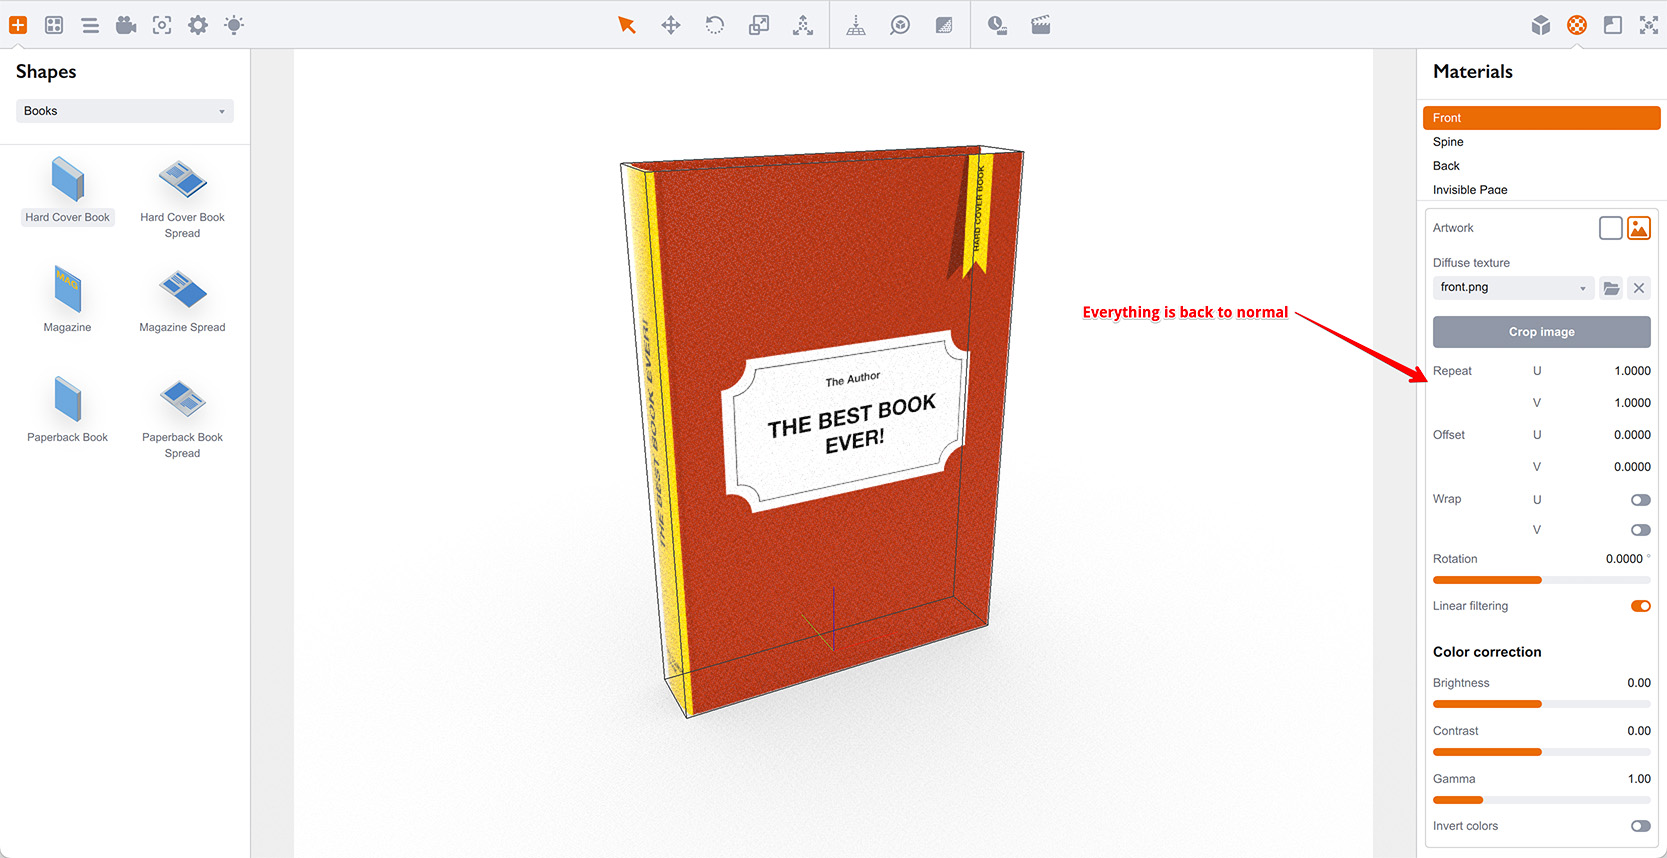
Let’s return the front cover back to normal and try flip the image vertically.
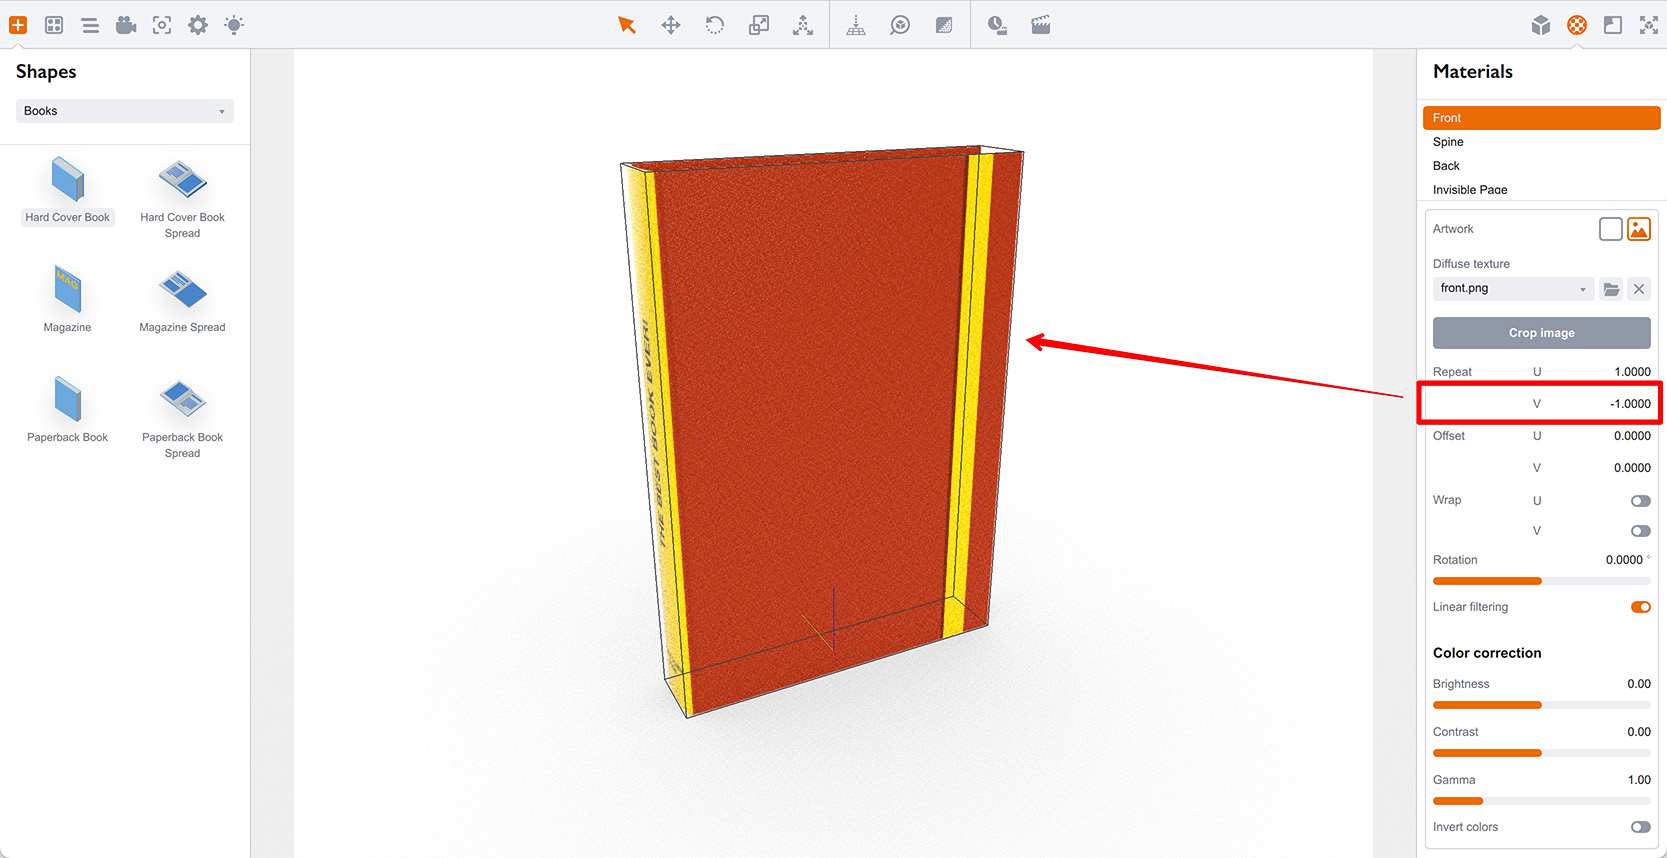
In order to flip the image along an U or V axis, you need to set the corresponding Repeat parameter to a negative value. If you don’t want a multiple copies of the texture, simply set it to “-1”. As we want to flip vertically, we need to adjust the Repeats V parameter:
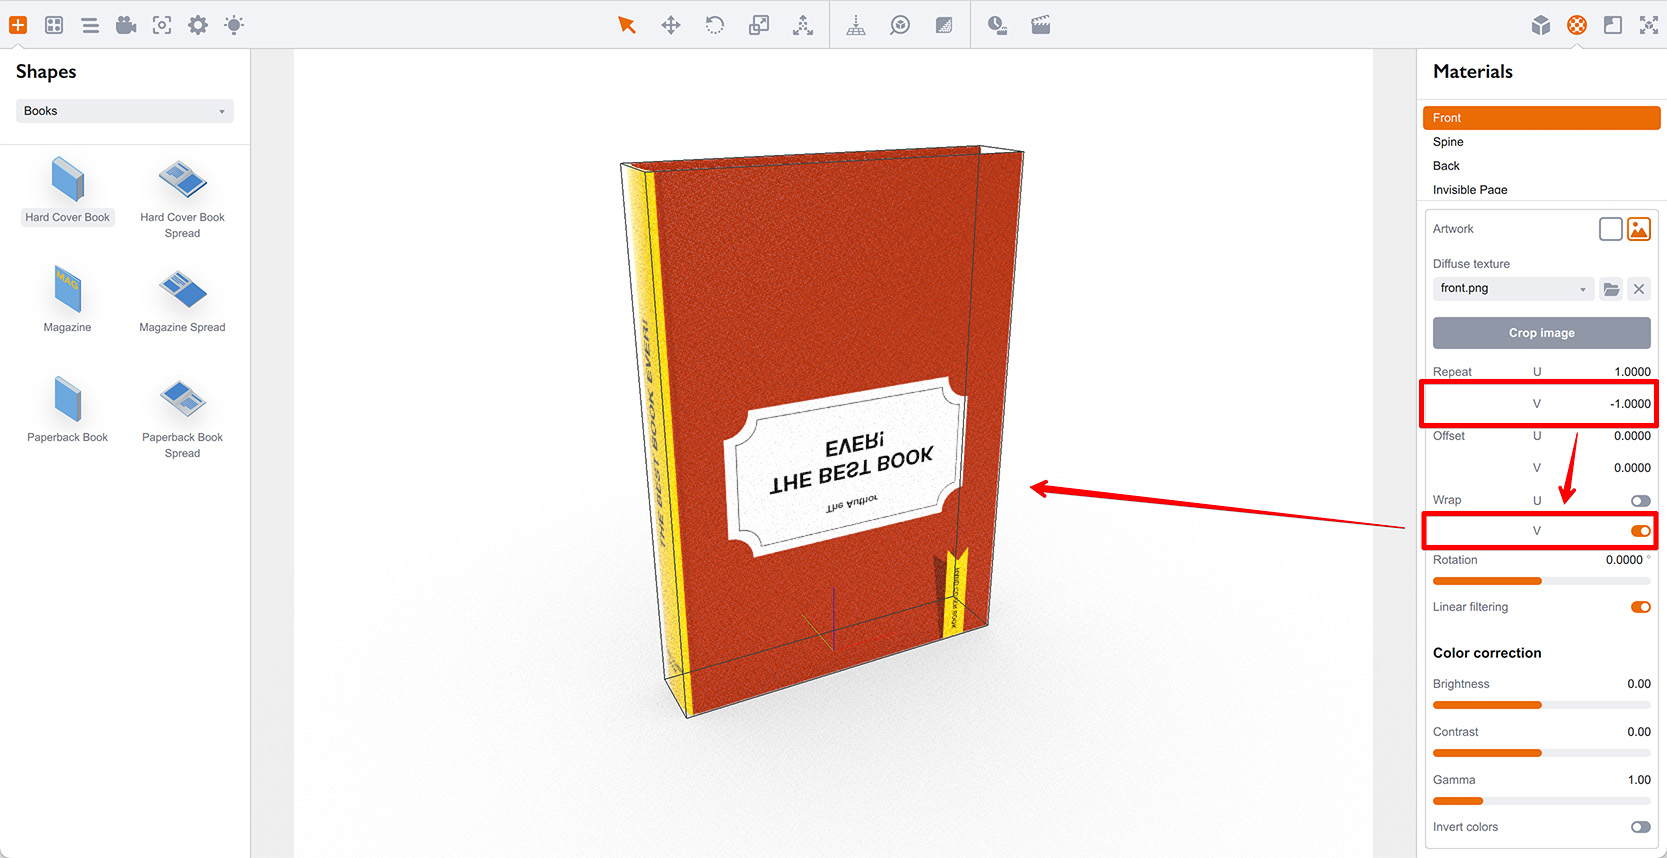
OK, so it doesn’t look flipped so far. The reason is explained above, but let’s repeat: as the wrapping along the V axis is disabled, the image is now outside of the visible texture mapping. There are two things you can do. The first one is to enable the wrapping along the V axis:
Another option is to keep the wrapping disabled (which is good to avoid the color mixup on the wrapped edges) and use the Offset parameter instead to adjust the artwork position along the V axis and make it visible:
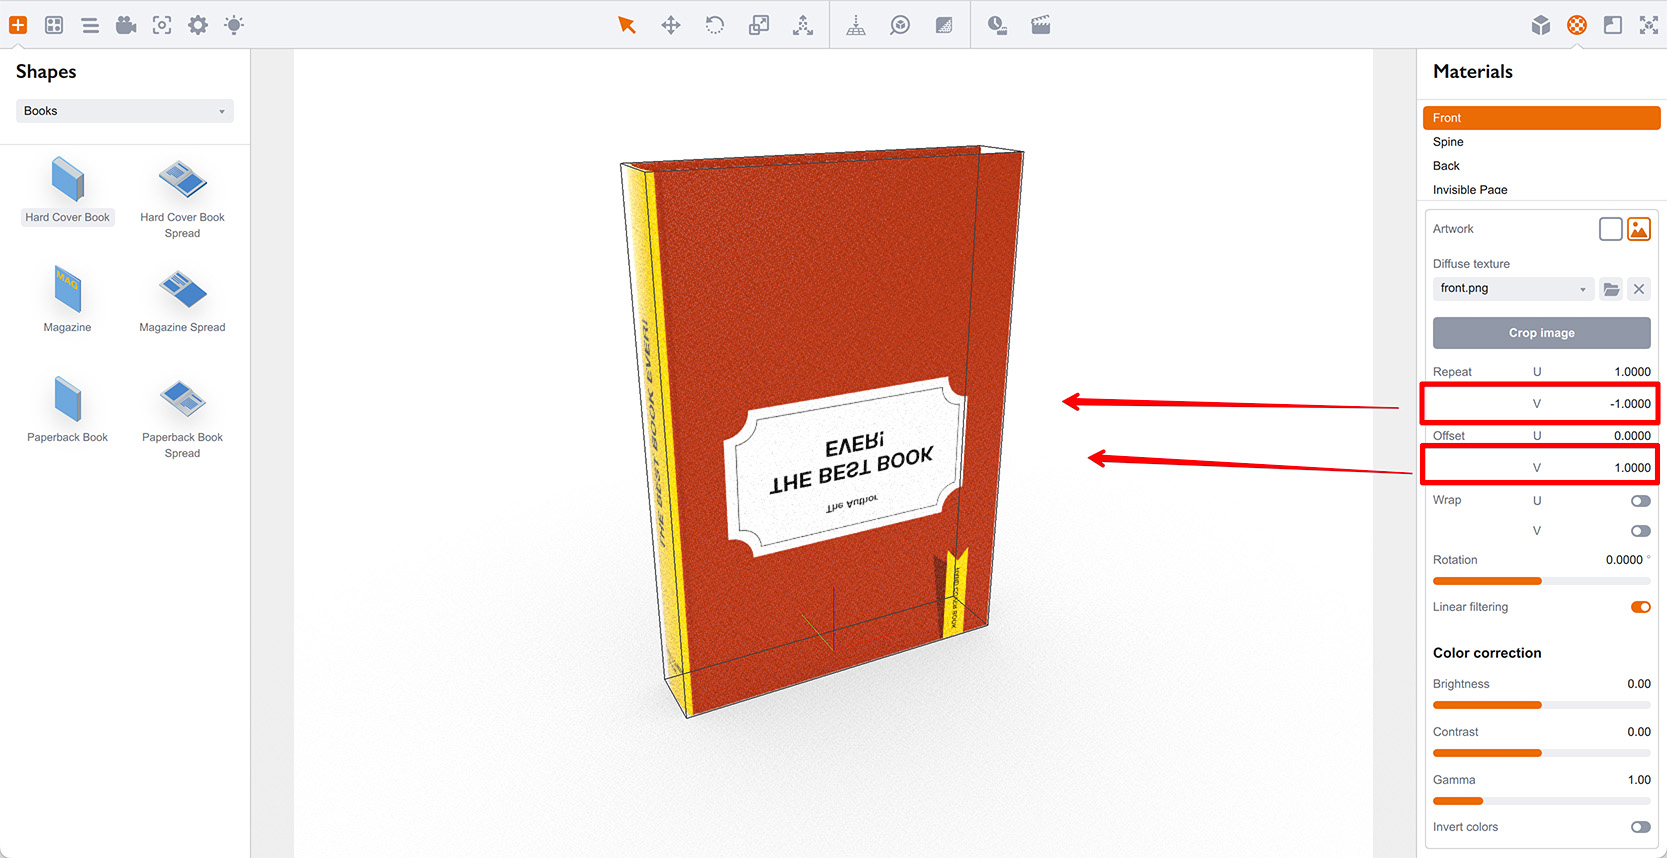
On the image above I disabled the wrapping back and changed Offset V parameter to “1” and the flipped artwork is back. You can try other numbers there between 0 and 1 to see the artwork revealing.
Texture Filtering
The next option of the texture slot is Linear filtering. It might not be obvious if you turn it on and off for normal texture, but it makes sense when using a high–contrast low–res textures like checkers. Here is an example:
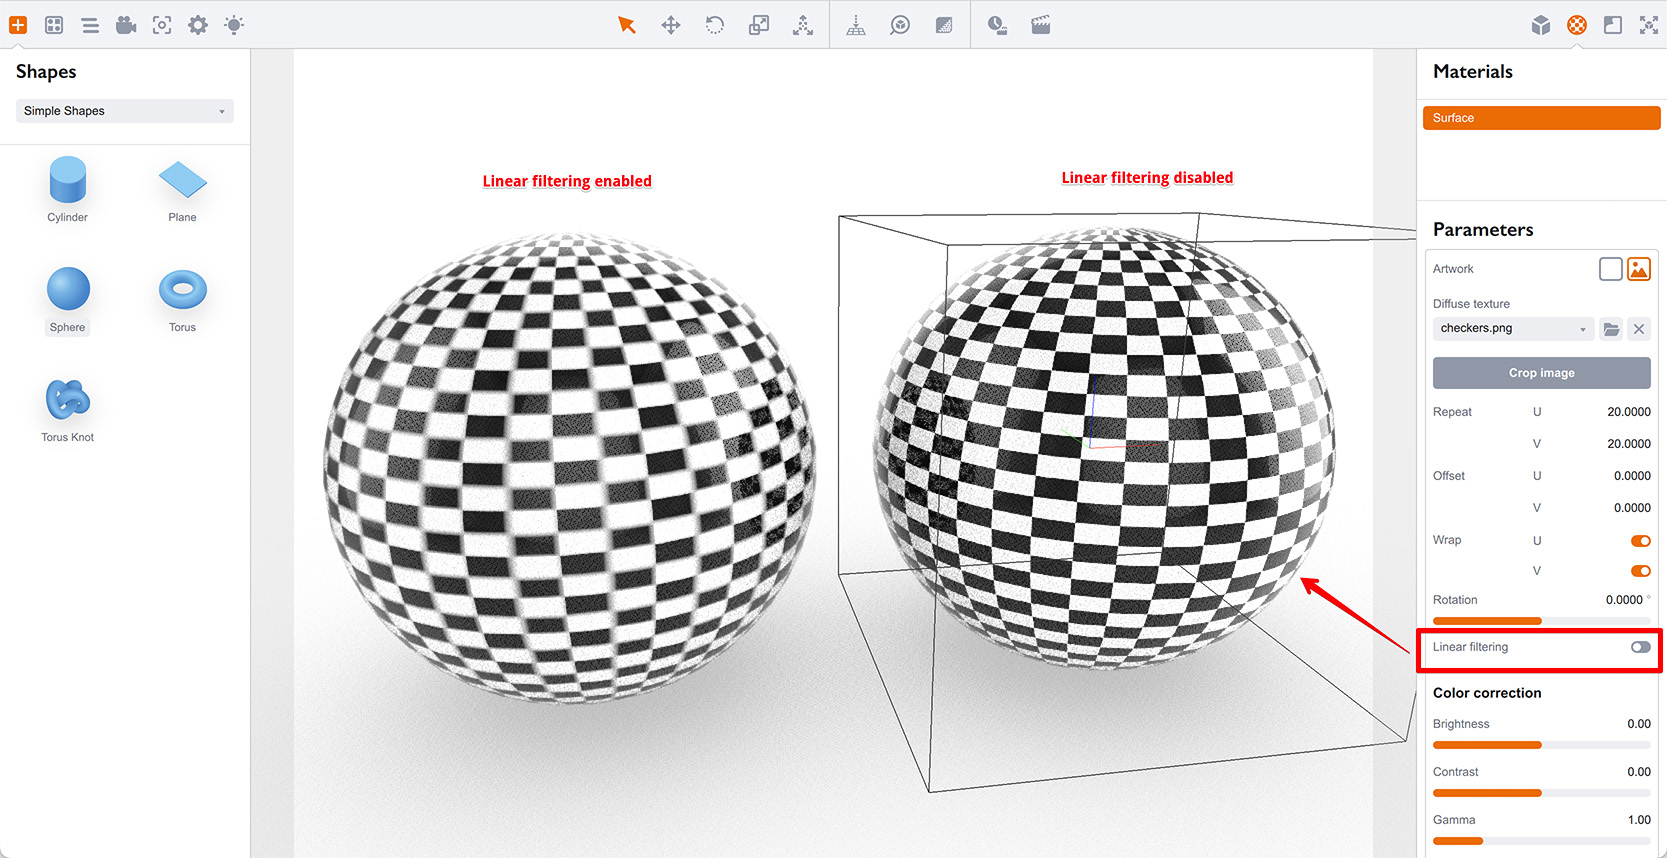
The ball on the left has a low–res checkers texture with the linear filtering option enabled, while the right one has that option disabled for the same texture. The difference is clearly visible on the texture edges: the shape on the left has smooth transitions between black and white parts of the texture, while the right shape has the sharp ones.
Linear filtering tells Boxshot to interpolate artwork textures and masks when rendering which gives you smooth transitions between pixels. When the filtering is disabled, Boxshot uses the “Nearest neighbor” algorithm to pick the artwork pixel, which gives sharp edges. The latter is good for masks or if the accent is made on the sharp edges in the artwork.
Obviously, the effect most visible on low–resolution textures, where the artwork pixels are big enough on the screen. High resolution artwork (unless properly mapped) will most likely have very small screen area covered by each pixel and interpolation mode will not be that visible.
Color Correction
Finally, the last block of parameters in the texture slot is about color correction. Here you can adjust the brightness and contras of the image and adjust its gamma level. It works pretty much the same as in any graphics or photo editor you use.
The Invert colors option at the bottom is useful for level masks, when you need to make black white and vice versa.
Texture Slot in Scene Properties
Besides materials, Boxshot uses texture slots for environment map and scene background. You can find them in the scene and lighting properties panels on the left. They work pretty much the same way with some exceptions.
Scene background texture slot does not let you adjust texture cropping and UV mapping parameters like repeats, offsets and wrapping as Boxshot does not support that for scene background.
Environment texture slot also does not support texture cropping and UV mapping options, and also doesn’t support texture filtering, as Boxshot always use linear filtering for environment maps.
However, you can still adjust color correction for these textures, if needed.
That’s All!
That’s pretty much it. Once the texture slot is configured, you can click outside of it or to its top part to collapse it back and return to material editing.
More Tutorials
Rendering
- Realistic Rendering — improving scenes visual appearance;
- Lighting — control environment and directional lighting;
- Saturated Reflection — make "rich" colorful reflections;
- Floor Reflection — reflecting scene objects in the floor;
- Job Manager — rendering jobs later;
- GPU Rendering — rendering scenes faster on GPU;
- Rendering Time and Quality — getting more control on rendering;
- Simple and Realistic Lighting — speeding up scene rendering.
Materials
- Texture Slots — how to use texture slots in Boxshot;
- Glass Materials — how to make semi–transparent objects look attractive;
- UV–Spot — how to make a UV–spot effect easily;
- Foil Effect — how to add foil–finishing to your shapes;
- Bump — adding relief to your materials;
- Copying Materials — how to copy materials to other shapes;
- Custom Materials — extend the materials library with your own ones;
- Semi–Transparent Labels — making semi–transparent and partial labels;
- Boxshot Materials — more details about Boxshot materials.
Features
- Boolean Operations — combining and subtracting shapes, making holes;
- Decals — applying decals and configuring them;
- Bump Decals — applying bump where it is needed;
- Depth Of Field — adding more realism to your renderings;
- Tools — read more about Boxshot tools;
- Managing Images — how to manage image files used by Boxshot projects;
- Shapes Instances — creating lightweight copies of other shapes;
- Model Editor — edit embedded models in many ways;
- Shrink Wrap — heat–shrink film simulation for objects wrapping;
- Physics Simulation — applying gravity to your scene;
- Palletize — arrange scene objects for the pallet;
- Snapshots — save scene state to re–use it later;
- Translation — teach Boxshot to speak your language;
- Vector Artwork — how to maintain the quality of vector artwork.
Shapes
- Lathe Objects — making symmetrical objects using revolving curves;
- Loft Objects — making custom objects with 2D cross–sections;
- 3D Text — making 3D text objects in Boxshot;
- Extruded Objects — how to make thick 3D object of your flat 2D curve;
- Conical Labels — making conical labels with distorted artwork;
- Dieline Box — a very realistic dieline–based box;
- Custom Shapes — adding custom shapes to the left panel;
- Solid Shapes — create boolean-friendly shapes;
- Script-Based Solids — create complex solid shapes with code;
- Third Party Shapes — importing third party shapes to Boxshot.