Adding Realism to Rendered Scenes
What if your scene doesn’t look realistic enough? Or what if it doesn’t match the reference image completely? What can be done to improve the scene appearance? This tutorial shows some tricks that may improve your scene look easily.
A Bit Of Theory
There are two things that affect result in Boxshot: materials and environment. Materials are quite obvious — they have colors, textures and various parameters including the reflection ones. Even if material is diffuse (matte) it still reflects, but reflection is so blurry, you can’t really see anything but the overall color of the environment.
Let’s put a simple matte bottle into an empty scene:
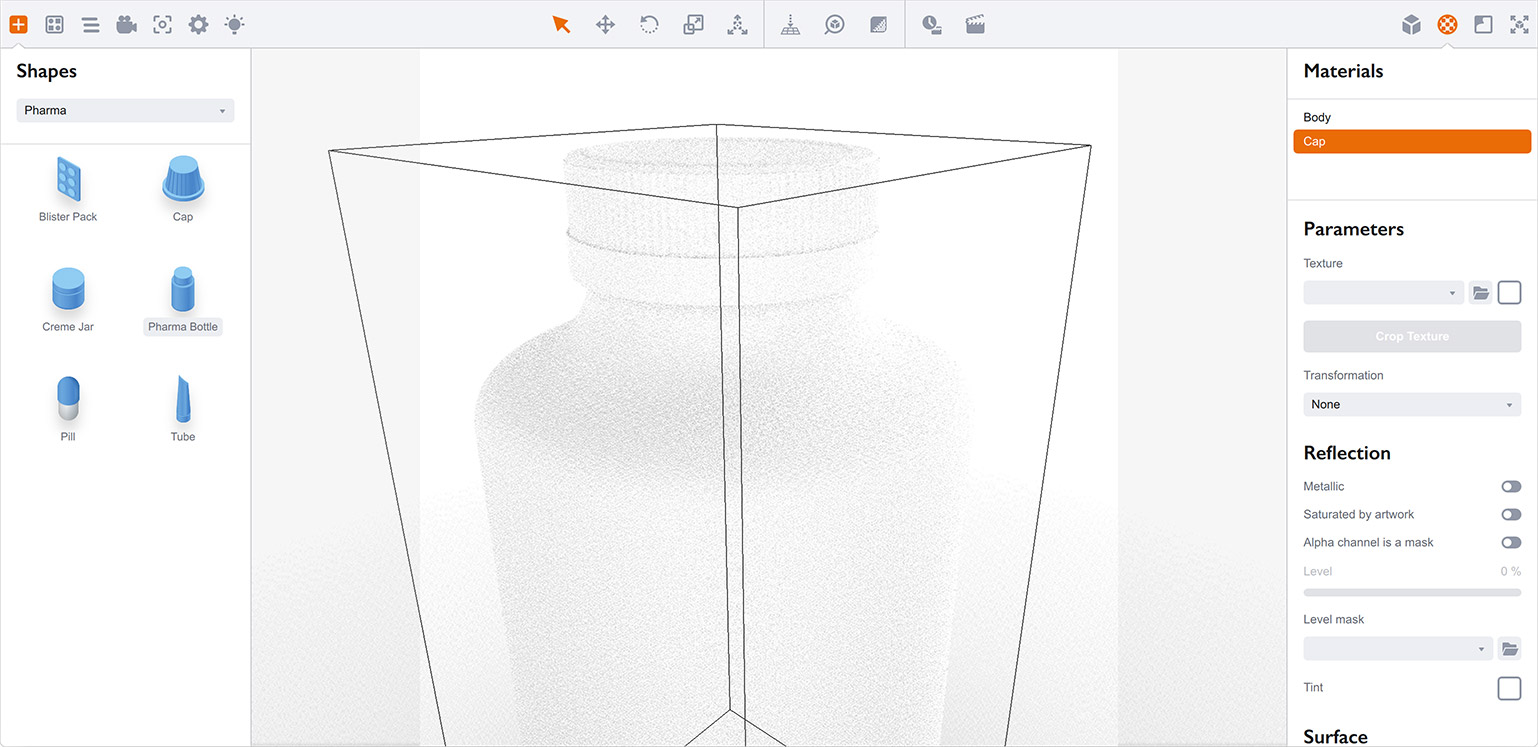
You see that some areas are white and some are gray, why that? Because of the default environment map used by Boxshot. You can see it by switching the background mode to “Environment”:
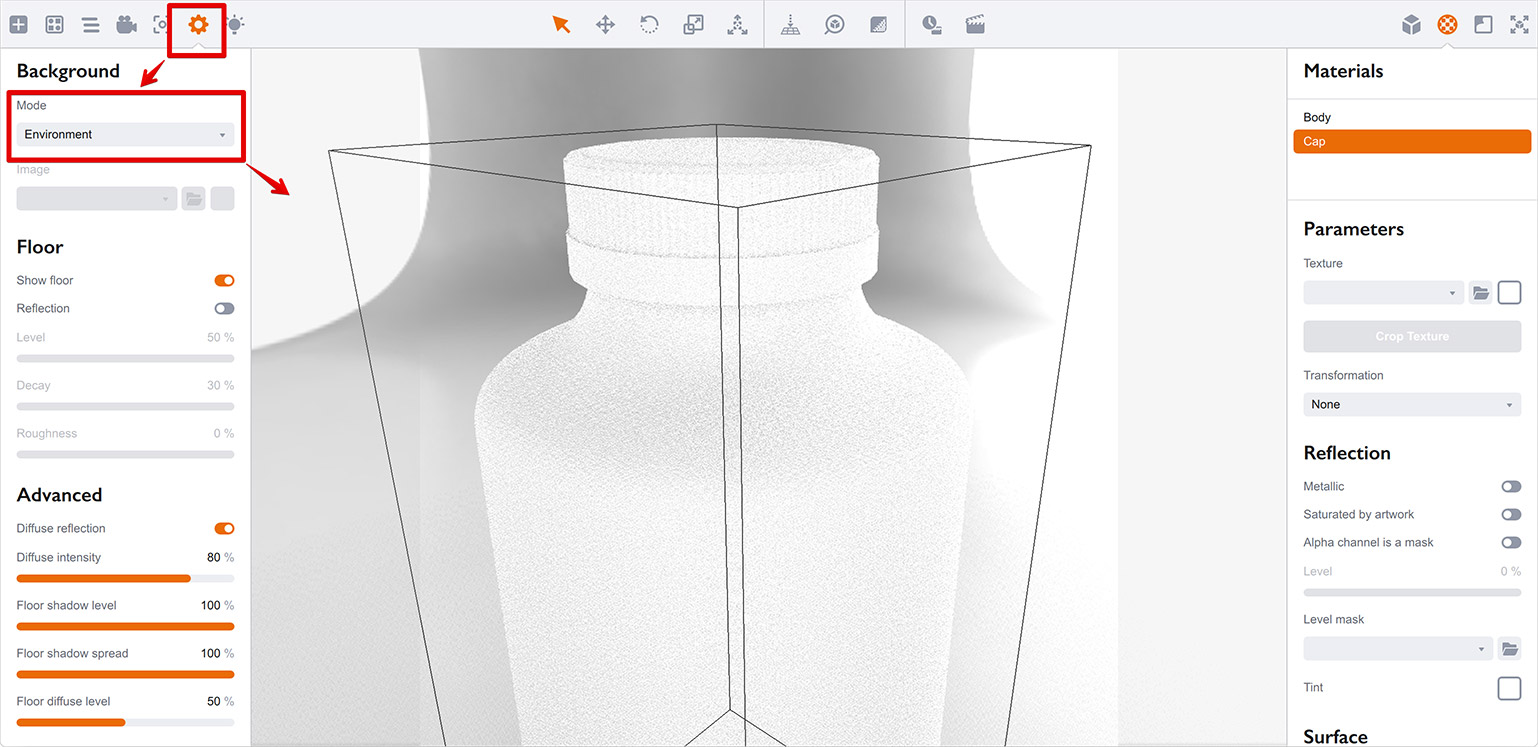
Now you can see what lights up the scene, so we are ready to start.
Materials
In this tutorial we’ll focus on opaque plastic materials, leaving metals and translucent materials aside. We will adjust the properties of the bottle cap to make it look better and the first thing we’re going to do is to change its diffuse color for better visibility. You don’t have to do that and if your cap is white, you are free to leave it as is for now. For this tutorial we’ll make it orange:
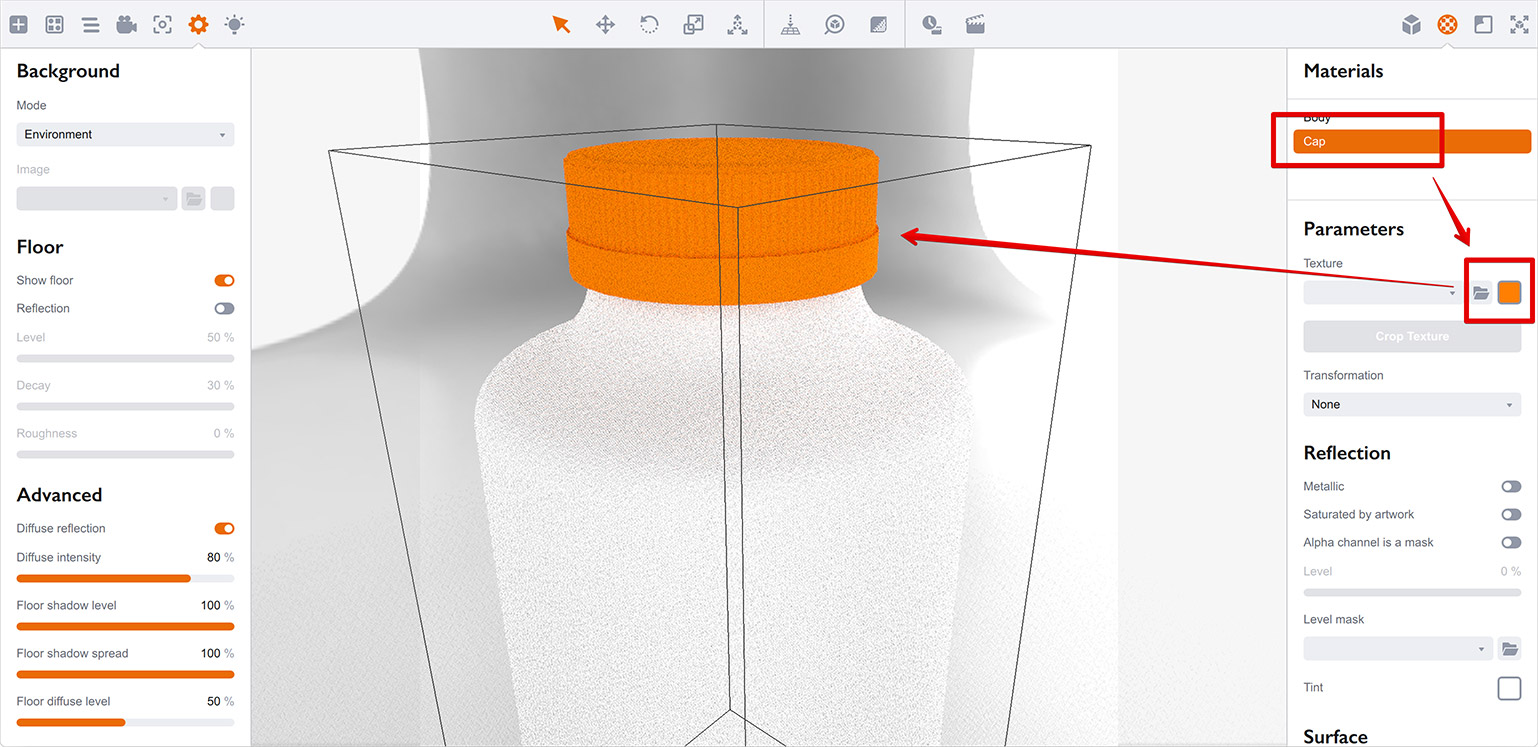
That’s better, we can see where the cap is and where the background is, but the cap itself still looks “flat”. That’s because the lack of reflection.
In real life plastics reflect. Even the matte ones. The reflection depends on the physical property of the plastic called “index of refraction” or simply “IOR”. Most of plastics have it about 1.5. Let’s set that:
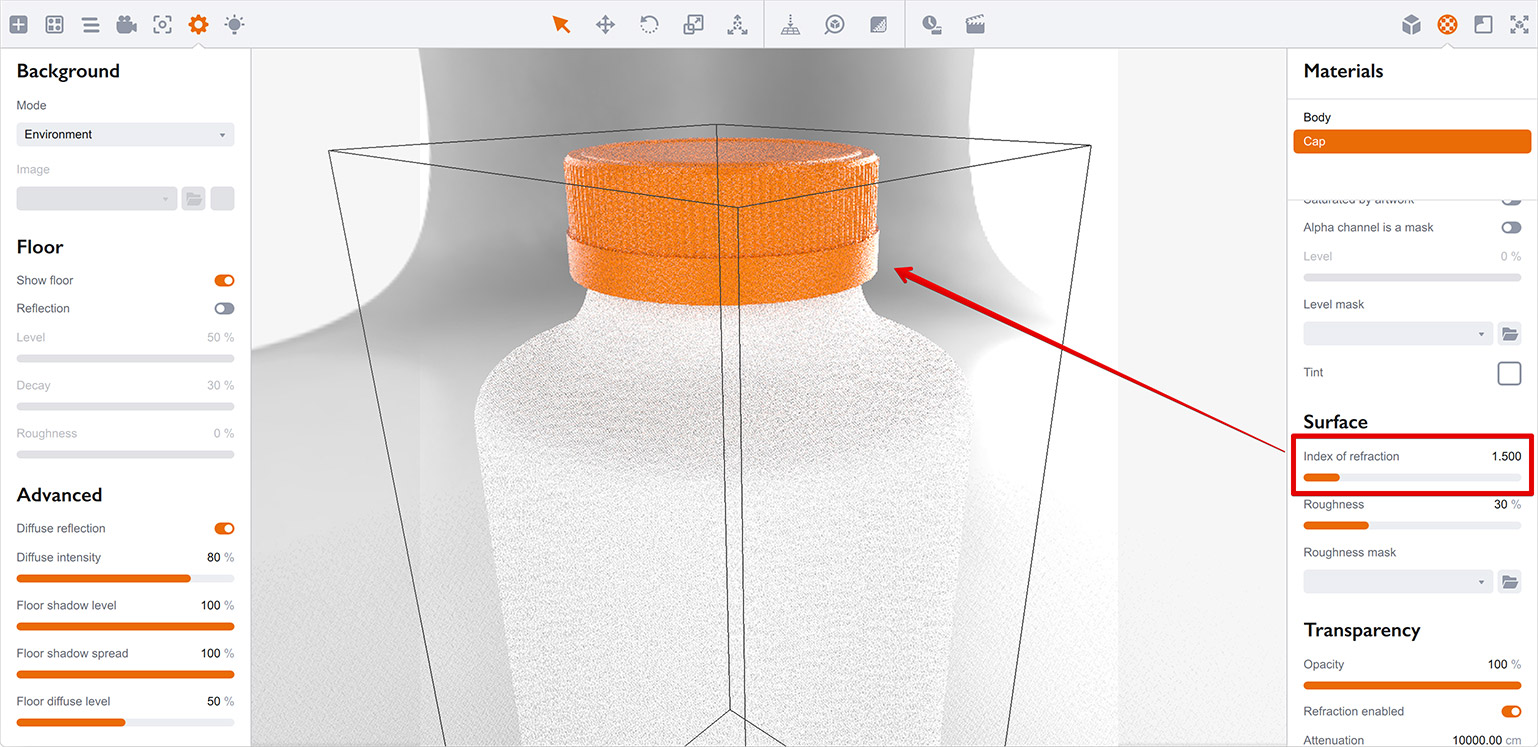
Great, we’ve got reflections or (in our case) highlights. The reason is that the plastic here is rough and provides blurred reflection. We can change that by using the Roughness parameter:
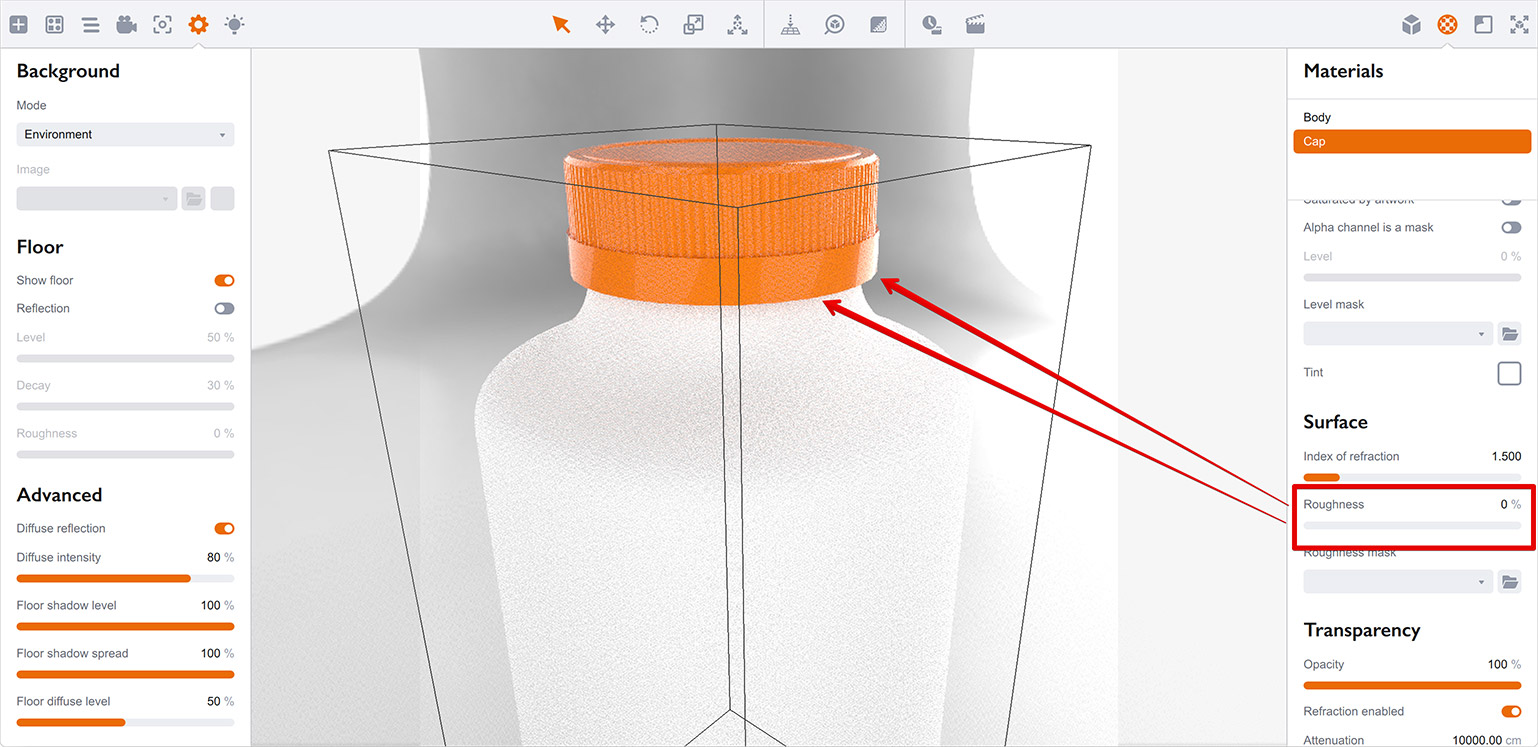
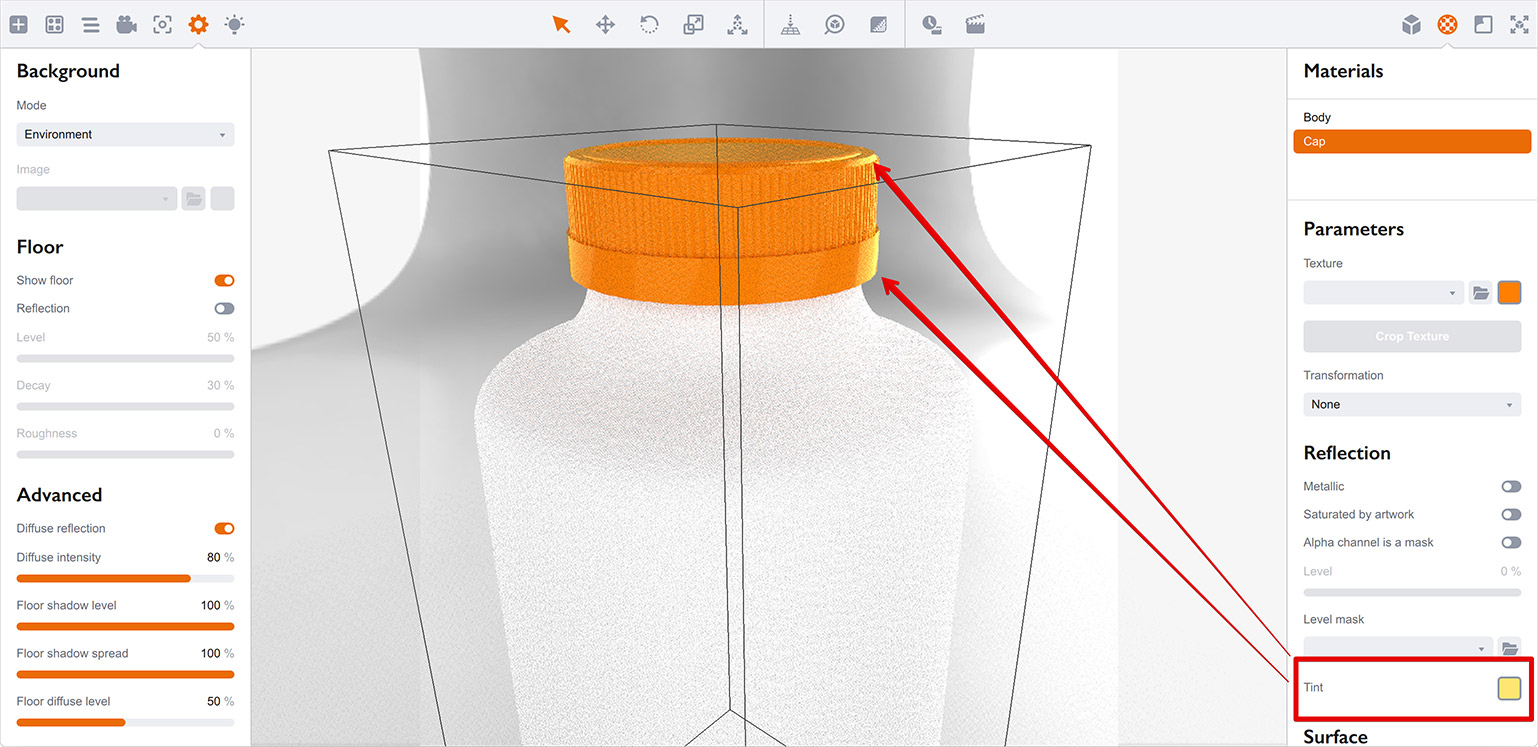
Now we can clearly see the environment reflected in the cap. Great, what you can also do is to tint these reflections up to make them not so white. This goes against the physics (as plastics have white reflection) and adds a metallic look, so use with caution:
That’s basically all you need to know about opaque plastic materials to make them look realistic. But that is just a half of the story, as we still have…
Environment
As we mentioned above, the scene is surrounded by environment. As in real life, there is always something around any object. If you take photos in a studio, there will be background, lights and so on. If you are outside, there will be grass and sky, maybe the sun or clouds. Environment does a very important job: it provides the light to the scene. Without that light the scene would be dark and we get just a black screen rendered. Not good.
So how do we simulate environment in rendering software? We can add some objects and lights here or there, but that is way too long and complicated. Instead, we use environment images (or maps, or textures) that have all that information baked–in. Boxshot comes with some built–in environment maps that you can find in the Assets panel. Lets drop one into the scene:

This changes the scene completely! Note that neither the camera, nor shape or material have been changed — we simply loaded a different environment image and the materials picked it up.
By this time you have probably realized that environment image is the key to a realistic scene appearance. It provides both lighting and reflection information to the renderer and if you want a realistic rendering, you will most likely spend some time configuring the environment.
Note that you are not limited by the environment maps in the Assets panel. You can use virtually any image as environment, but for good results the images need to be in hight–definition range (HDR), so they provide enough light to the scene. Here I used a completely different HDR image for the same scene (no other changes made):
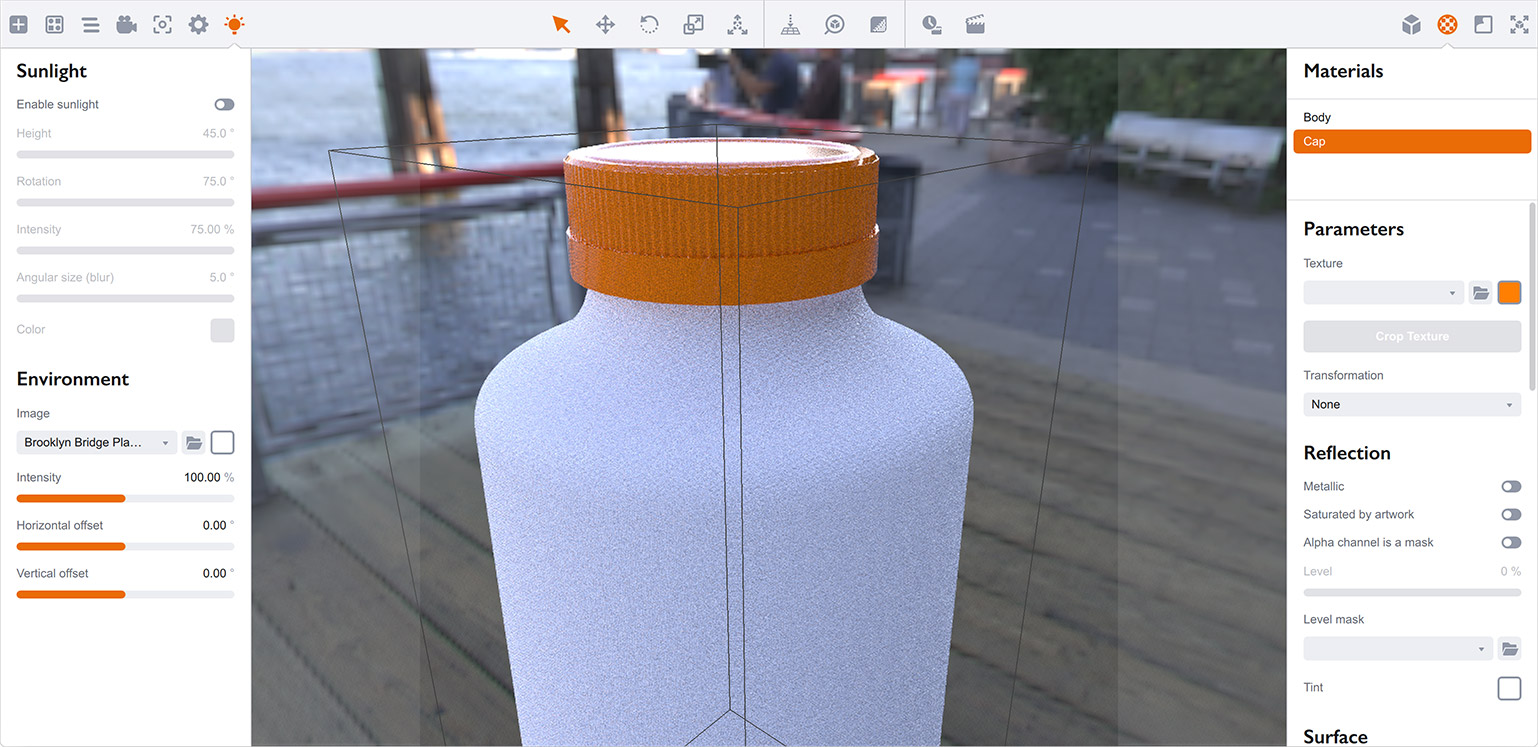
Again, you can see our white bottle picks up blue tints of the environment. There are plenty of HDR environment maps in various photo stocks, so try to find something that makes the look you need. You can also edit those images in Photoshop to add some highlights or shadows to the scene where needed. Just make sure you save to HDR–supporting formats (EXR is the best) and use bright colors (with intensity 2 or more) so the environment map emits enough light to the scene.
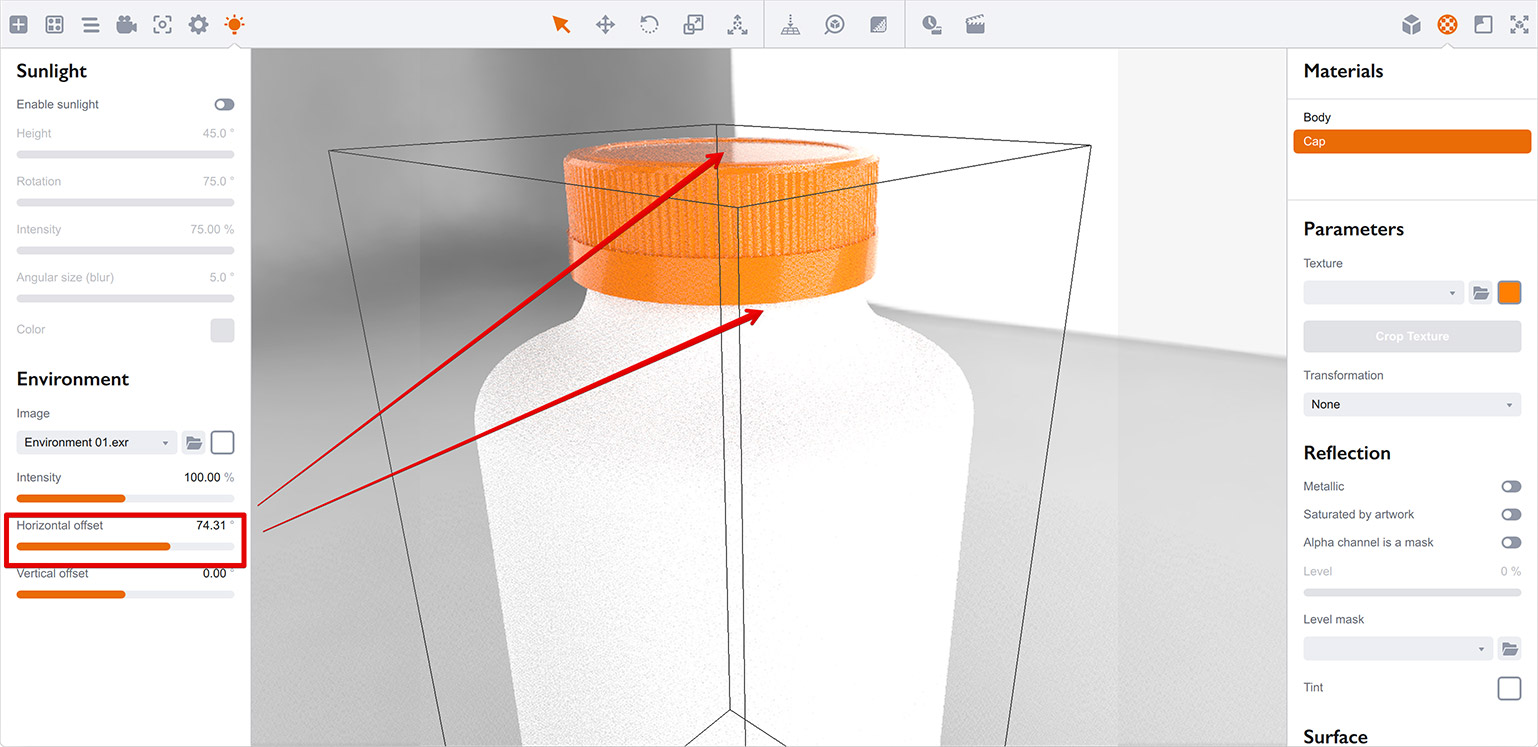
Finally, you can fine–tune the scene by moving highlights or reflections along the shape. To do so, adjust the horizontal rotation of the environment map. For instance, here is the original scene:
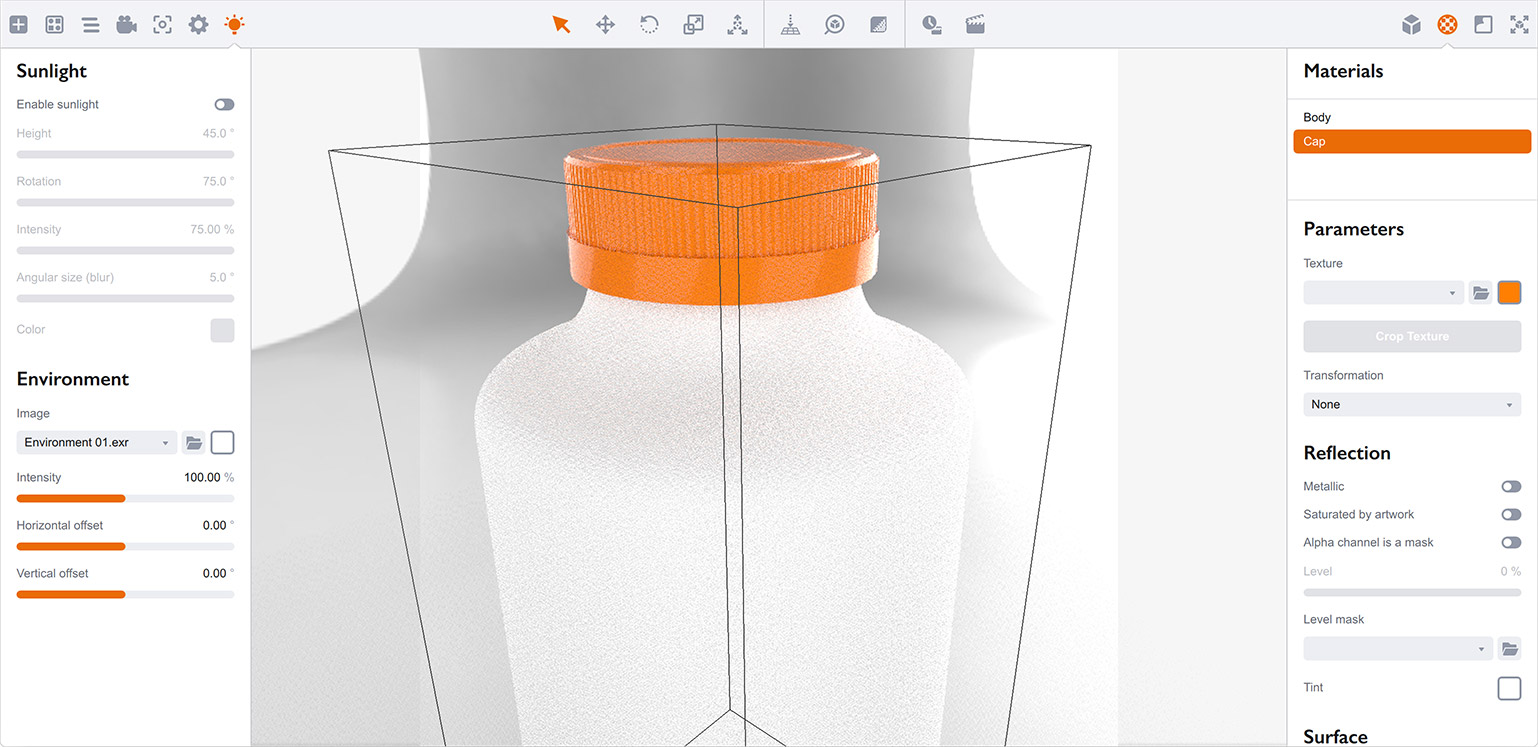
And here is the same scene with environment map rotated a bit:
As you may see, reflections and highlights have moved along the shape with the environment image in background. Rotate the environment image to place the highlights where they look better. If a highlight is missed somewhere, you can always add it to the environment map in Photoshop.
Too Much Light?
Sometimes a scene may look way too bright even if the only light source is the environment map. There are two things you can do about this:
- to adjust the material;
- to adjust the environment.
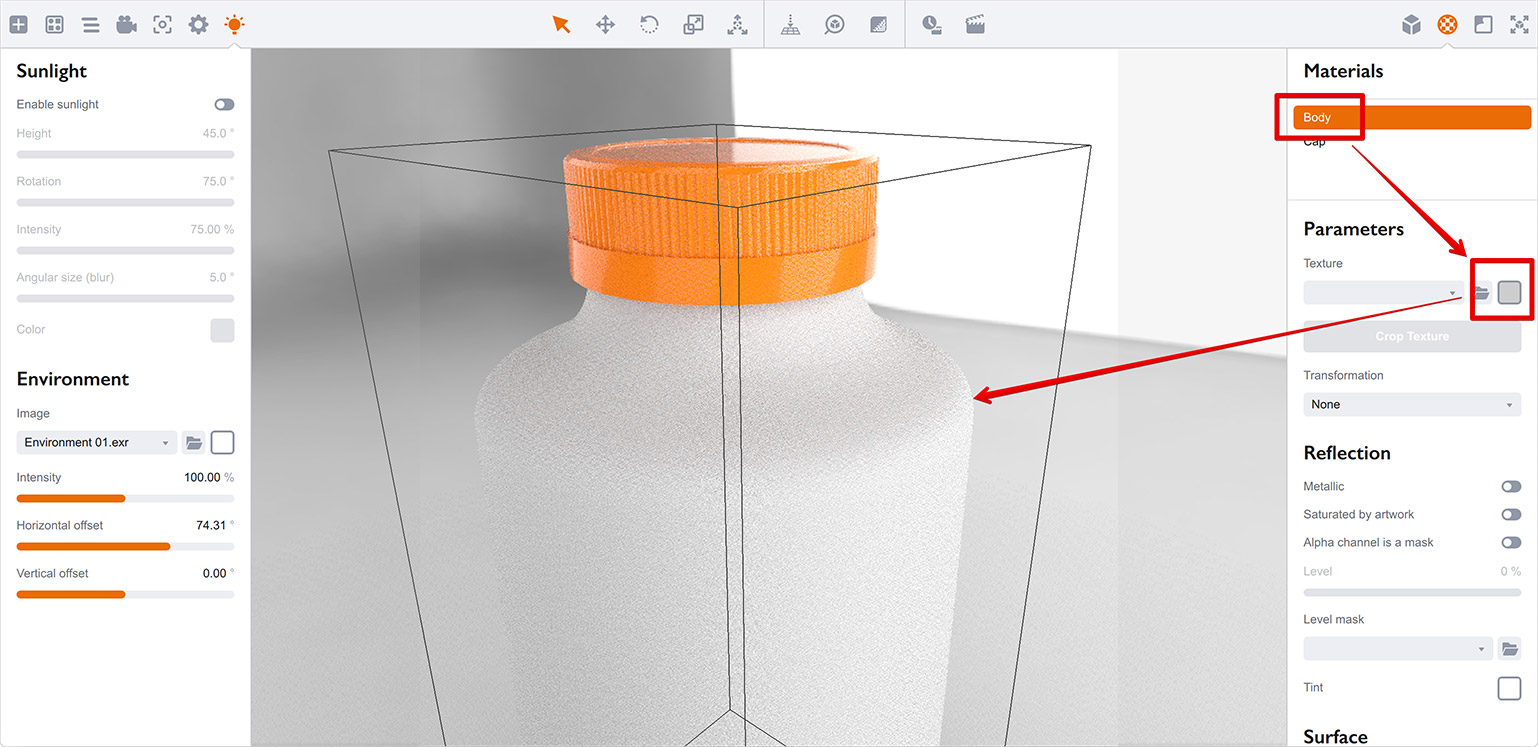
Well, that is obvious as everything you see in the scene is a combination of those two items. Lets have a look at the image above, especially at the bottle itself. It is too white, so the shape is not clearly visible. The cap is fine, so we’d better adjust the material as adjusting environment will affect everything in the scene. What we can do is to make the diffuse tint of the bottle light gray instead of white:
Now you can see the bottle itself more clearly. You can do the same by adjusting environment intensity:
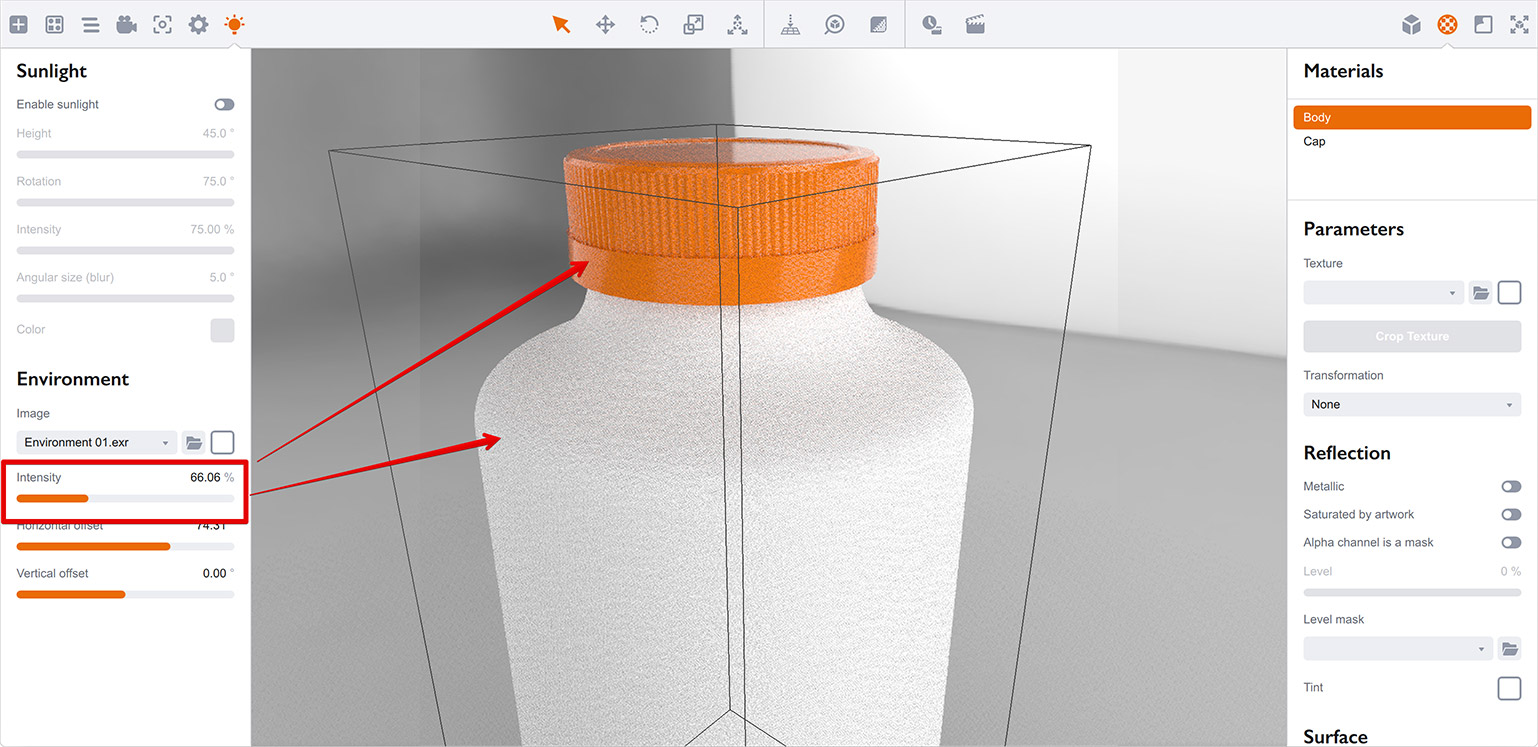
Again, we’ve got a not–so–white bottle, but the cap is also darker. Decide for yourself which option gives better results and use that one. Or both.
Background Mode Doesn’t Matter
Of course, you don’t have to keep the environment map visible at background if you don’t want to. This tutorial shows it so you can see what exactly lights the scene, but you can set background to a solid color or transparent mode without affecting the scene look:
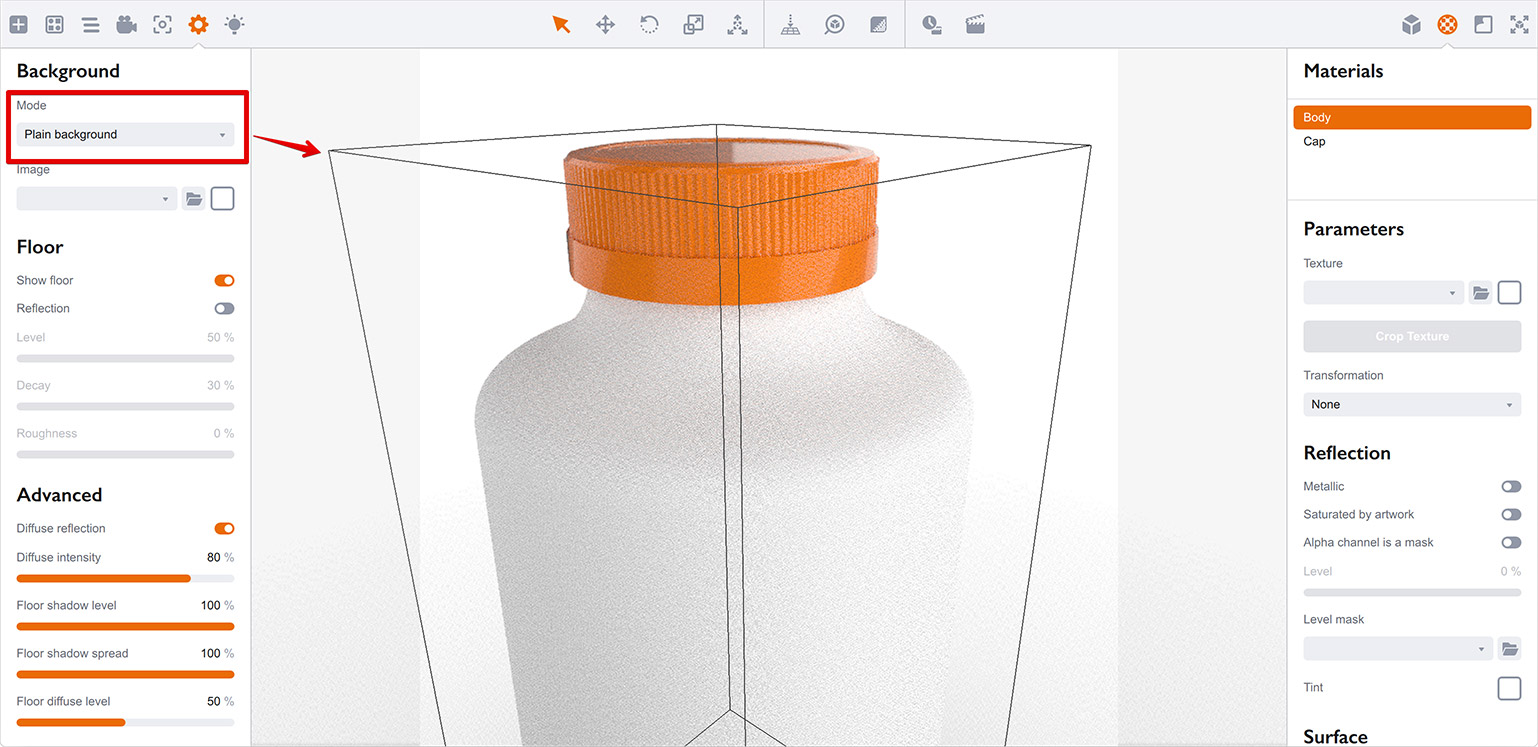
Note that the shape itself looks exactly the same. It is only the background that was changed.
Once Again…
So here is a simple list of the things you need to consider to get a better appearance of the scene:
- everything is controlled by materials and environment;
- setup materials first to their physically–correct parameters;
- choose a proper environment map, edit it if necessary;
- adjust environment rotation to place the highlight where needed;
- adjust environment intensity and materials tint to remove extra light if needed;
- fine–tune materials to get the look you need.
This works for any type of materials, not only plastics. The details may differ, but the main idea is the same: everything is controlled by materials and environment.
That’s All!
It takes some time to get used to environment maps, but once done you’ll hardly look back :)
More Tutorials
Rendering
- Realistic Rendering — improving scenes visual appearance;
- Lighting — control environment and directional lighting;
- Saturated Reflection — make "rich" colorful reflections;
- Floor Reflection — reflecting scene objects in the floor;
- Job Manager — rendering jobs later;
- GPU Rendering — rendering scenes faster on GPU;
- Rendering Time and Quality — getting more control on rendering;
- Simple and Realistic Lighting — speeding up scene rendering.
Materials
- Texture Slots — how to use texture slots in Boxshot;
- Glass Materials — how to make semi–transparent objects look attractive;
- UV–Spot — how to make a UV–spot effect easily;
- Foil Effect — how to add foil–finishing to your shapes;
- Bump — adding relief to your materials;
- Copying Materials — how to copy materials to other shapes;
- Custom Materials — extend the materials library with your own ones;
- Semi–Transparent Labels — making semi–transparent and partial labels;
- Boxshot Materials — more details about Boxshot materials.
Features
- Boolean Operations — combining and subtracting shapes, making holes;
- Decals — applying decals and configuring them;
- Bump Decals — applying bump where it is needed;
- Depth Of Field — adding more realism to your renderings;
- Tools — read more about Boxshot tools;
- Managing Images — how to manage image files used by Boxshot projects;
- Shapes Instances — creating lightweight copies of other shapes;
- Model Editor — edit embedded models in many ways;
- Shrink Wrap — heat–shrink film simulation for objects wrapping;
- Physics Simulation — applying gravity to your scene;
- Palletize — arrange scene objects for the pallet;
- Snapshots — save scene state to re–use it later;
- Translation — teach Boxshot to speak your language;
- Vector Artwork — how to maintain the quality of vector artwork.
Shapes
- Lathe Objects — making symmetrical objects using revolving curves;
- Loft Objects — making custom objects with 2D cross–sections;
- 3D Text — making 3D text objects in Boxshot;
- Extruded Objects — how to make thick 3D object of your flat 2D curve;
- Conical Labels — making conical labels with distorted artwork;
- Dieline Box — a very realistic dieline–based box;
- Custom Shapes — adding custom shapes to the left panel;
- Solid Shapes — create boolean-friendly shapes;
- Script-Based Solids — create complex solid shapes with code;
- Third Party Shapes — importing third party shapes to Boxshot.