Semi–Transparent Labels
Boxshot lets you create partial and semi–transparent labels by fine–tuning materials to provide a proper transparency. This tutorial covers the most common cases, so you can easily add a label by following it.
Let’s Get Started
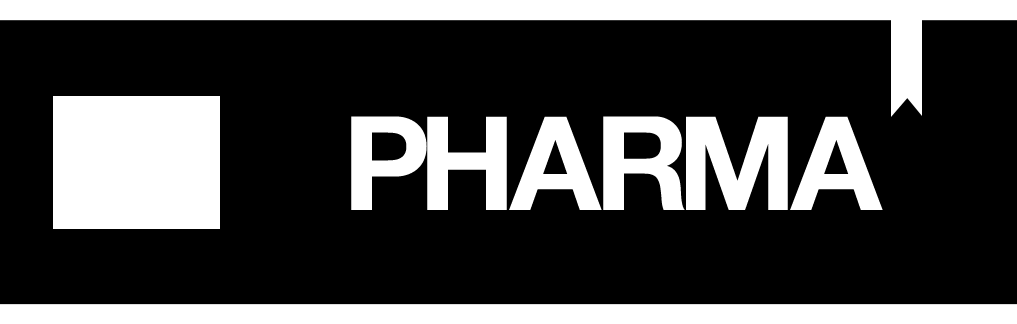
First of all, we need a label. Let’s make a transparent version of the default pharma–bottle label:
Right–click the image above and download it to your desktop, so you can use it if you want to follow the tutorial step by step.
Now start a new project, drop a pharma bottle into the scene, and assign the new label texture to the bottle. You may also want to add a plane with a checkerboard texture so you can see the refraction better.
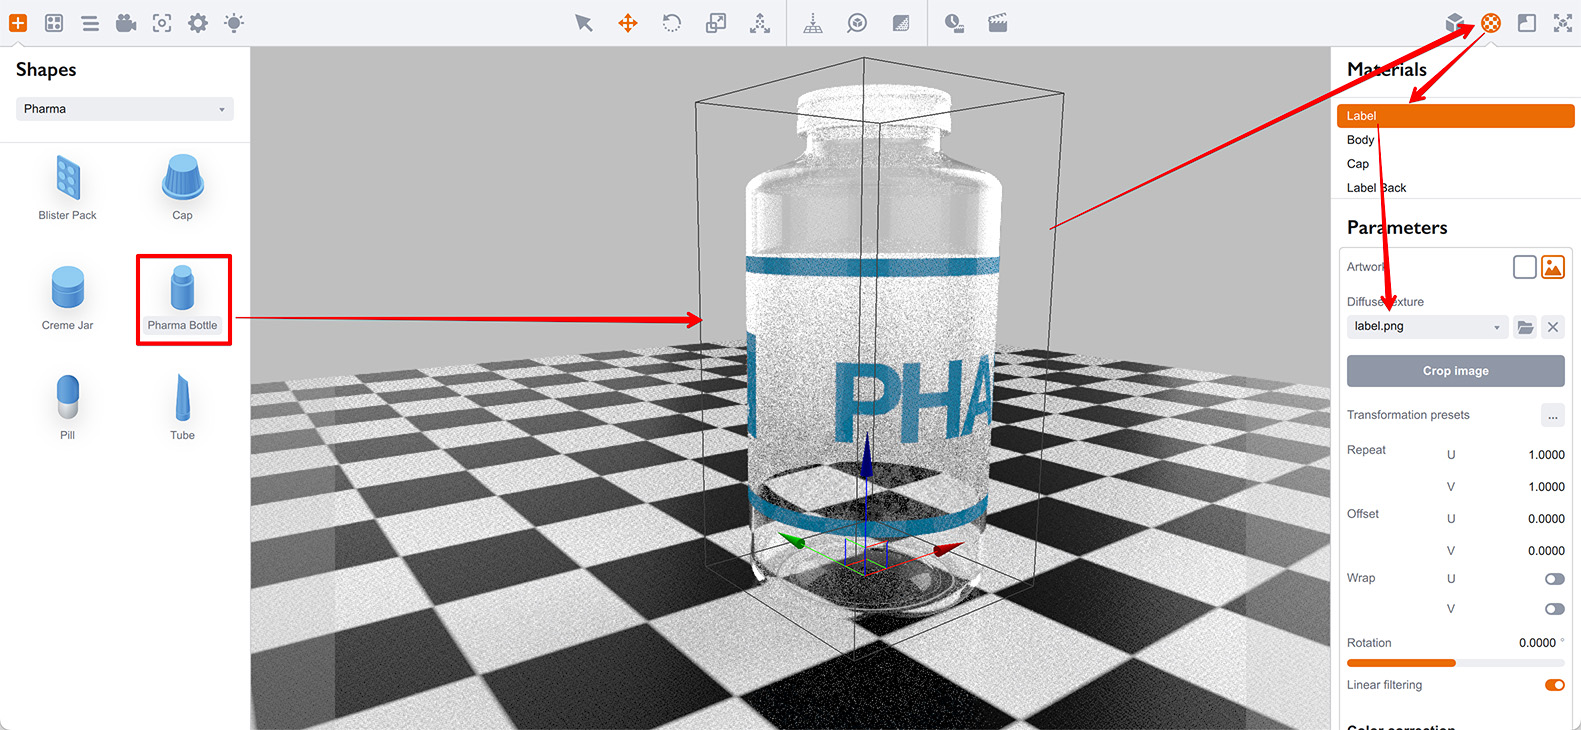
Make sure the Replace glass with label box is not selected. If this option is selected, transparency will not work well.
So far we did everything right, but the label doesn’t look well, so what happens?
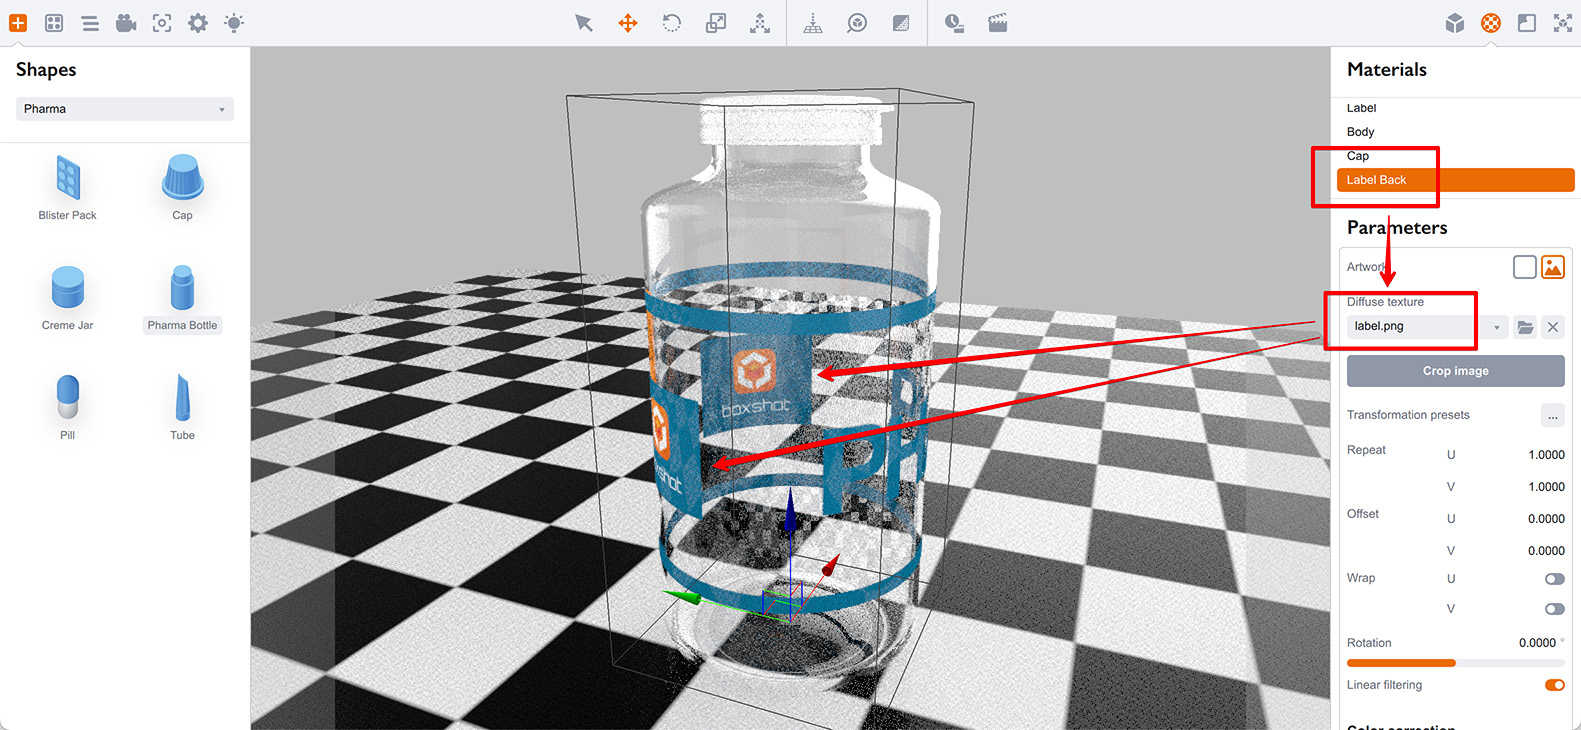
The Back Side of the Label
The problem is that the back side of the label is still opaque. So let’s assign the same texture there:
Almost perfect, but we still need to do one thing. As you can see, the front and back sides don’t match. You need to flip the back image using the Transformation presets button or by configuring UV offset and scale manually:
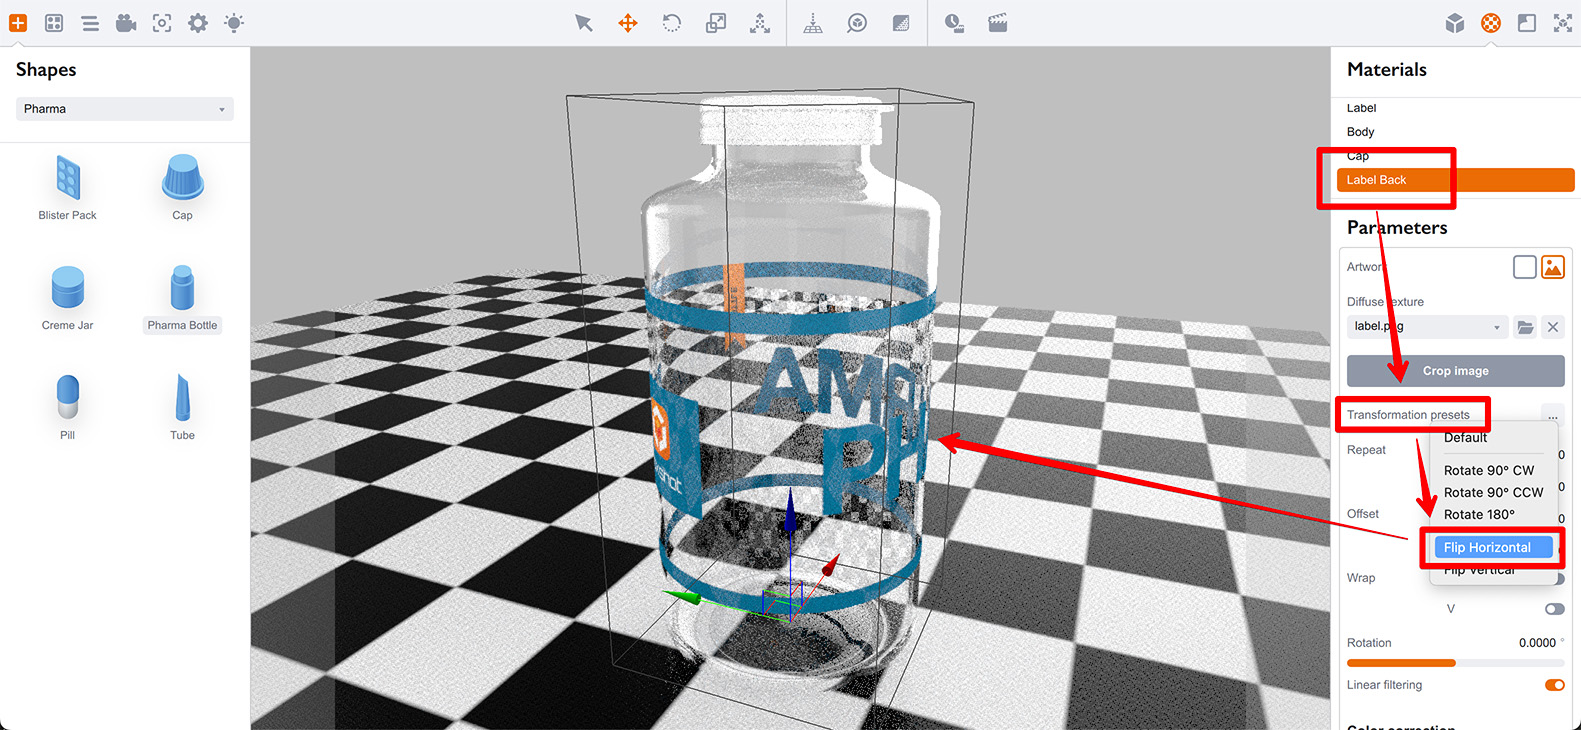
Well done! It looks much better now.
Colored Glass
What if we need a label on the colored glass? Let’s drag an olive glass material onto the bottle:
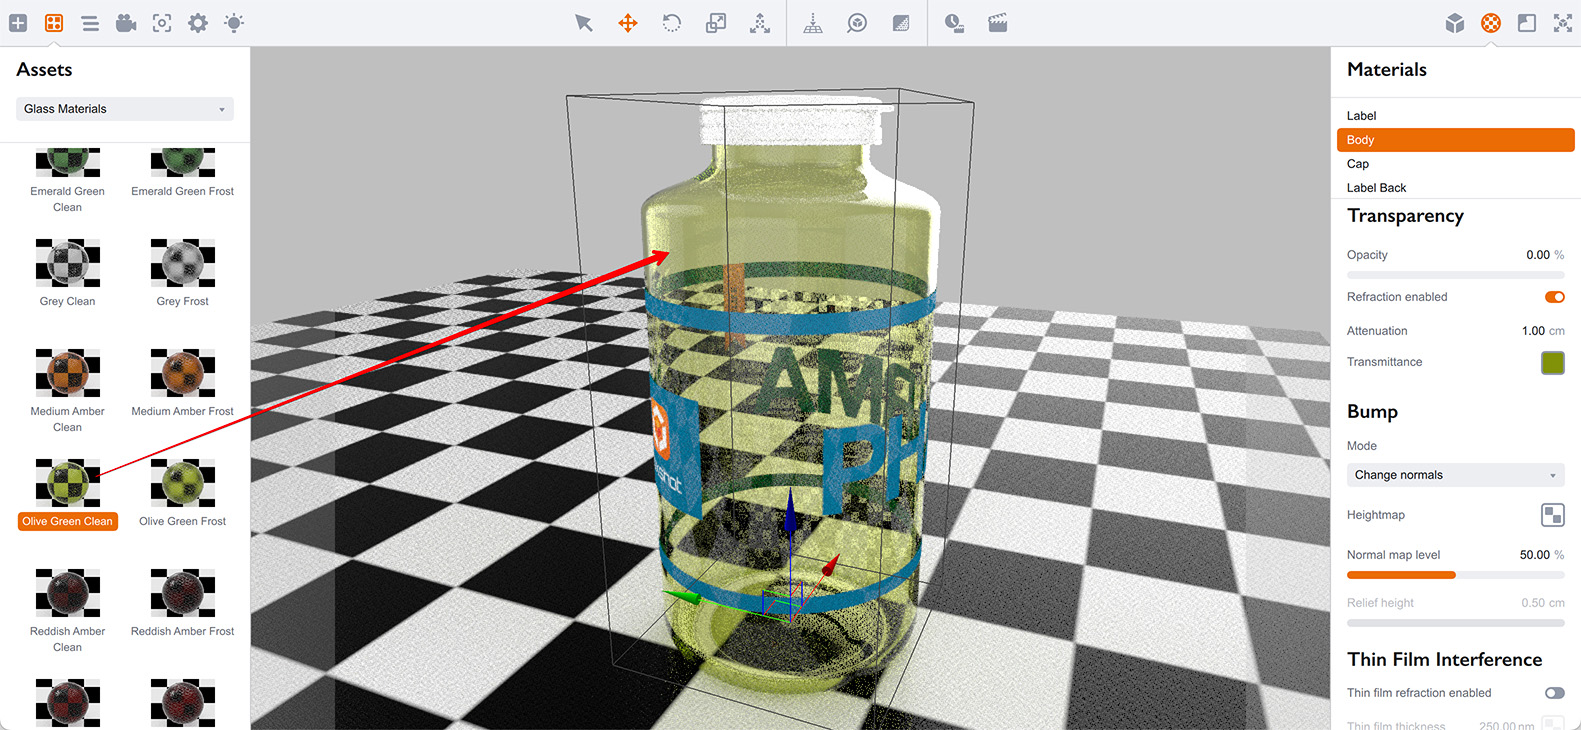
It also works! In case of any issues with medium colors and thin semi–transparent objects (like labels) the first thing to check is the Refraction parameter of the Transparency section.
Make sure the refraction is disabled for label materials if you have any problems with glass becoming too dark under the label.
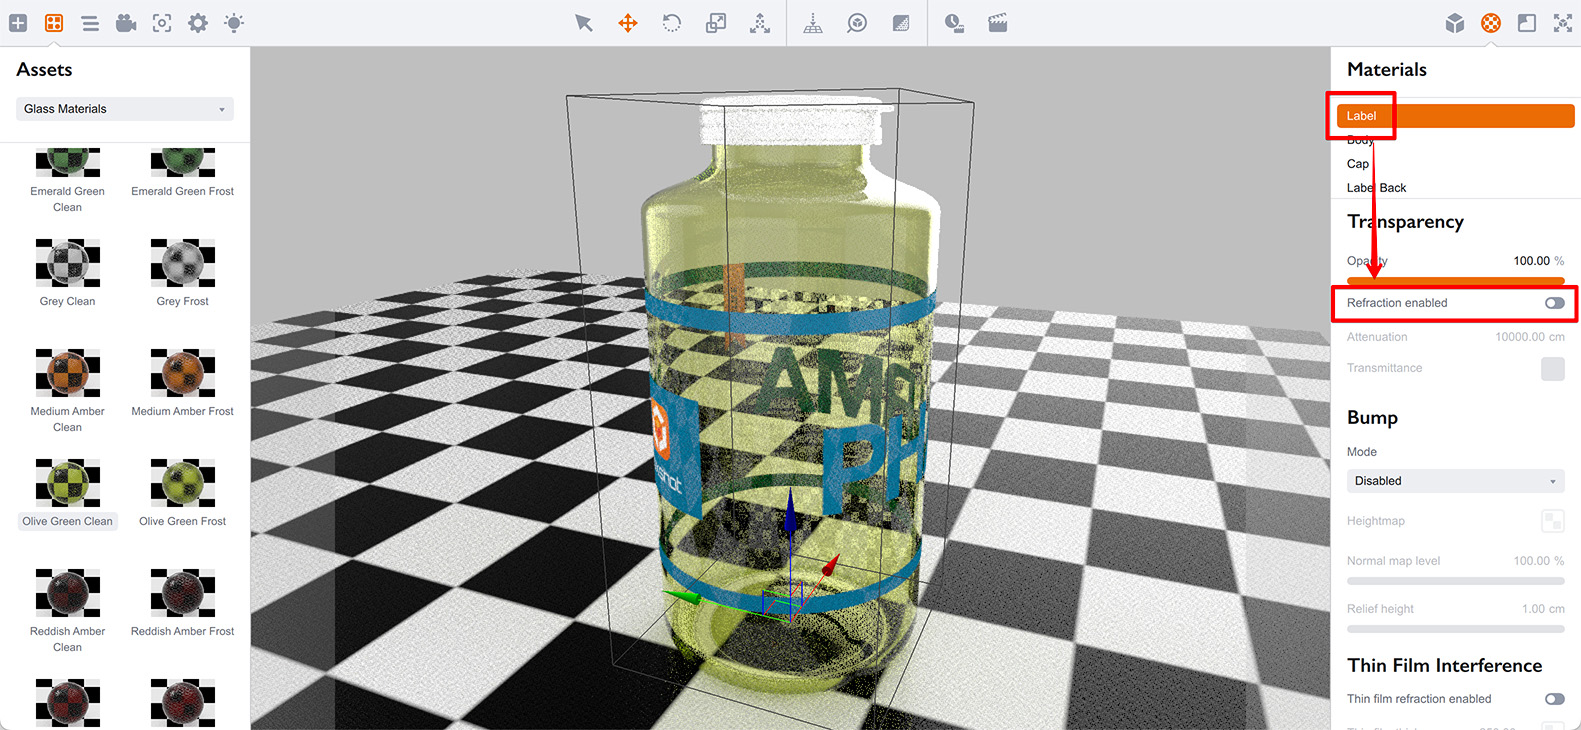
This needs to be done for both sides of the thin object if the materials are different there.
Opaque Bottle
What if we need, say, a plastic bottle? Let’s drag a red plastic material from the left panel onto the bottle:

So far so good, but what if we want the bottle to be less reflective? Let’s set the roughness of the Body material to 50%:
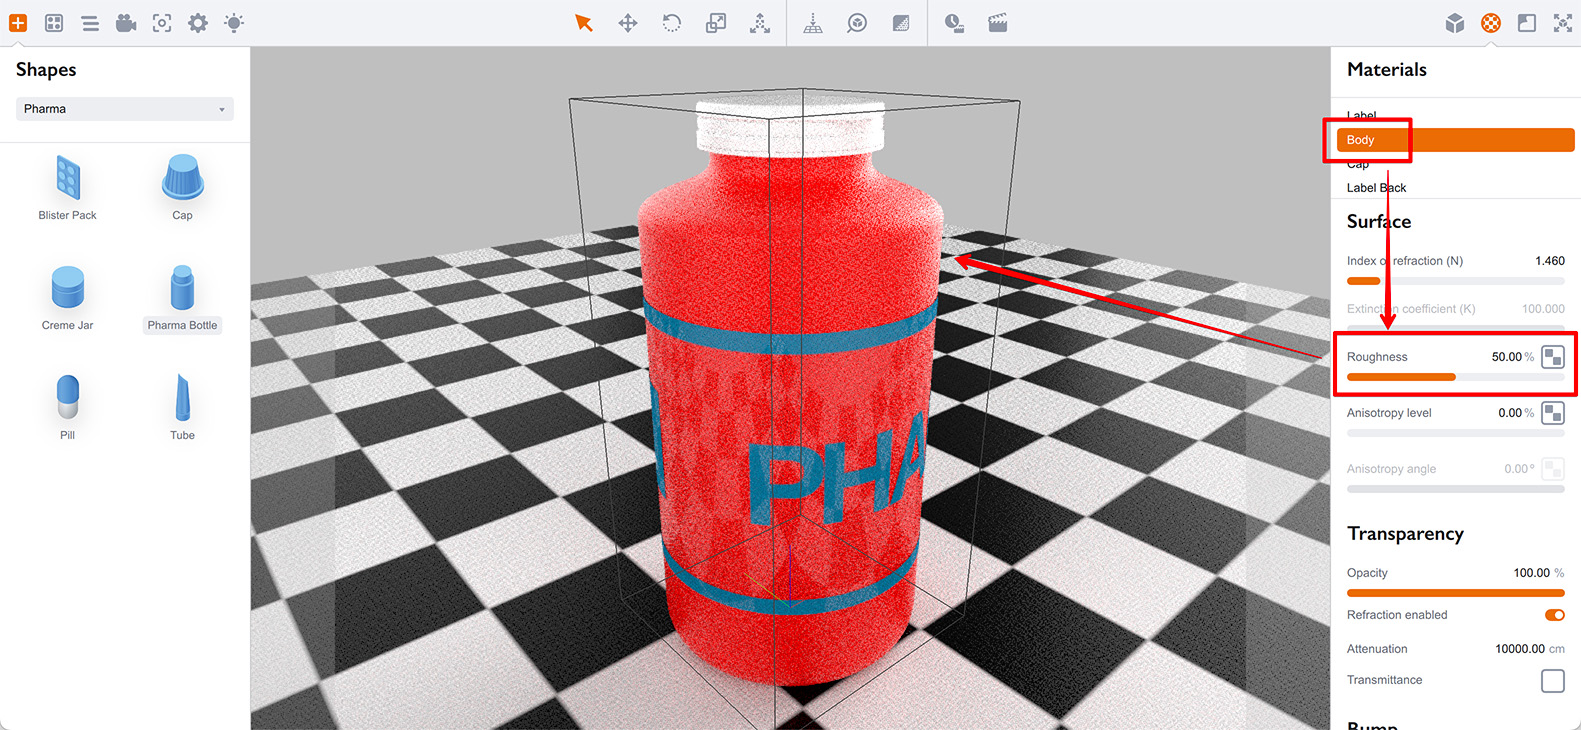
Did you notice the difference between the transparent areas of the label and the surface of the bottle? The label still reflects the environment, while the bottle doesn’t due to the roughness.
The reason is that the light first hits the label and even its transparent areas reflect light without any distortion (as the roughness of the label is zero), so we see the reflection of the scene in the label itself, regardless of its transparency.
That’s how Boxshot works, that’s how you make soap bubbles and glass bottles reflective, so that’s OK. This might also be OK for a particular label, but let’s make the transparent parts of the label fully transparent.
We need a reflection mask for the label in order to do that. The mask should be white where the label is not transparent, and black where it is. This way Boxshot will skip reflections for the transparent areas of the label.
Here’s such a mask. Right–click it to download a copy if you are following the tutorial.
Locate the Reflectance texture slot of the Label material and apply the image there. Then see the difference:
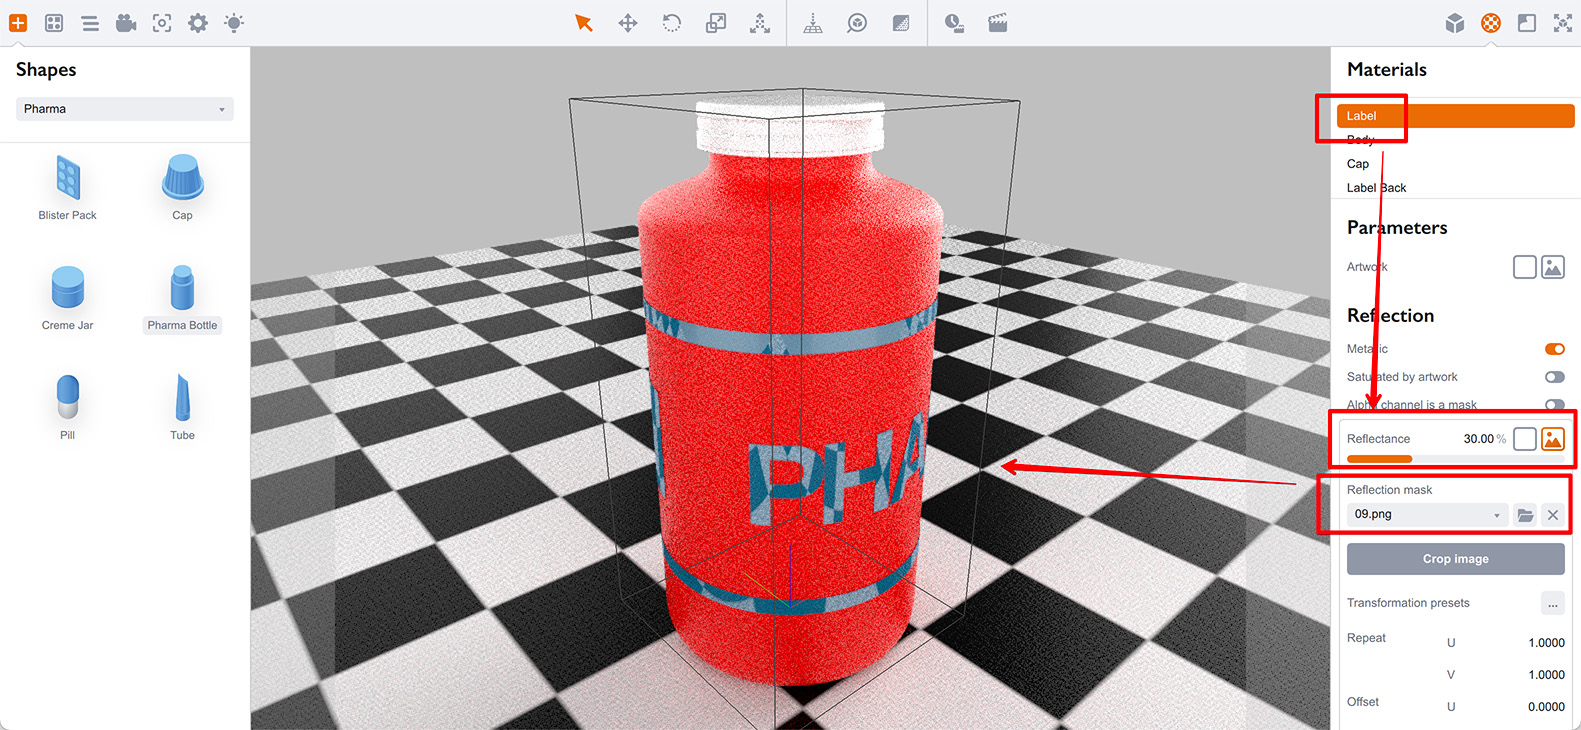
Here I also increased the reflection level of the label to 30% to make the reflection more obvious. You can clearly see that only the opaque elements of the label reflect the light.
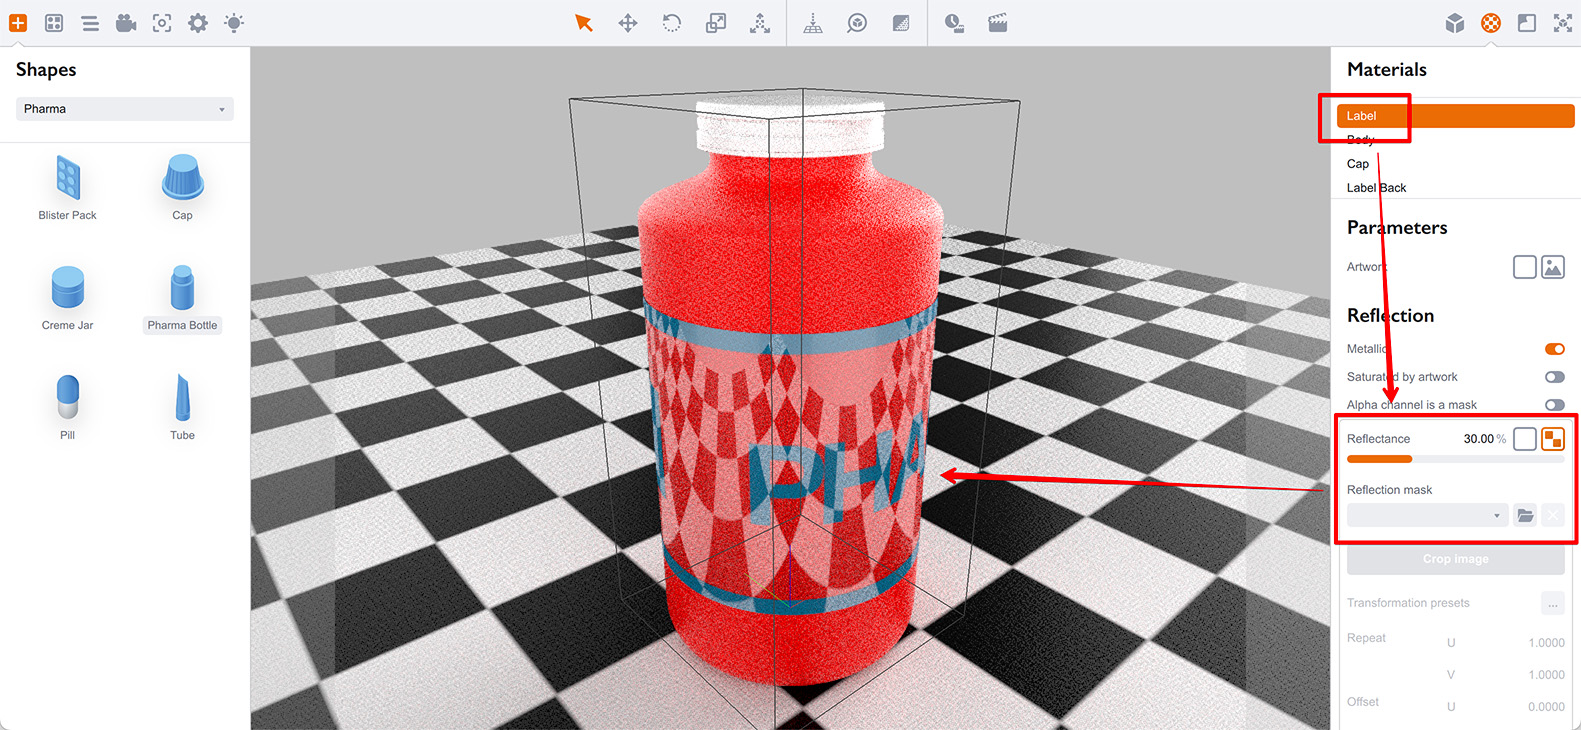
Here we took some extra steps to show the process in details, but there is a short way to do the same in most cases. Boxshot can use the alpha channel of the main artwork as a mask, so let’s try that.
Unload the reflection mask from the Reflectance slot and keep the reflection level at 30%. You should get this:
Now check that Alpha channel is a mask option in the Reflectance section:
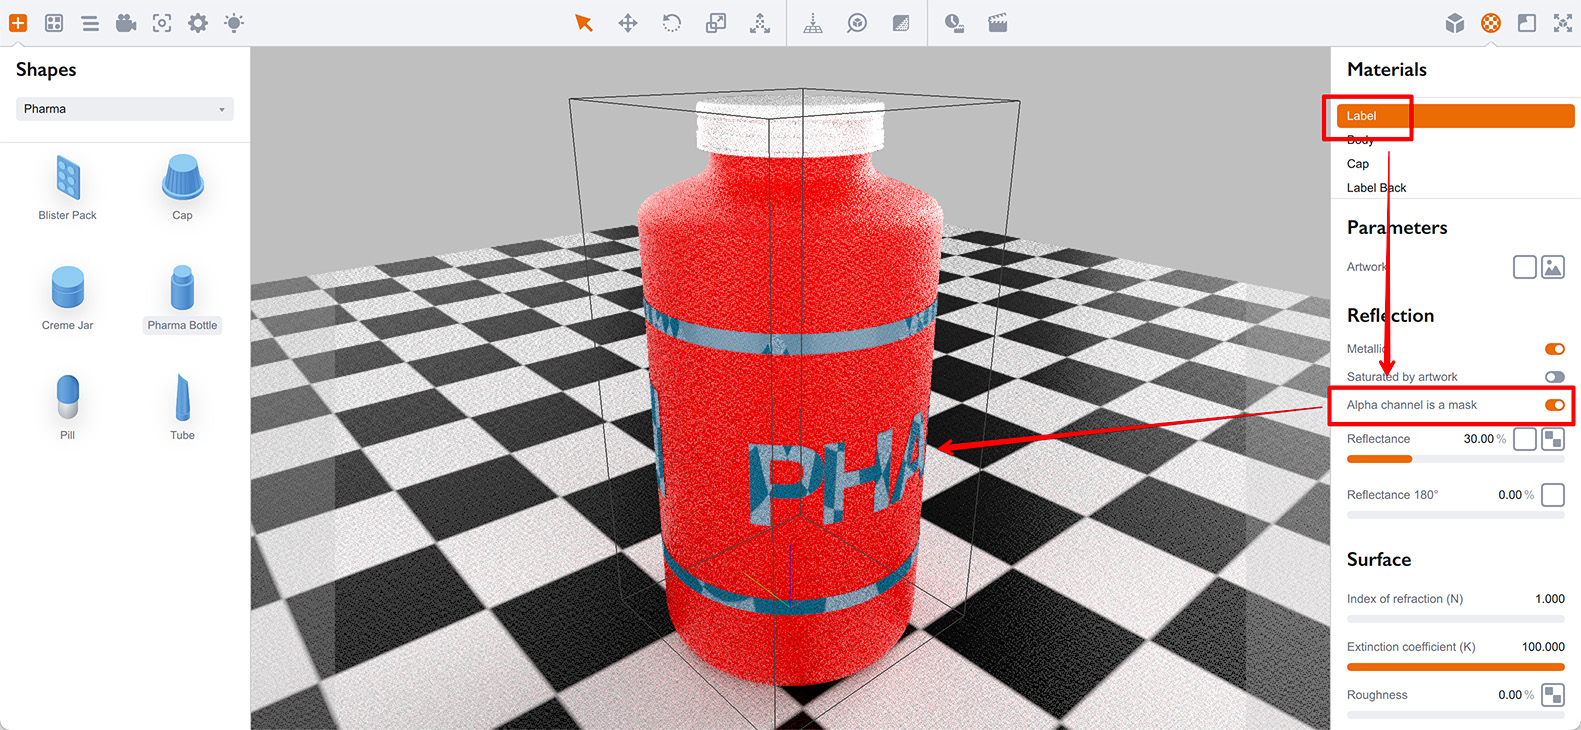
As you may see, the result is the same. This option helps saving some time by avoid dealing with masks if the alpha channel of the main artwork is the same as the mask you are going to use.
Some Hints
You can use the same techniques for lathe objects, as well. Just make another lathe object for a label, make it double–sided, align it around the main object and then repeat the steps above.
Boxshot also has dedicated Label and Conical Label shapes if you need the simple label shapes.
You can also use decals for simple small partial labels.
For both methods it is a good idea to make the label a child object of the bottle by dragging the label onto the bottle in the scene tree and aligning them after. This way the label will also follow the bottle when you move it around, scale or rotate.
The same transparency trick can be used to make partial labels. If you need a small label on just one side of the bottle, all you need is to add some transparent filler around it, so the label can wrap the bottle, then add a mask to hide reflections.
Finally, you can make pleasing effects by using the reflection mask alone. Remove the label texture, set the Opacity slider to 0 to make the label transparent, then load a pattern as a reflection mask and set the Reflection Tint color to, say, yellow.
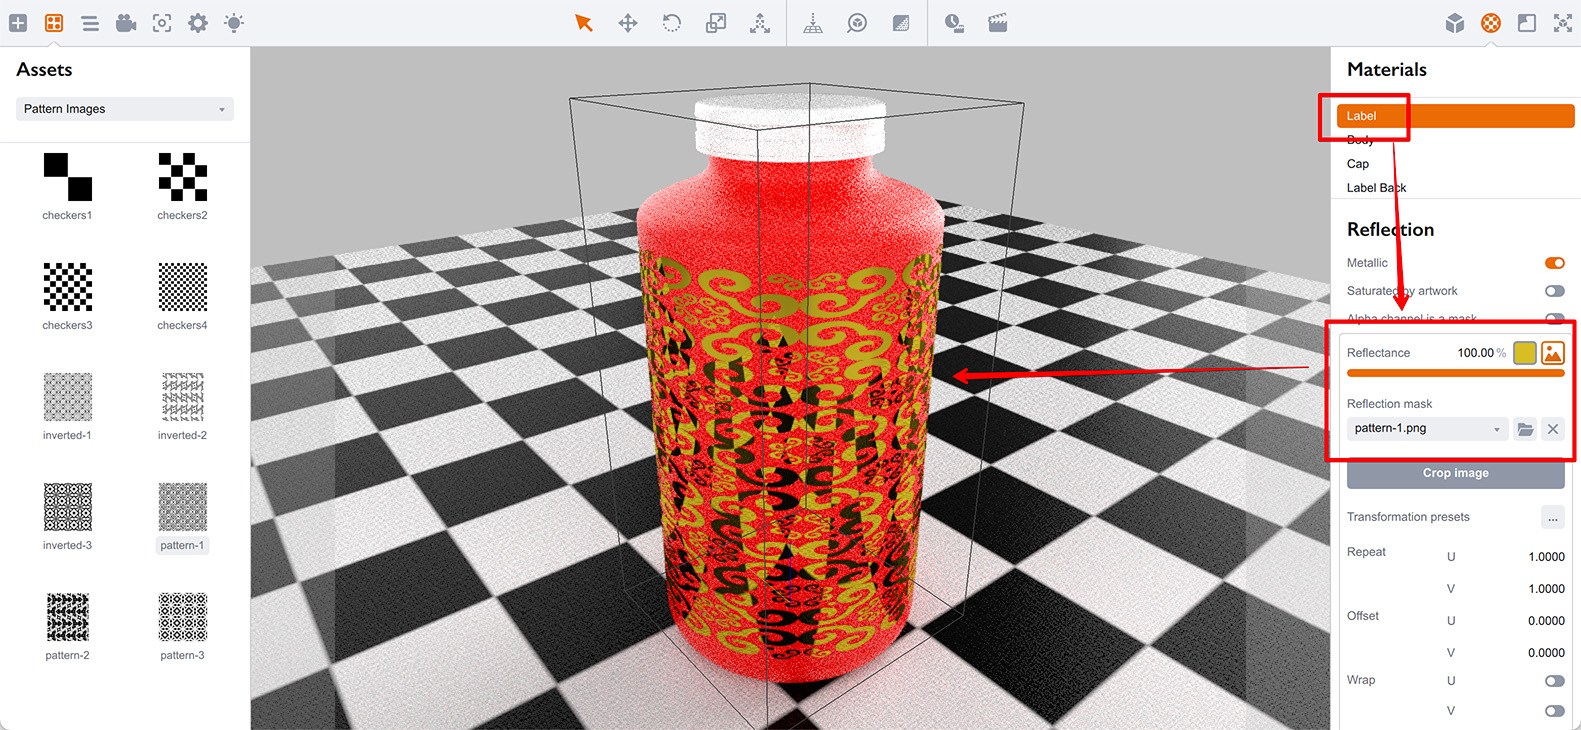
Right, that’s a foil effect! Just make sure you adjusted both front and back sides of the label, as otherwise you might see the “shadow” of the old artwork. Also, do not forget to flip the reflection mask for the back side of the shape horizontally as you did for the label artwork above.
That’s All
You’ve learned how to make semi–transparent labels and fix the issues that may arise. Isn’t that great?
More Tutorials
Rendering
- Realistic Rendering — improving scenes visual appearance;
- Lighting — control environment and directional lighting;
- Saturated Reflection — make "rich" colorful reflections;
- Floor Reflection — reflecting scene objects in the floor;
- Job Manager — rendering jobs later;
- GPU Rendering — rendering scenes faster on GPU;
- Rendering Time and Quality — getting more control on rendering;
- Simple and Realistic Lighting — speeding up scene rendering.
Materials
- Texture Slots — how to use texture slots in Boxshot;
- Glass Materials — how to make semi–transparent objects look attractive;
- UV–Spot — how to make a UV–spot effect easily;
- Foil Effect — how to add foil–finishing to your shapes;
- Bump — adding relief to your materials;
- Copying Materials — how to copy materials to other shapes;
- Custom Materials — extend the materials library with your own ones;
- Semi–Transparent Labels — making semi–transparent and partial labels;
- Boxshot Materials — more details about Boxshot materials.
Features
- Boolean Operations — combining and subtracting shapes, making holes;
- Decals — applying decals and configuring them;
- Bump Decals — applying bump where it is needed;
- Depth Of Field — adding more realism to your renderings;
- Tools — read more about Boxshot tools;
- Managing Images — how to manage image files used by Boxshot projects;
- Shapes Instances — creating lightweight copies of other shapes;
- Model Editor — edit embedded models in many ways;
- Shrink Wrap — heat–shrink film simulation for objects wrapping;
- Physics Simulation — applying gravity to your scene;
- Palletize — arrange scene objects for the pallet;
- Snapshots — save scene state to re–use it later;
- Translation — teach Boxshot to speak your language;
- Vector Artwork — how to maintain the quality of vector artwork.
Shapes
- Lathe Objects — making symmetrical objects using revolving curves;
- Loft Objects — making custom objects with 2D cross–sections;
- 3D Text — making 3D text objects in Boxshot;
- Extruded Objects — how to make thick 3D object of your flat 2D curve;
- Conical Labels — making conical labels with distorted artwork;
- Dieline Box — a very realistic dieline–based box;
- Custom Shapes — adding custom shapes to the left panel;
- Solid Shapes — create boolean-friendly shapes;
- Script-Based Solids — create complex solid shapes with code;
- Third Party Shapes — importing third party shapes to Boxshot.