Foil Effect in Boxshot
The foil effect is done by placing a thin metal layer on top of the printed artwork to make it shine in that particular place. You can Google for samples, if you like.
What is a foil effect after all? It is basically a masked reflection with masked bump. Boxshot can do both, so let’s make a foil finishing for our business card from the uv–spot tutorial. This time we’ll need just this image to start:
Download it to your desktop and open an empty scene in Boxshot.
Make it shine
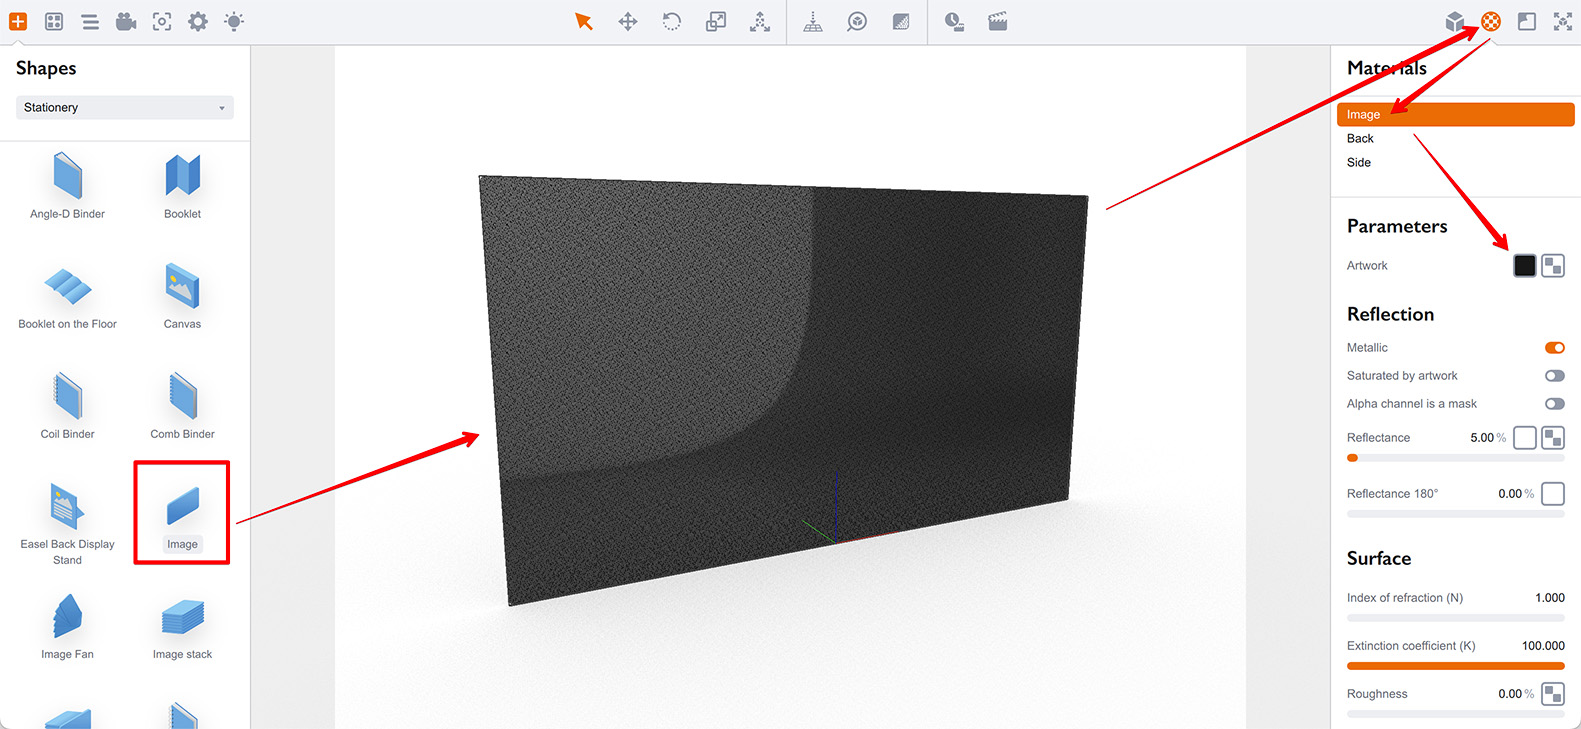
Add an Image shape to the scene and make its front side black by removing artwork and setting diffuse tint to dark gray, almost black:
Now scroll the materials panel down to the “Reflectance” parameter and load the “BOSS” image above to the reflectance slot. Then enable the “Metallic” reflection option and set the reflectance level to 80:
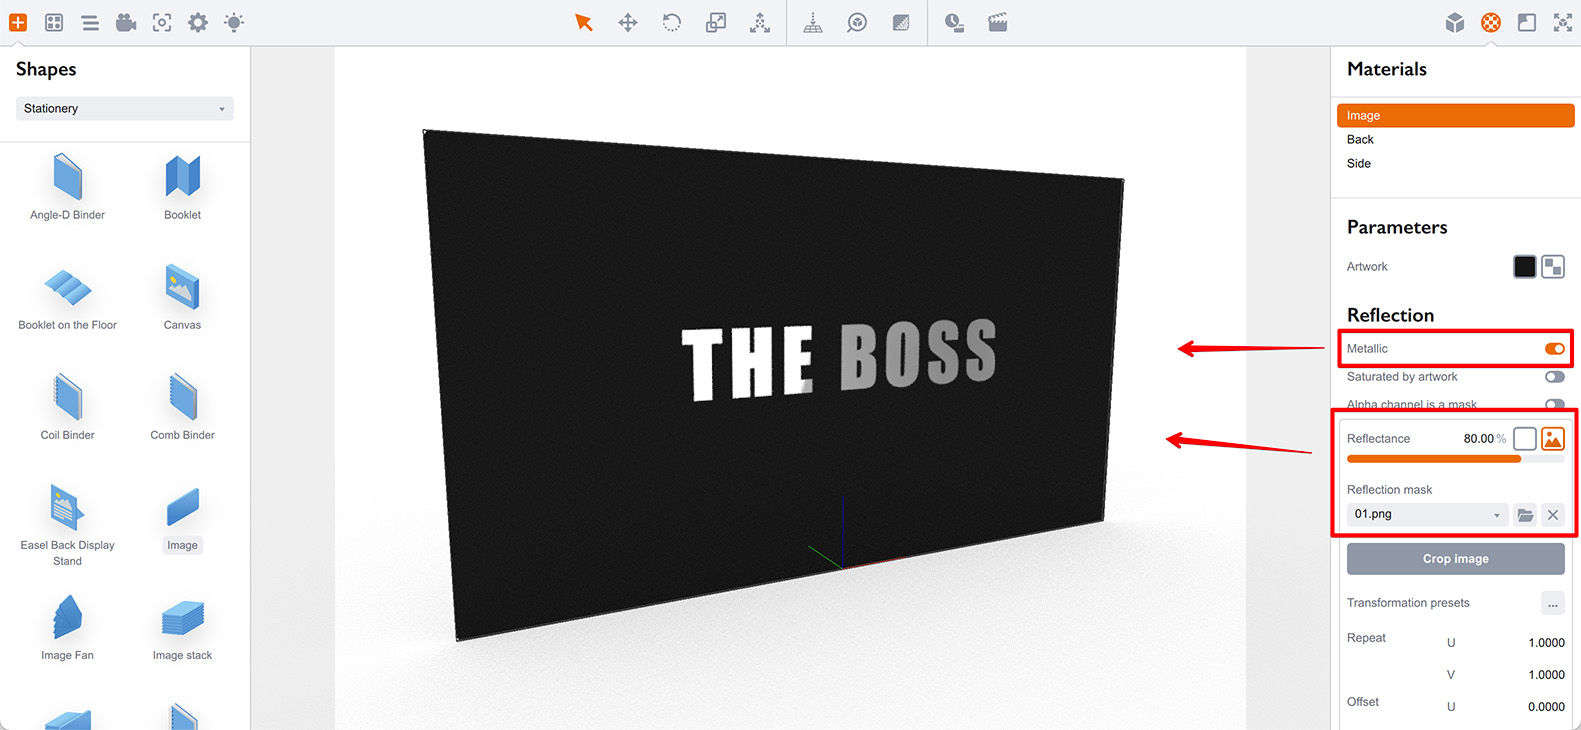
Basically, that’s all, here is a foil–like effect done in just a few clicks. The idea is to increase the reflection level and limit reflective area by providing the mask.
Make it gold
The next step is to add some color. There is a color tint box in the “Reflectance” slot, click it to open the color selector and change the tint color to “gold” (something like RGB 212, 175, 55):
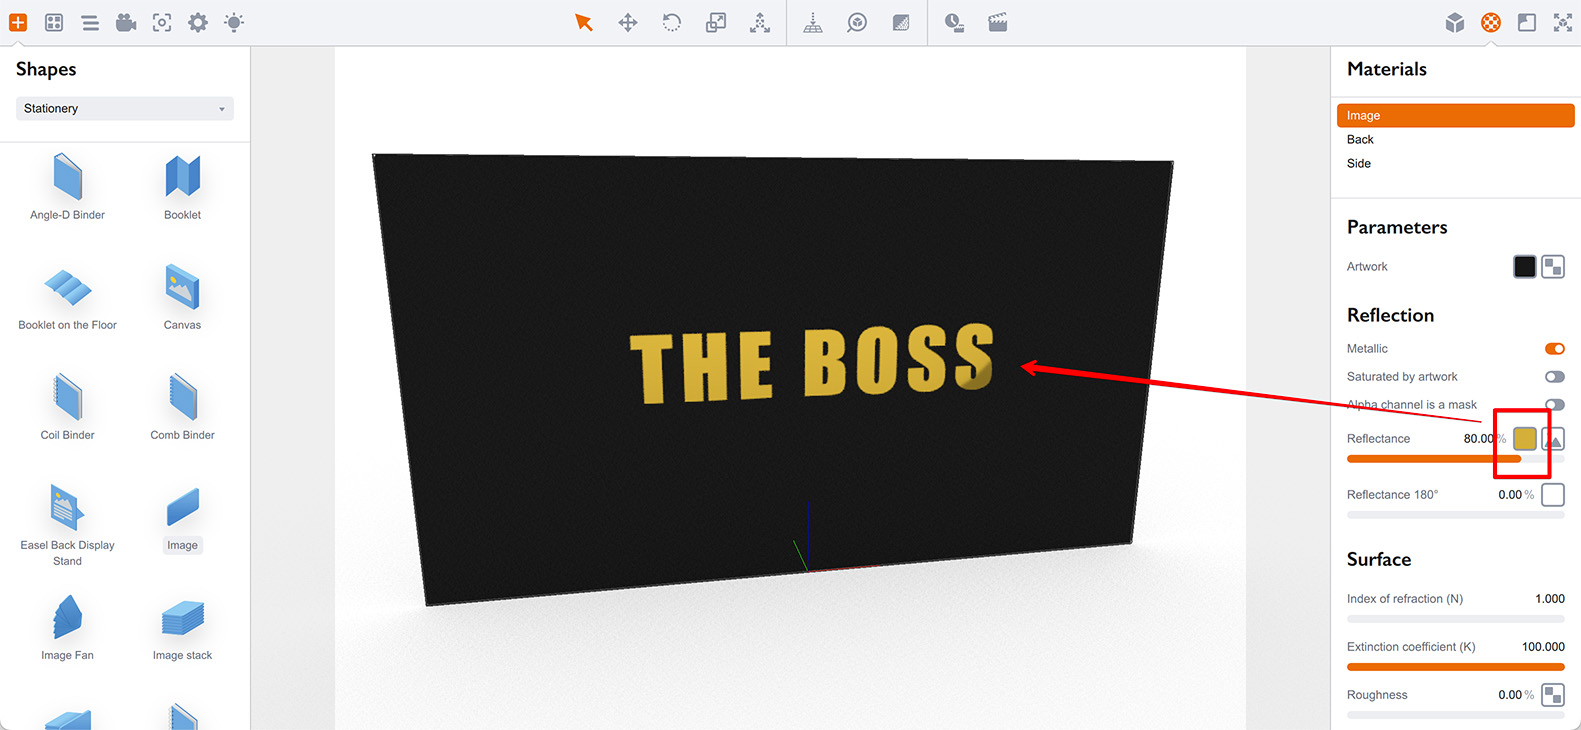
Yep, it’s that easy! For a gold surface, all you need is to make it reflective and tint that reflection to the gold color.
If you want a plastic finish instead, you can turn the metallic reflection off and adjust the index of refraction parameter and tint to simulate a plastic material.
Adding relief
To make it even more interesting, you can add some relief to the surface to make the gold part embossed or uneven. To do so, you need a heightmap image like this one (Google for “seamless paper texture” for more images like that):
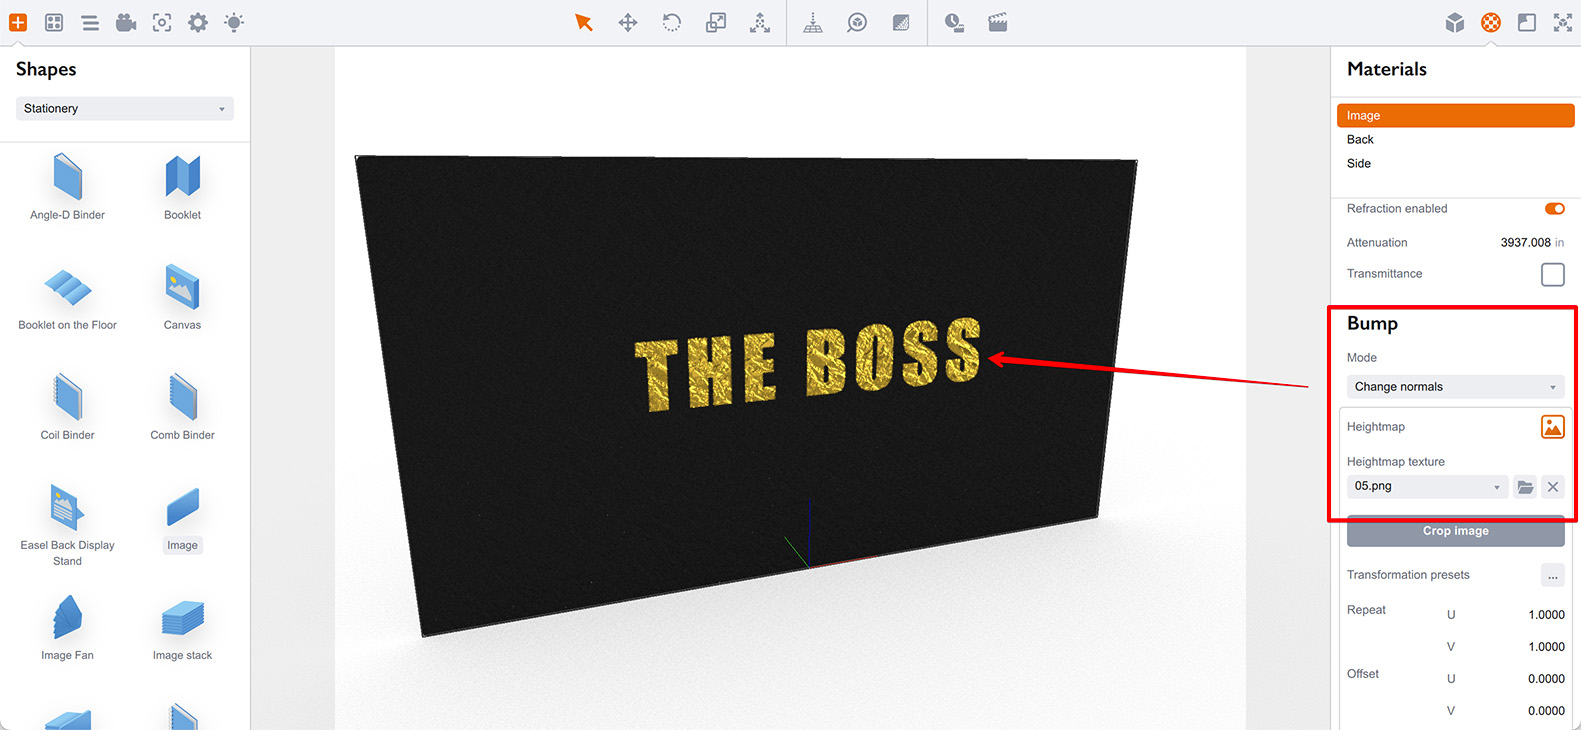
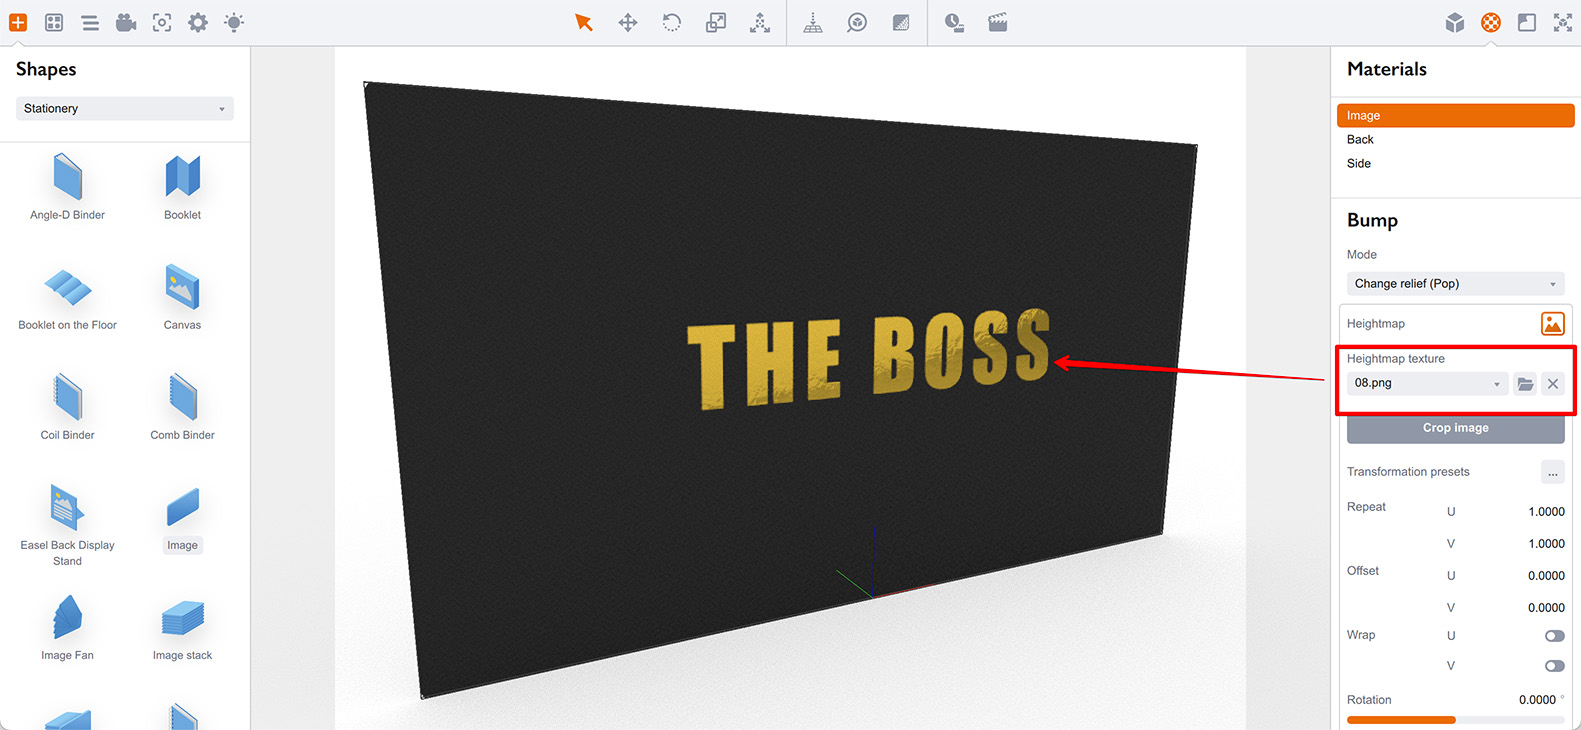
Scroll the materials panel down to the “Bump” section, load the image to the “Heightmap” slot, set the bump mode to “Change normals” and keep the normal map level as “50%”. Here’s what you get:
Note that the relief is currently applied to the whole shape. If you want it to be applied to the foil–covered areas, you need to adjust the heightmap image.
The easiest way is to simply multiply the heightmap image by the reflection mask in Photoshop.
Here I changed the bump mode to change the relief, so the bump is better visible on the dark areas of the card:
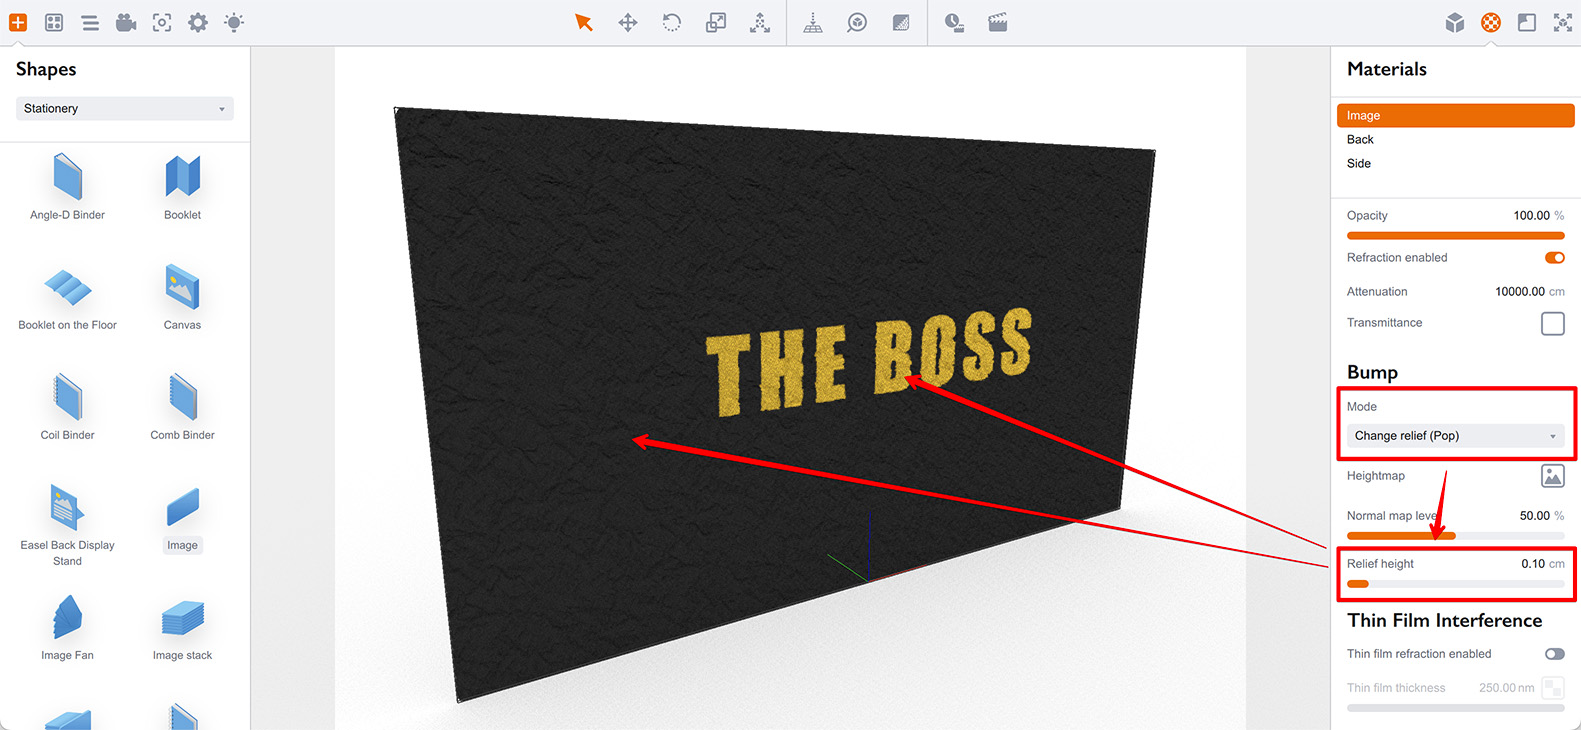
Now you can see the relief applied everywhere. Let’s try a modified relief texture like below:
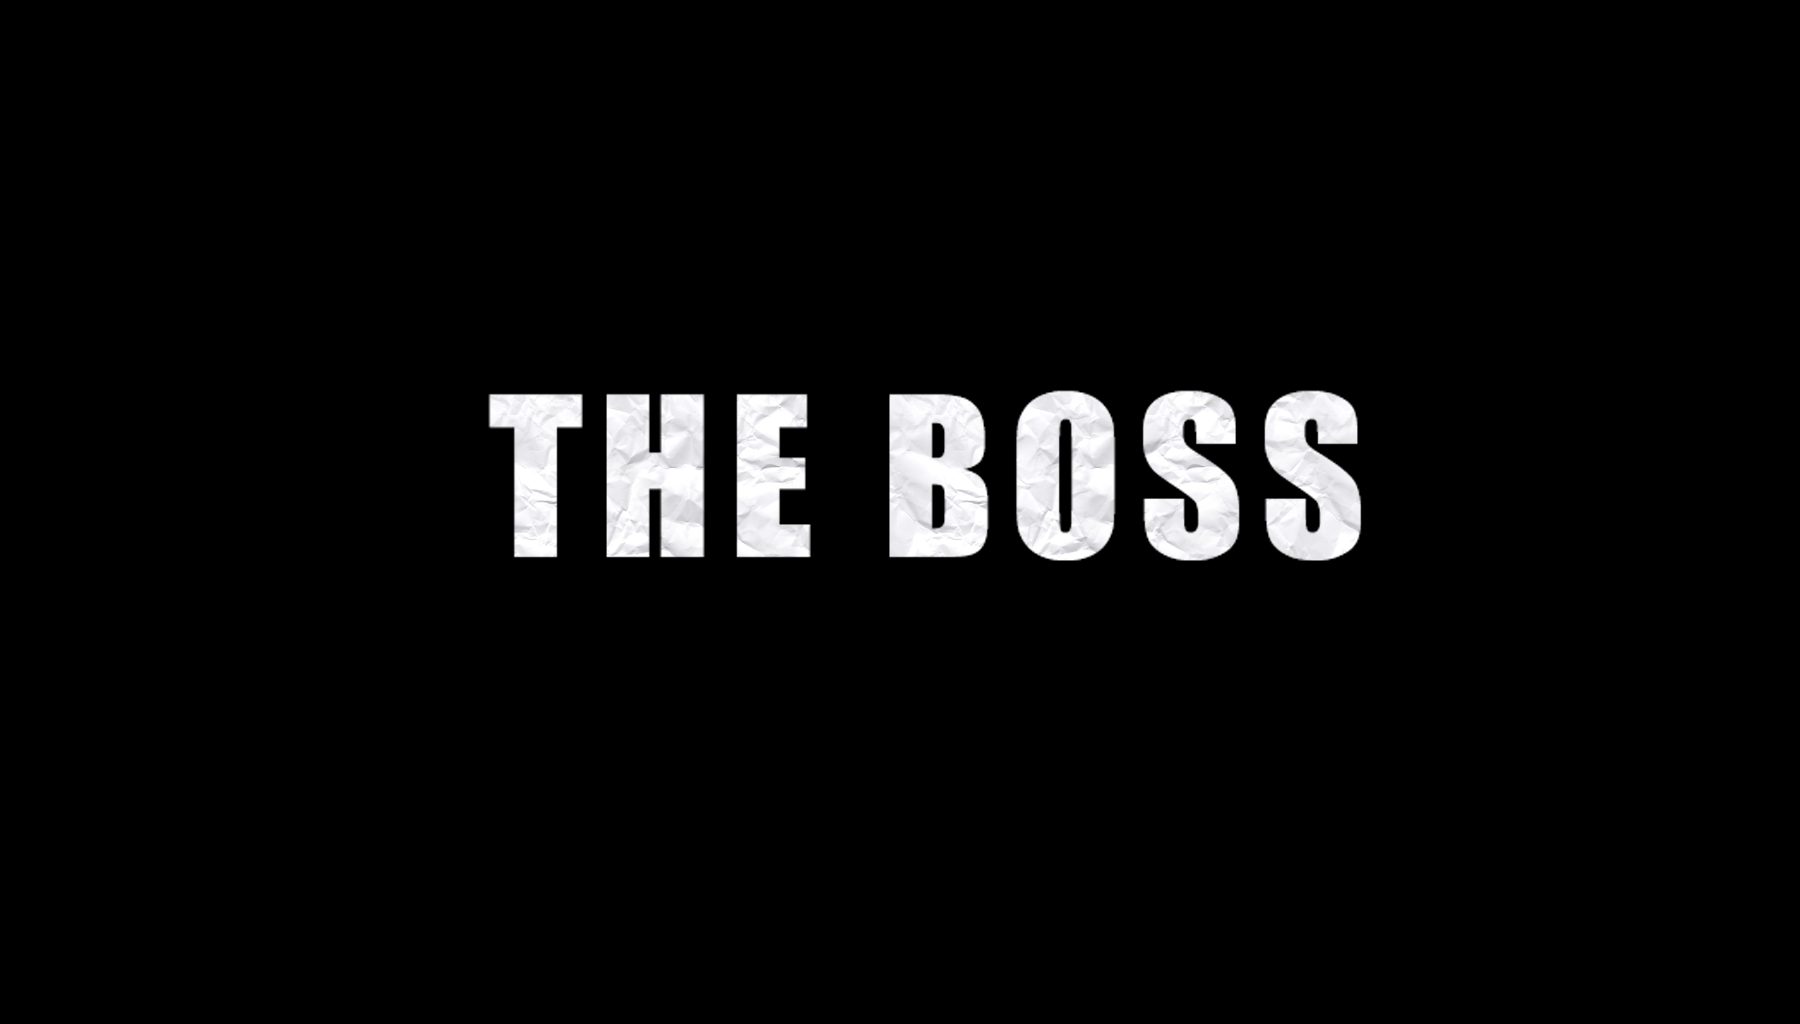
Try loading this image to the heightmap slot and see the difference:
Great, we’ve got a better relief on the gold parts and flat surface for the rest of the business card!
One more thing
As the foil is simply a reflection, it is essential what to reflect. If you don’t like the foil appearance, you need to adjust the environment map.
See the Realistic Rendering tutorial for more information on environment maps and how they affect the rendering results.
Long story short
Foil is just a reflecting thin layer of metal, so when you need foil you use reflection. Enable metallic reflection and set the reflectance level to something above 70%. Use reflection mask to define the foil area. Use reflection tint to color the reflection. Use bump to add some relief to reflection and better define its edges.
That’s all
You’ve just learned how to create foil finishing effect in Boxshot using reflection mask, tint and bump. Good job!
More Tutorials
Rendering
- Realistic Rendering — improving scenes visual appearance;
- Lighting — control environment and directional lighting;
- Saturated Reflection — make "rich" colorful reflections;
- Floor Reflection — reflecting scene objects in the floor;
- Job Manager — rendering jobs later;
- GPU Rendering — rendering scenes faster on GPU;
- Rendering Time and Quality — getting more control on rendering;
- Simple and Realistic Lighting — speeding up scene rendering.
Materials
- Texture Slots — how to use texture slots in Boxshot;
- Glass Materials — how to make semi–transparent objects look attractive;
- UV–Spot — how to make a UV–spot effect easily;
- Foil Effect — how to add foil–finishing to your shapes;
- Bump — adding relief to your materials;
- Copying Materials — how to copy materials to other shapes;
- Custom Materials — extend the materials library with your own ones;
- Semi–Transparent Labels — making semi–transparent and partial labels;
- Boxshot Materials — more details about Boxshot materials.
Features
- Boolean Operations — combining and subtracting shapes, making holes;
- Decals — applying decals and configuring them;
- Bump Decals — applying bump where it is needed;
- Depth Of Field — adding more realism to your renderings;
- Tools — read more about Boxshot tools;
- Managing Images — how to manage image files used by Boxshot projects;
- Shapes Instances — creating lightweight copies of other shapes;
- Model Editor — edit embedded models in many ways;
- Shrink Wrap — heat–shrink film simulation for objects wrapping;
- Physics Simulation — applying gravity to your scene;
- Palletize — arrange scene objects for the pallet;
- Snapshots — save scene state to re–use it later;
- Translation — teach Boxshot to speak your language;
- Vector Artwork — how to maintain the quality of vector artwork.
Shapes
- Lathe Objects — making symmetrical objects using revolving curves;
- Loft Objects — making custom objects with 2D cross–sections;
- 3D Text — making 3D text objects in Boxshot;
- Extruded Objects — how to make thick 3D object of your flat 2D curve;
- Conical Labels — making conical labels with distorted artwork;
- Dieline Box — a very realistic dieline–based box;
- Custom Shapes — adding custom shapes to the left panel;
- Solid Shapes — create boolean-friendly shapes;
- Script-Based Solids — create complex solid shapes with code;
- Third Party Shapes — importing third party shapes to Boxshot.