Floor Reflection
Boxshot supports reflection of the scene in the floor to visually enhance the image. This tutorial explains the options you can use to customize the reflection.
Enabling Floor Reflection
Let’s create a simple scene with a hard cover book and open the scene panel on the left. Notice the “Floor reflection” checkbox at the bottom:
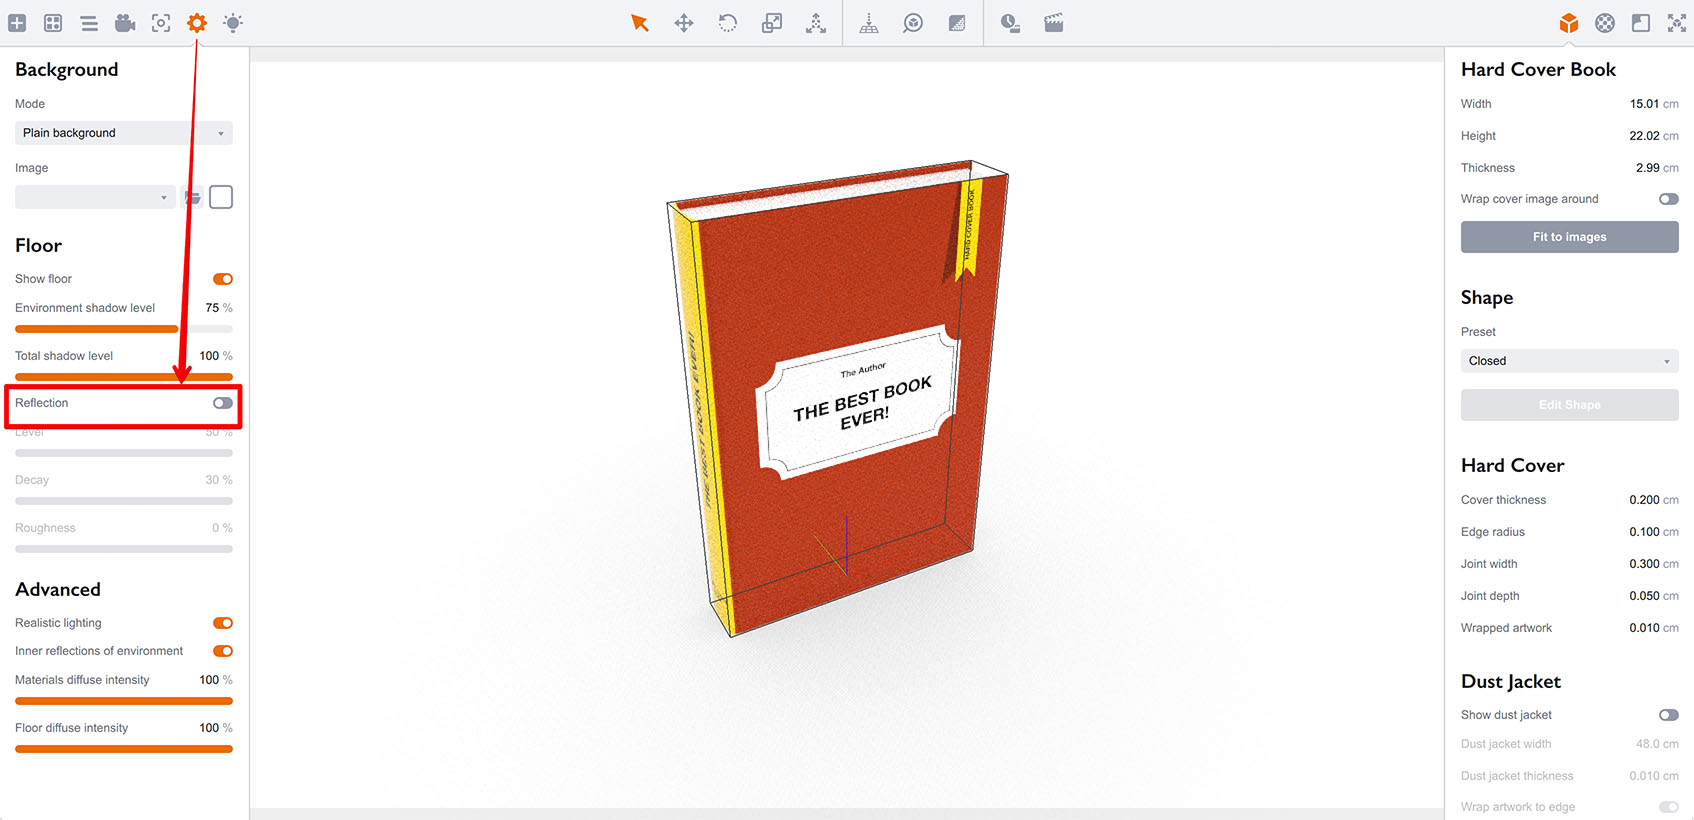
The option is unchecked and the book is not reflected in the floor. Let’s change that:
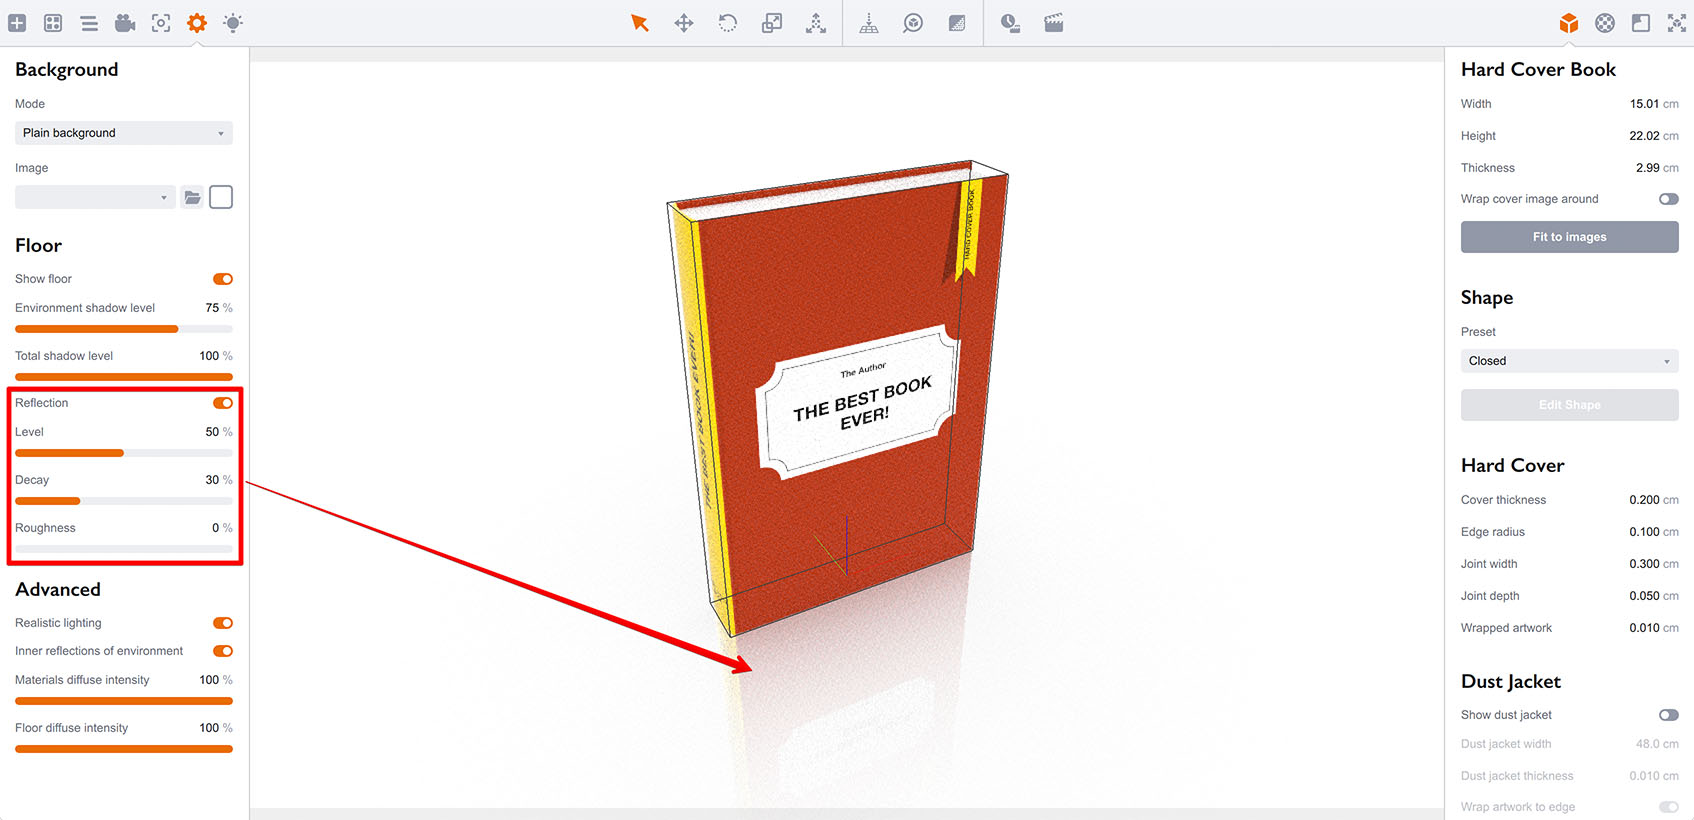
It’s that easy. The sliders below let you configure the reflection.
Reflection Level and Decay
The Reflection level parameter configures the base level of reflection in the floor. The Decay parameter configures how fast the reflection fades away with the distance. Here is the 100% reflection without decay:
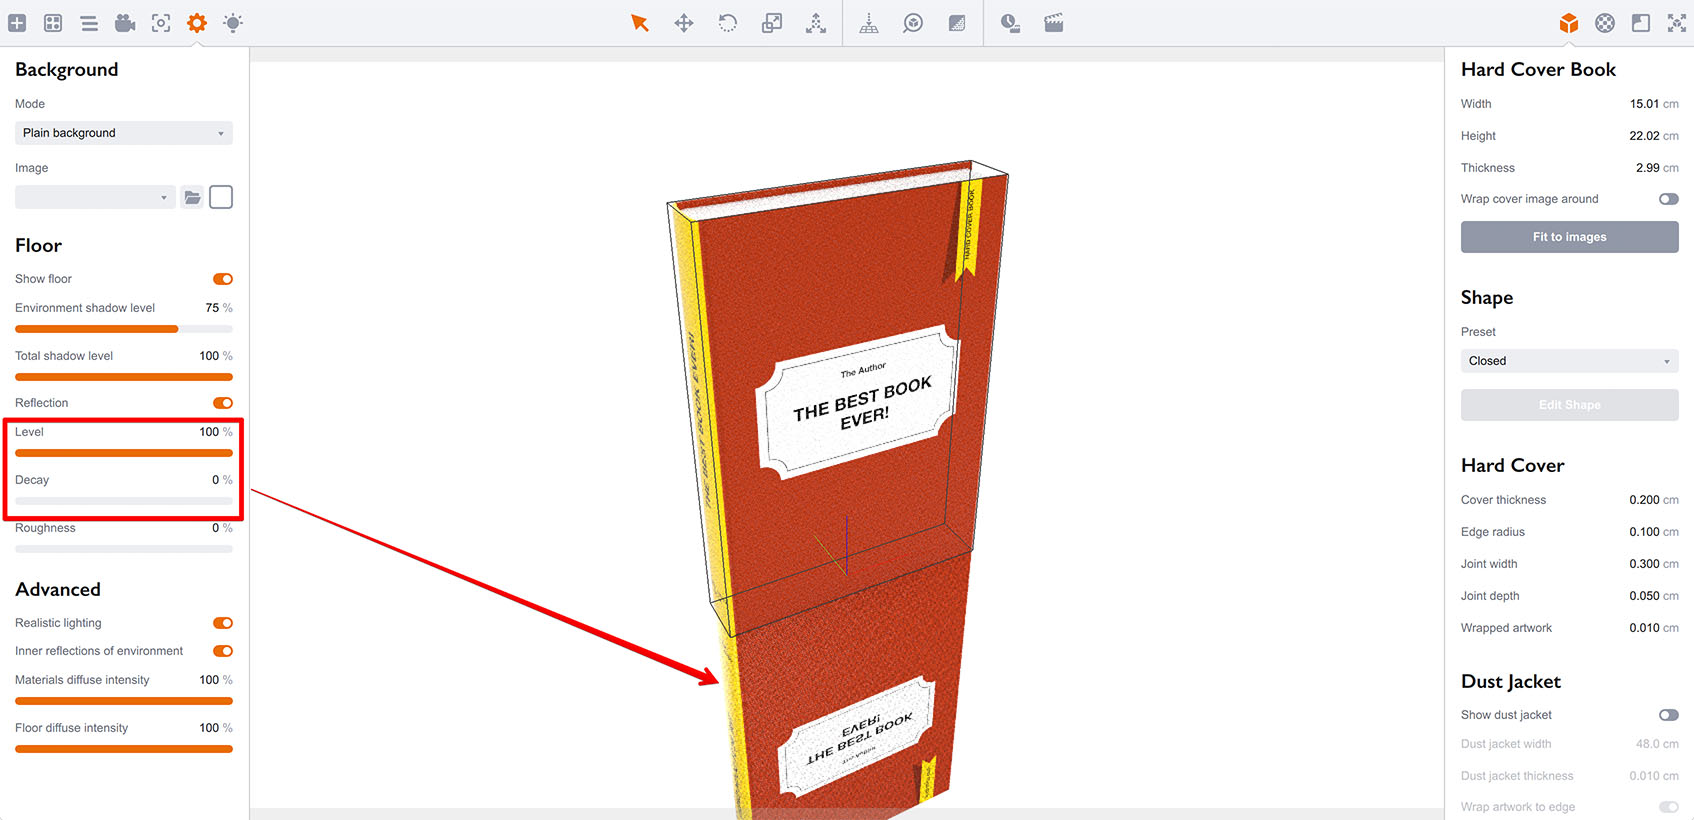
You see that the book is completely reflected and that reflection is the same along the book height. Let’s now set Decay to 20% to see the difference:
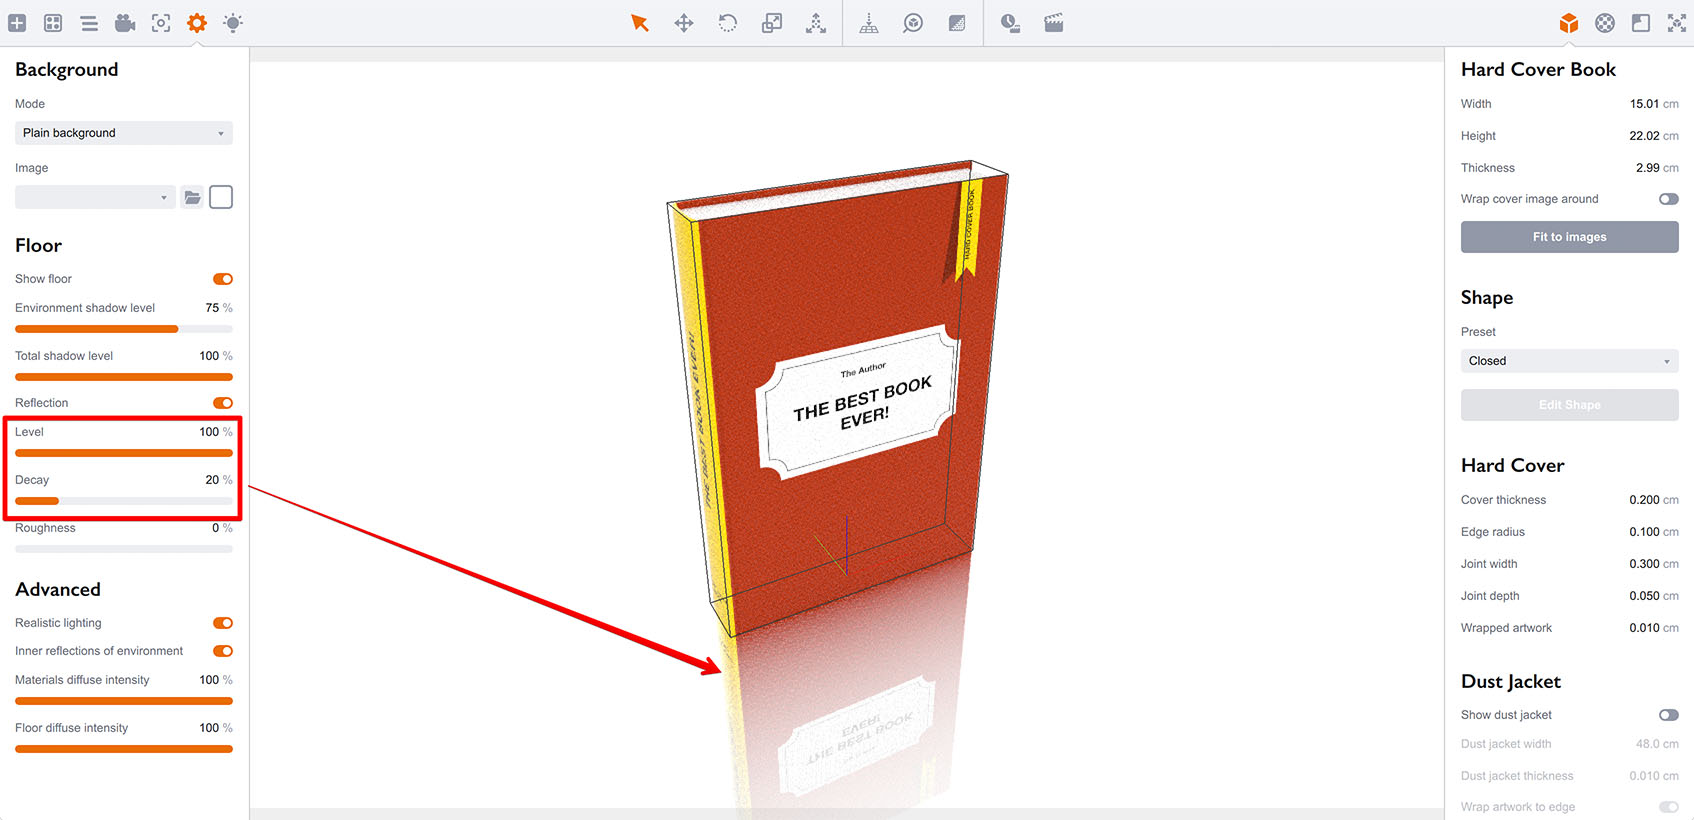
Now let’s change the base reflection level to 50%:
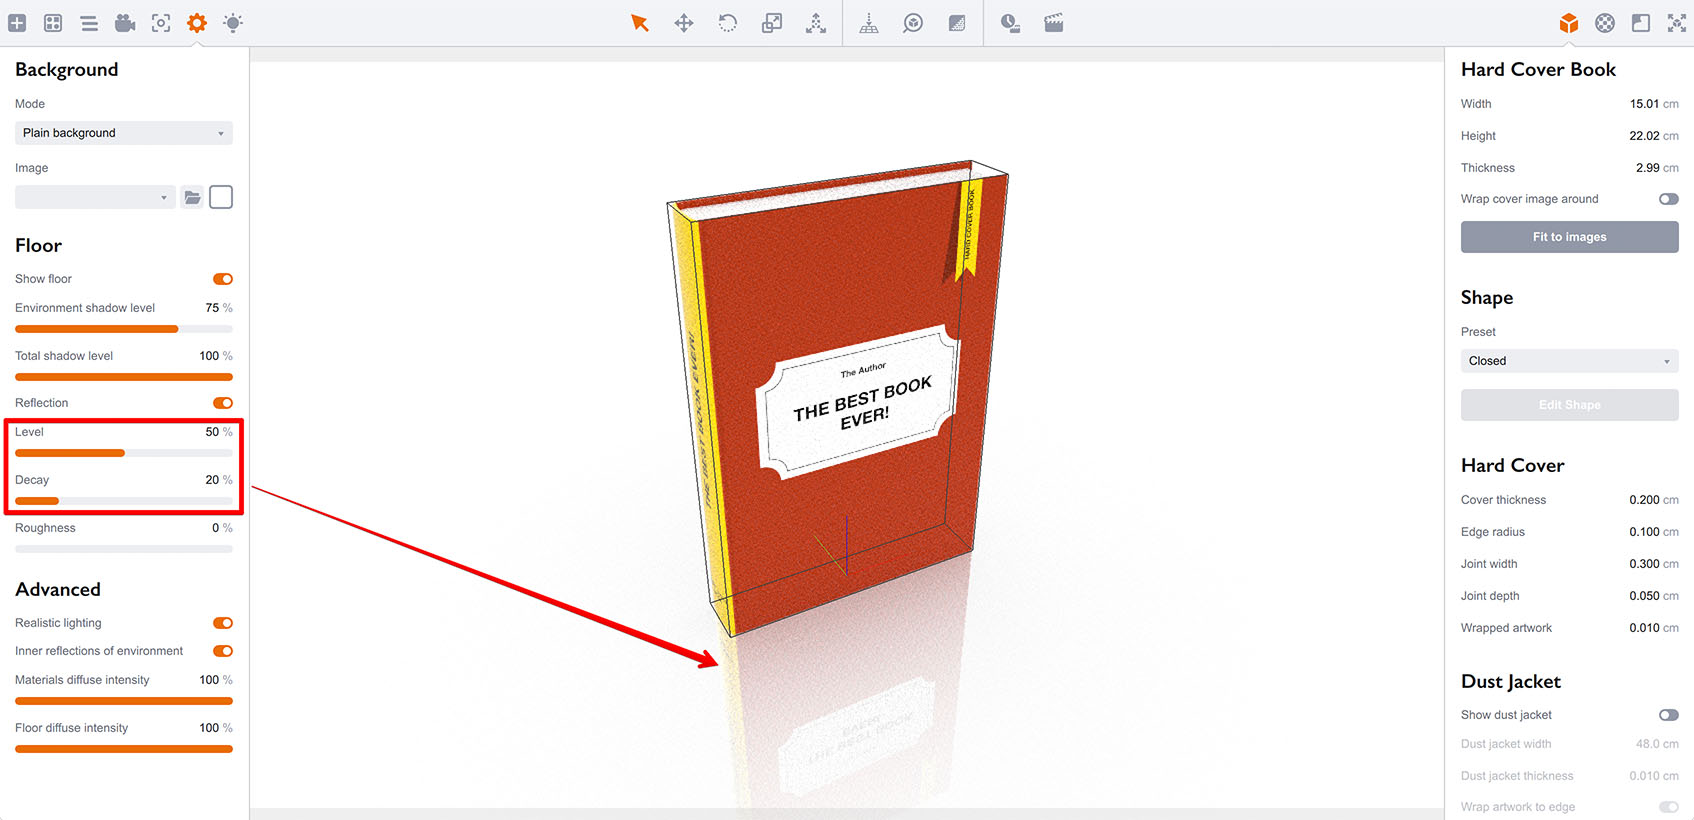
Floor Roughness
Now let’s set the reflection level back to 100% and decay to 20%, then slightly increase the Roughness parameter:
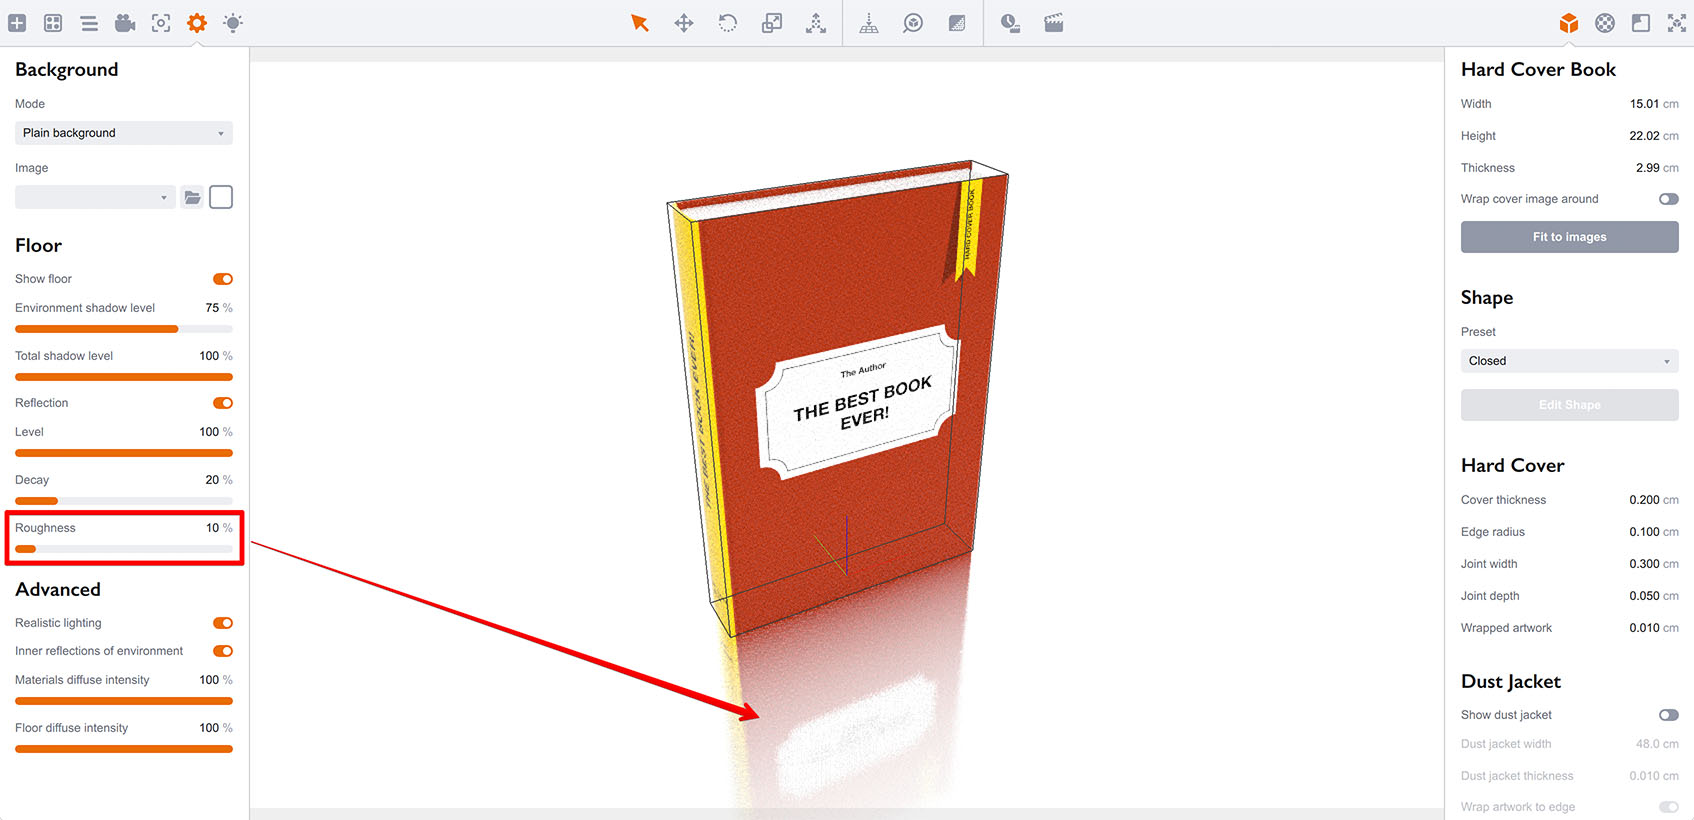
Notice the change in the floor reflection which becomes a little blurry. Let’s increase the roughness further:
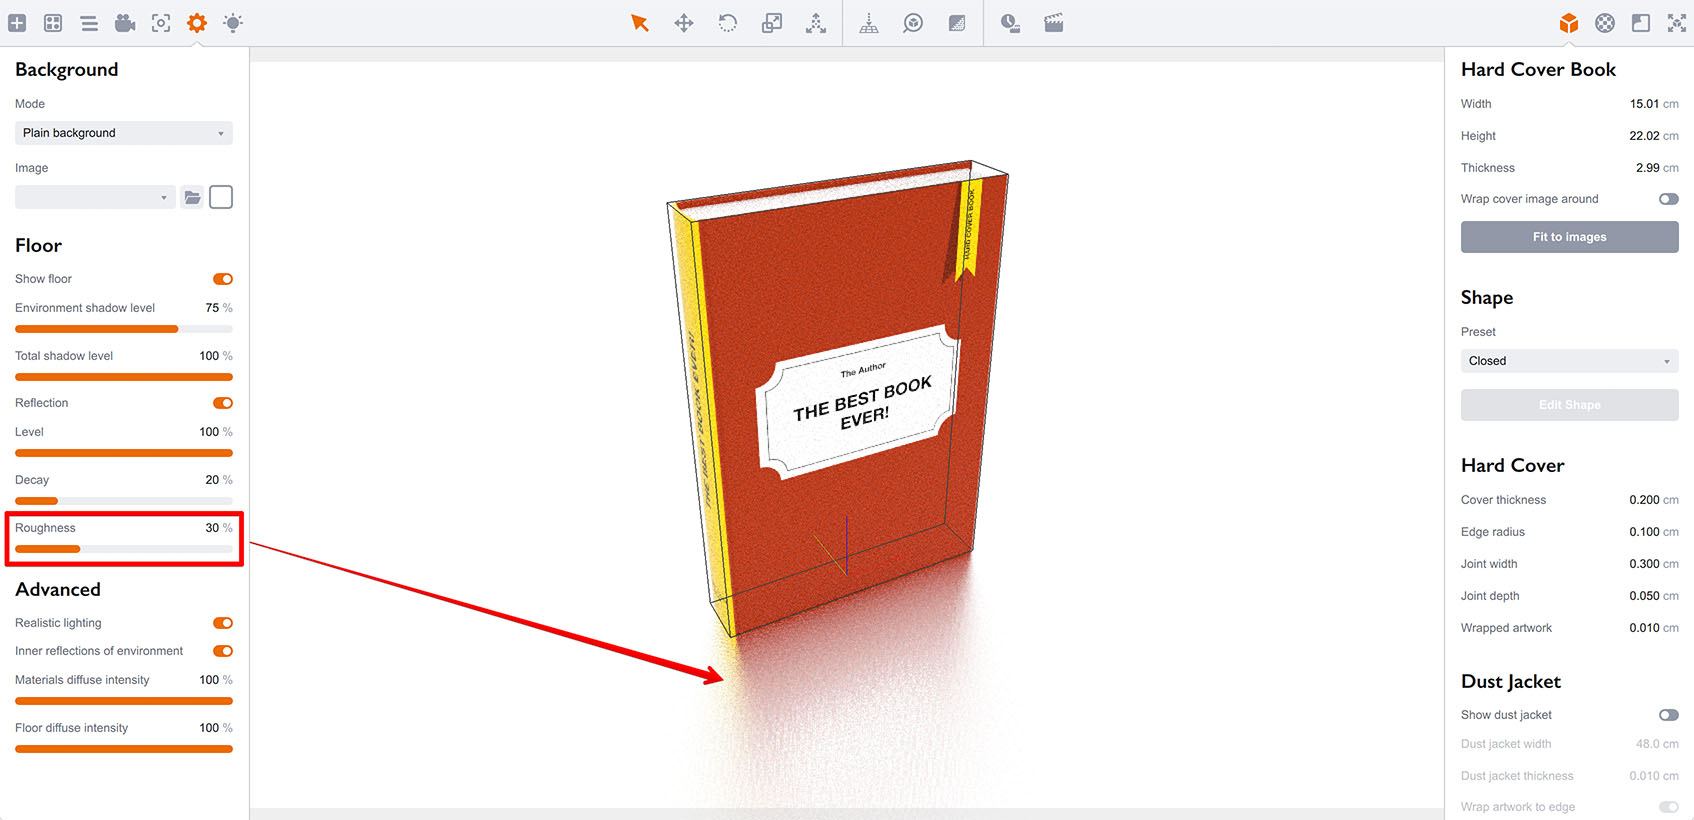
So the Roughness parameter affects the blur level of the floor reflection, exactly as with materials.
That’s All
You’ve learned how to configure the floor reflection in just a few mouse clicks. Cool :)
More Tutorials
Rendering
- Realistic Rendering — improving scenes visual appearance;
- Lighting — control environment and directional lighting;
- Saturated Reflection — make "rich" colorful reflections;
- Floor Reflection — reflecting scene objects in the floor;
- Job Manager — rendering jobs later;
- GPU Rendering — rendering scenes faster on GPU;
- Rendering Time and Quality — getting more control on rendering;
- Simple and Realistic Lighting — speeding up scene rendering.
Materials
- Texture Slots — how to use texture slots in Boxshot;
- Glass Materials — how to make semi–transparent objects look attractive;
- UV–Spot — how to make a UV–spot effect easily;
- Foil Effect — how to add foil–finishing to your shapes;
- Bump — adding relief to your materials;
- Copying Materials — how to copy materials to other shapes;
- Custom Materials — extend the materials library with your own ones;
- Semi–Transparent Labels — making semi–transparent and partial labels;
- Boxshot Materials — more details about Boxshot materials.
Features
- Decals — applying decals and configuring them;
- Bump Decals — applying bump where it is needed;
- Depth Of Field — adding more realism to your renderings;
- Tools — read more about Boxshot tools;
- Managing Images — how to manage image files used by Boxshot projects;
- Shapes Instances — creating lightweight copies of other shapes;
- Model Editor — edit embedded models in many ways;
- Shrink Wrap — heat–shrink film simulation for objects wrapping;
- Physics Simulation — applying gravity to your scene;
- Palletize — arrange scene objects for the pallet;
- Snapshots — save scene state to re–use it later;
- Translation — teach Boxshot to speak your language;
- Vector Artwork — how to maintain the quality of vector artwork.
Shapes
- Lathe Objects — making symmetrical objects using revolving curves;
- Loft Objects — making custom objects with 2D cross–sections;
- 3D Text — making 3D text objects in Boxshot;
- Extruded Objects — how to make thick 3D object of your flat 2D curve;
- Conical Labels — making conical labels with distorted artwork;
- Dieline Box — a very realistic dieline–based box;
- Custom Shapes — adding custom shapes to the left panel;
- Third Party Shapes — importing third party shapes to Boxshot.