Depth Of Field
The depth of field effect provides a better simulation of physical camera lens and aperture settings that gives much more realistic renderings. Boxshot features a simple circle aperture with adjustable size and focal distance that is more than enough for making really compelling pictures. This tutorial shows how to use it.
Let’s make a scene
We’ll need a scene with several objects, some of them a little bit further from where the camera is than others. The depth of field effect depends on the distance from camera, so make something like this:
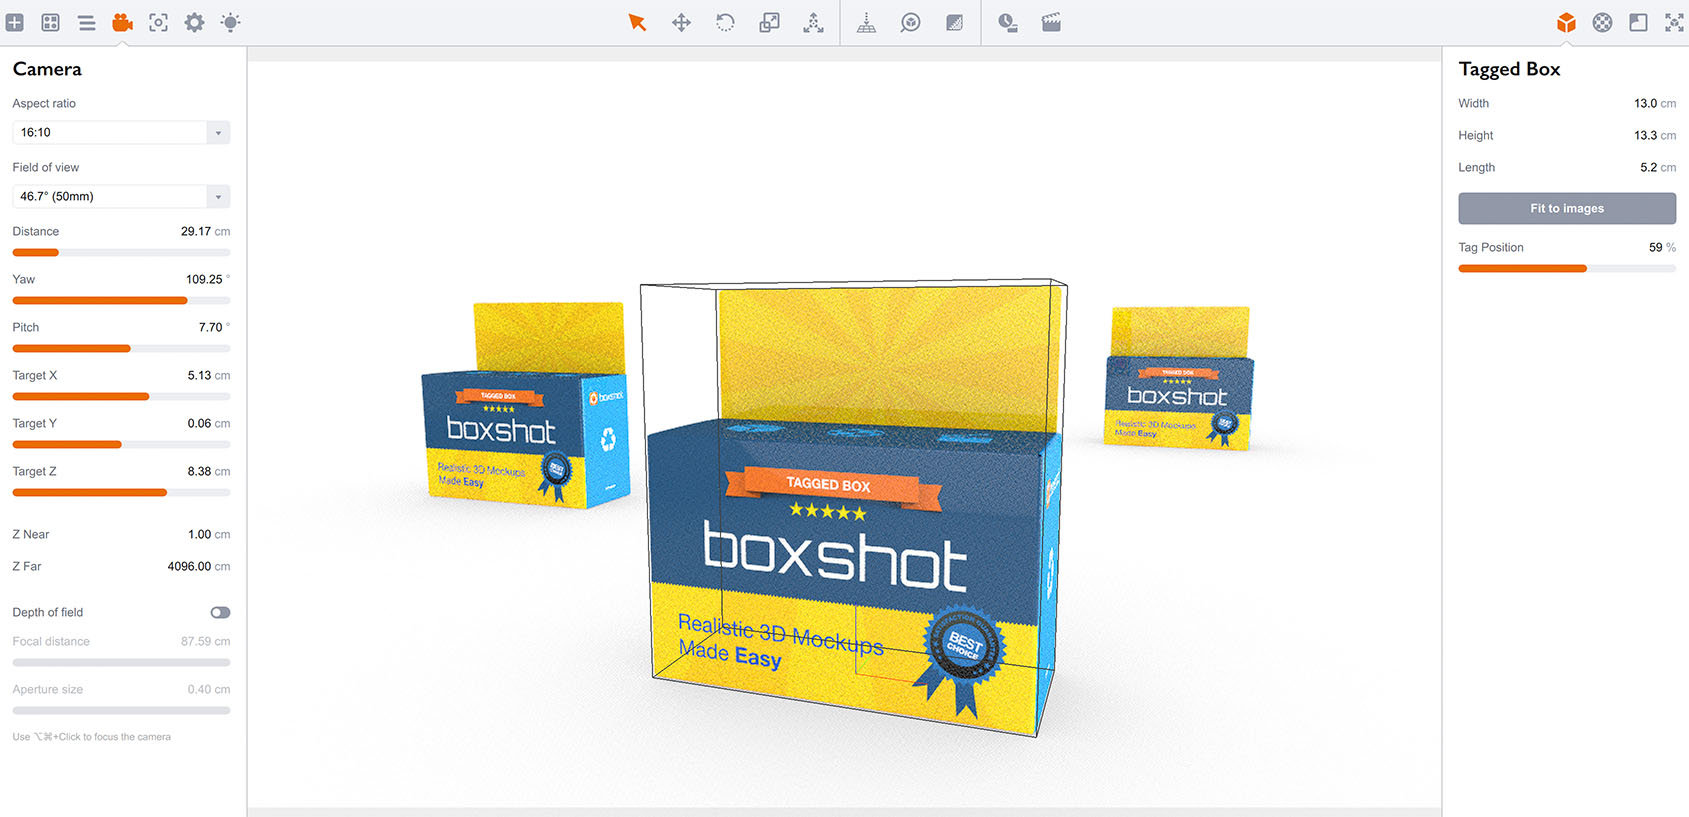
Move most of the objects to the background, leaving just one object a little closer to the camera, so the scene has some depth.
Nothing new so far, right?
Enabling Depth of Field
Now go to the camera panel on the left and check the Depth of field box and see the difference:
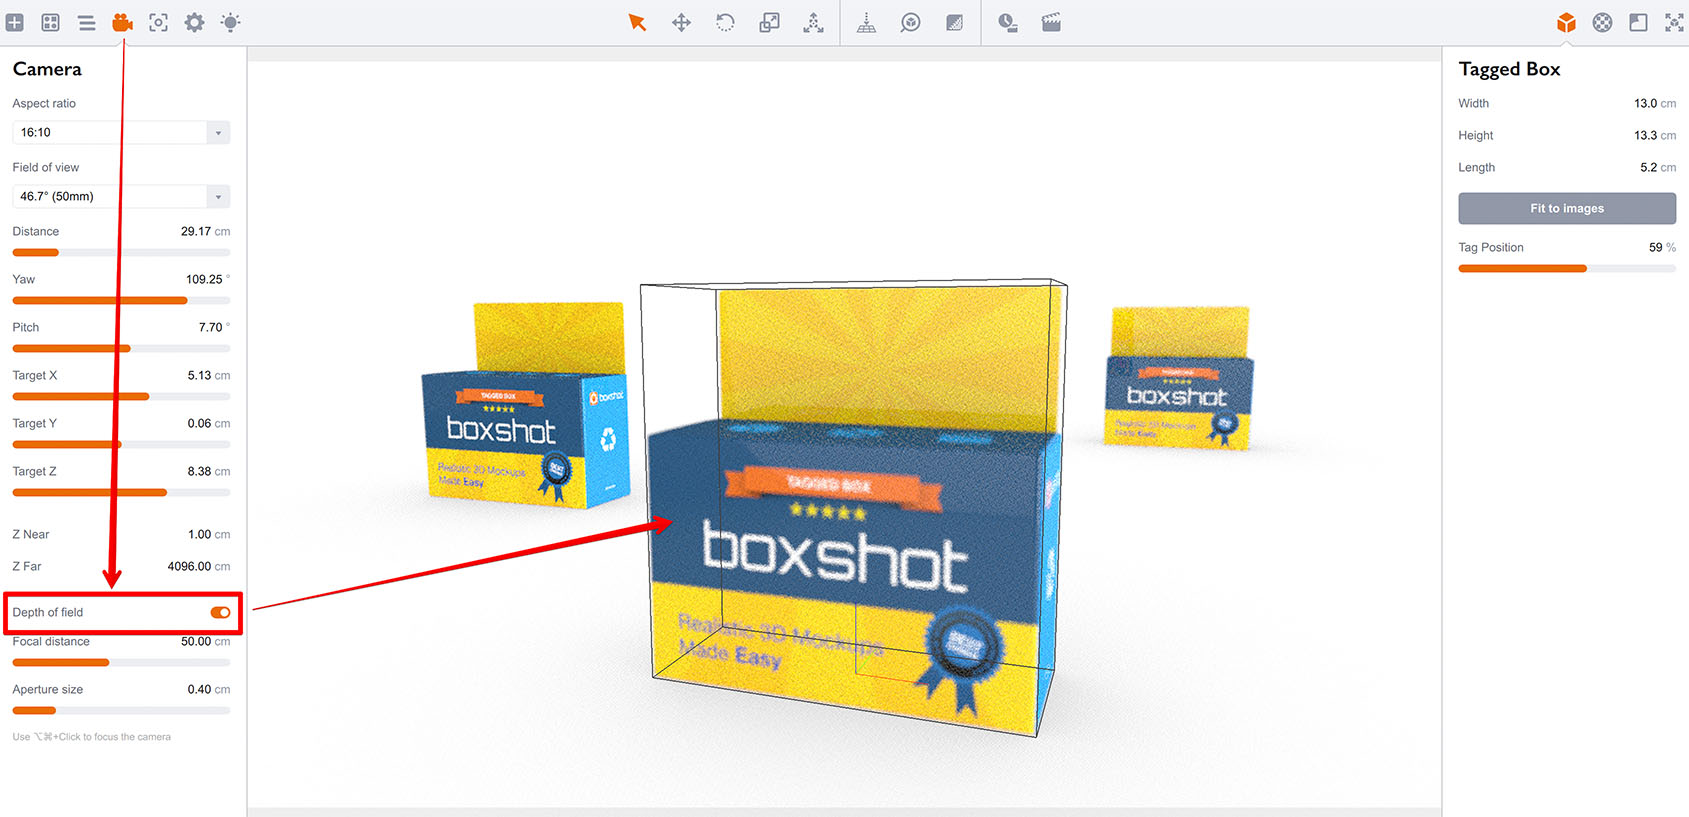
The front–most and the right boxes are blurred, while the left one is sharp. That looks pretty much like an out–of–focus photo, right? Let’s focus it.
Focal distance
Exactly as with a real camera, Boxshot has a distance from the lens where the objects are sharply in focus. That distance is controlled by the Focal distance slider. Although you can change it manually, it is highly recommended to use the automatic way: simply hold the Control/Command + Alt keys and click the place you want to be in sharp focus. You will see the Focal distance parameter changes as Boxshot adjusts the focal distance of the lens.
Now focus on the front box and see the changes:
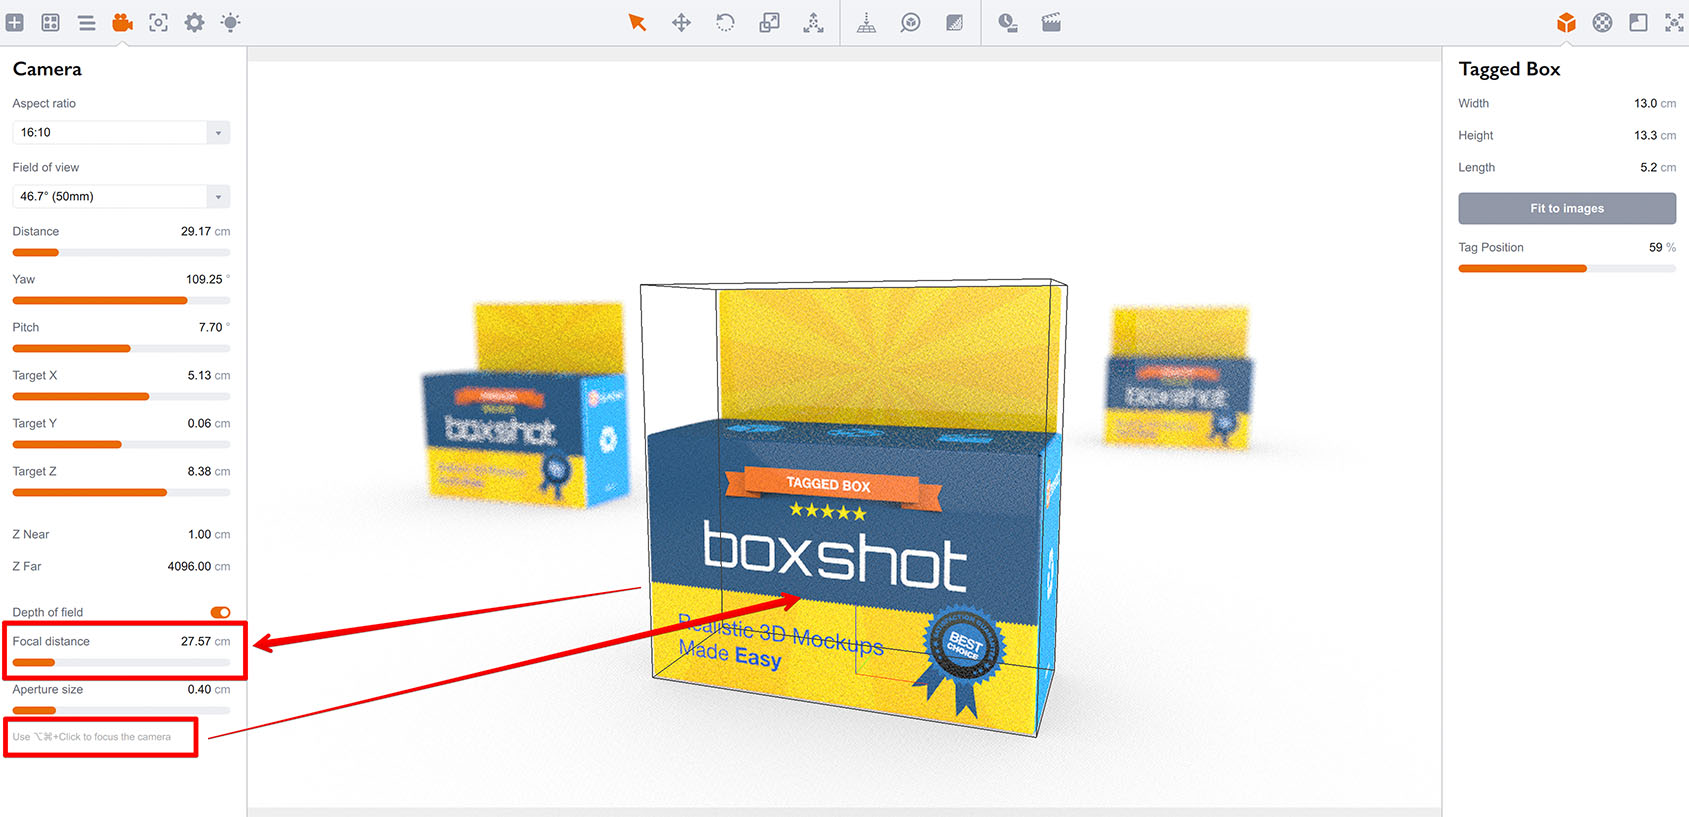
As you can see, the front box is now in focus, while the back boxes are blurry. You may also notice that the scene looks more realistic than the flat one we had before.
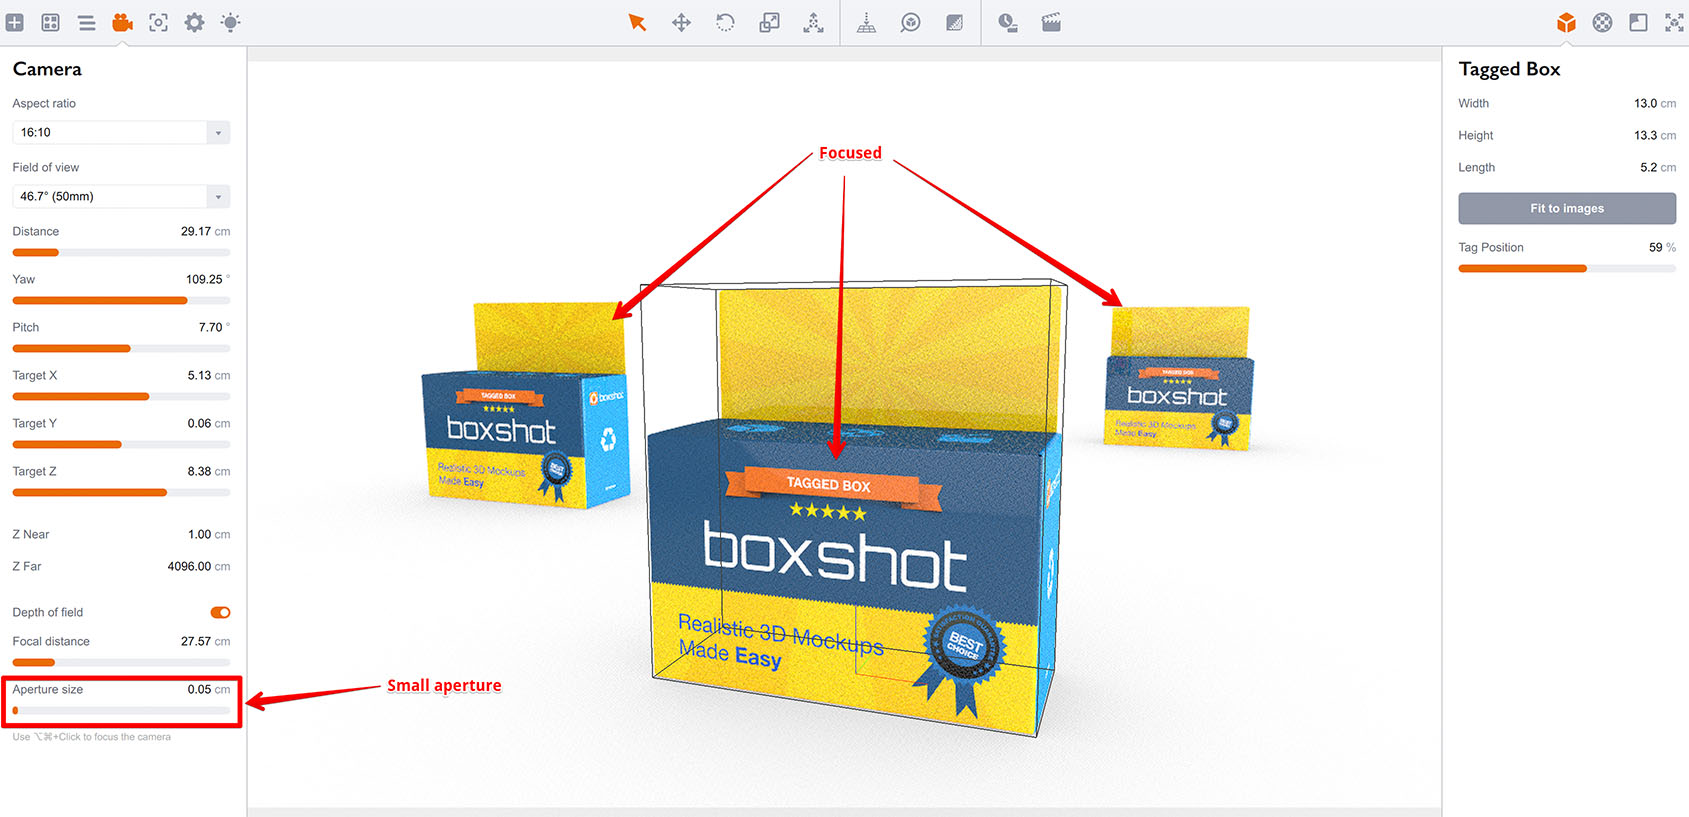
Aperture size
The Aperture size parameter controls the level of the effect. The smaller the aperture size, the less effect of changes to depth of field. This parameter uses real–world size, measured in centimeters, so you will need to adjust it to get the look you want for your scene. You will see no depth of field effect on large scenes with small aperture size and you will get everything blurred with a large aperture size setting on small scenes.
Let’s give it a try. Using the same scene, increase the aperture size by 2–3 times and see the difference:
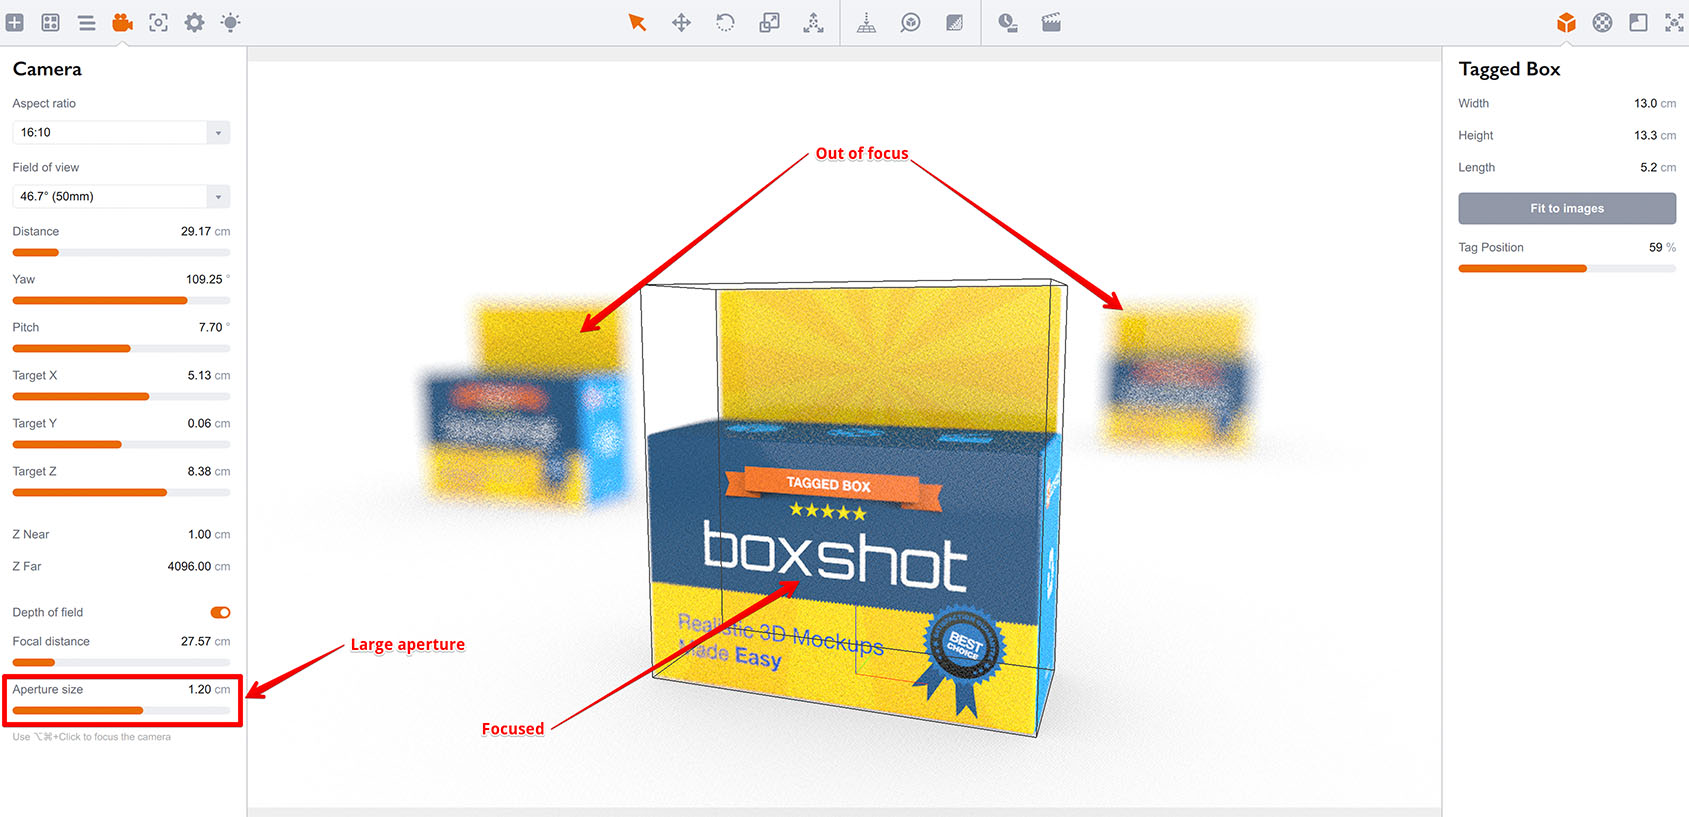
See it? The back boxes are completely blurred and even the back parts of the front box are blurred. The aperture is wide open now and the “sharp” range becomes quite short. The only sharp area is around the place that you clicked on while focusing.
Let’s do the opposite thing and make the aperture smaller than before:
Now the front box is as sharp as before, and the back ones are just a little bit blurred.
Once again
In summary: to make the depth of field effect work for your scene you need to enable it first, then focus on the object you need, and finally adjust the aperture size to make as much blur as you want. Increase the aperture size to get more blur, and reduce it to get less.
That’s all
That’s basically all you need to know about the depth of field effect in Boxshot. Note that rendering takes longer when the effect is enabled.
More Tutorials
Rendering
- Realistic Rendering — improving scenes visual appearance;
- Lighting — control environment and directional lighting;
- Saturated Reflection — make "rich" colorful reflections;
- Floor Reflection — reflecting scene objects in the floor;
- Job Manager — rendering jobs later;
- GPU Rendering — rendering scenes faster on GPU;
- Rendering Time and Quality — getting more control on rendering;
- Simple and Realistic Lighting — speeding up scene rendering.
Materials
- Texture Slots — how to use texture slots in Boxshot;
- Glass Materials — how to make semi–transparent objects look attractive;
- UV–Spot — how to make a UV–spot effect easily;
- Foil Effect — how to add foil–finishing to your shapes;
- Bump — adding relief to your materials;
- Copying Materials — how to copy materials to other shapes;
- Custom Materials — extend the materials library with your own ones;
- Semi–Transparent Labels — making semi–transparent and partial labels;
- Boxshot Materials — more details about Boxshot materials.
Features
- Boolean Operations — combining and subtracting shapes, making holes;
- Decals — applying decals and configuring them;
- Bump Decals — applying bump where it is needed;
- Depth Of Field — adding more realism to your renderings;
- Tools — read more about Boxshot tools;
- Managing Images — how to manage image files used by Boxshot projects;
- Shapes Instances — creating lightweight copies of other shapes;
- Model Editor — edit embedded models in many ways;
- Shrink Wrap — heat–shrink film simulation for objects wrapping;
- Physics Simulation — applying gravity to your scene;
- Palletize — arrange scene objects for the pallet;
- Snapshots — save scene state to re–use it later;
- Translation — teach Boxshot to speak your language;
- Vector Artwork — how to maintain the quality of vector artwork.
Shapes
- Lathe Objects — making symmetrical objects using revolving curves;
- Loft Objects — making custom objects with 2D cross–sections;
- 3D Text — making 3D text objects in Boxshot;
- Extruded Objects — how to make thick 3D object of your flat 2D curve;
- Conical Labels — making conical labels with distorted artwork;
- Dieline Box — a very realistic dieline–based box;
- Custom Shapes — adding custom shapes to the left panel;
- Solid Shapes — create boolean-friendly shapes;
- Script-Based Solids — create complex solid shapes with code;
- Third Party Shapes — importing third party shapes to Boxshot.