3D Conical Labels in Boxshot
Boxshot lets you make 3D conical labels. In order to do so, you need an image with distorted artwork that Boxshot loads and applies to the shape. The tutorial below shows the process in details.
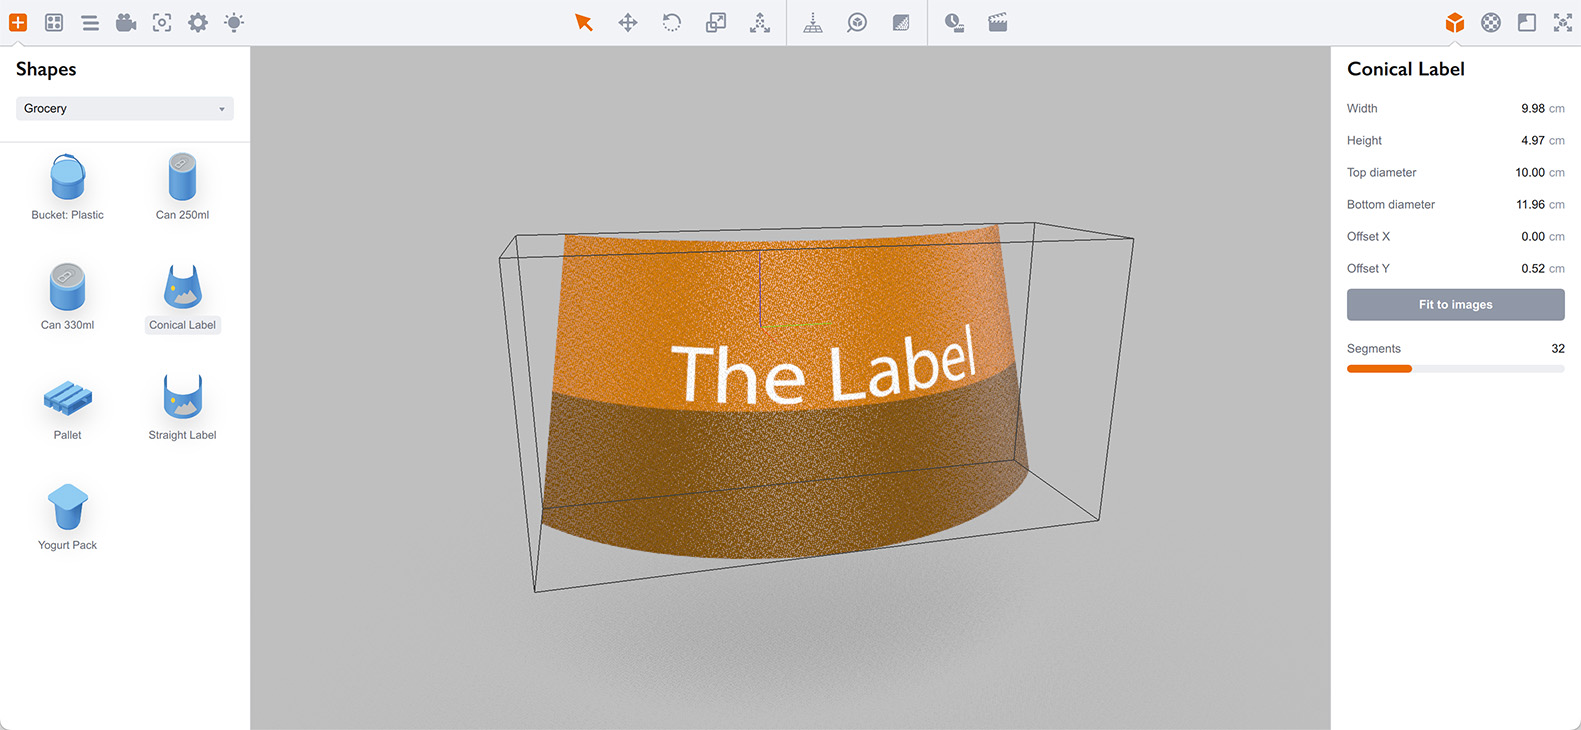
We’ll start with creating a conical label shape. Locate the shape in the shapes panel on the left and drag it into the scene:
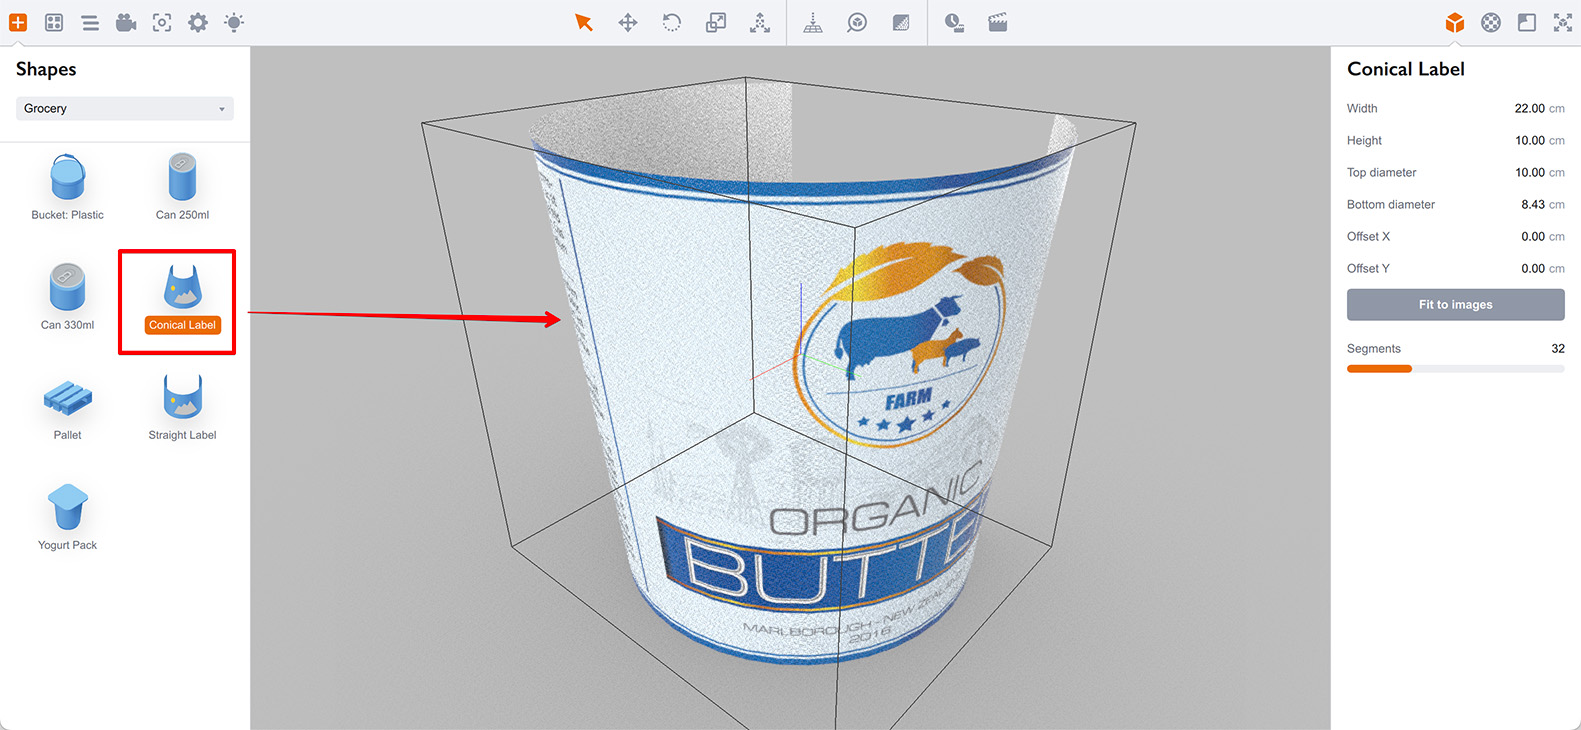
You’ll see a conical label with default texture. The bottom radius of the cone is smaller than the top, this label can fit a bucket or something similar.
Note that all the texts on the label look straight and parallel to the floor. However, if you check the artwork by pressing the Crop texture button in the artwork slot of the material, you’ll find out that it doesn’t look that:
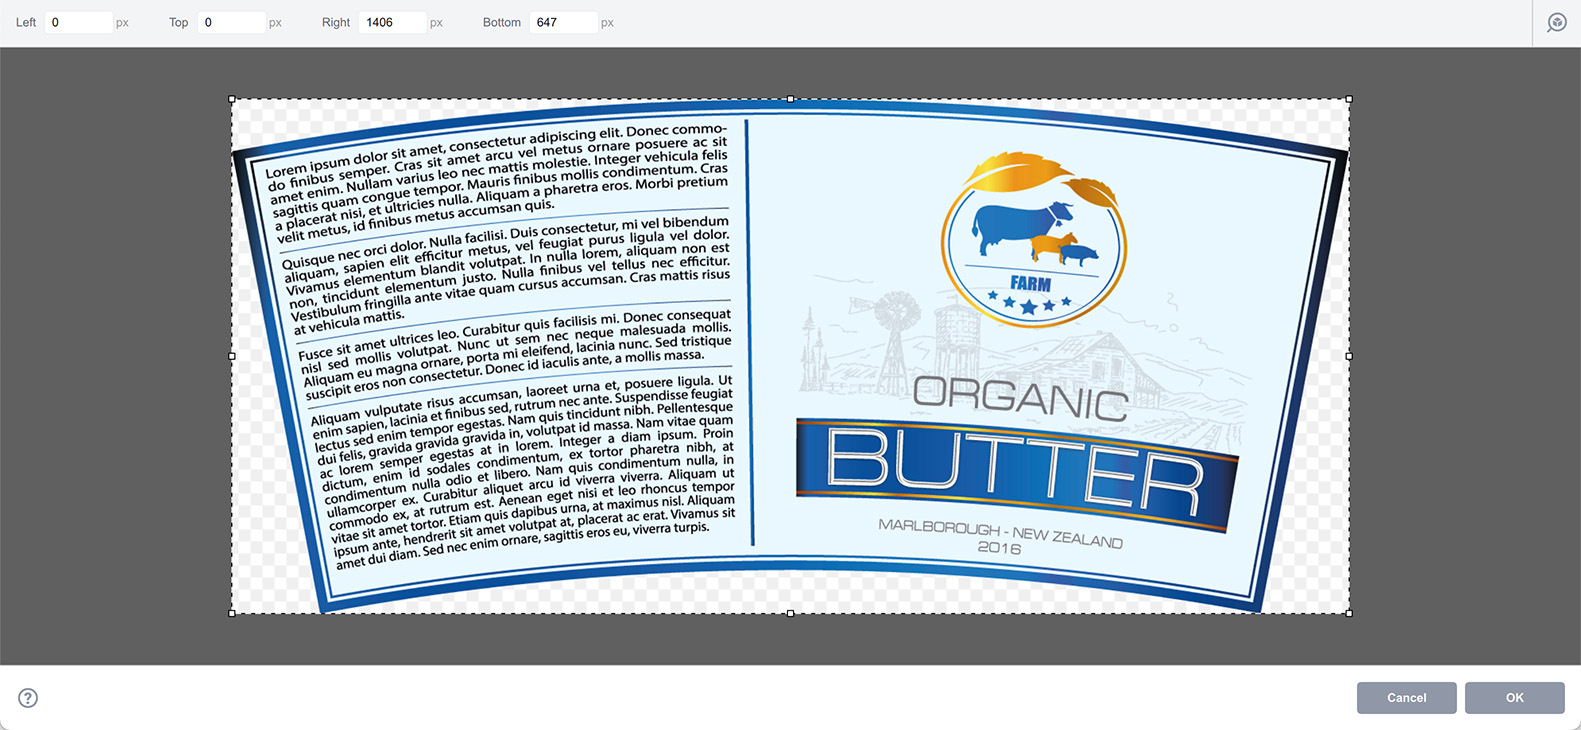
The thing about conical labels is that they need a special “distorted” artwork, so once applied to a conical surface it looks properly aligned. Boxshot expects you to provide such artwork and lets you map it to the shape you created.
Let’s Make a Label
As you are here, you probably already have one, but let’s still make a label from scratch to show the process. We’ll start with a conical label for the surface with the top diameter of 10cm and the bottom diameter of 12cm. The label width will be 10cm and height will be 5cm. Let’s put this values into the shape’s parameters:
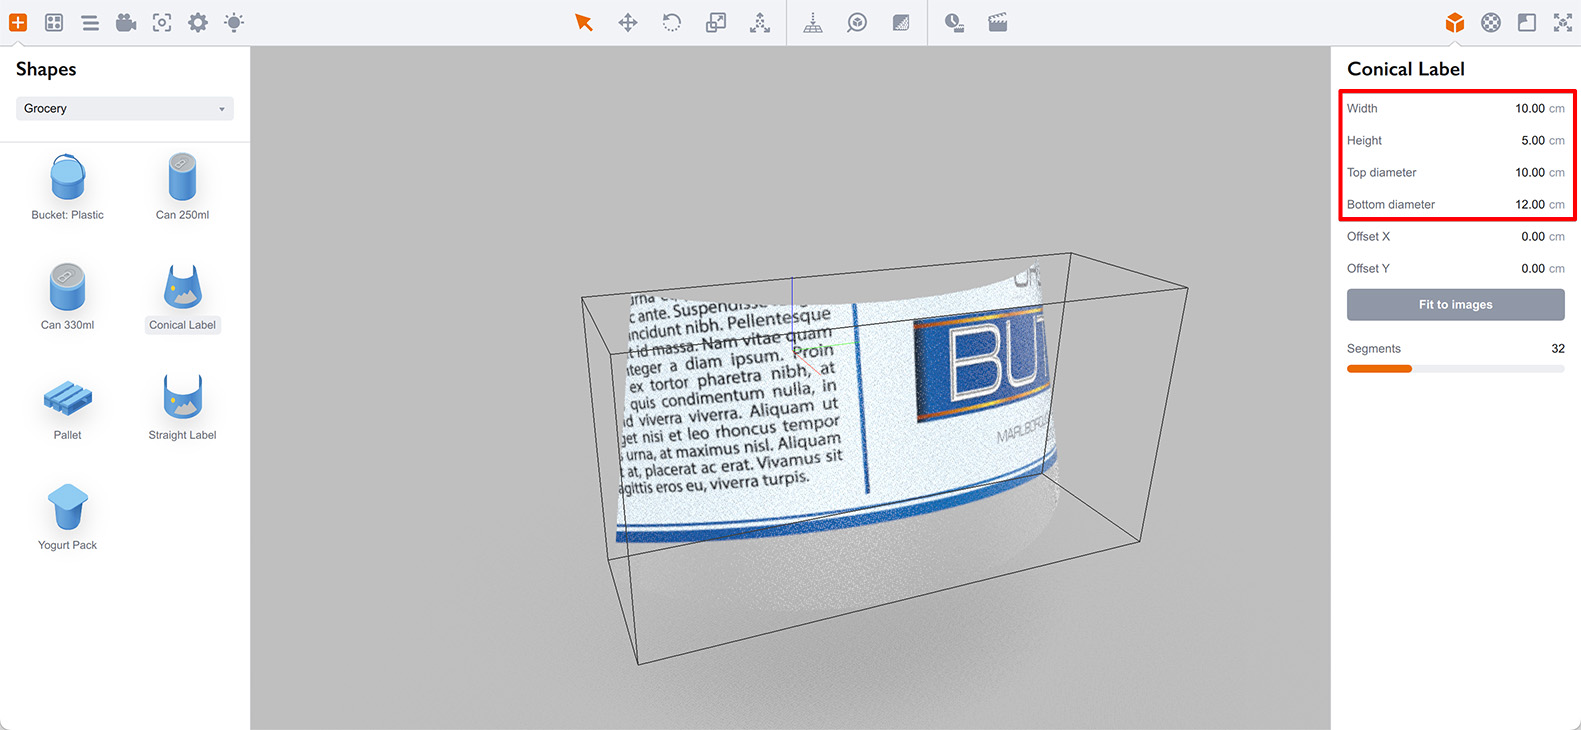
Once we changed the parameters, Boxshot updated the shape. The image is applied wrong and the transparent area is added at the bottom. The reason is that we need to provide a properly distorted artwork once we changed the cone or the label dimensions. It is the essential part when working with conical labels both in Boxshot and in real life.
You need to click Fit to images to open the artwork editor for conical labels.
Artwork Editor
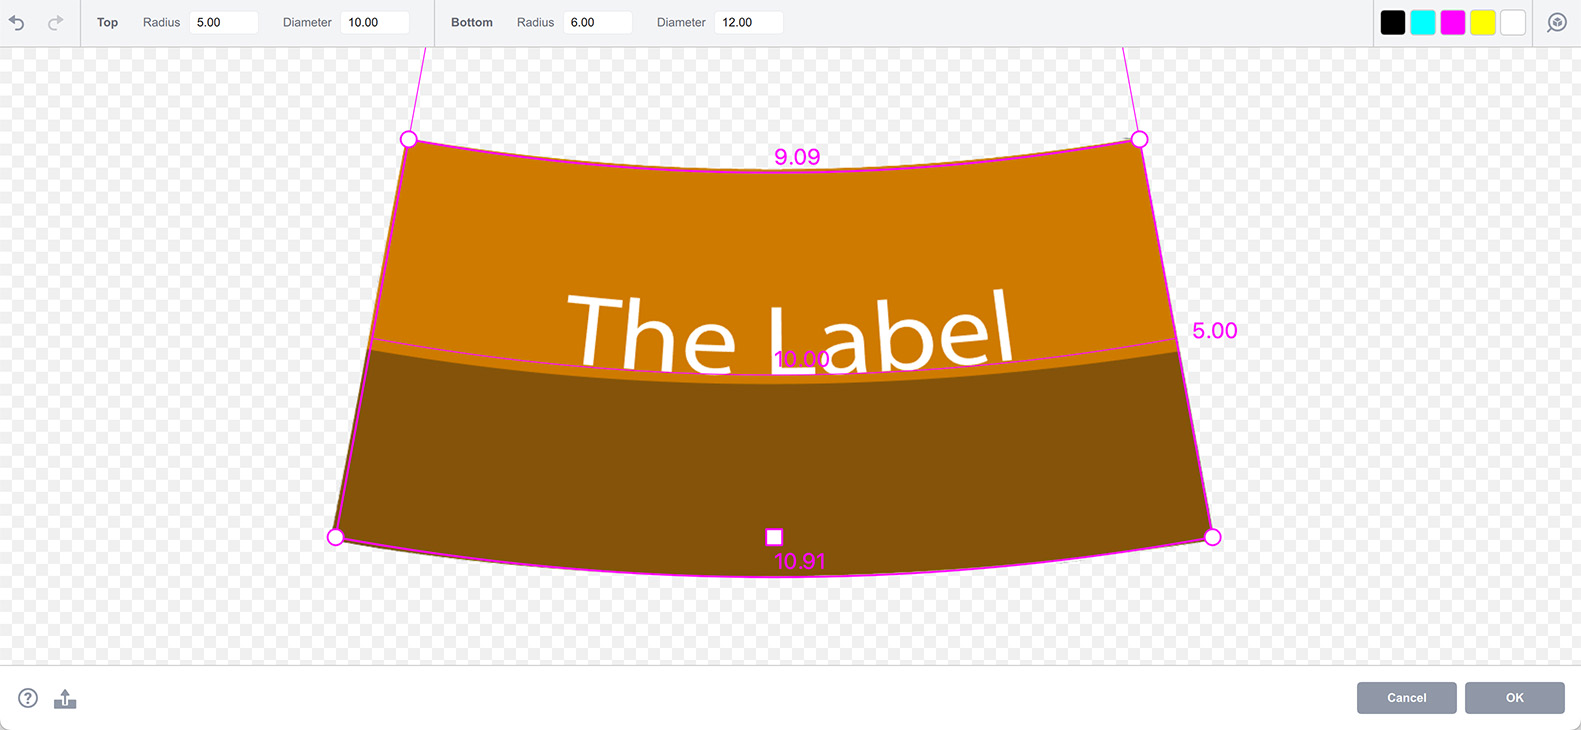
Once you clicked Fit to images, you’ll see the artwork editor window:
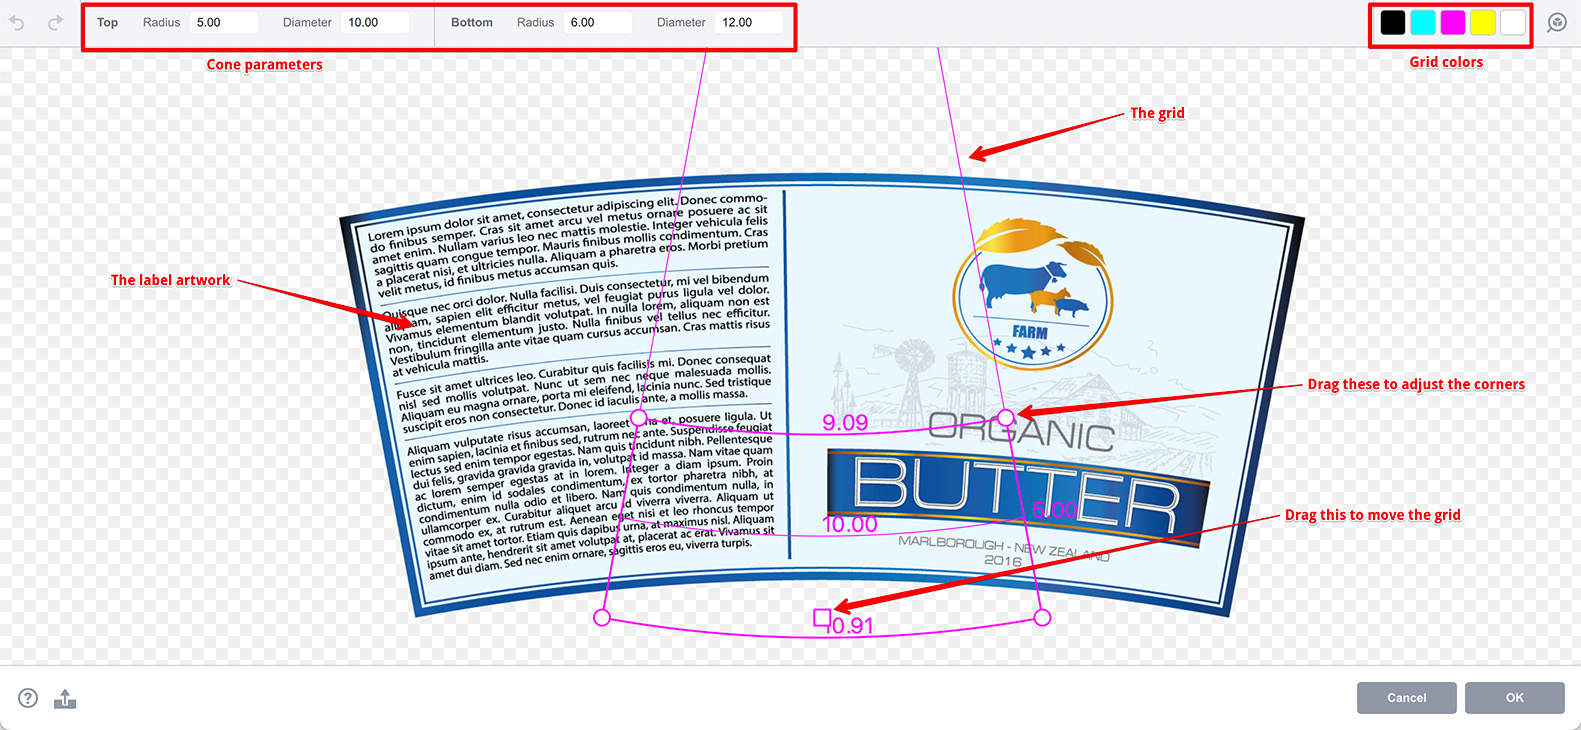
You see the artwork in the middle with the magenta frame above — the grid. The grid defines which part of the artwork is used for the label. The shape of the grid is controlled by both label’s width and height and cone’s diameters. You can move the grid by dragging its square handle and change the grid by dragging the round handles. Note that in the second case you’ll also update the label and cone parameters.
There is a toolbar at the top, showing the cone parameters you entered earlier. The top diameter is 10cm and the bottom one is 12cm. The grid shows three widths (top, middle and bottom) and the height of the label. You can see that middle width is 10cm and the height is 5cm, exactly as we set it up above.
Note that the grid doesn’t overlay the artwork completely and there is a transparent area at its bottom. That’s why you see the bottom part of the shape transparent.
So we need a proper artwork for that exactly grid that we can later match and apply to the shape we’ve just created. Boxshot lets you export a template that you can later fill with the artwork. Click the Export Template button at the bottom left corner of the window to save the grid template to an SVG file. You can later open the template in your favorite editor and make the artwork.
Here we opened the template in Adobe Illustrator:
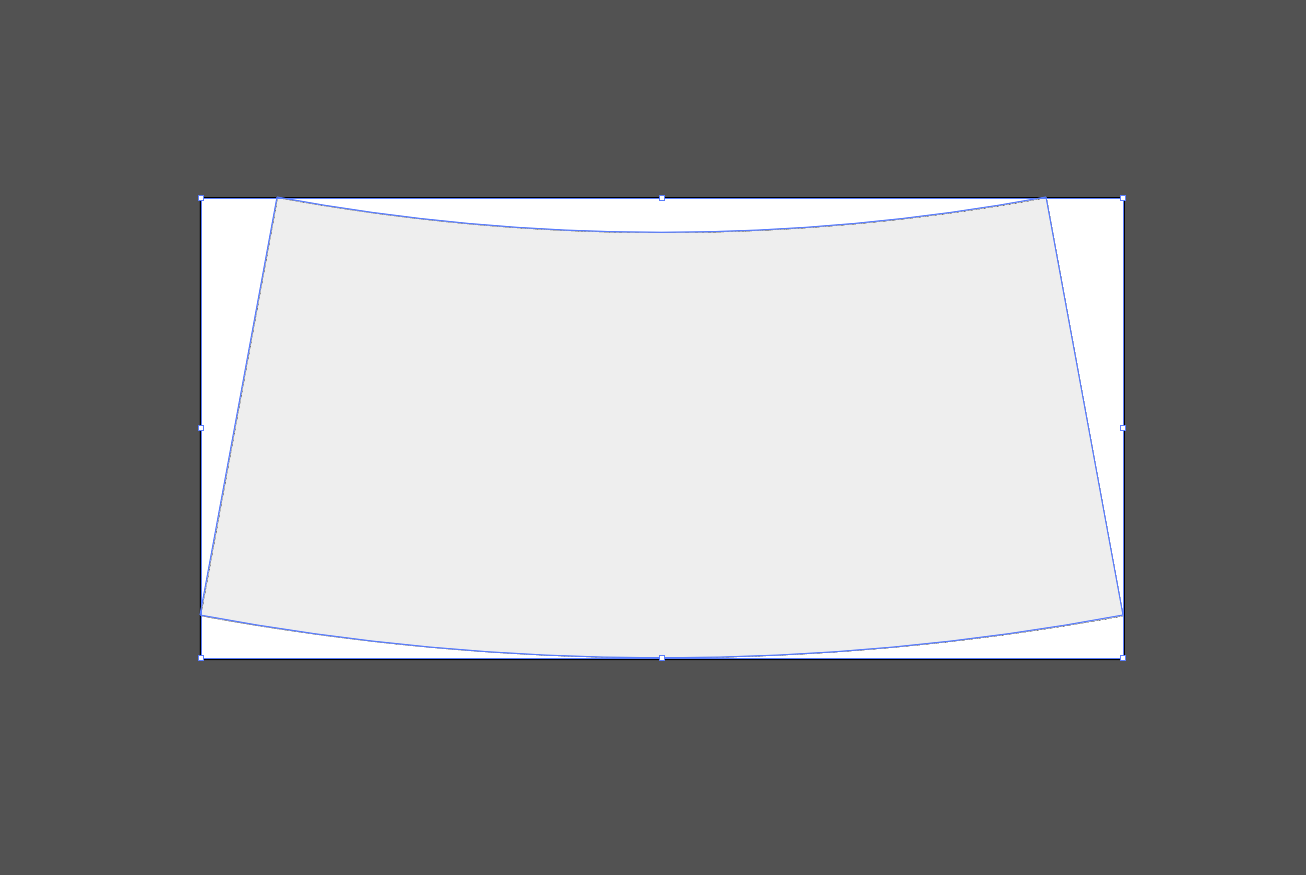
Let’s start with a simple “flat”, undistorted label artwork. Something like this:
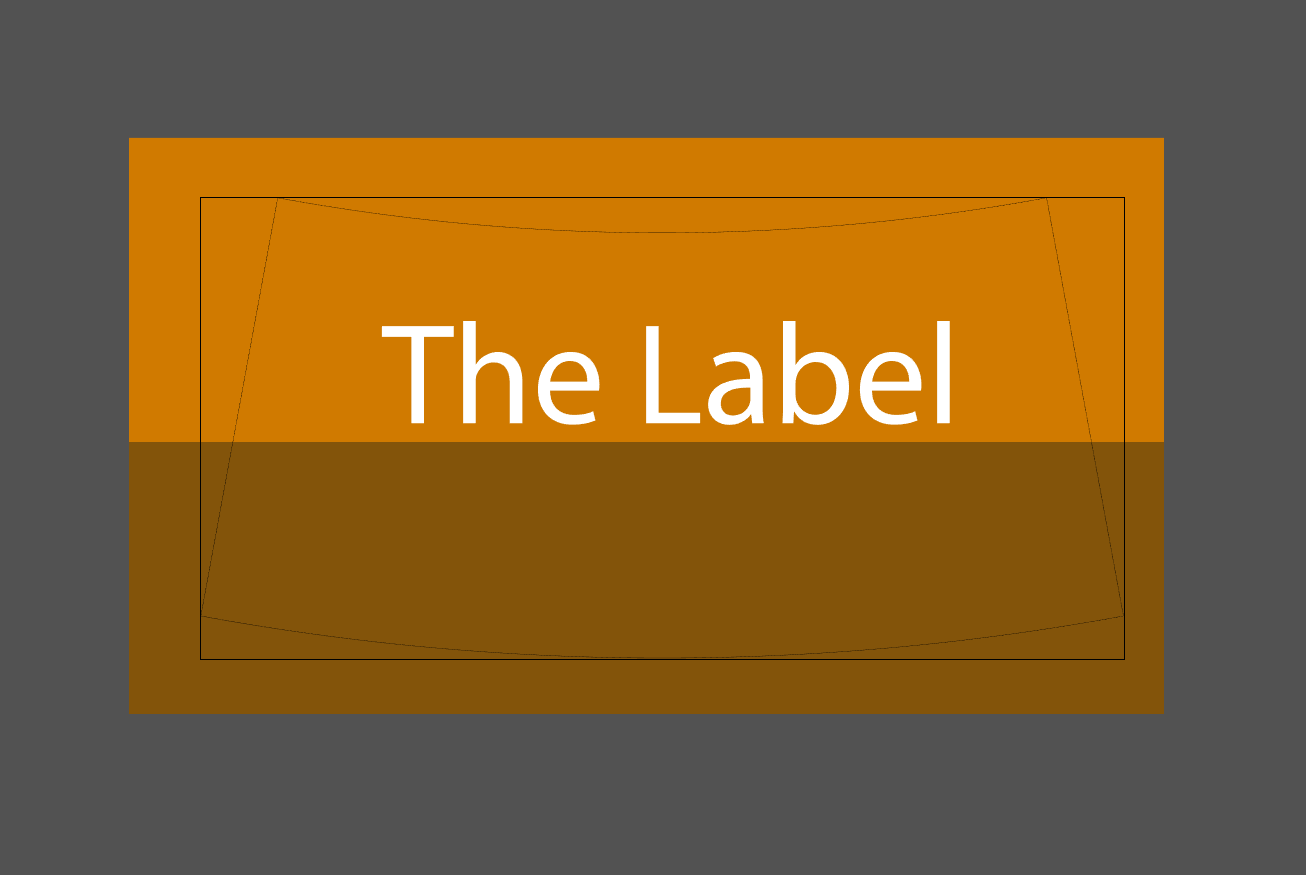
The next step is to distort the artwork, so it follows the template. Here’s the distorted version:
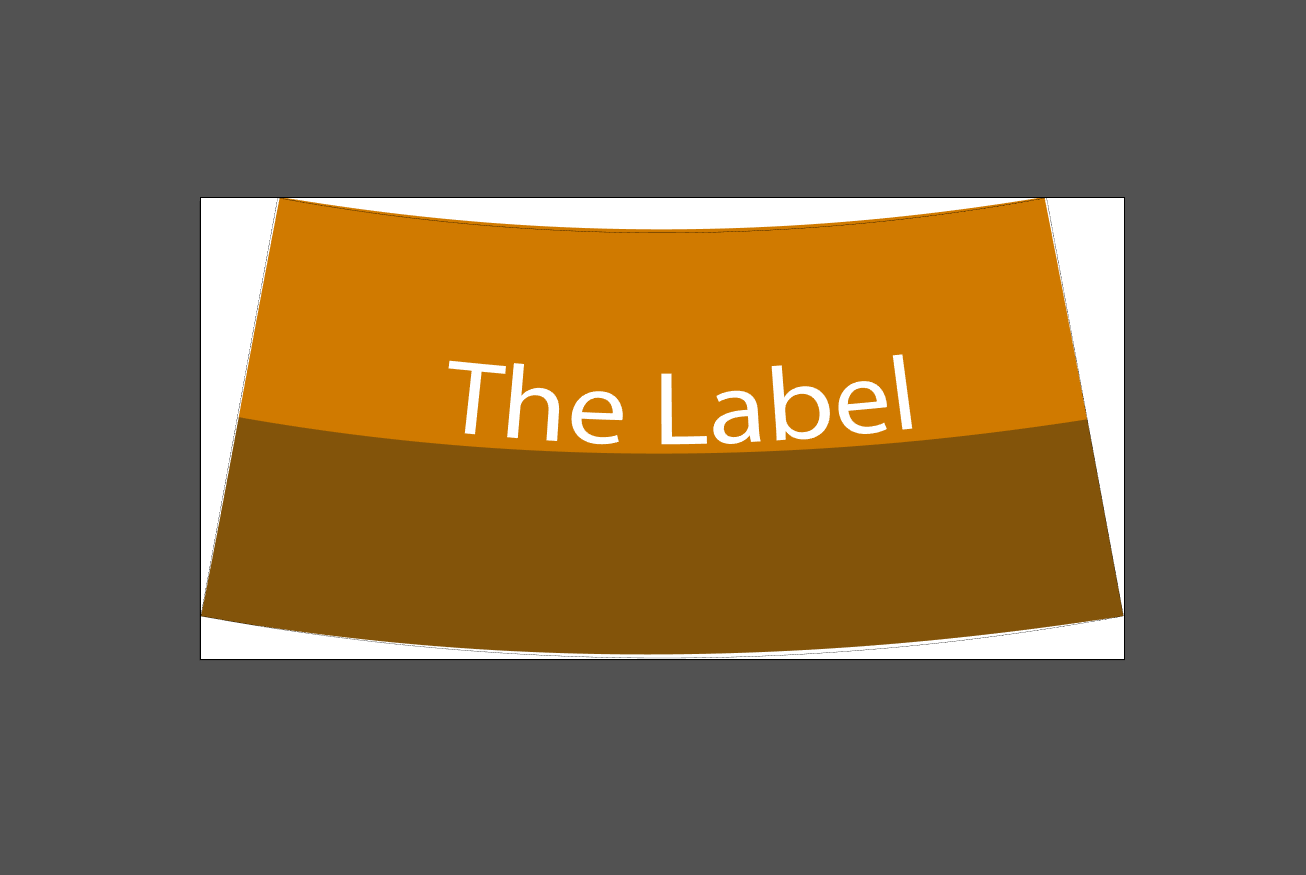
You may want to spend more time on this and make sure everything is perfectly aligned, but that’s enough for our tutorial. Now export the new artwork into the PNG or TIFF format and load it to the front surface of the label. Then bring back the artwork editor. You should get something like this:
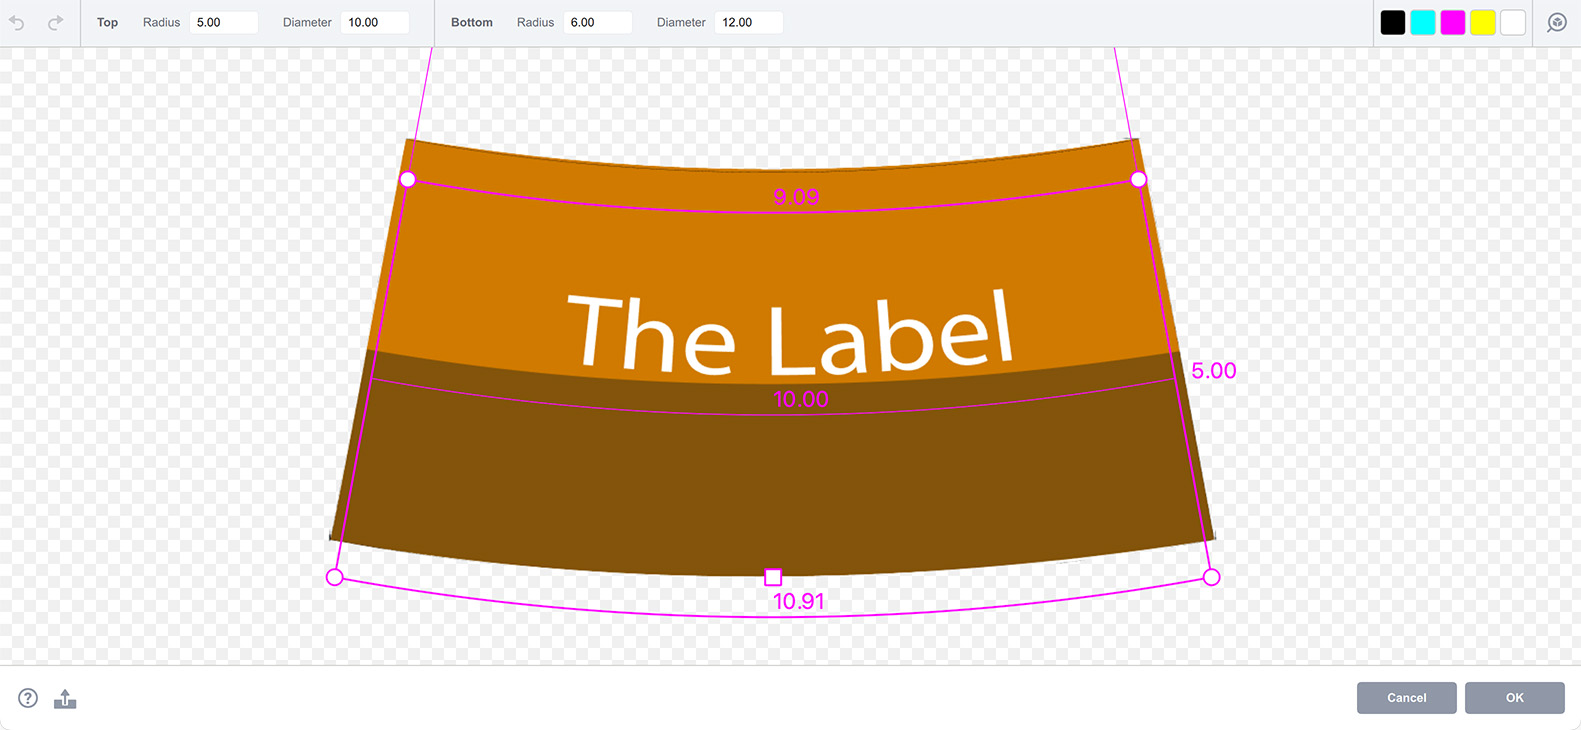
As you may see, the artwork now matches the shape of the grid, all you need is to align the grid with the artwork like below:
You can do this by dragging the grid by its square handle. Do not touch round handles at that stage, as this way you may change the grid and the artwork will not be perfectly aligned.
Once done, click OK to see the resulting label:

You see that the horizontal line is perfectly parallel to the floor and the text looks vertical. The better you prepare the distorted artwork, the better results you get.
What if I Already Have the Artwork?
In that case you’d better setup the cone first, so Boxshot knows what diameters to use. The problem with conical labels is that you can’t guess its size from the cone size and you can’t guess the cone parameters from the label. You need to define both and Boxshot just helps you to speed the things up.
Once you have the artwork loaded, you need to adjust the grid to match it. Let’s start again with the default label, applying our new artwork and opening artwork editor without changing any dimensions or diameters in the default model:
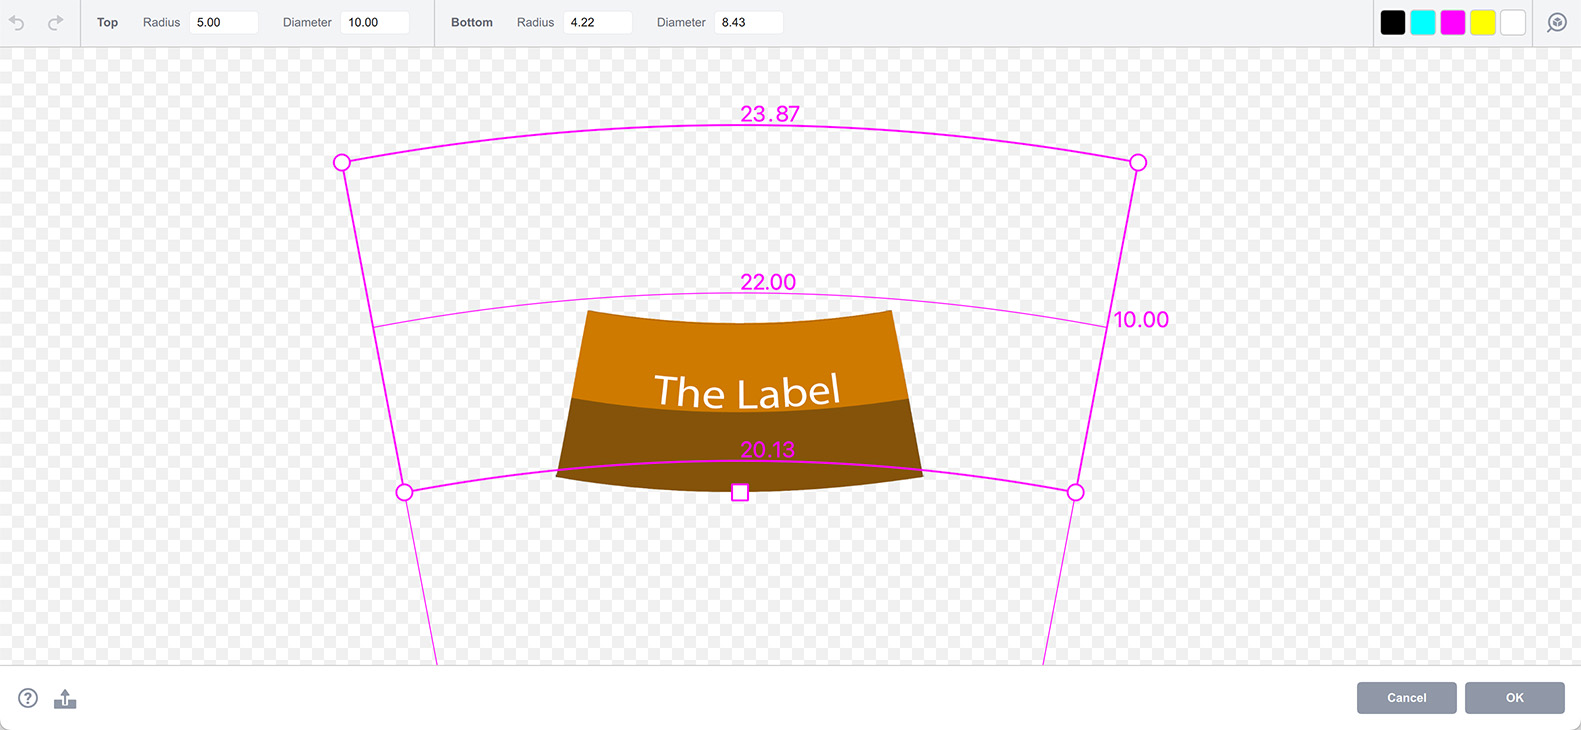
You see the grid doesn’t match the artwork, so we drag its round handles to align it. Boxshot automatically adjusts the other handles while you drag to make sure the grid is still a valid conical label grid.
Zoom the artwork using the mouse wheel and drag the canvas with the right mouse button. You should end up with something like this:
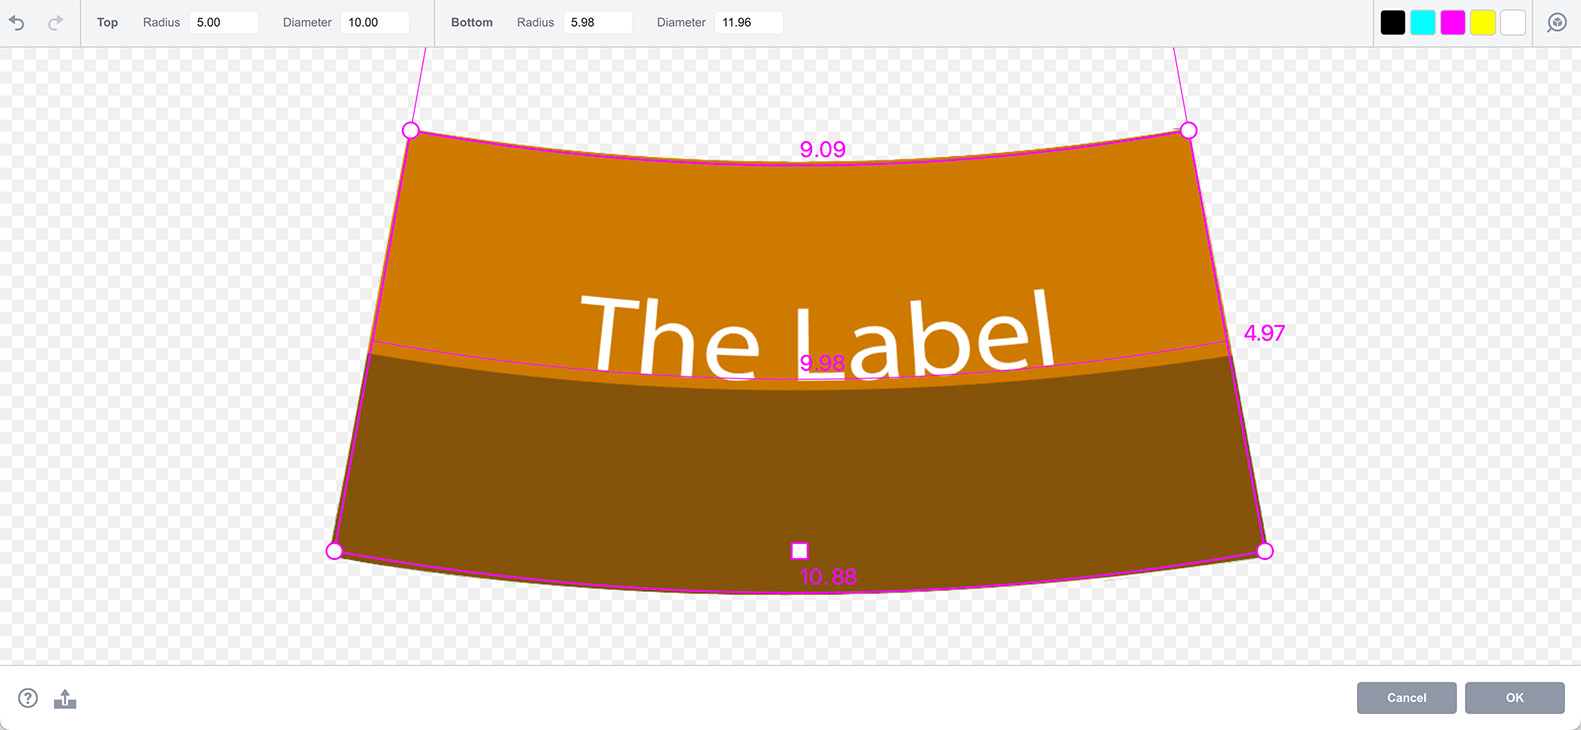
Note that Boxshot has computed the proper label width of 10cm and height is about 5cm, as expected. However, such label can fit to various cones, so you also need to check the top toolbar and make sure the cone parameters are fine. The diameters there are 10 and 12cm — as expected, so we can click OK now and see the adjusted label:
Job done!
Possible Errors
Artwork editor performs some checks to make sure the grid you setup is valid.
For instance it checks if the label width does not exceed the total circumference of the cone and also that label height is enough for that top and bottom diameters.
In case of any errors you’ll see the Error button at the bottom. Clicking it will pop up the window with the detailed description of the problem.
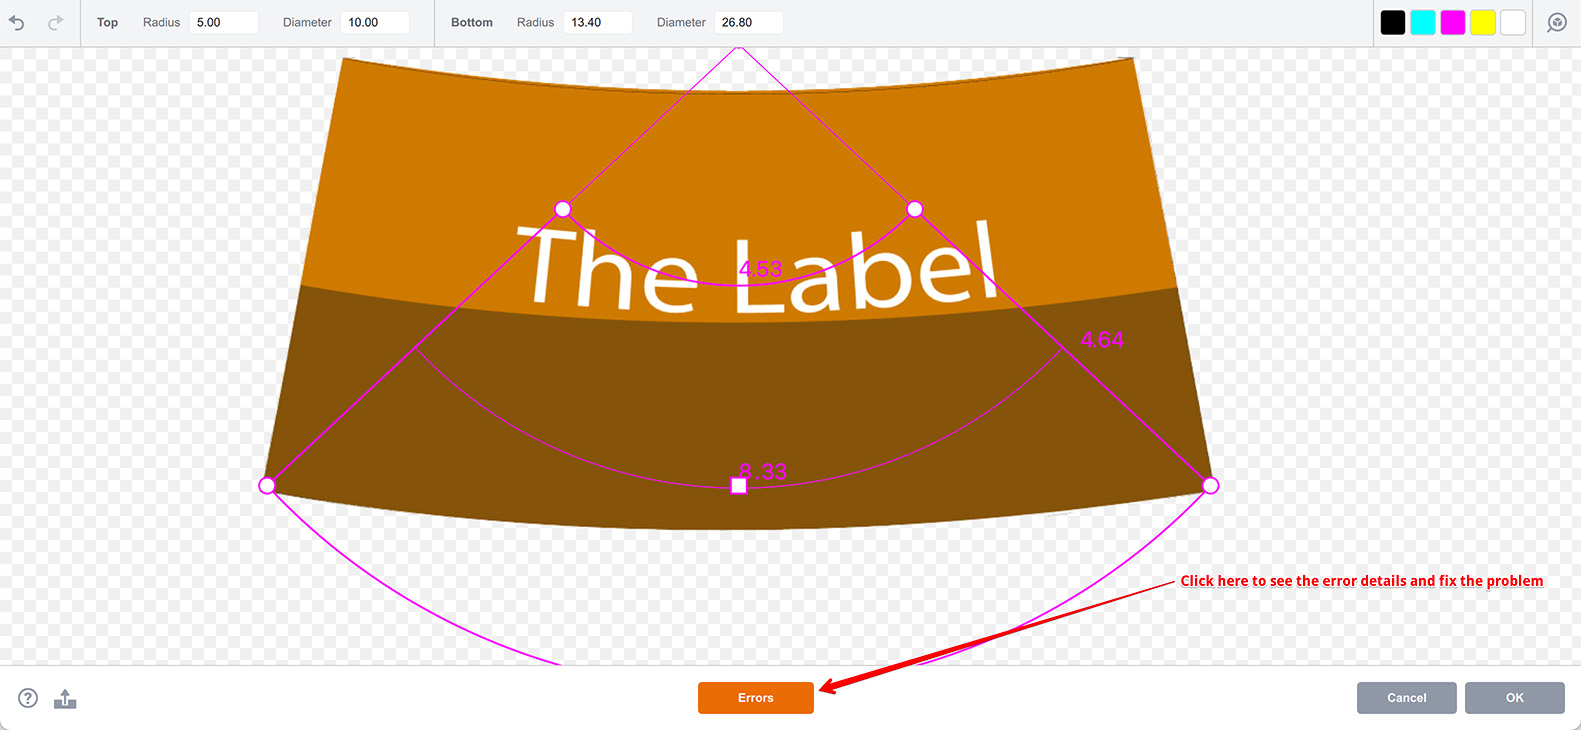
Here Boxshot detected that the height of the label is not enough to reach from the top diameter to the bottom one, so it asks you to fix the grid. Make sure you do so before clicking OK, as otherwise Boxshot can’t make a proper label shape.
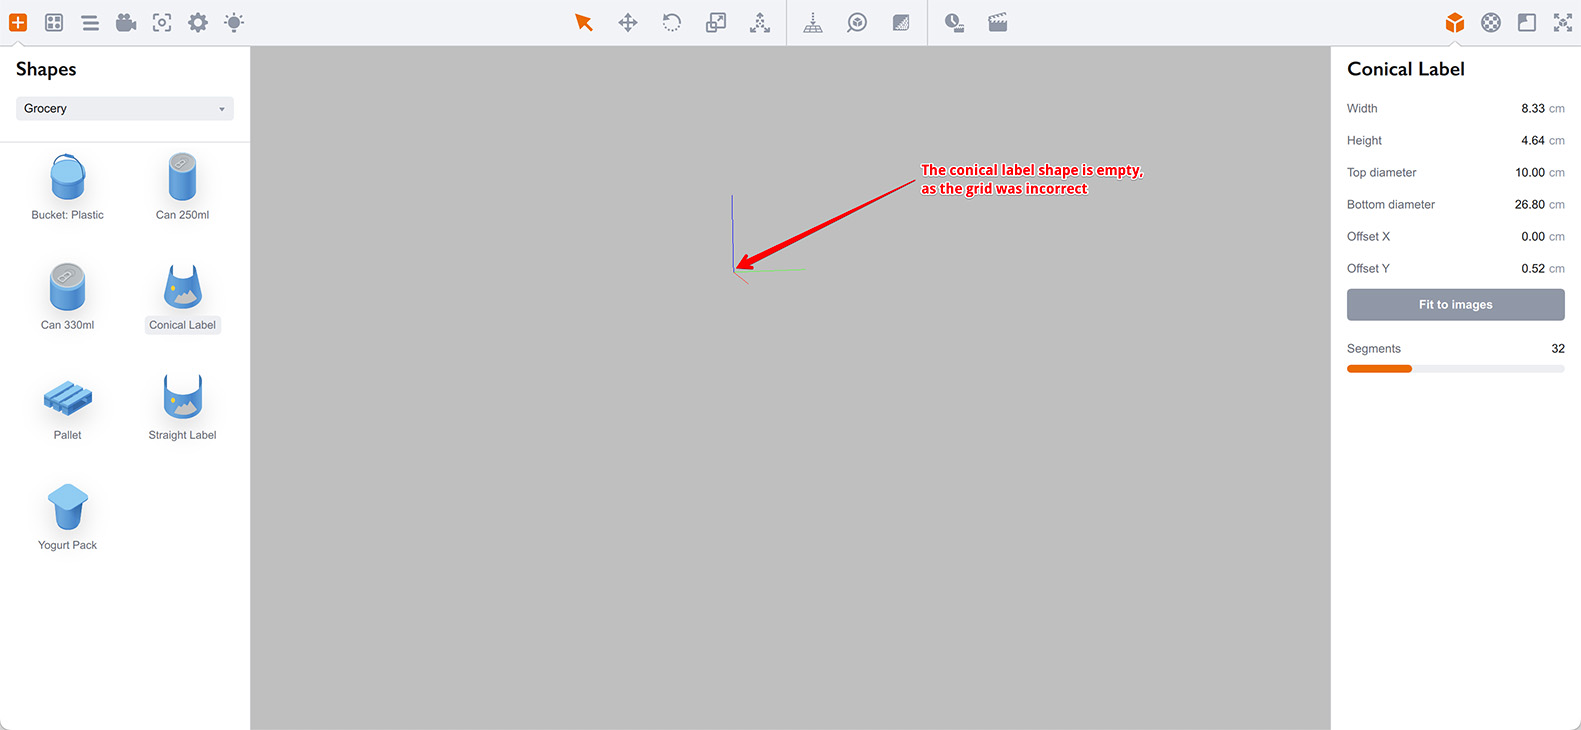
You will most likely end up with an empty shape like this:
Worst of all, Boxshot cannot reconstruct the grid in that case, so when you return to the artwork editor, you get a broken grid like that:
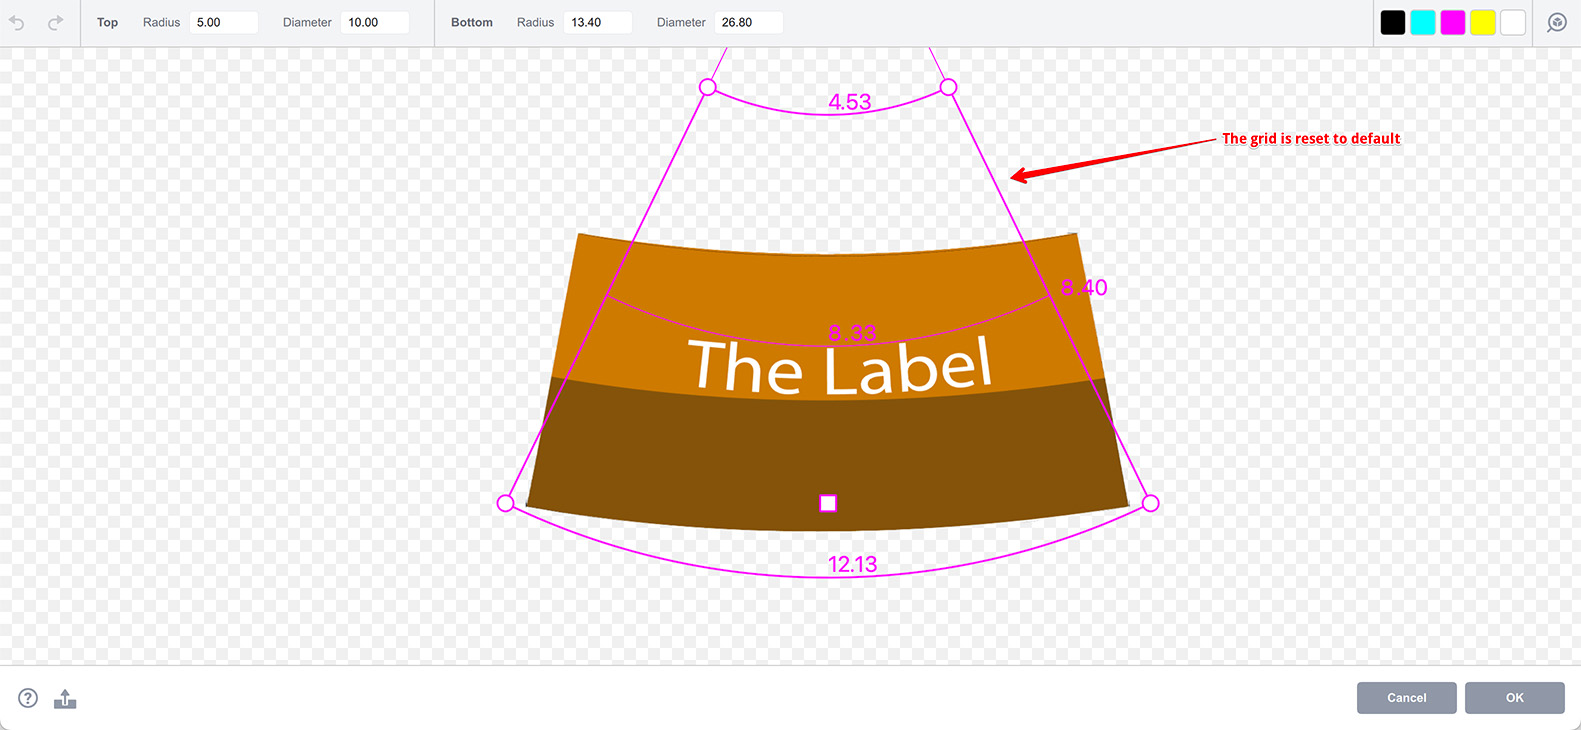
So once again: make sure your artwork has no errors when you click the OK button in the editor. This saves your time on re–making things, and also double checks that the artwork will fit the real shape when printed.
More Tutorials
Rendering
- Realistic Rendering — improving scenes visual appearance;
- Lighting — control environment and directional lighting;
- Saturated Reflection — make "rich" colorful reflections;
- Floor Reflection — reflecting scene objects in the floor;
- Job Manager — rendering jobs later;
- GPU Rendering — rendering scenes faster on GPU;
- Rendering Time and Quality — getting more control on rendering;
- Simple and Realistic Lighting — speeding up scene rendering.
Materials
- Texture Slots — how to use texture slots in Boxshot;
- Glass Materials — how to make semi–transparent objects look attractive;
- UV–Spot — how to make a UV–spot effect easily;
- Foil Effect — how to add foil–finishing to your shapes;
- Bump — adding relief to your materials;
- Copying Materials — how to copy materials to other shapes;
- Custom Materials — extend the materials library with your own ones;
- Semi–Transparent Labels — making semi–transparent and partial labels;
- Boxshot Materials — more details about Boxshot materials.
Features
- Boolean Operations — combining and subtracting shapes, making holes;
- Decals — applying decals and configuring them;
- Bump Decals — applying bump where it is needed;
- Depth Of Field — adding more realism to your renderings;
- Tools — read more about Boxshot tools;
- Managing Images — how to manage image files used by Boxshot projects;
- Shapes Instances — creating lightweight copies of other shapes;
- Model Editor — edit embedded models in many ways;
- Shrink Wrap — heat–shrink film simulation for objects wrapping;
- Physics Simulation — applying gravity to your scene;
- Palletize — arrange scene objects for the pallet;
- Snapshots — save scene state to re–use it later;
- Translation — teach Boxshot to speak your language;
- Vector Artwork — how to maintain the quality of vector artwork.
Shapes
- Lathe Objects — making symmetrical objects using revolving curves;
- Loft Objects — making custom objects with 2D cross–sections;
- 3D Text — making 3D text objects in Boxshot;
- Extruded Objects — how to make thick 3D object of your flat 2D curve;
- Conical Labels — making conical labels with distorted artwork;
- Dieline Box — a very realistic dieline–based box;
- Custom Shapes — adding custom shapes to the left panel;
- Solid Shapes — create boolean-friendly shapes;
- Script-Based Solids — create complex solid shapes with code;
- Third Party Shapes — importing third party shapes to Boxshot.