PNG Barcodes
PNG is a lossless raster format supported by most graphics editors and browsers. Its features make it probably the best raster format for barcodes, unless they are supposed to be printed. However, in that case a proper vector format should be considered.
Making a Test Barcode
Let’s make a test barcode first: start Barcode Generator and select any barcode you have there or make a new one using the plus button. Then open it for editing. You should get something like this:
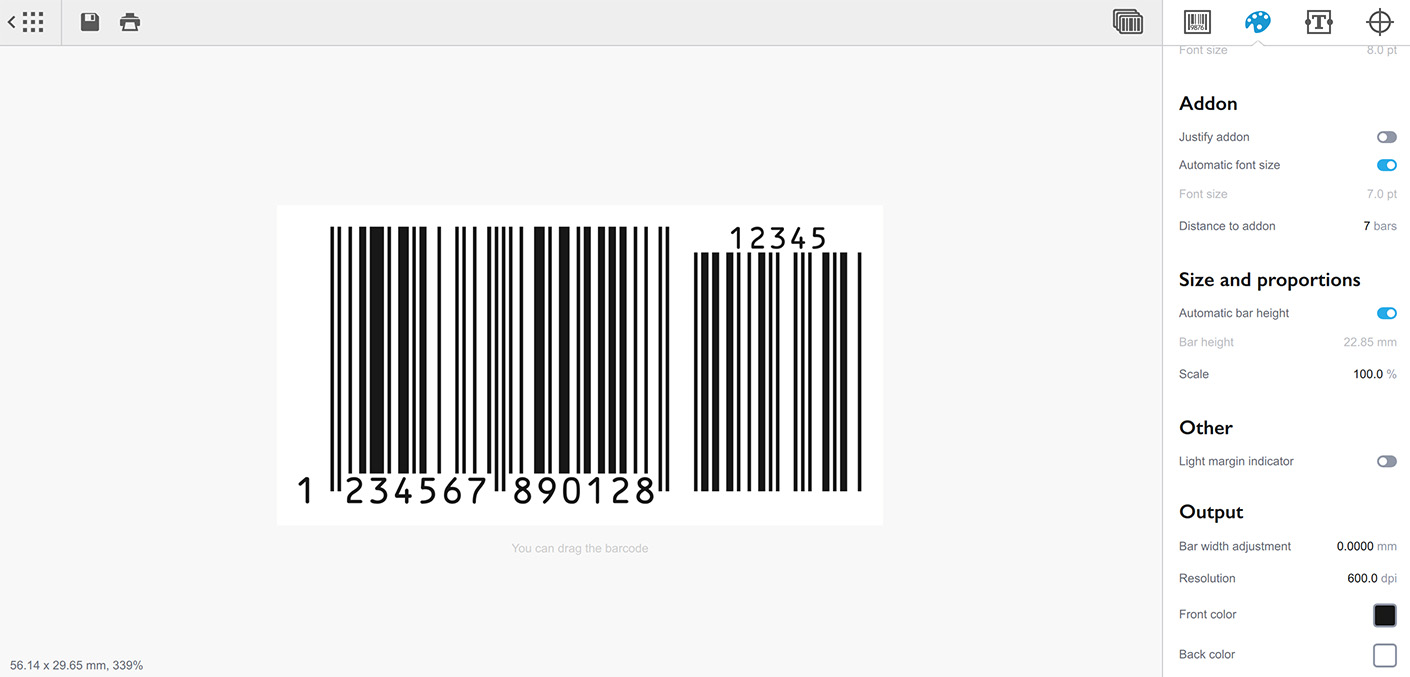
You can configure the barcode itself using the right panel. One of the options you might also want to adjust is the barcode colors: you can do this at the bottom of the second panel on the right. You can even make the barcode background transparent as PNG format supports transparency.
Output Resolution
Barcode size is measured in units like millimeters or inches, but raster formats (including PNG) do not support that. They work with pixels and that’s where DPI comes to help. DPI stands for “dots per inch” and tells the software how many pixels to use for every inch of the graphics.
The standard computer monitor DPI is 72, but modern high–density displays have DPI of 144 and more. The standard DPI for printing is 300 or 600.
You can configure DPI next to the barcode colors using the Resolution parameter, and it will affect the resolution of the images it makes. This only applies to the raster graphics and it is recommended to set it to 300 by default, then work from there.
Saving Barcode to PNG Format
The simplest way to make a PNG barcode is to click the Save button in the toolbar and select the PNG output format:
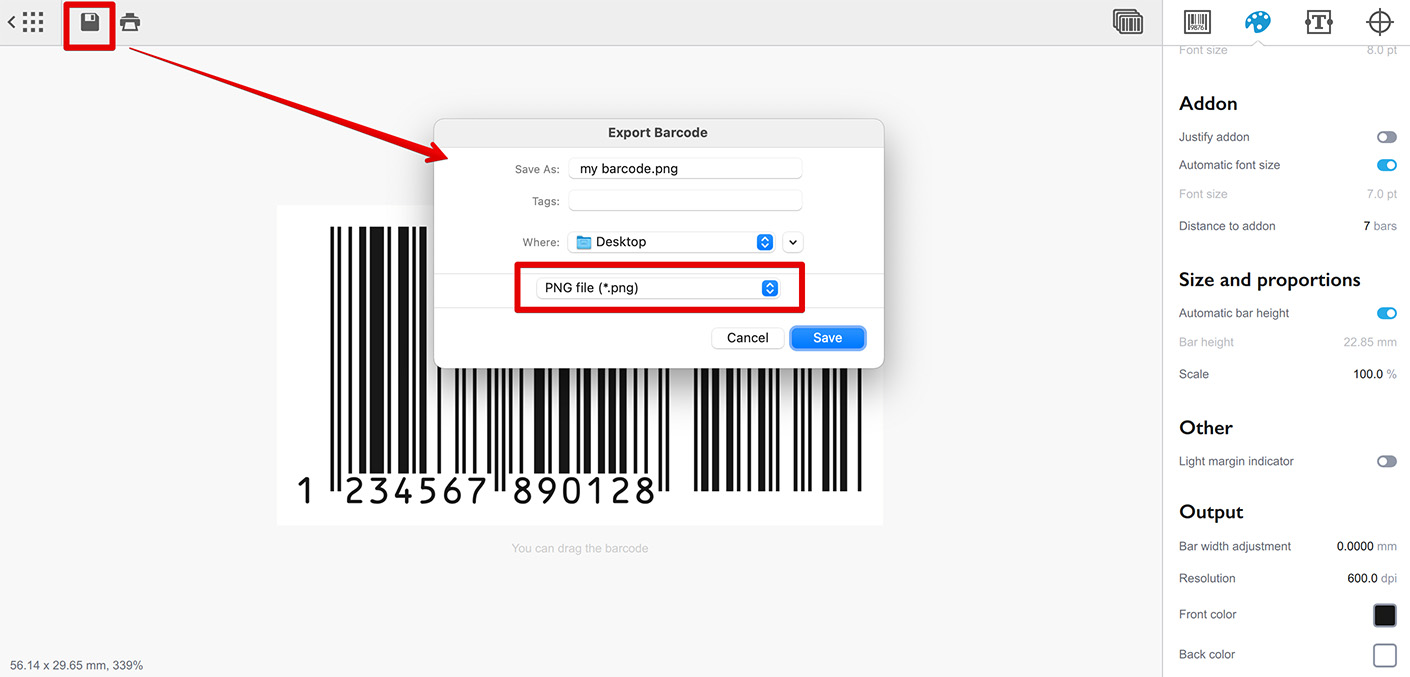
You can also use Control/Command–S keyboard shortcut or use the File → Export menu of the software. Note that there are two Export items in the menu: one uses the last name you used for saving, while another makes a name based on the barcode data.
Once you saved the barcode, load the PNG file into the application you want to use it in, and make sure that all the features like colors and background are there.
Other PNG Export Options
The Barcode Generator software offers other methods of exporting barcodes, but not all of them are supported by all the applications. If they are supported, they might help you save some time, so give them a try and see if they work with the applications you use.
The methods are: drag and drop and copy to clipboard. To use drag and drop simply click the barcode in the editor and move the mouse without releasing the button. The barcode will be dragged and you can move and drop it into the application you need. The copy to clipboard option is even simpler: you press Control/Command–C keyboard shortcut or click Edit → Copy in the menu, then switch to another application and paste the barcode there as any other text or image.
In order to use PNG format for drag and drop or copy options you need to configure it in settings. Open the settings window to do so:
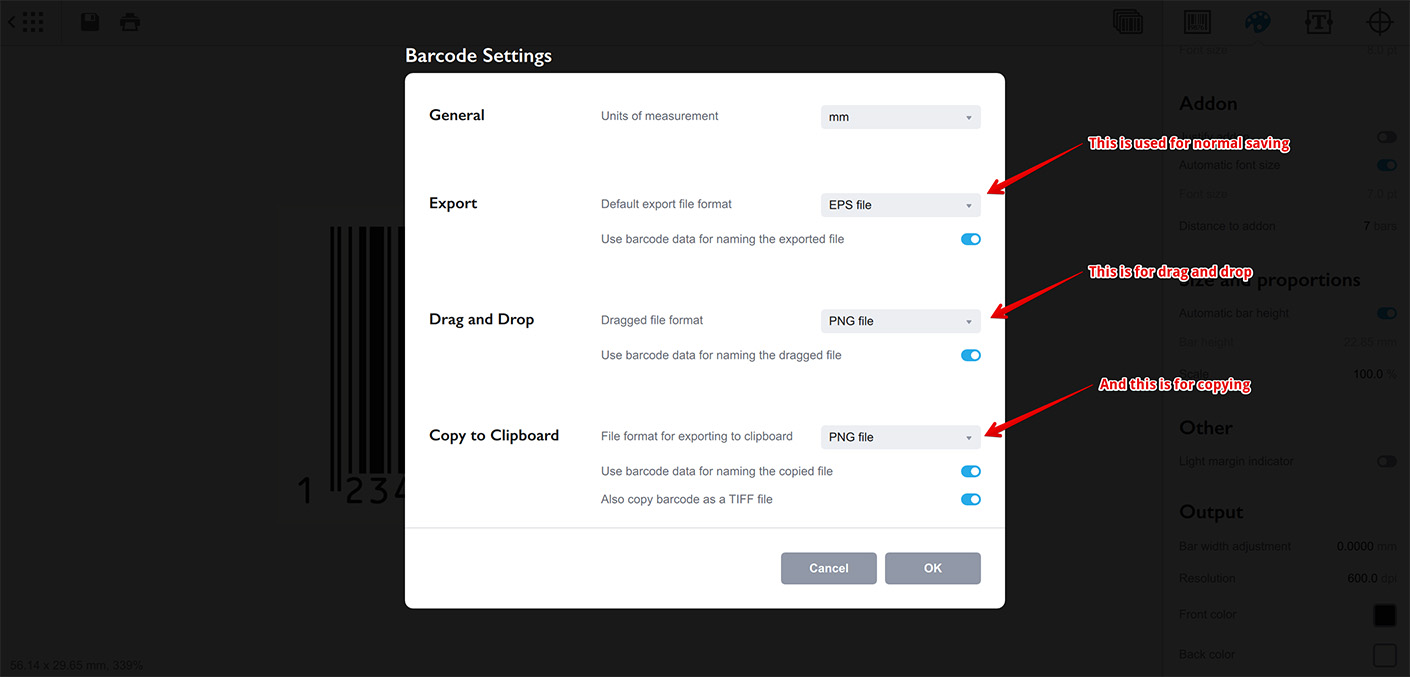
The two sections you need are: “Drag and Drop” and “Copy to Clipboard” — you need to make sure both have PNG format selected. You can uncheck the “Also copy as TIFF” option, as it is helpful for vector formats only.
Now you can try both methods of exporting PNG barcodes and see if they work with your software. Remember that you can always fall back to the simple saving use the File → Export command.
More Barcode Tutorials
Installation
- Installation — how to install Barcode generator;
- License Activation — how to activate Barcode software with a license key.
Basics
- User Interface — Barcode user interface explained in details;
- Barcode Management — adding, renaming, cloning and deleting barcodes;
- Importing Barcodes — importing barcode images;
- Custom Texts — adding custom text elements to barcodes;
- Marks Panel — configuring border, margins and canvas of barcodes;
- Bar Width Reduction — adjusting barcodes to compensate for ink spread;
- Quiet Zone — making sure the barcodes can be scanned well;
- Using Colors — coloring up barcodes and texts.
EAN Barcodes
- Making EAN–13 Barcodes — standard point–of–sale barcodes;
- EAN–13 Calculator — how to compute EAN–13 check digits.
UPC Barcodes
- Making UPC–A Barcodes — learn to make UPC–A barcodes;
- Making UPC–E Barcodes — how to create UPC–E barcodes;
- UPC–A Calculator — compute check digits of UPC–A barcodes.
NDC Barcodes
- NDC Barcodes — learn about NDC barcodes and how to make them;
- NDC Barcode Check Digit Calculator — how to compute NDC check digits.
QR Code
- QR Code — how to make and configure the popular 2D barcodes;
- QR Code with Image — adding custom artwork to QR Code.
Other Barcodes
- ISBN Barcode Generator — how to make ISBN barcodes;
- BC412 Barcode — making barcodes for silicon wafers identification;
Export
- Transparent Barcodes — making barcodes with transparent background;
- PNG Barcodes — exporting barcodes to PNG format;
- Vector Barcodes — exporting barcodes to vector formats;
- Export.js — defining custom file names for exported barcodes.
Automation
- Batch Processing — how to batch–convert text data to barcodes;
- Command Line Processing — command line barcode generation.
Other
- Self–Drawing Barcode — drawing QR codes in browser with just an SVG file;
- Fake Barcodes — need a random barcode as a placeholder?
- Other Barcode Symbologies — history and features of lesser-known barcode formats;
- Translation — teach Barcode to speak your language.