Marks Panel
The fourth panel of the Barcode generator is Marks panel where you can configure the output artwork dimensions, position and border:
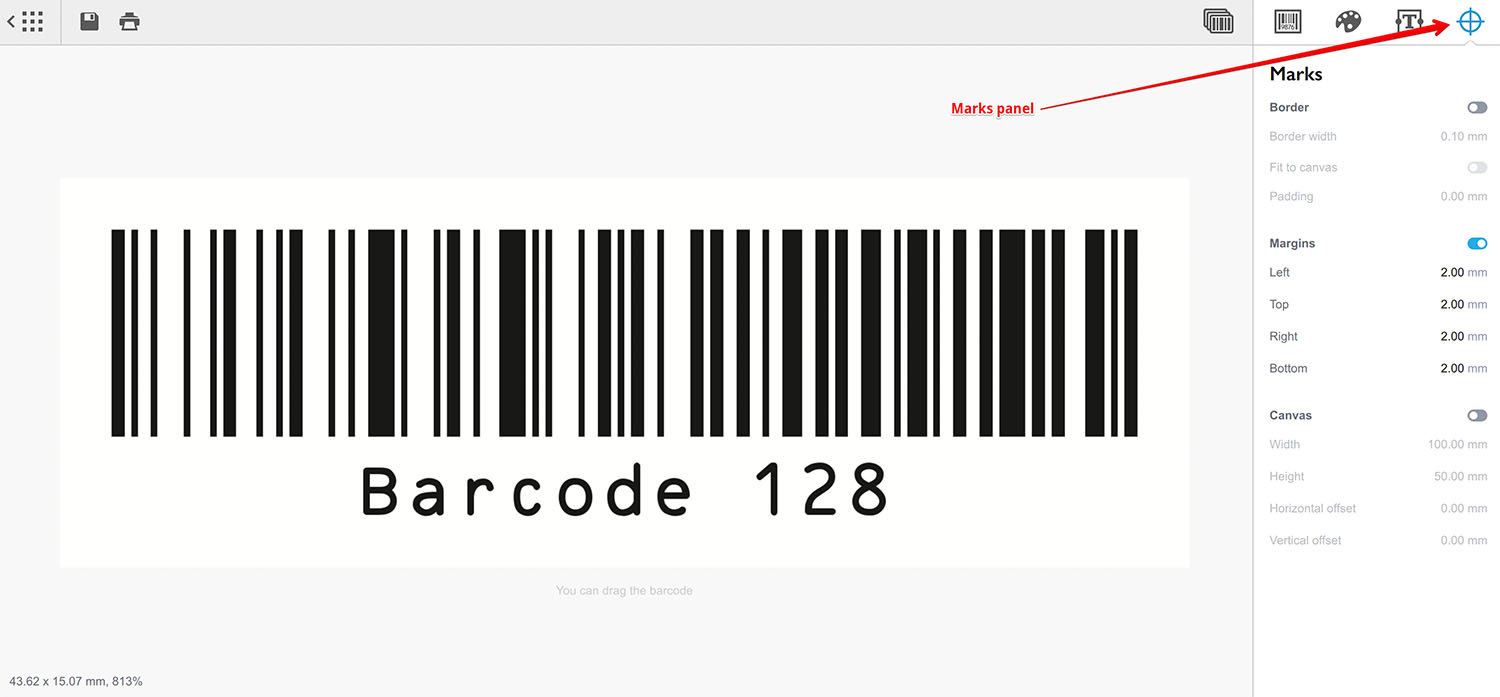
It has three blocks: border, margins and canvas. Let’s discuss them one by one.
Border Parameters
When enabled, border block adds a border around the barcode:
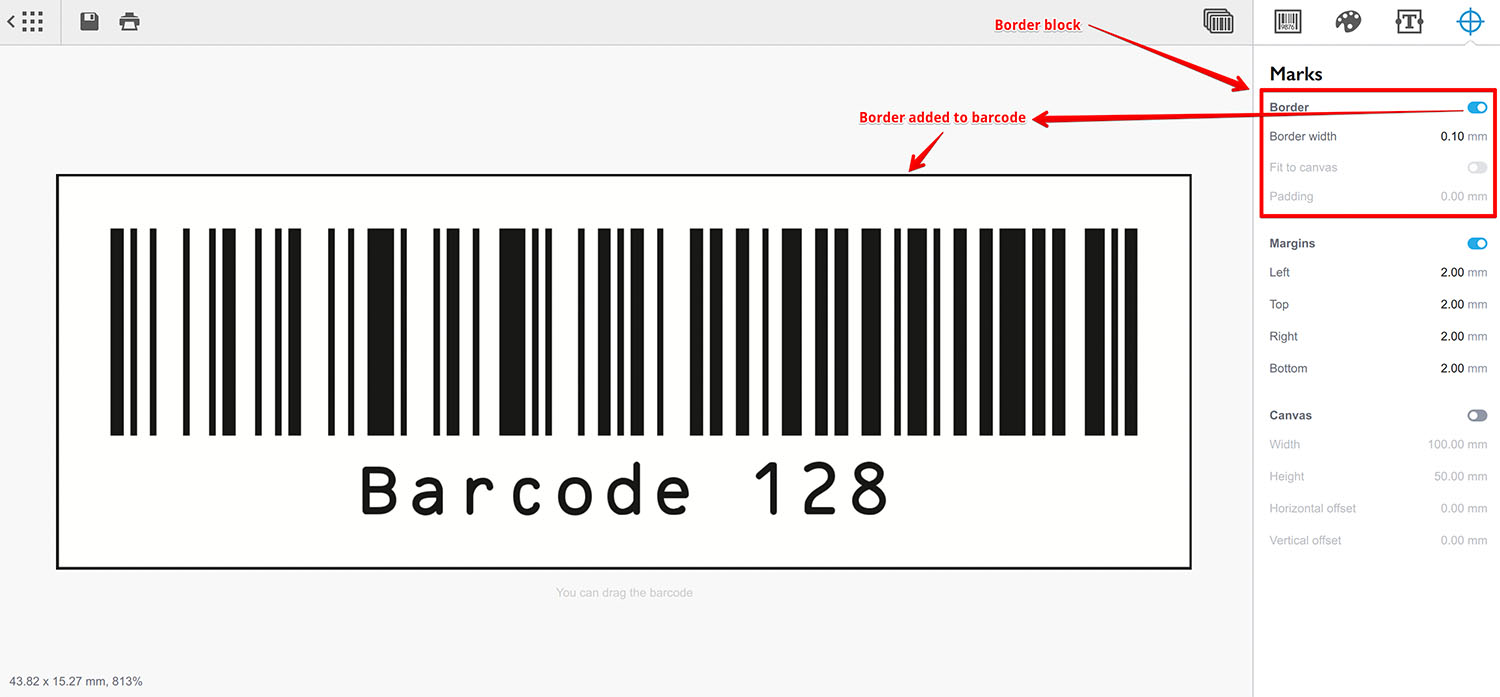
By default, border dimensions are defined by the barcode itself, custom texts and the margins. There are no texts on the image above and the margin is set to 2mm, so the border is slightly bigger than the barcode.
Let’s add a custom text element and see what happens:
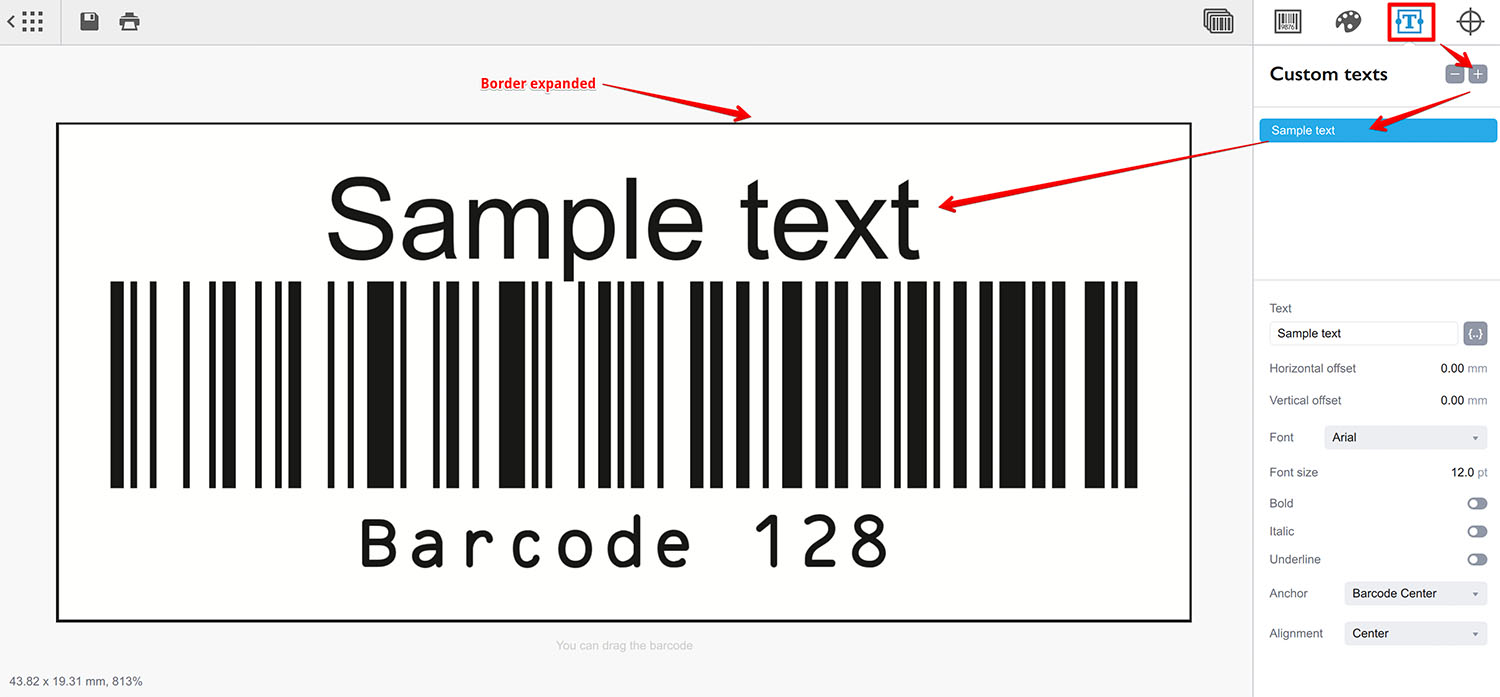
The border expanded and now contains the barcode and the text element we’ve just added. Let’s switch back to the marks panel and adjust the margins:

Here we set the left and right margins to 20mm instead of 2mm and the border extended to the left and right to contain that margin.
Basically, Barcode puts a barcode, adds custom text elements to it, then takes their bounding box of all these element, extends it by the margins and draws a border there. If there is no border, that extended area defines the dimensions of the barcode drawing.
The border block has extra parameters which will be discussed later in the Canvas section.
Margin Parameters
As explained above, margins are added on top of the barcode itself and the custom text elements. Let’s start with a barcode without margins and add a border to better see the artwork size:
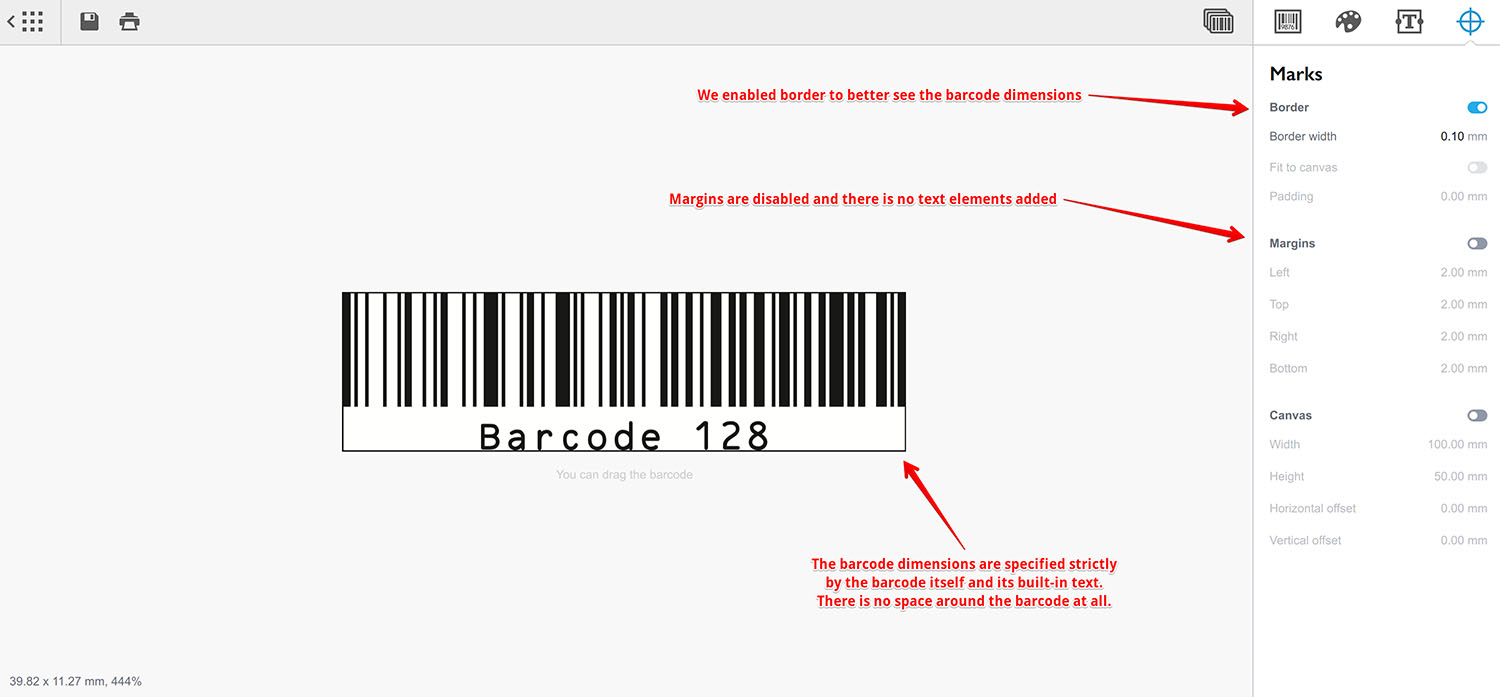
You can see that there is no free space around the barcode at all, the artwork size exactly matches the barcode dimensions which can be easily seen by the border touching the barcode.
Now let’s enable margins and configure them to have different values:

As there are no text blocks, the margins are computed from the barcode itself. Let’s add a custom text element again:
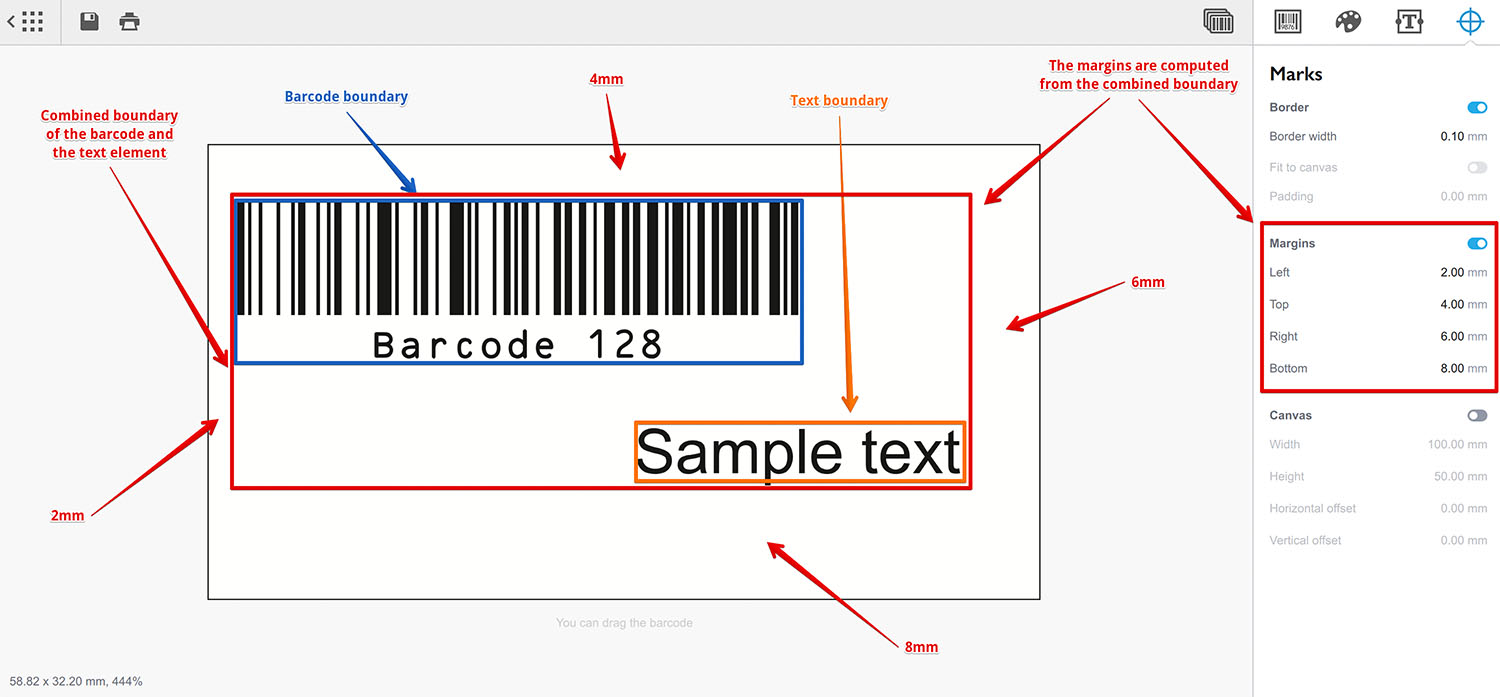
The text element is moved right and down, below the barcode. The software computes the barcode box (marked with blue) and the text box (marked with orange), then it computes the box containing both barcode and all the texts and applies margins to that box to get the resulting dimensions of the barcode. The border is then drawn around that.
You use margins to add some “air” or quiet zone around the barcodes, and also to move the border away of the barcode.
Canvas Parameters
There is another way to configure the output barcode artwork dimensions — to use the canvas option. The canvas is like an artboard in Adobe Illustrator, it tells the software the exact size of the barcode artwork and cuts everything that doesn’t fit.
Let’s start with a simple barcode with default parameters (again we enabled border to better see the boundaries):
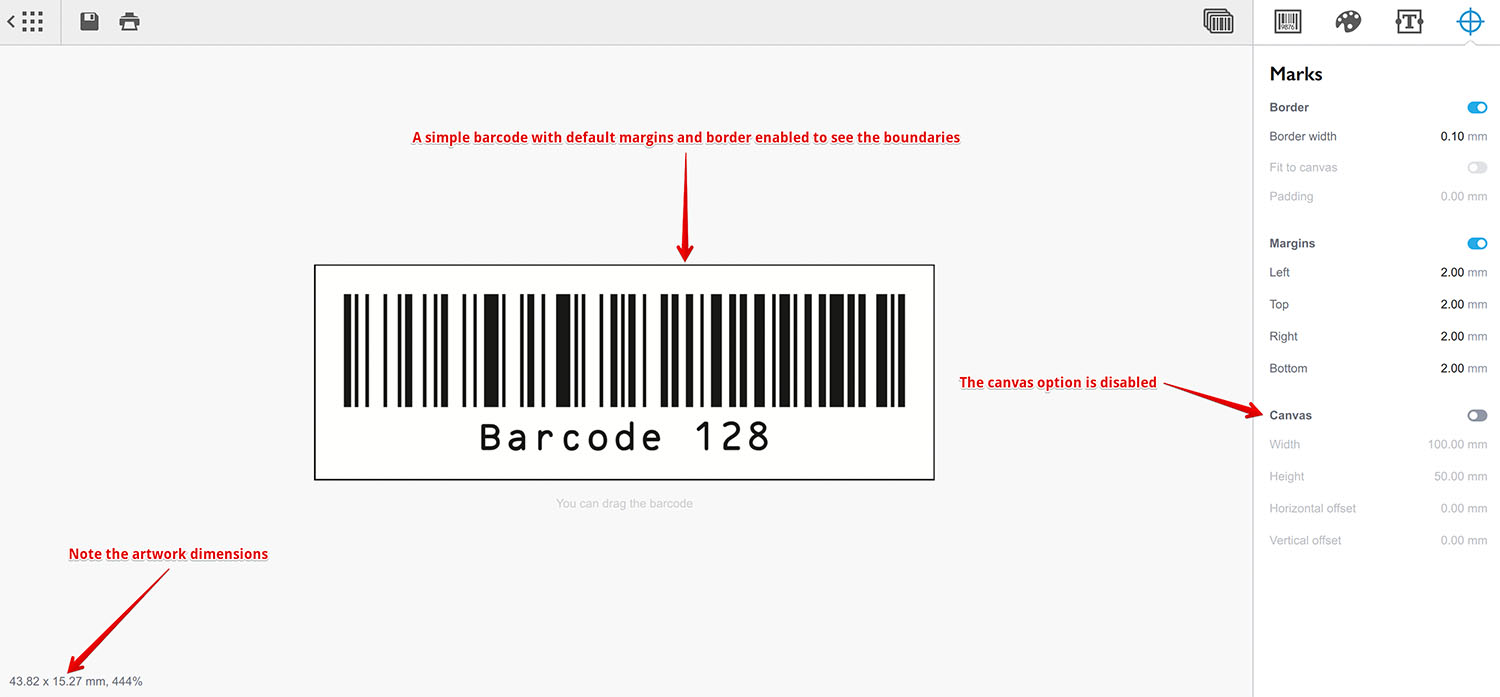
Notice the artwork dimensions at the bottom left corner: it is about 43x15mm, defined by the barcode size and the margins.
Now enable the canvas by clicking its check box:
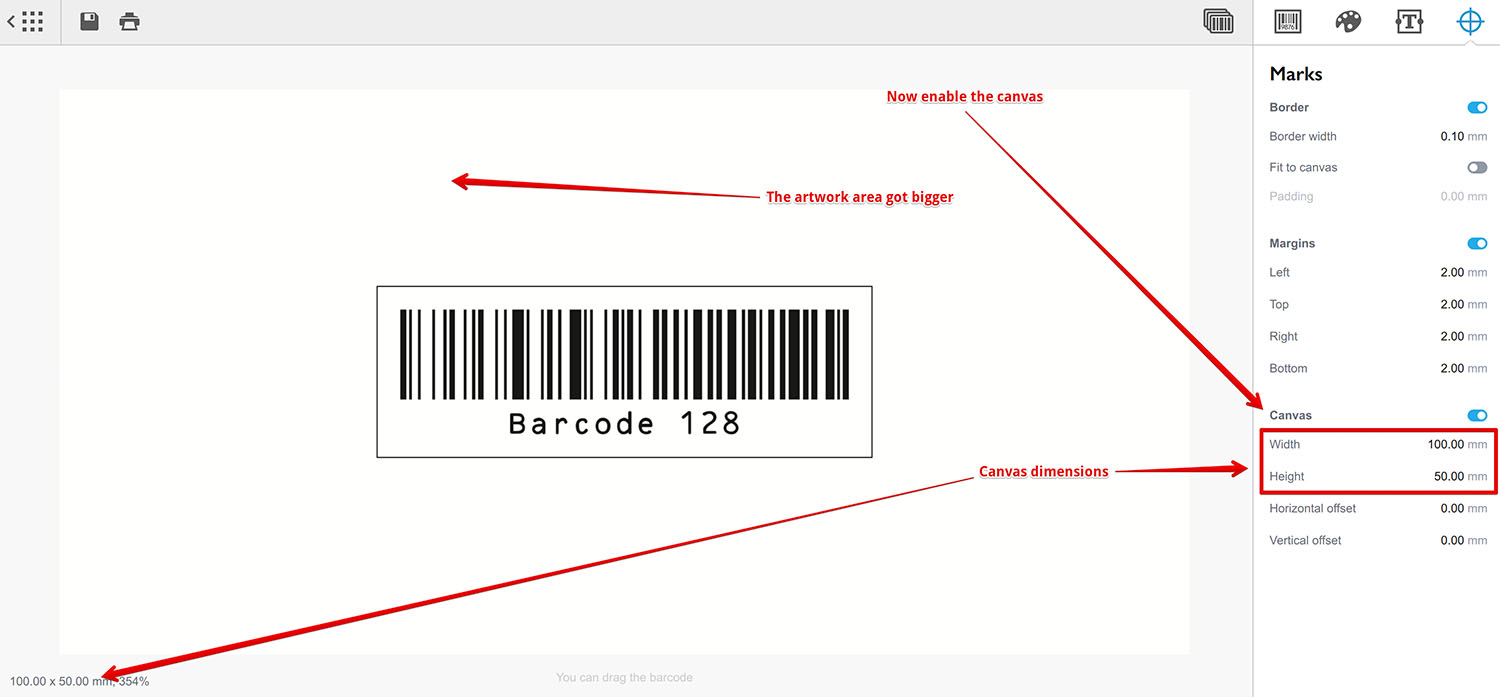
Note that the canvas size is configured to 100x50mm and the numbers in the bottom left corner reflect that. Also note that the artwork area became much larger.
When the canvas is enabled, the resulting artwork size is defined by the canvas, not by the content. You can add a text element or adjust margin — this will only affect the border, but not the artwork dimensions:
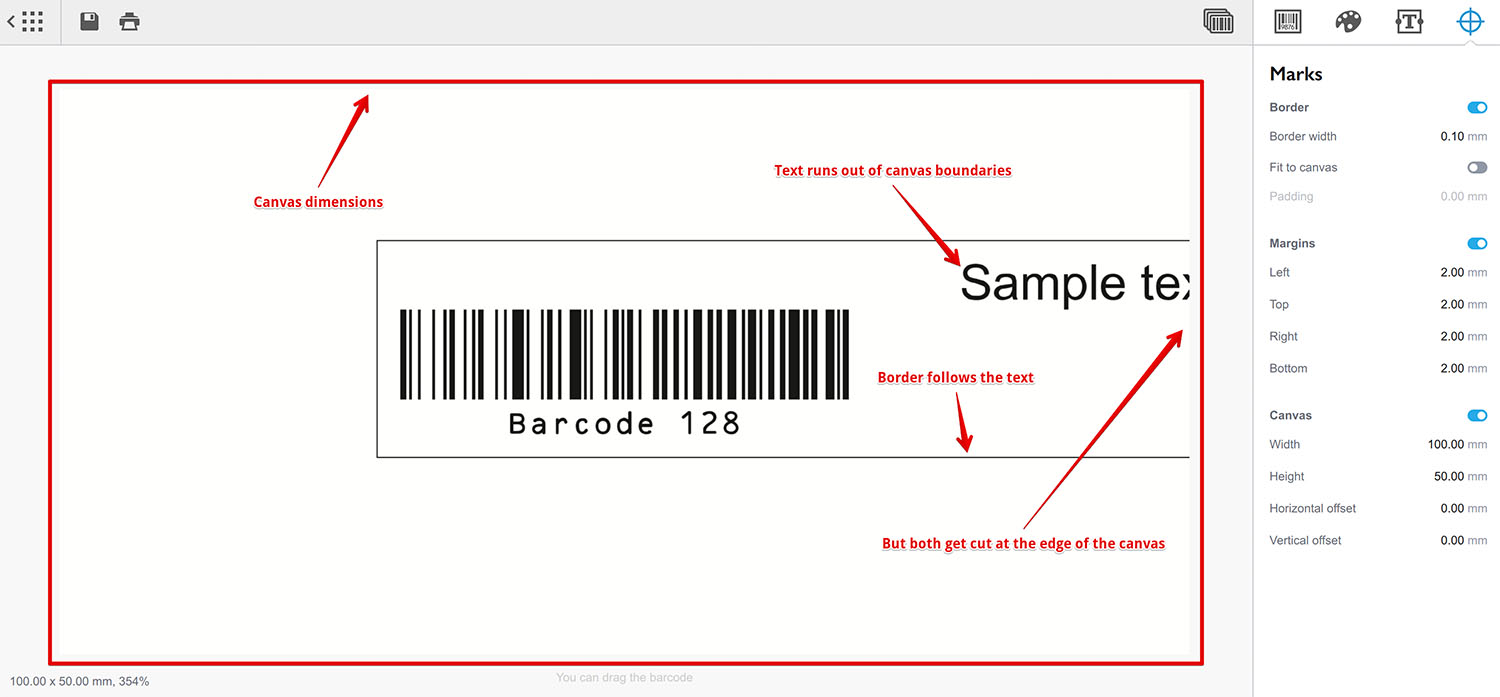
On the screenshot above the text element is located too far, so it doesn’t fit the canvas and gets cut. The border is expanded to contain the text element and gets cut, as well. As the canvas is enabled, the output artwork size is fully controlled by the canvas and everything that is outside is hidden.
You can adjust the content position inside the canvas using the offset parameters:
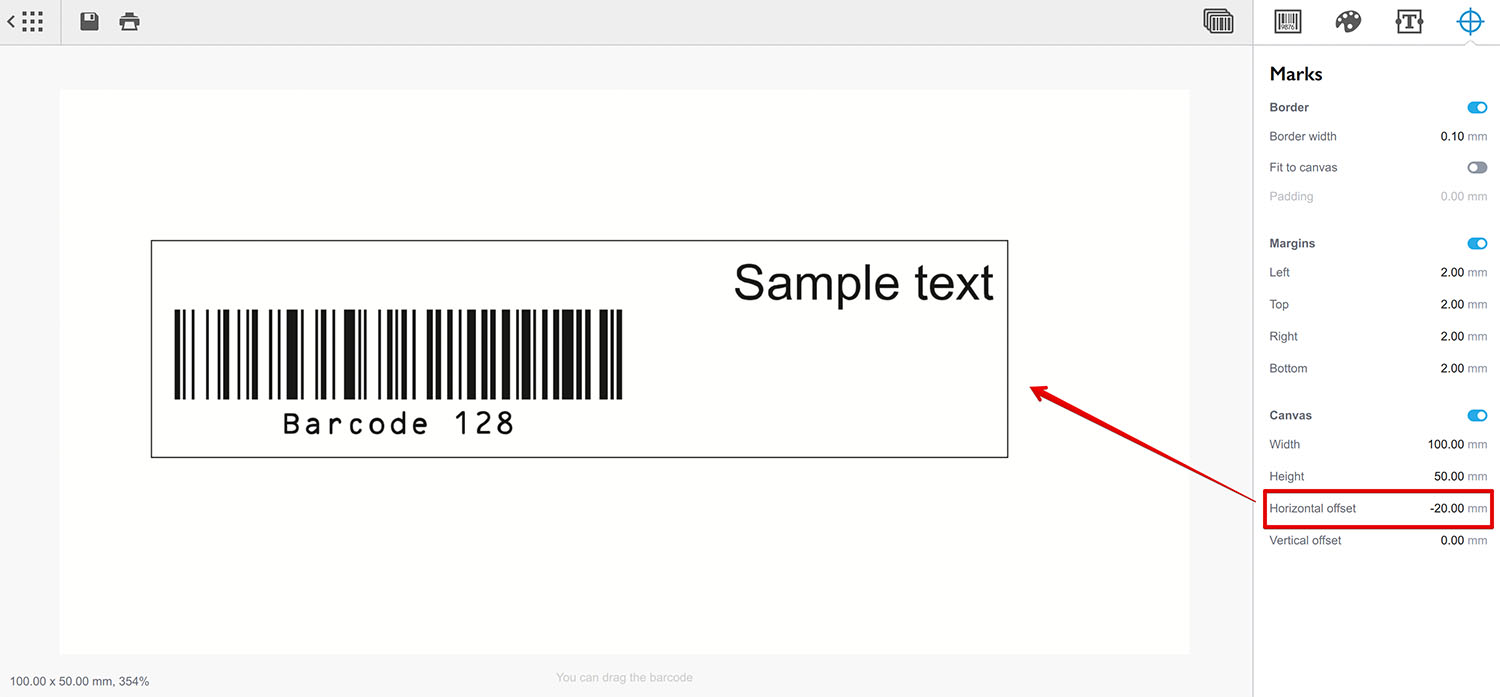
Here we moved the content to the left by 20mm to see the whole text and the border by adjusting the Horizontal offset parameter of the canvas.
Fit Border to Canvas
Finally, you can configure the border to follow the canvas instead of the content. Enable the Fit to canvas option of the border to do so (note that it is only enabled when both border and canvas elements are active):
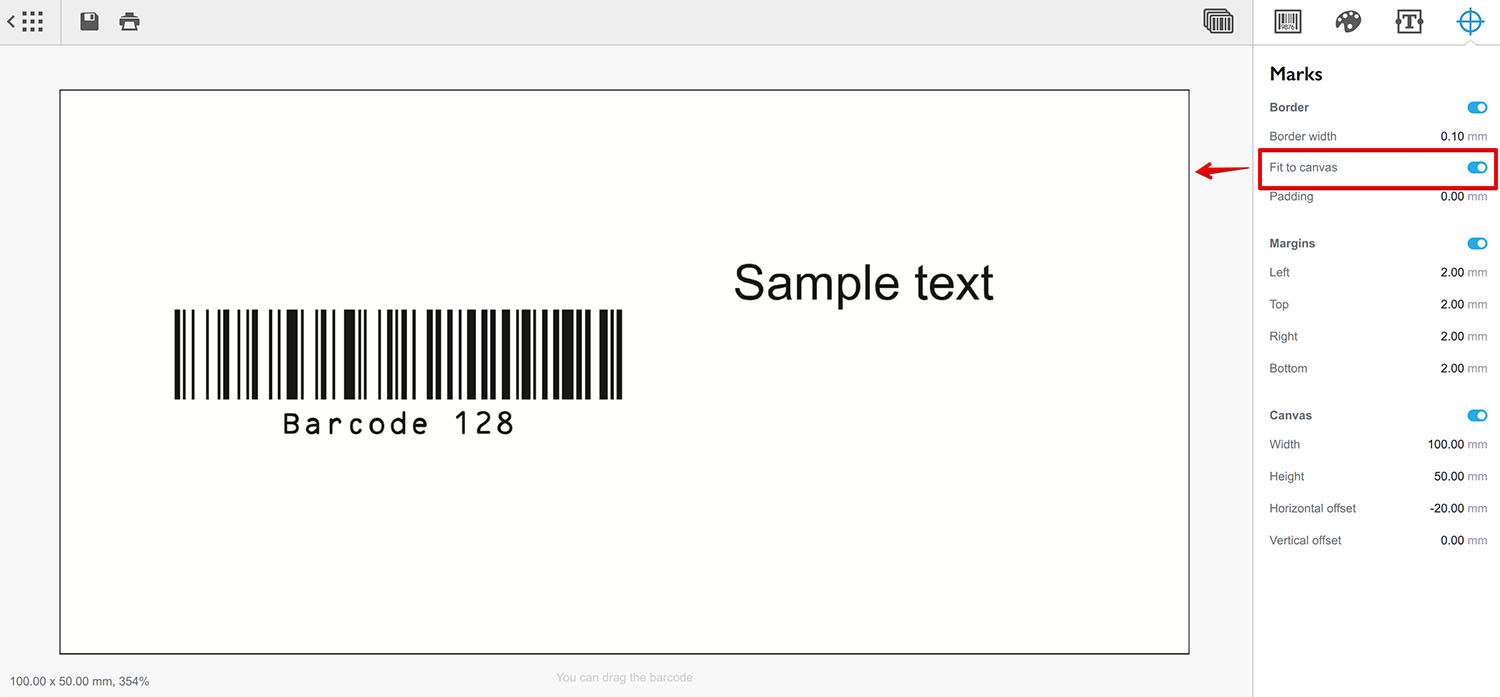
Once the option is enabled, the border stops following the barcode and text element dimensions and gets attached to the canvas instead.
You can use the Padding option to move the border inside the canvas:

This way you can leave some space around the border for design purposes or as bleeds.
More Barcode Tutorials
Installation
- Installation — how to install Barcode generator;
- License Activation — how to activate Barcode software with a license key.
Basics
- User Interface — Barcode user interface explained in details;
- Barcode Management — adding, renaming, cloning and deleting barcodes;
- Importing Barcodes — importing barcode images;
- Custom Texts — adding custom text elements to barcodes;
- Marks Panel — configuring border, margins and canvas of barcodes;
- Bar Width Reduction — adjusting barcodes to compensate for ink spread;
- Quiet Zone — making sure the barcodes can be scanned well;
- Using Colors — coloring up barcodes and texts.
EAN Barcodes
- Making EAN–13 Barcodes — standard point–of–sale barcodes;
- EAN–13 Calculator — how to compute EAN–13 check digits.
UPC Barcodes
- Making UPC–A Barcodes — learn to make UPC–A barcodes;
- Making UPC–E Barcodes — how to create UPC–E barcodes;
- UPC–A Calculator — compute check digits of UPC–A barcodes.
NDC Barcodes
- NDC Barcodes — learn about NDC barcodes and how to make them;
- NDC Barcode Check Digit Calculator — how to compute NDC check digits.
QR Code
- QR Code — how to make and configure the popular 2D barcodes;
- QR Code with Image — adding custom artwork to QR Code.
Other Barcodes
- ISBN Barcode Generator — how to make ISBN barcodes;
- BC412 Barcode — making barcodes for silicon wafers identification;
Export
- Transparent Barcodes — making barcodes with transparent background;
- PNG Barcodes — exporting barcodes to PNG format;
- Vector Barcodes — exporting barcodes to vector formats;
- Export.js — defining custom file names for exported barcodes.
Automation
- Batch Processing — how to batch–convert text data to barcodes;
- Command Line Processing — command line barcode generation.
Other
- Self–Drawing Barcode — drawing QR codes in browser with just an SVG file;
- Fake Barcodes — need a random barcode as a placeholder?
- Other Barcode Symbologies — history and features of lesser-known barcode formats;
- Translation — teach Barcode to speak your language.