Conical Label from Selection
Let’s start with a simple label artwork like this:
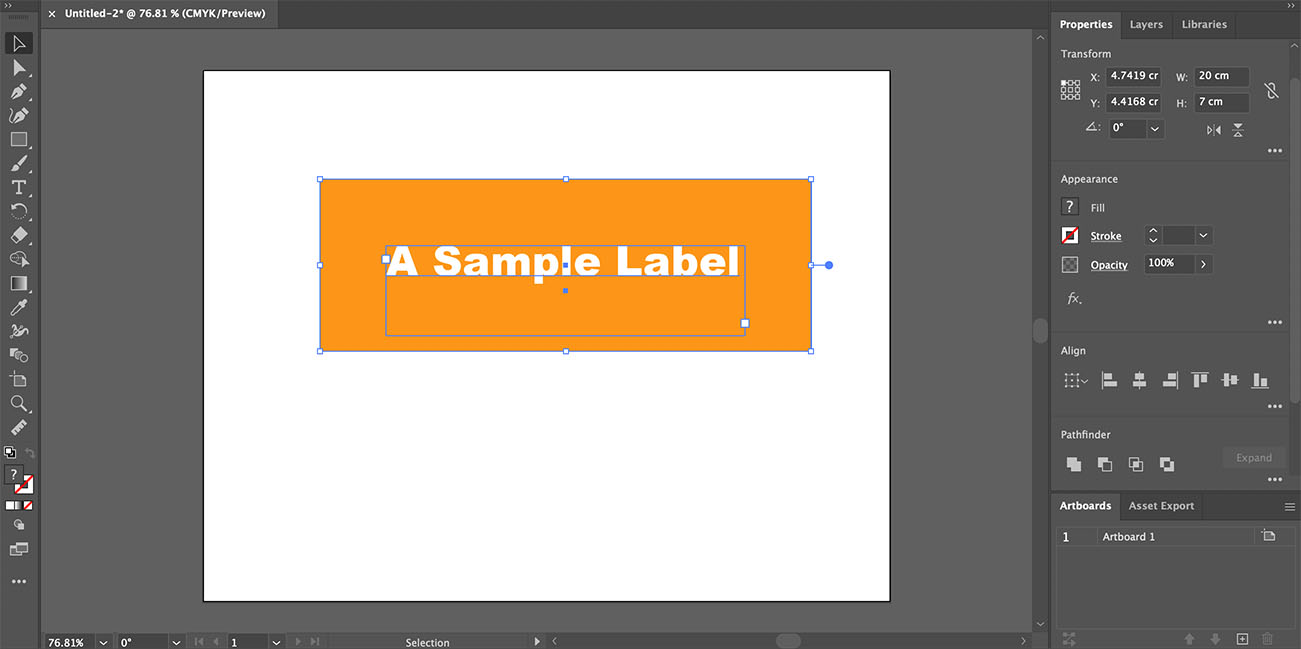
Here I made an orange rectangle and placed a white text inside. You might have your own artwork there, it doesn’t really matter. What matters is the dimensions of the artwork, as it defines the flat label size. In our case it is 20x7 centimeters and this will be used by the plugin. If you have bleeds in your artwork, you need to use the artboard–based label creation mode.
Now select all the artwork you want to see in the conical label and click Objects → Conical Label → Make from Selection… item in the Illustrator main menu. The Ai Toolbox plugin interface will pop up.
Configuring the Cone
The plugin interface is pretty straightforward and lets you define the cone parameters and how to apply your artwork there:
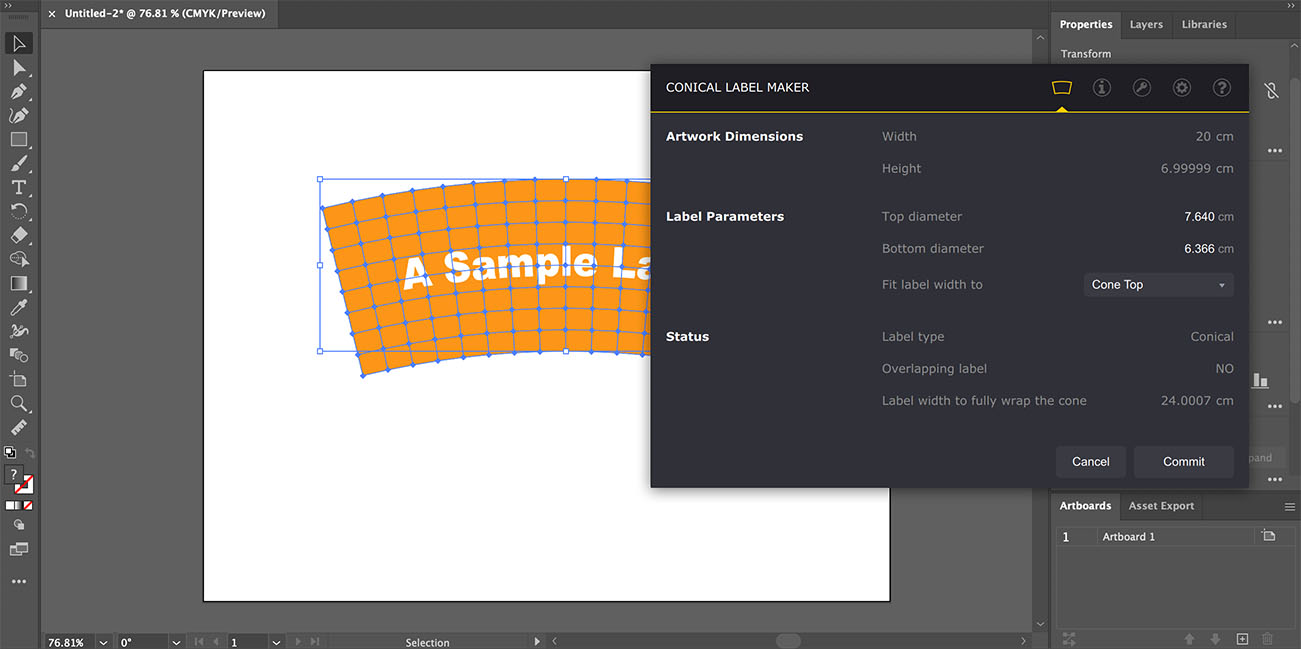
There are three parameters you can configure:
- Top diameter — the top diameter of the conical surface you want to apply the label to;
- Bottom diameter — the bottom diameter of the conical surface you want to apply the label to;
- Fit label width to — see below.
The third parameter is the trickiest one and needs some extra comments. The flat artwork has its own dimensions (they are displayed at the top of the plugin interface), the conical surface has its own dimensions. For instance, the image above has the top cone diameter of 7.64 centimeters and the bottom diameter of 6.37 centimeters. The circumference of the top part of the cone is 24 centimeters and the bottom one is 20 centimeters.
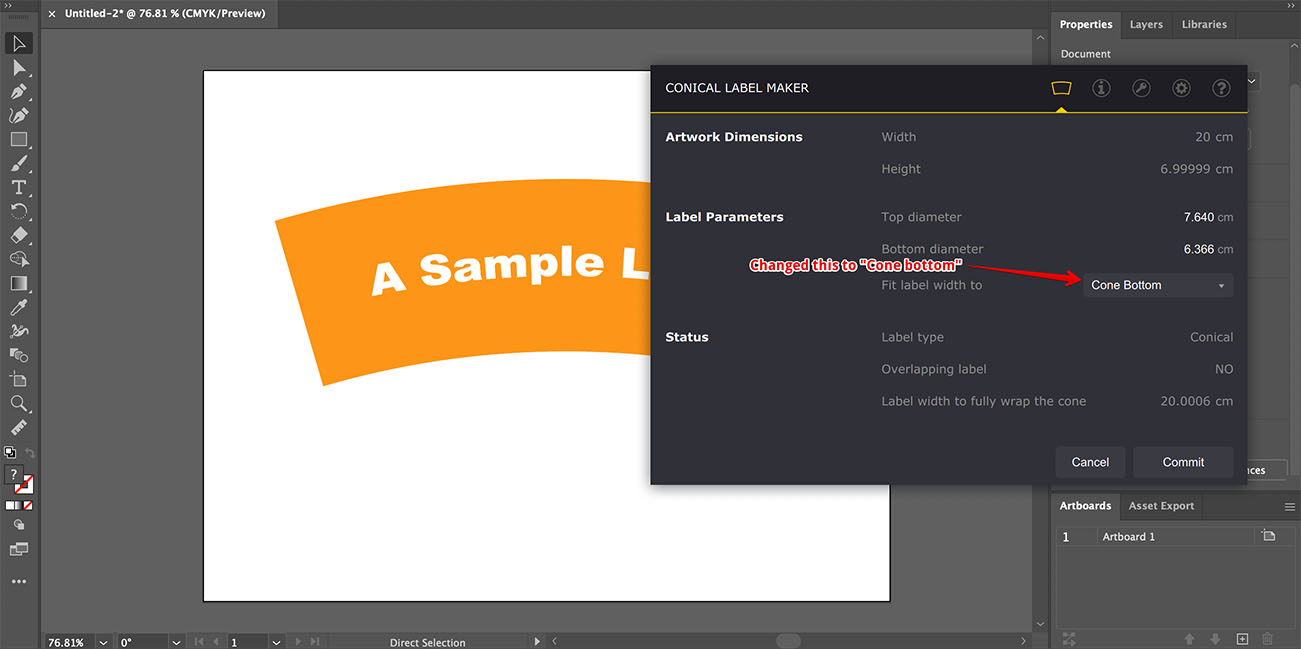
The width of the label is 20 centimeters and if the plugin keeps the bottom width intact while applying the conical deformation, it will need to make the top width smaller, so the label looks proportional on the surface. If the plugin keeps the top width intact, the label will look bigger on the surface.
The plugin lets you make this decision and choose the part of the cone where the label will keep its original width: top, bottom or middle.
Notice how the label shape is changed in background when you edit the cone parameters:
So all you need is to specify the cone diameters and where to apply the original label width. The plugin does the rest and displays the instant preview.
At the bottom of the plugin window you may find some extra information about the current label. This includes the “Overlapping label” indicator which helps to make sure the label fits to the cone without overlapping, and the label width needed to fully wrap the cone without gaps or overlapping.
Finally
Once done, click the Commit button and get your label distorted for the conical surface you configured.
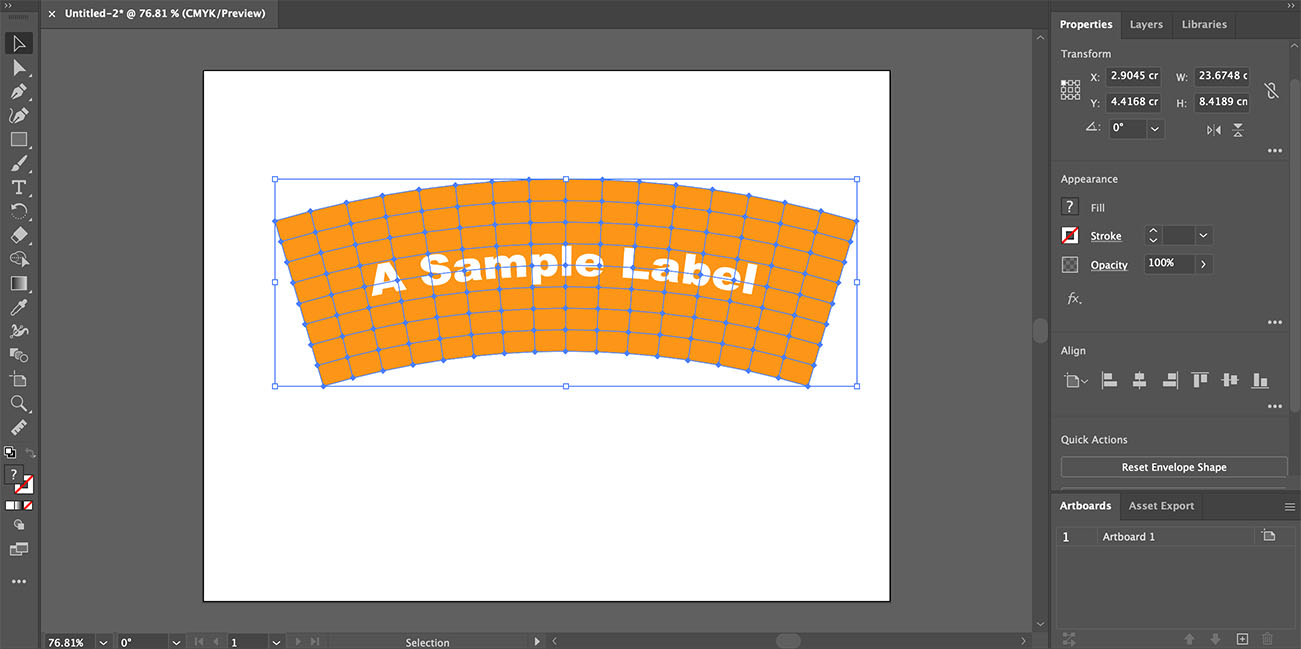
The plugin uses Adobe Illustrator Envelope tool, so you can edit the artwork later if needed, or share the file with someone else who doesn’t have the plugin — the label will look distorted even without the plugin.
More Ai Toolbox Tutorials
Installation
- Installation — how to install the plugin;
- License Activation — how to activate the plugin with a license key.
Renaming and Creating Elements
- Bulk Rename in Illustrator — rename multiple elements at once;
- Create Artboards from Selection — make artboards from selected elements.
Selection Operations
- Selecting Paths by Name — bulk selection by name in Illustrator;
- Select → Same → Font — selecting objects with the same font in Illustrator.
Text Operations
- Merging Texts in Illustrator — combine text elements, keeping lines intact;
- Dynamic Texts — add dynamic information to text elements in Illustrator.
Files Operations
- Collect Resources — package multiple files at once, including the nested ones.
Conical Labels
- Conical Label from Selection — making the label from the selected artwork;
- Conical Label from Artboard — making the label from the artboard content.
Color Bars
- Making Color Bars — how to make color bars in Illustrator in a few clicks;
- Color Bar Appearance — customizing color bars to display the data you need;
- Color Patches — color bars that display the inks you want;
- Reusing Color Bars — how to copy color bars to another project.
Adobe and Adobe Illustrator are either registered trademarks or trademarks of Adobe Systems Incorporated in the United States and/or other countries.