Color Patches in Illustrator
Ai Toolbox lets you customize the colors displayed by a color bar, so you can display as many inks as you need. This includes single–ink marks or color patches.
This tutorial assumes that you already know how to make color bars and how to customize them. If you don’t — have a look there first.
Test Project
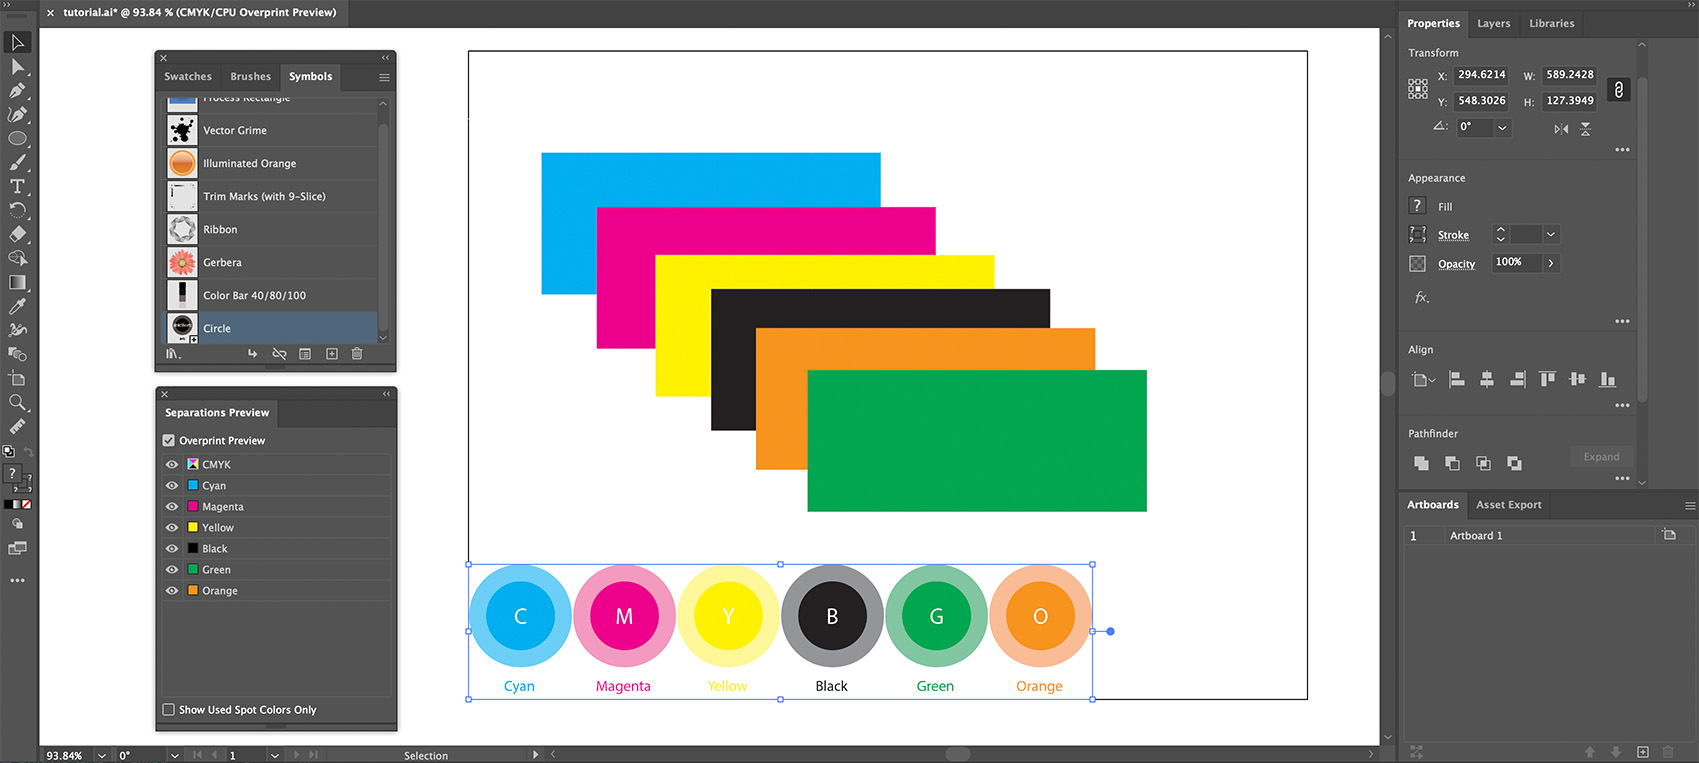
We’ll start with the test project from the color bar appearance tutorial that has a circle symbol with ink names:
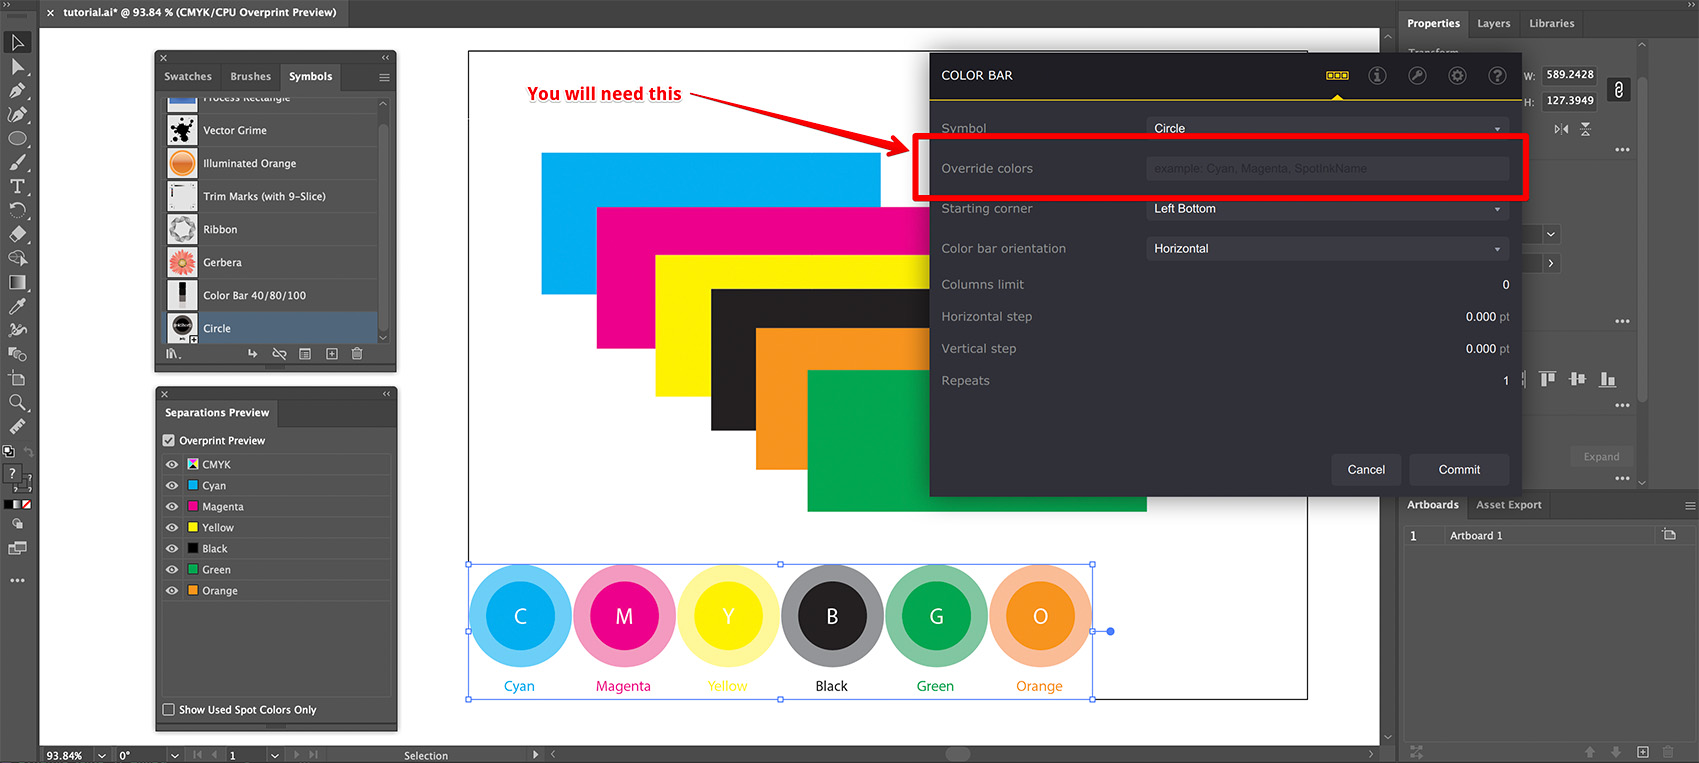
Now select the color bar and open its properties using Object → Color Bar → Color Bar Parameters… menu item in Illustrator:
Nothing new so far…
Custom Colors
You will need the Override colors field of that window. It lets you enter a comma–separated list of the colors to display in the color bar.
This even includes the colors not presenting in the document. As long as the color is a standard process color or an existing spot color — it will be displayed by the color bar.
Let’s try entering something there:
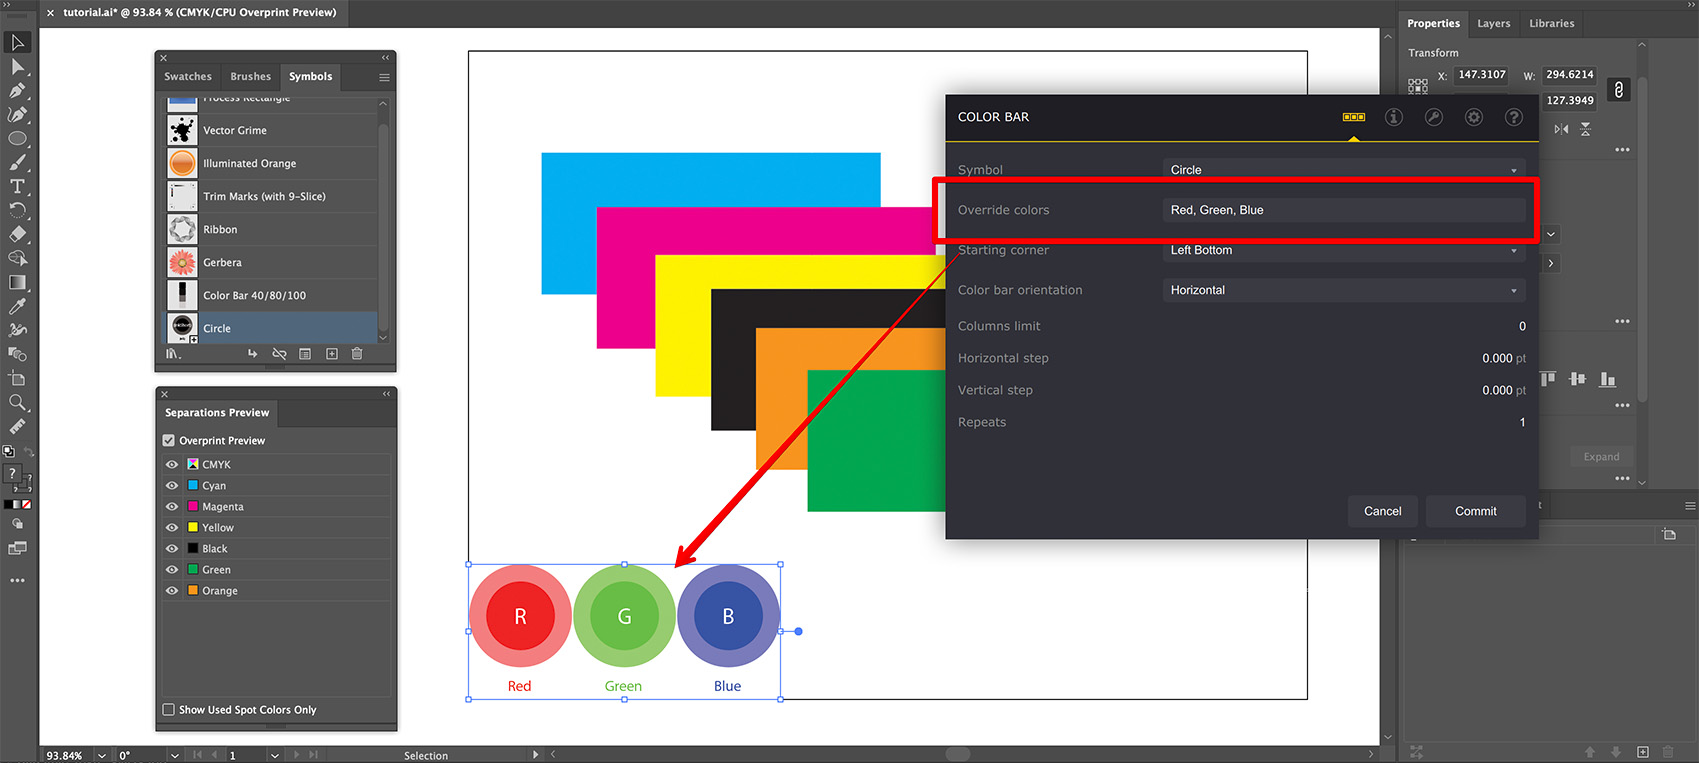
The color bar now displays red, green and blue process colors even if they are not used in the project directly.
Here we used a single spot color there to create a color patch:
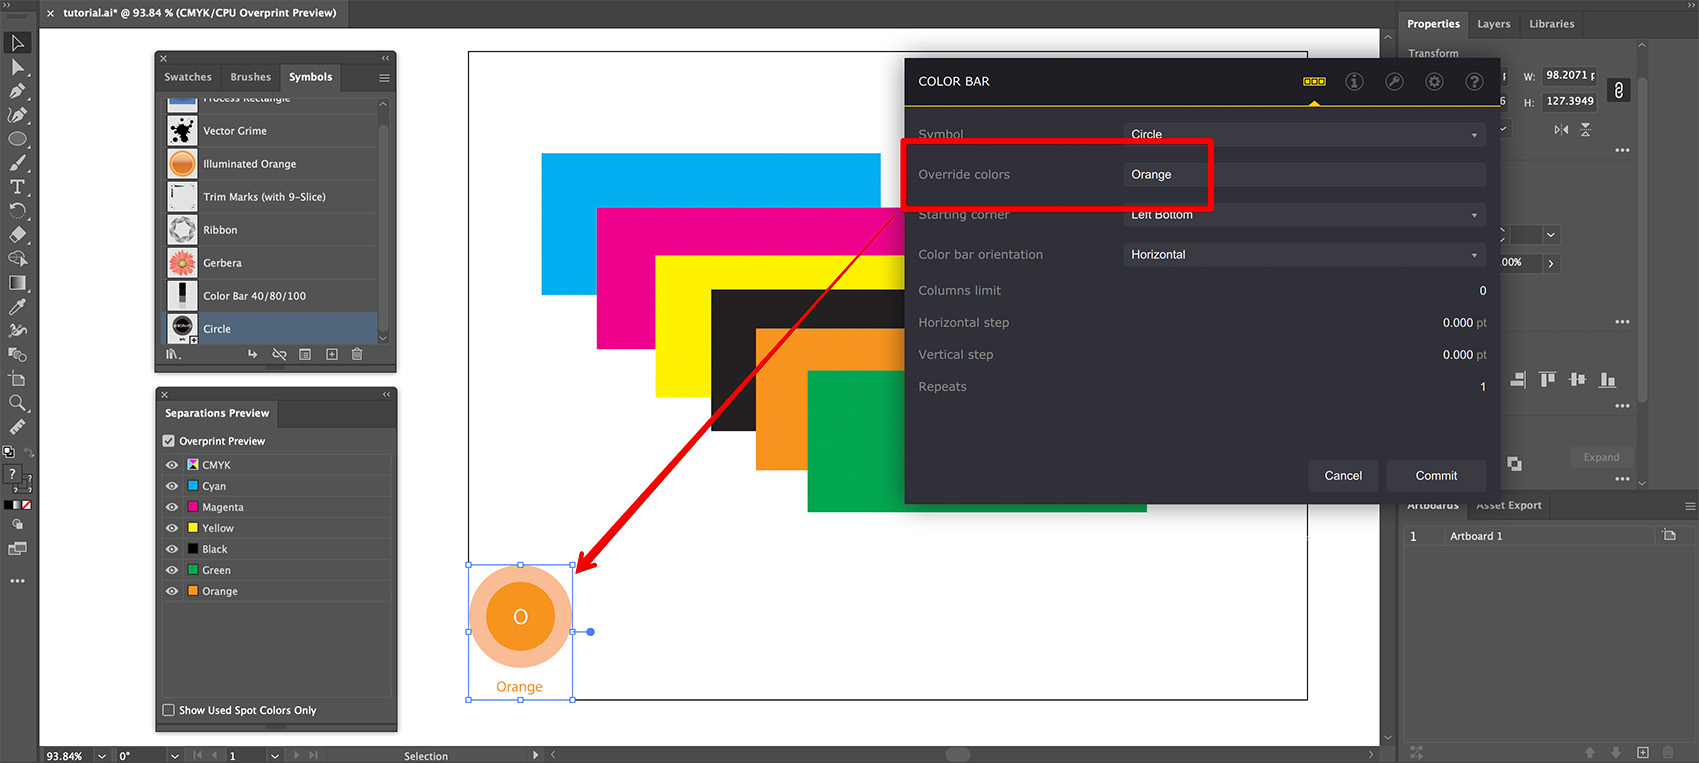
We’ve got a symbol colored up with a given ink.
Missing Colors
If the color is missing: not a standard process color name and there is no such spot color, Ai Toolbox displays it with an “invalid color” art:
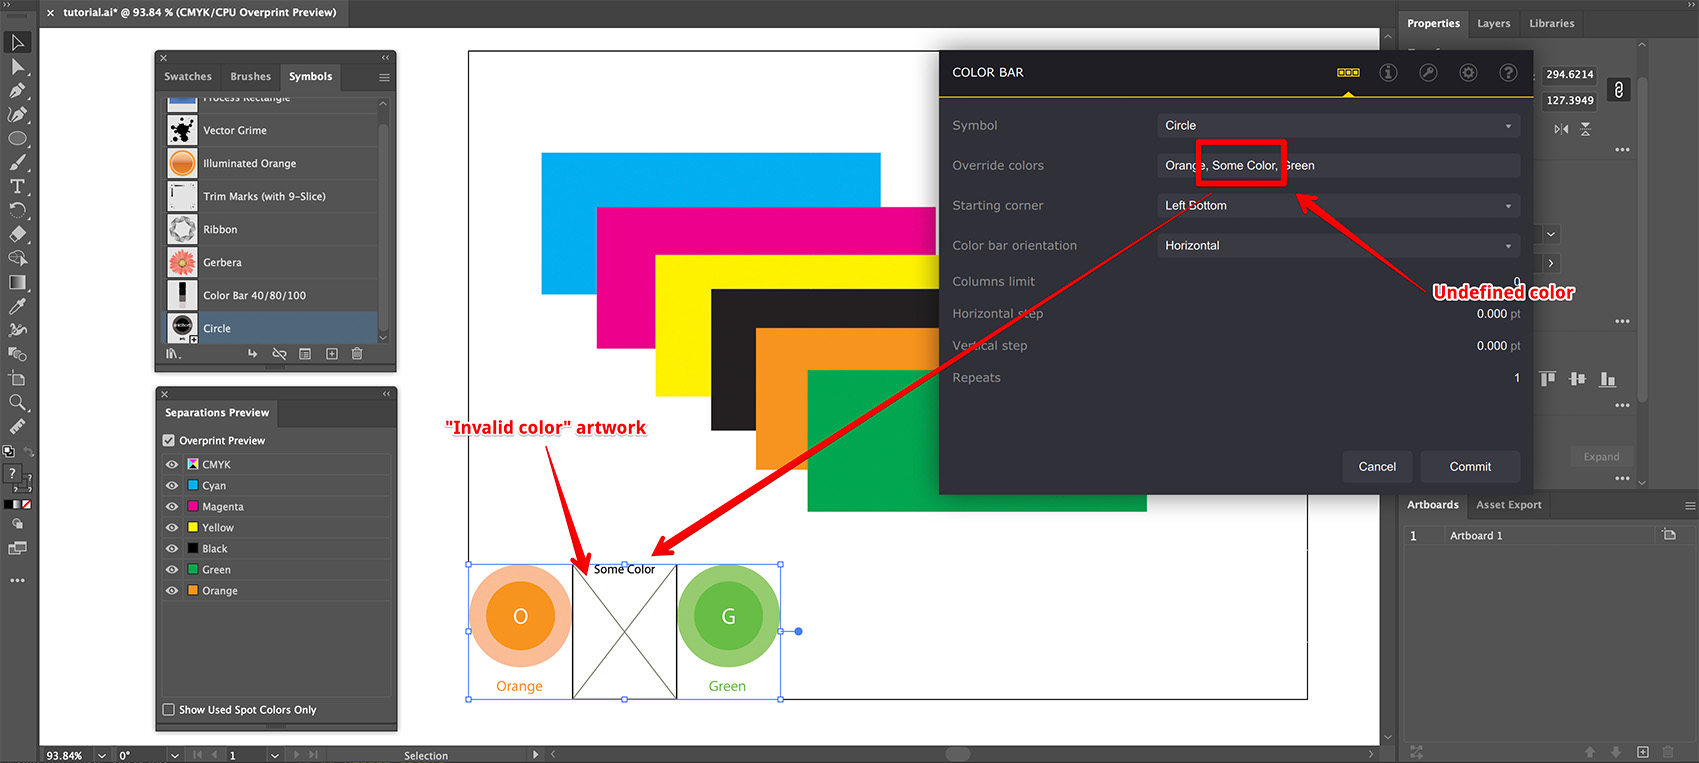
This way you can easily see if something is wrong with the customized colors in the color bar.
Indexed Colors
You can also access inks by index instead of names when overriding colors. Ai Toolbox supports names like {process 1} or {spot 2} to request the first process or second spot color name. Let’s give it a try:
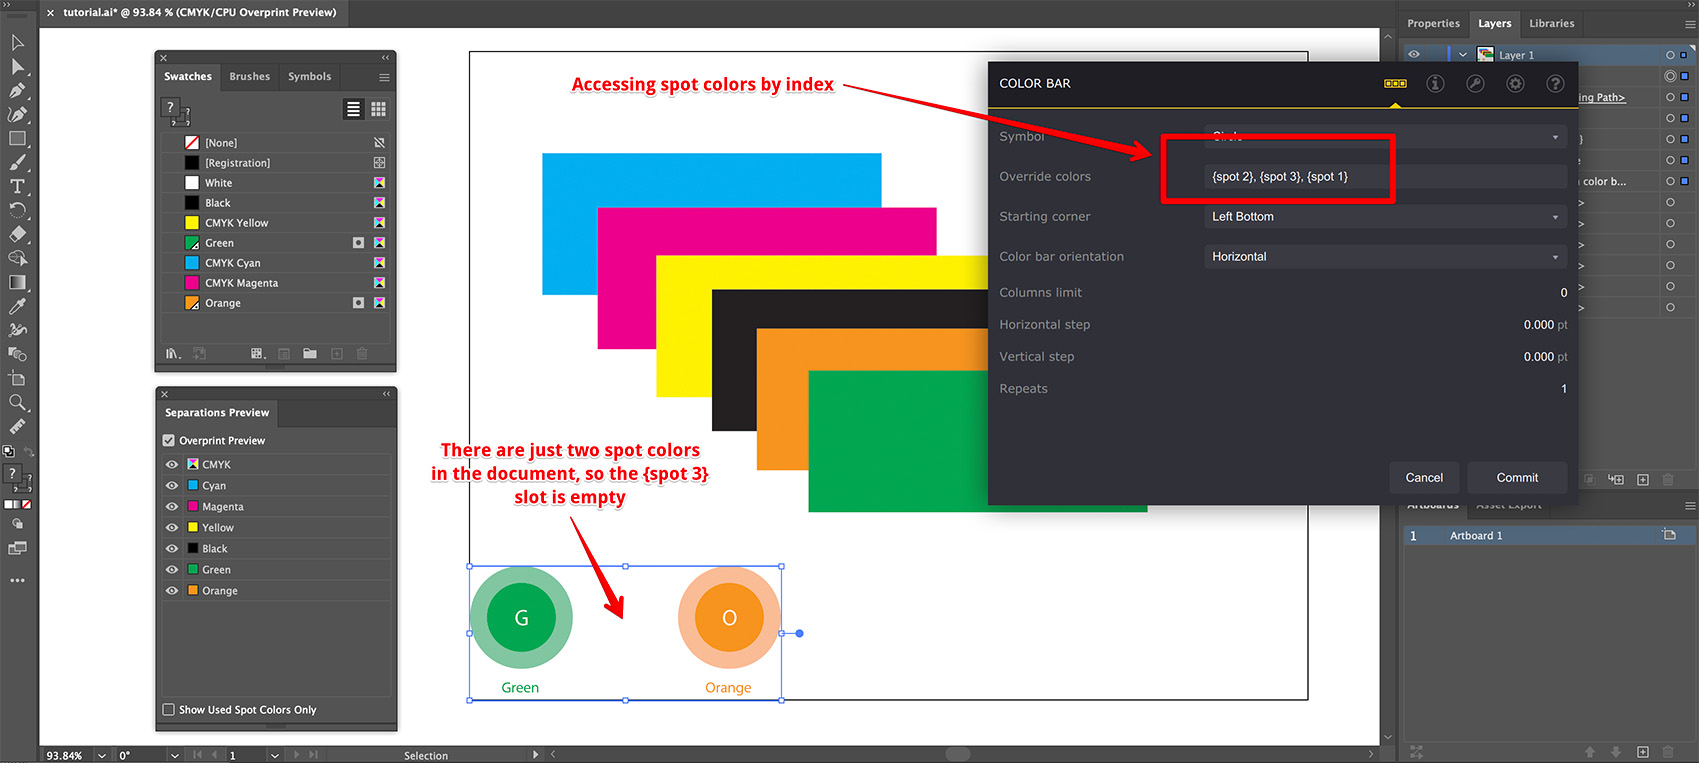
Here we used the {spot 2}, {spot 3}, {spot 1} line to override the color bar inks. The document has just two spot colors, so there is no such color as {spot 3}. Instead of drawing the “invalid color” artwork as above, the plugin leaves this space empty (actually draws a hidden symbol there).
This is done to let you make color bar templates with multiple ink slots that display only the available ones. Here is another example showing all the available process colors:
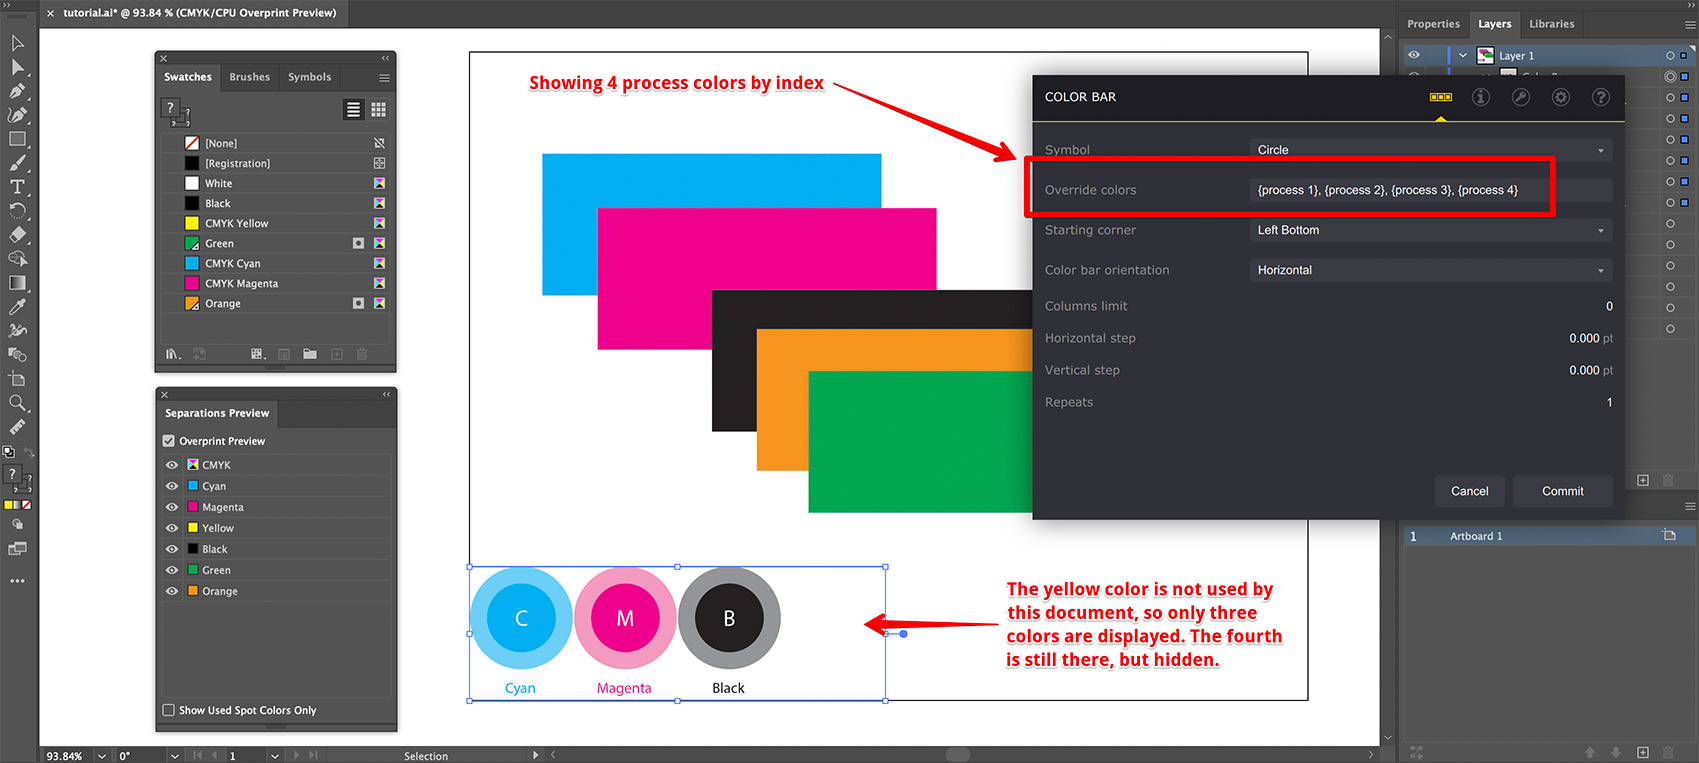
The document doesn’t use CMYK Yellow process color, so the color bar doesn’t show it even if the Override color line specifies four colors.
Once Again
You can specify colors by name and by index. If the color is found — it is displayed in the color bar. If not, it is either displayed with an “invalid color” art (if the color is specified by name) or not displayed (it the color is specified by index).
More Ai Toolbox Tutorials
Installation
- Installation — how to install the plugin;
- License Activation — how to activate the plugin with a license key.
Renaming and Creating Elements
- Bulk Rename in Illustrator — rename multiple elements at once;
- Create Artboards from Selection — make artboards from selected elements.
Selection Operations
- Selecting Paths by Name — bulk selection by name in Illustrator;
- Select → Same → Font — selecting objects with the same font in Illustrator.
Text Operations
- Merging Texts in Illustrator — combine text elements, keeping lines intact;
- Dynamic Texts — add dynamic information to text elements in Illustrator.
Files Operations
- Collect Resources — package multiple files at once, including the nested ones.
Conical Labels
- Conical Label from Selection — making the label from the selected artwork;
- Conical Label from Artboard — making the label from the artboard content.
Color Bars
- Making Color Bars — how to make color bars in Illustrator in a few clicks;
- Color Bar Appearance — customizing color bars to display the data you need;
- Color Patches — color bars that display the inks you want;
- Reusing Color Bars — how to copy color bars to another project.
Adobe and Adobe Illustrator are either registered trademarks or trademarks of Adobe Systems Incorporated in the United States and/or other countries.