Customizing Color Bars
Ai Toolbox makes color bars using standard Illustrator symbols, so if you want to customize the color bar appearance, all you need is to make a new symbol and tell Ai Toolbox to use it for the color bar.
How It Works?
Let’s start with a simple project and add a color bar to it. We’ll be using the same project as in our color bars tutorial, but this time we’ll click Object → Color Bar → Create 40/80/100 Color Bar item in the Illustrator main menu:
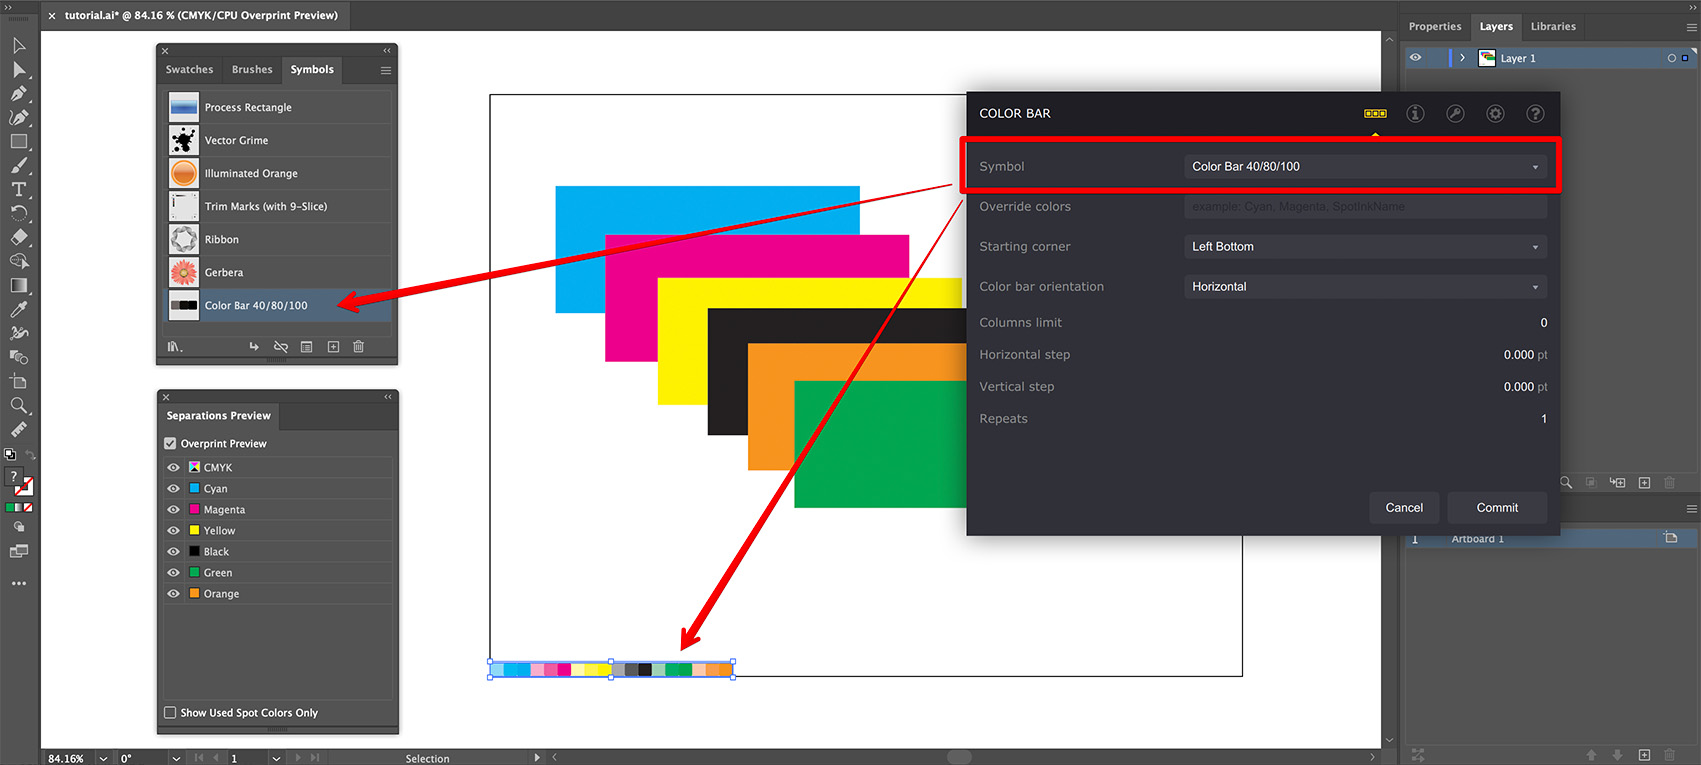
Note that this time the color bar looks different as more shades are displayed for each ink. Also note that the symbol mentioned in the color bar properties window is actually listed in the Symbols panel of Illustrator. Let’s have a closer look at it:
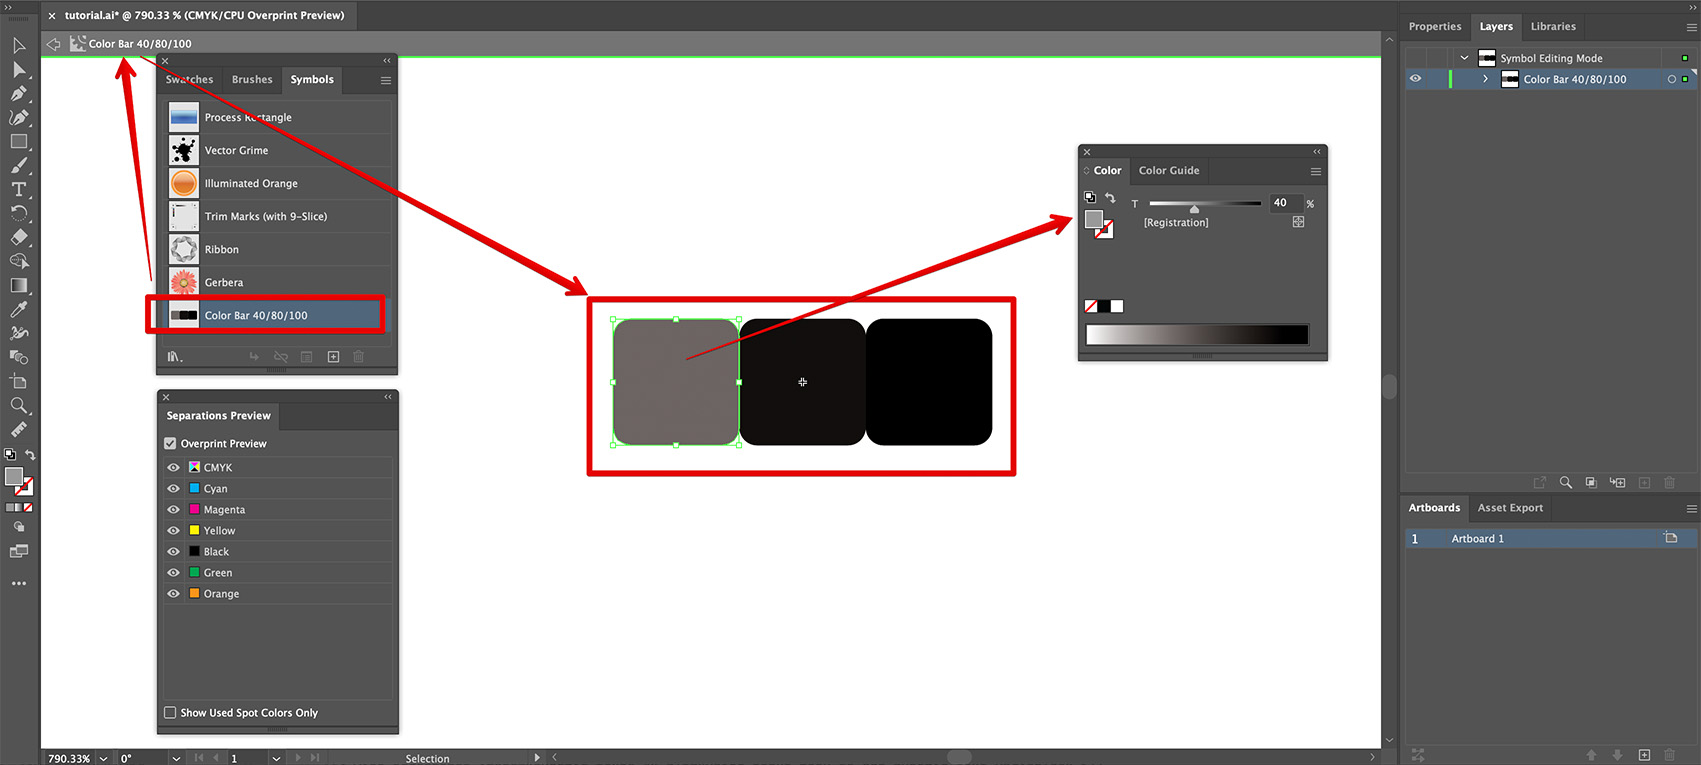
Double–click the symbol in the panel to open it for editing. You will see three rounded rectangles filled with registration color with different tint levels. Now you should see how it works:
- For each ink in the document Ai Toolbox takes a symbol you selected;
- Then it expands the symbol and colors it with the ink color;
- Only the spot colors of the symbol are changed, process colors are left intact.
Although you can use any spot color in symbols, consider using the registration color as it doesn’t change your swatches list when the symbol is added to the project. Use the tint level to create different shades of the color.
Let’s Make Changes
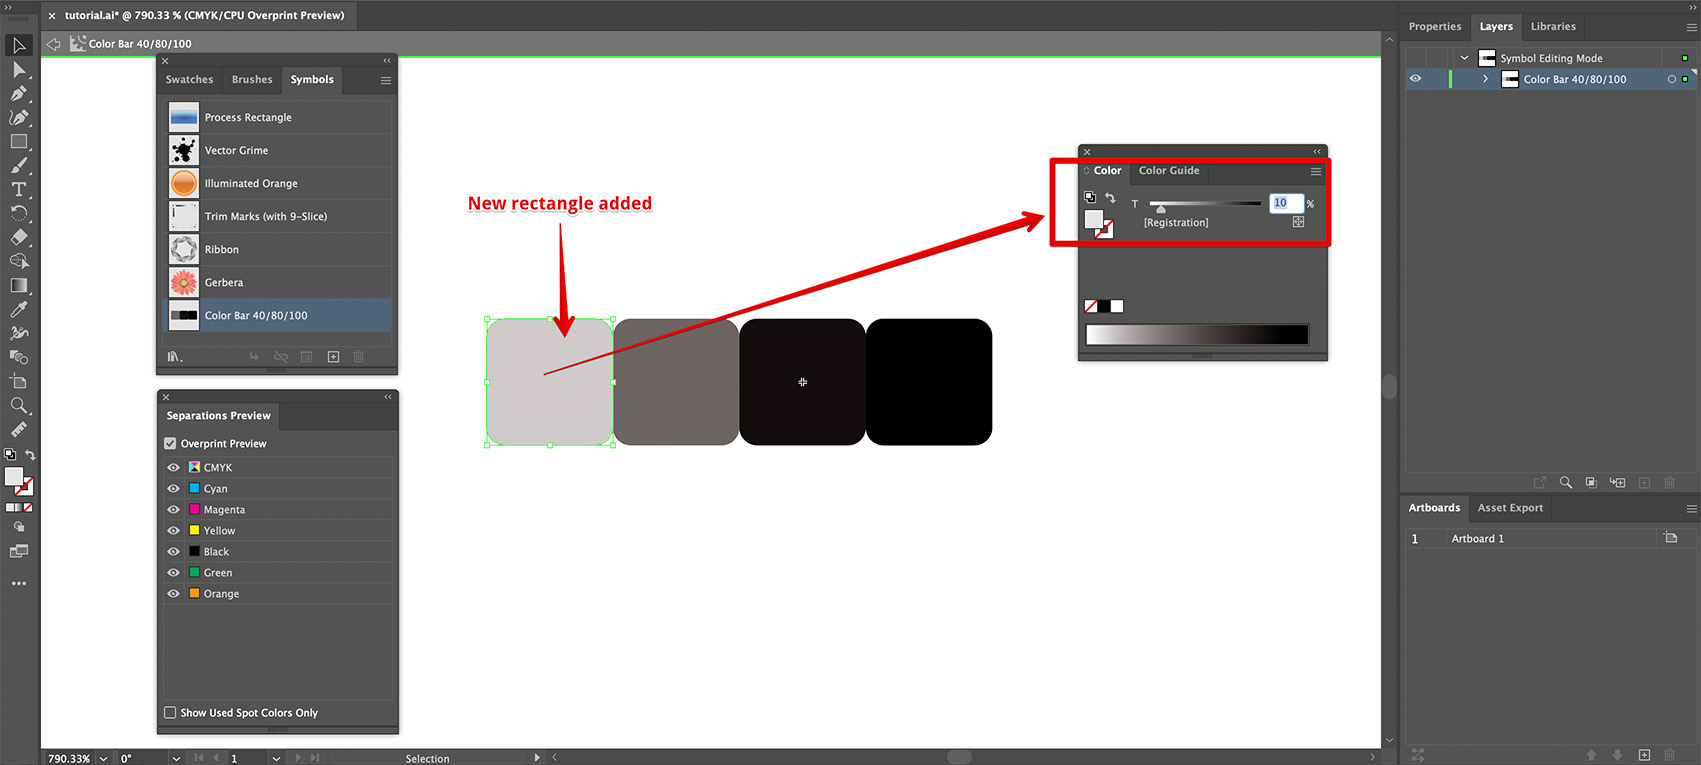
The color bar displays 3 shades of each color, lets add one more shade with 10% tint. To do so, copy one of the squares place it on the left of the others and adjust its tint this way:
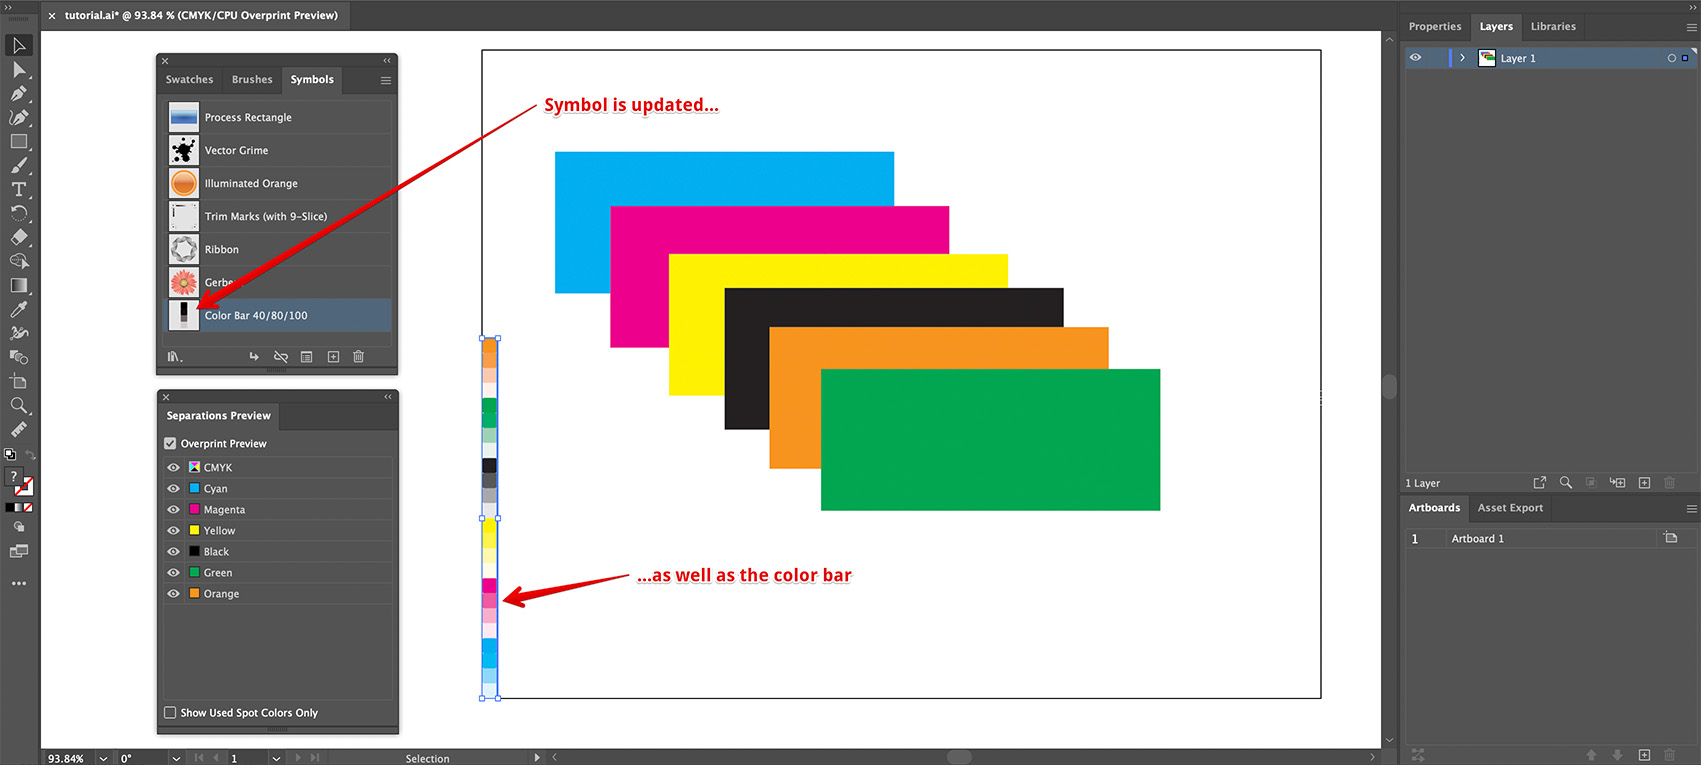
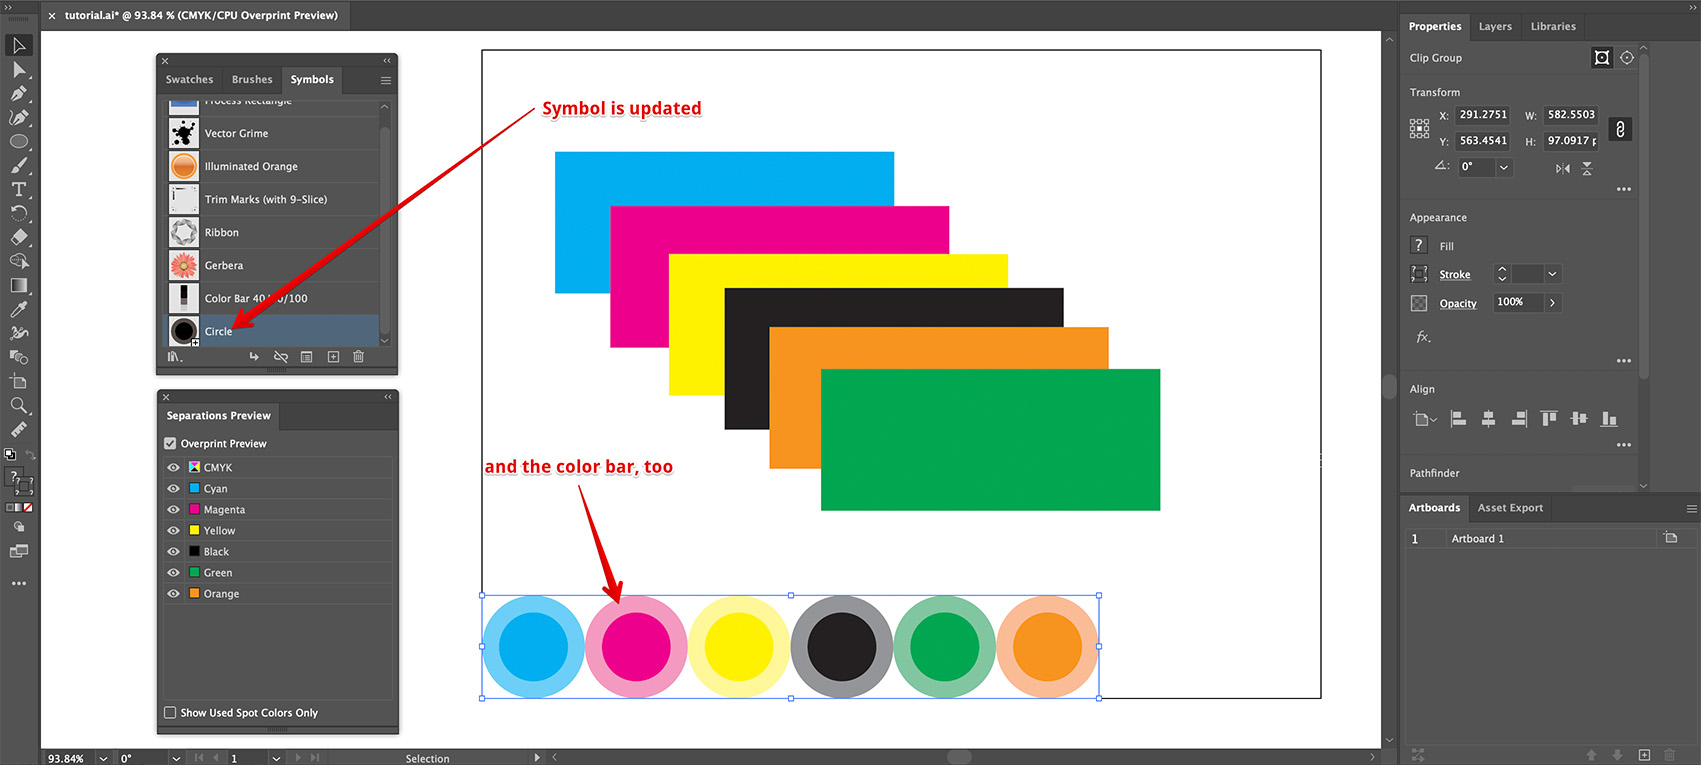
Once done, leave the symbol editor and check the color bar. It may not update immediately, as Ai Toolbox doesn’t monitor all the changes. To force the update click Object → Color Bar → Update All Color Bars menu item. You should get this:
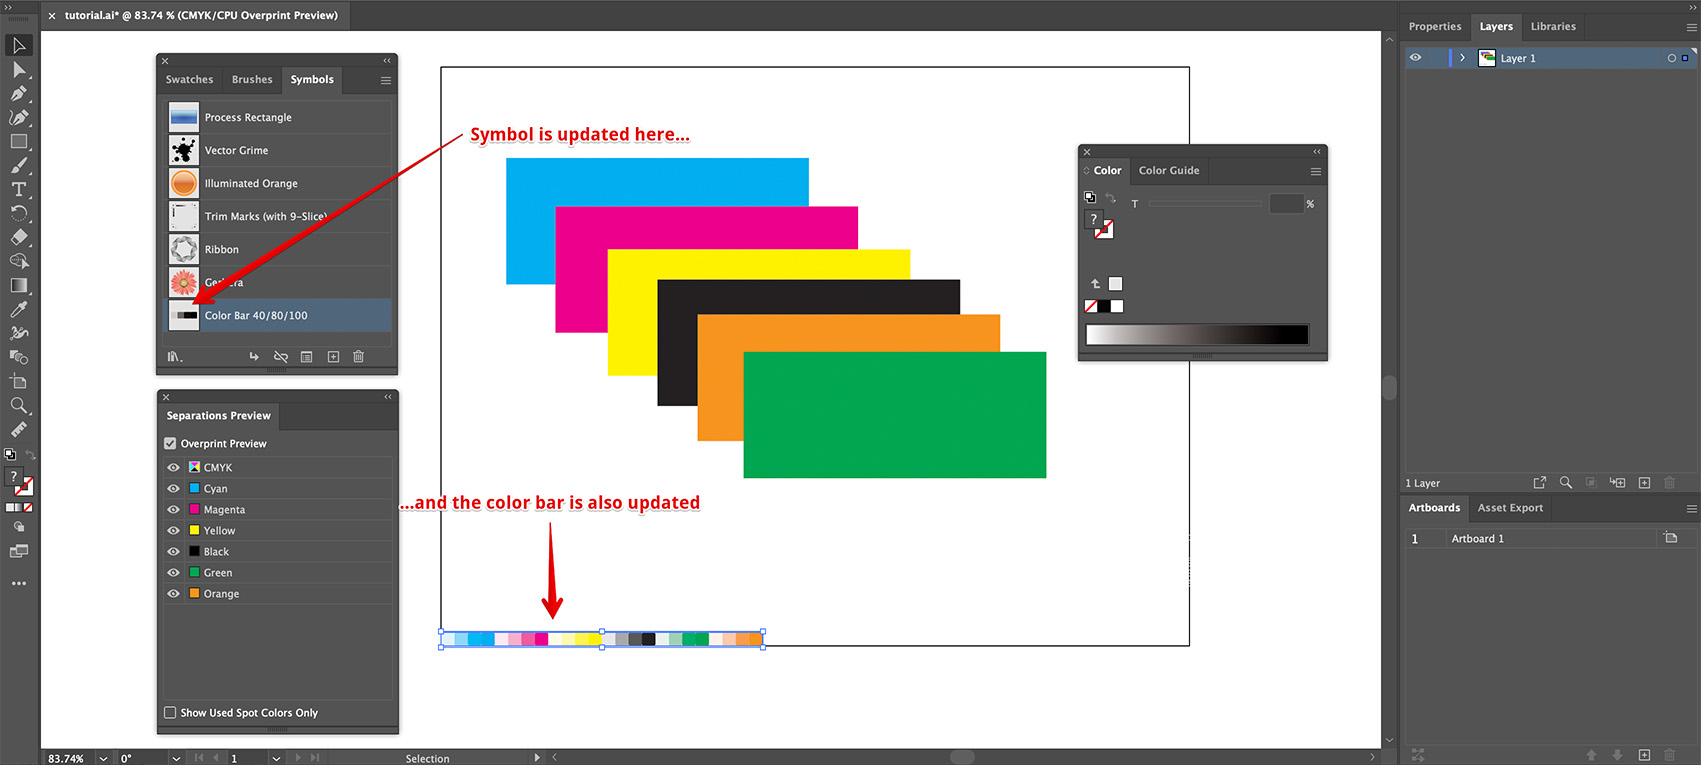
The symbol in the symbol list is updated and the color bar now displays four shades of each color instead of three.
Making Vertical Color Bar With Shades
Now if you simply switch the color bar orientation to vertical, you might not get what you expected:
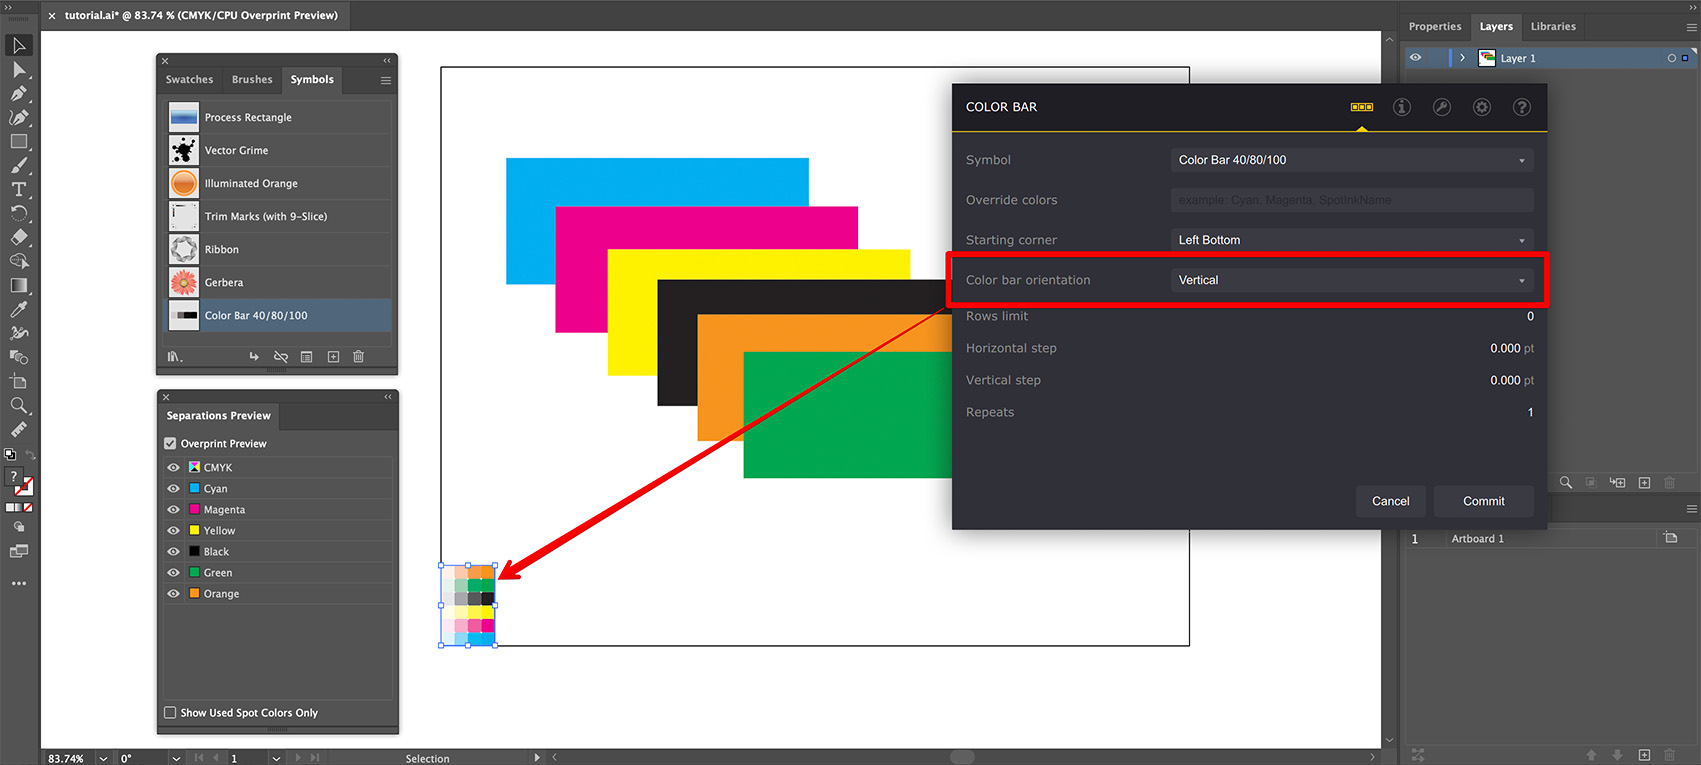
You might have expected all the elements to stay in one column, instead the elements are still horizontal one line per ink. The reason is that Ai Toolbox does not rotate the color bar elements for vertical orientation as it might not be what you want. Say they may have text elements that you want to keep horizontal, etc.
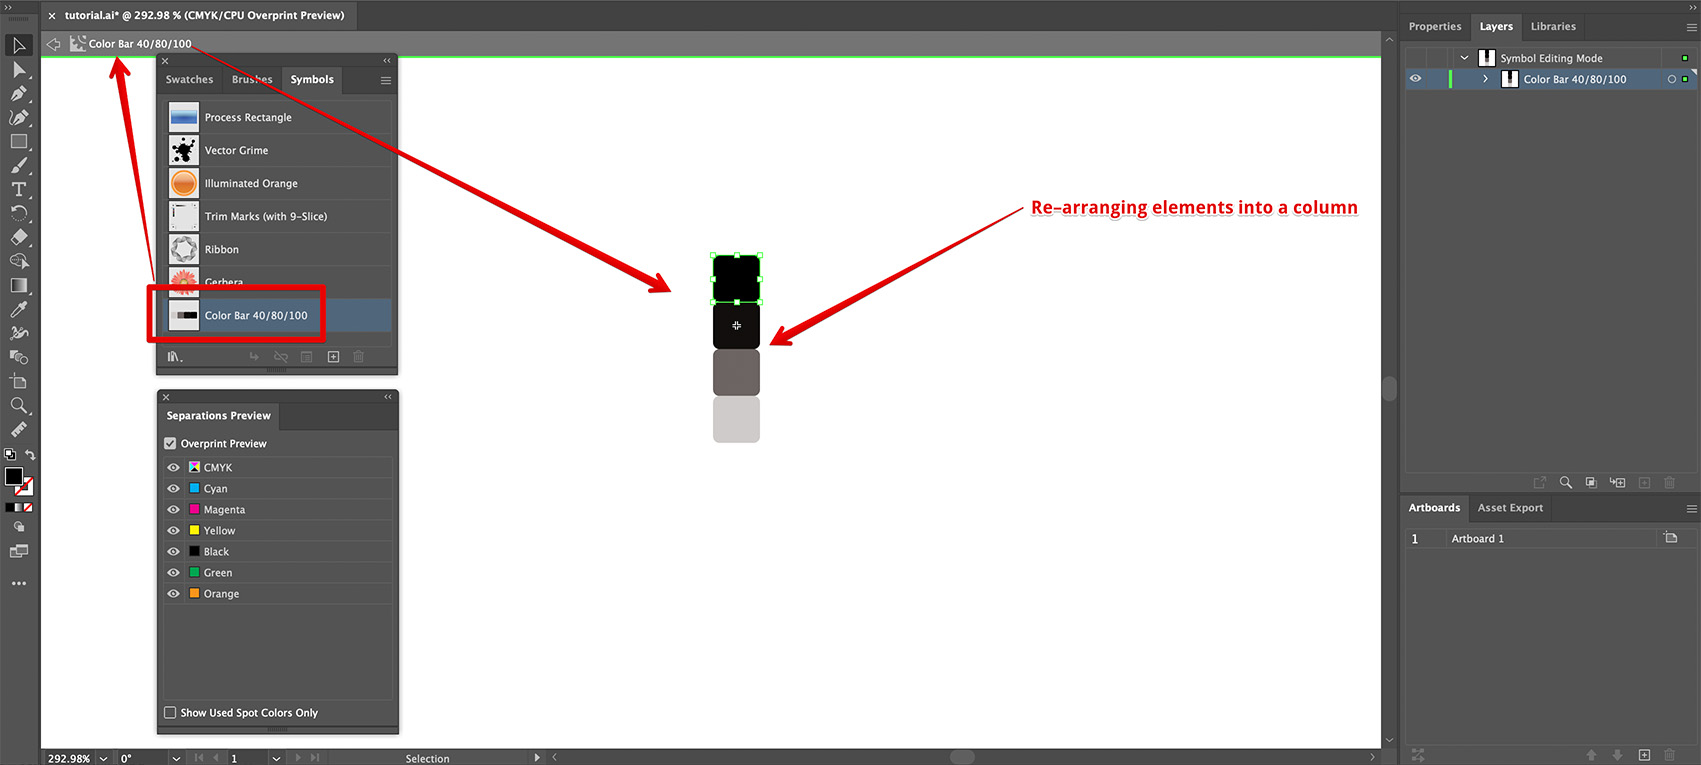
What you can do is to re–arrange the symbol artwork to make a column instead of the row. Let’s edit the symbol again:
Leave the symbol editor and update the color bar by using Update All Color Bars menu item. You should get a completely vertical color bar:
Custom Shapes and Sizes
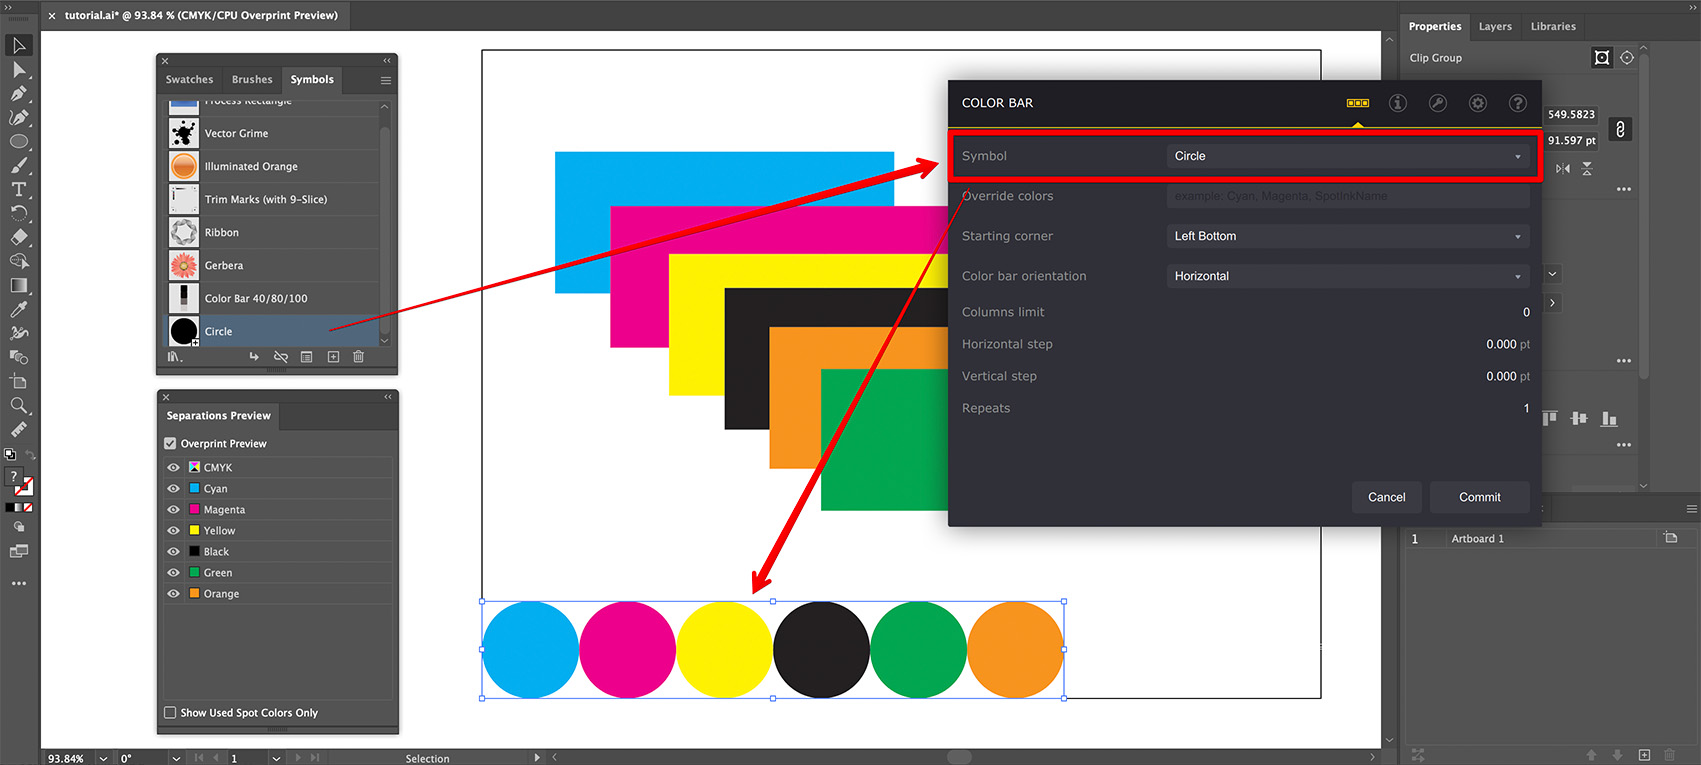
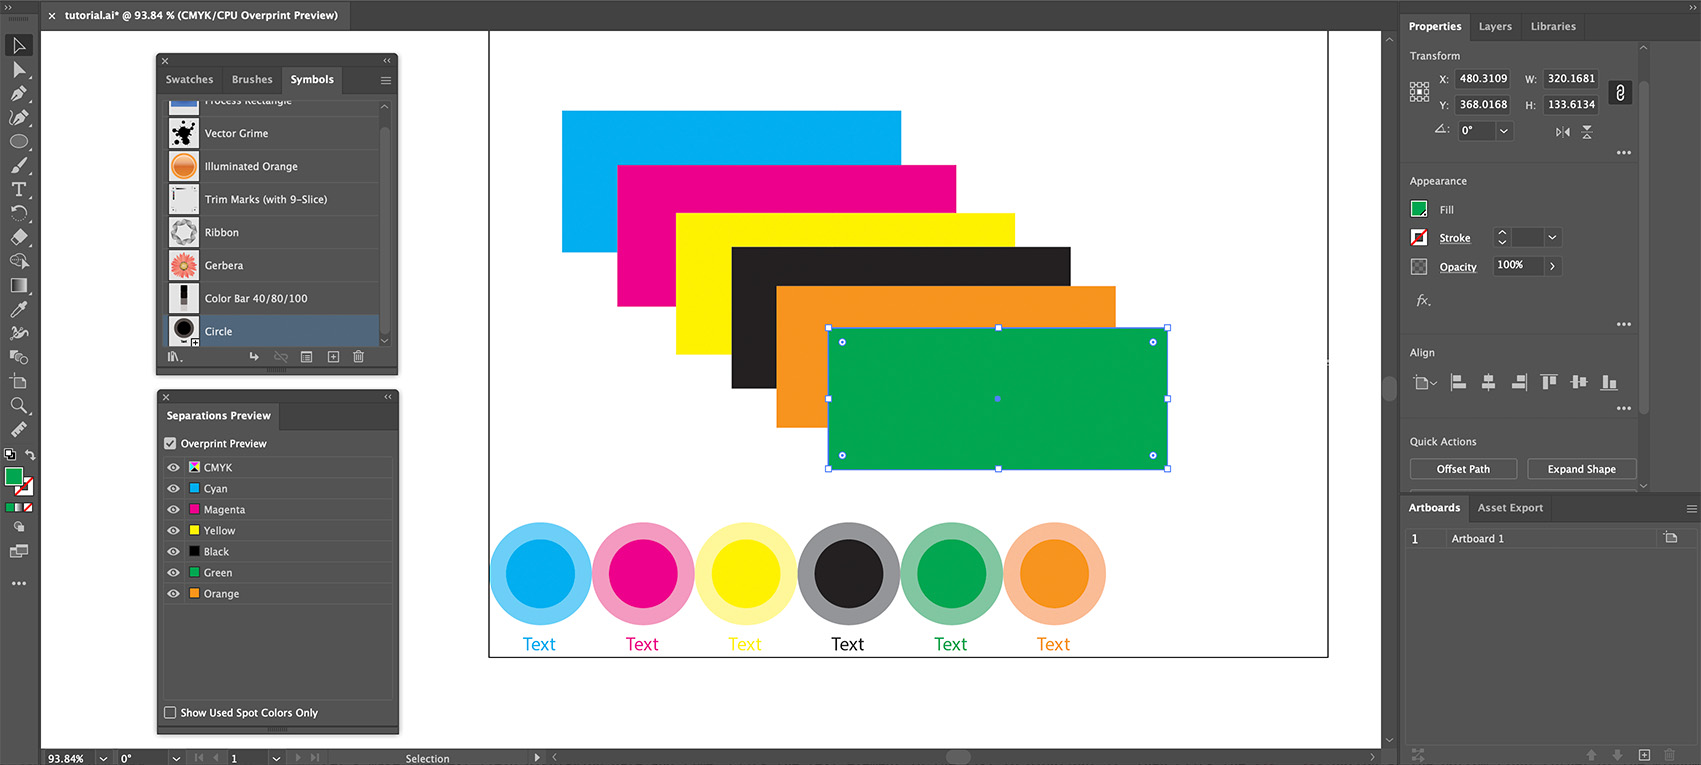
Let’s try something different and make a new symbol with a circle:
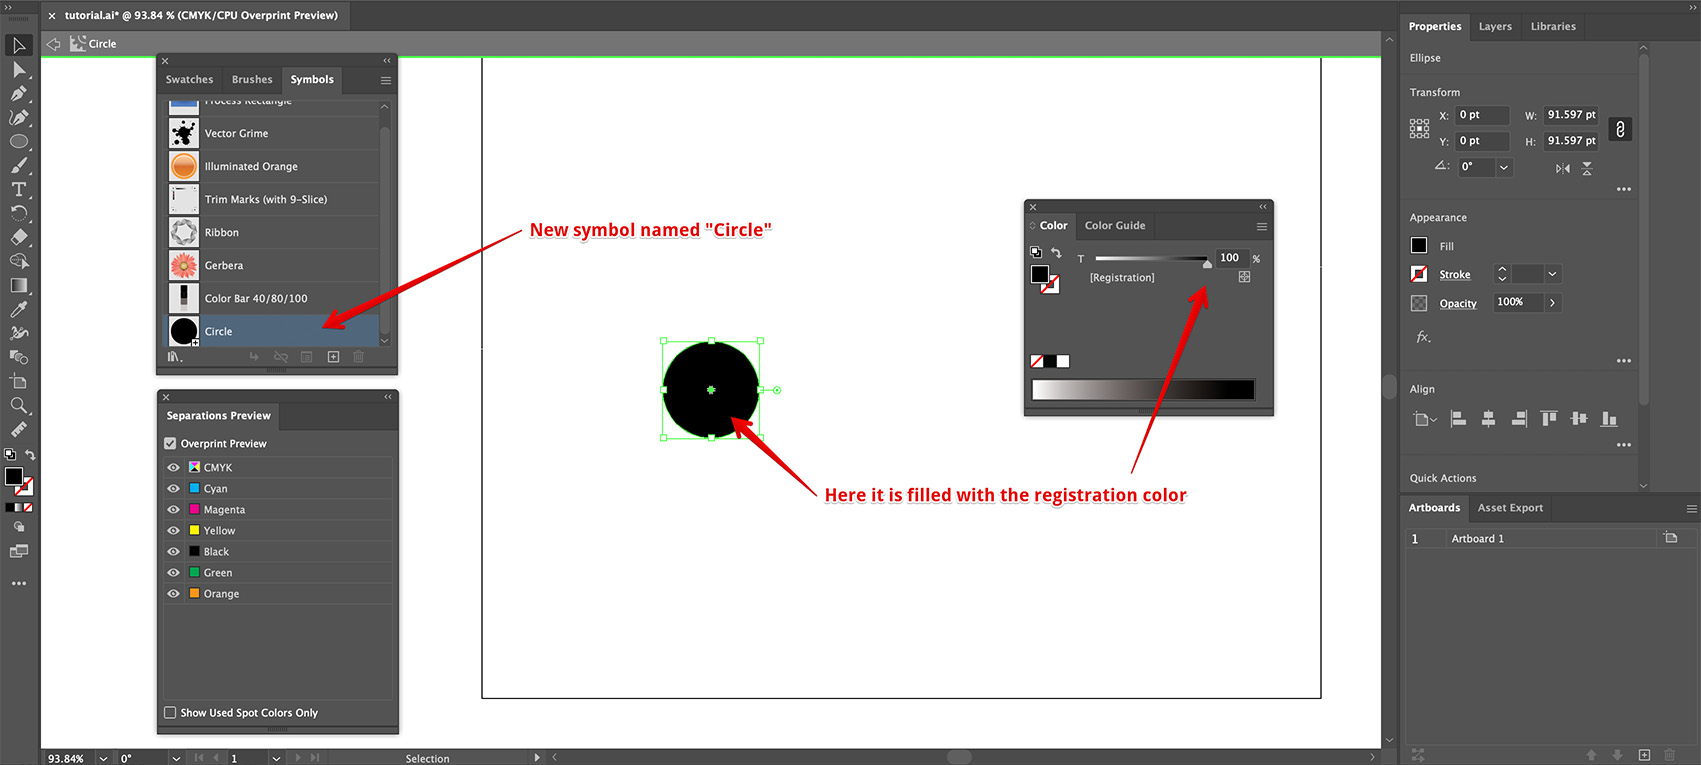
Once done, select the color bar and open its properties window. Then select “Circle” in the Symbol drop-down list and see what happens:
The color bar now uses our circle to display ink colors. Let’s enhance the symbol a bit with a half–tone stroke:
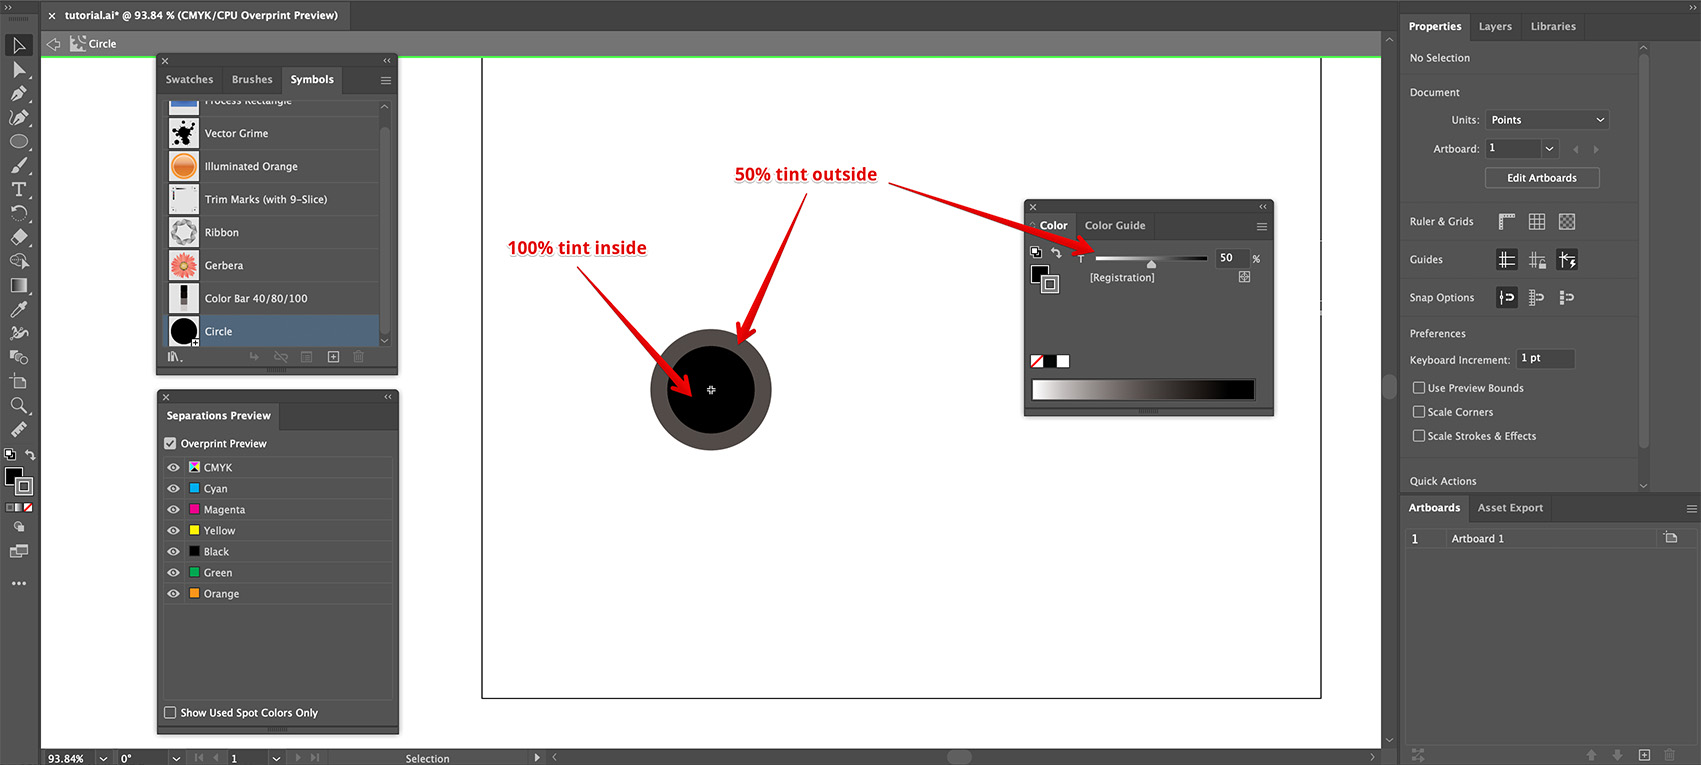
Here the stroke is set to use the same registration color with 50% tint. Once the symbol is saved and the color bar is updated, you will get this:
Basically, Ai Toolbox will colorize the symbol you provided and arrange its copies to make up a color bar.
Colorizing Limitations
Ai Toolbox colorizes all the simple elements of the color bar symbol which have a spot color assigned. This includes simple and combined paths and texts. Ai Toolbox supports groups of elements, but doesn’t support advanced artwork like envelopes, repeats and so on. It also doesn’t support patterns and gradient artwork even if it uses spot colors.
Process colors like CMYK are left untouched. This lets you add elements that don’t get colorized.
Another option is to lock a symbol element. Locked elements are also left intact.
Text Elements
You can have text elements in color bar symbols. Let’s add a simple text block under the circle in our symbol:
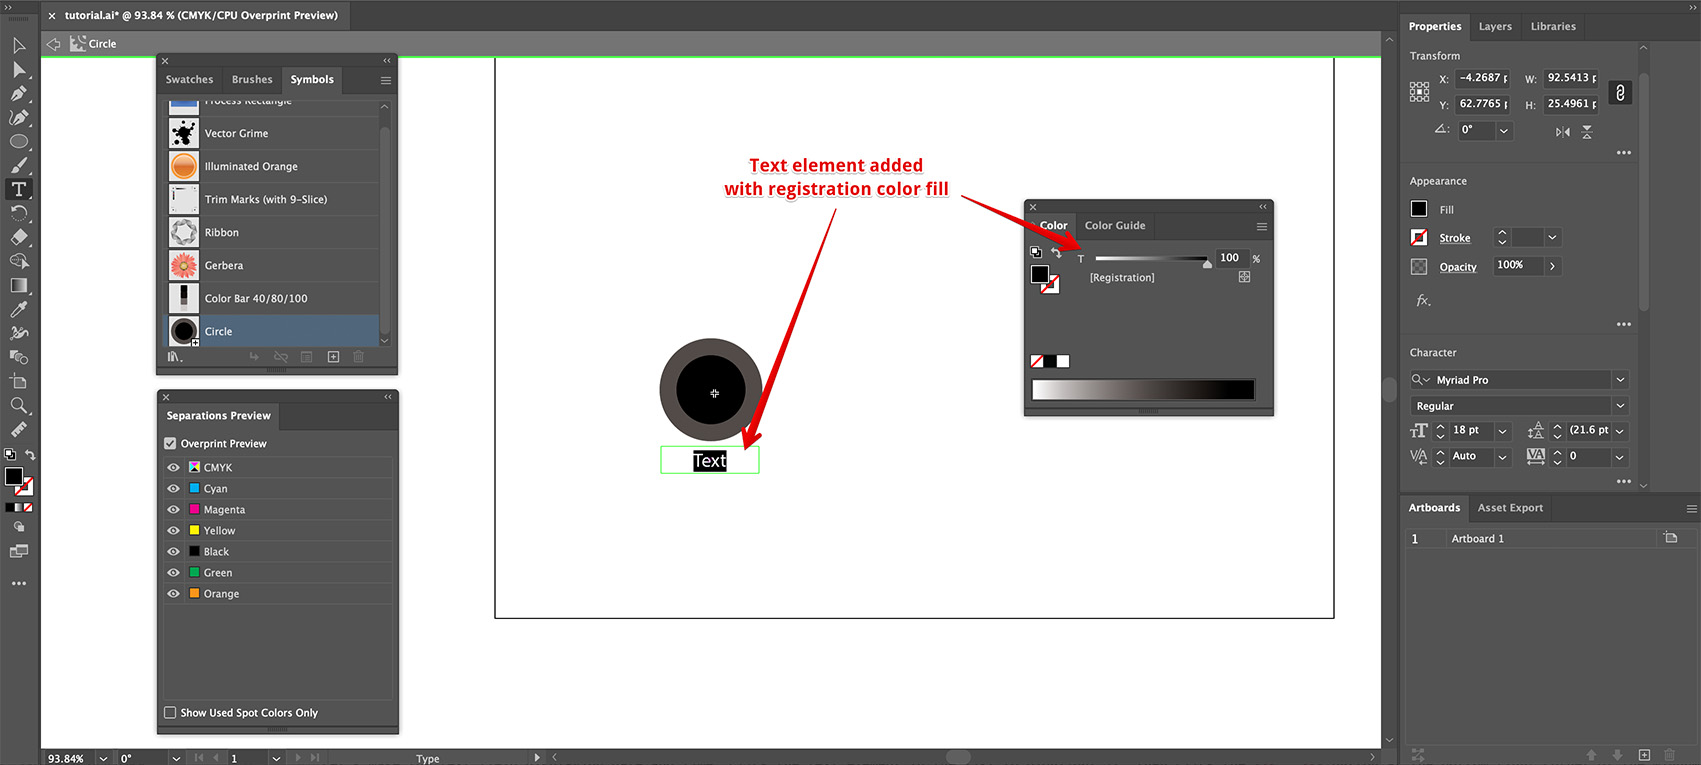
As the text element uses registration color, once the color bar is updated the texts will be colored with their inks:
The next obvious question is of course: can we display the ink names? Sure we can, Ai Toolbox uses special variables/placeholders that get replaced with ink parameters:
- {ink} — replaced with the full ink name;
- {inkShort} — replaced with the capitalized first letter of the ink name.
Let’s change the symbol this way:
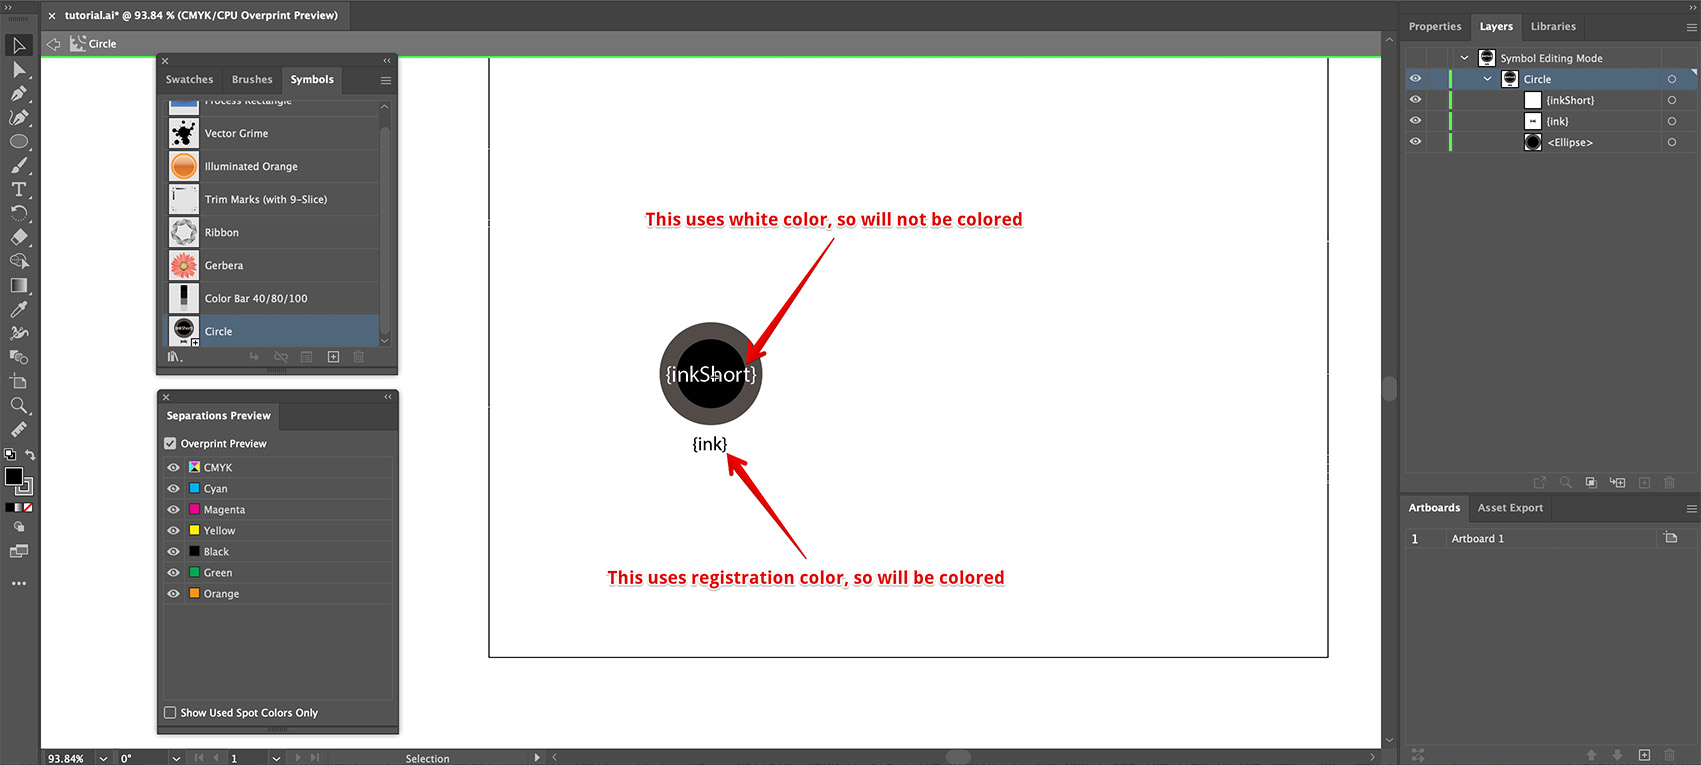
There are now two text items there. One at the top is filled with white color, so will not be colored by the plugin. It has {inkShort} text which will be replaced by the first letter of the ink (“C” for cyan, etc). The bottom text uses {ink} template and registration color, so it should have the full ink name and should be colored by that ink.
Let’s see if it works as expected:
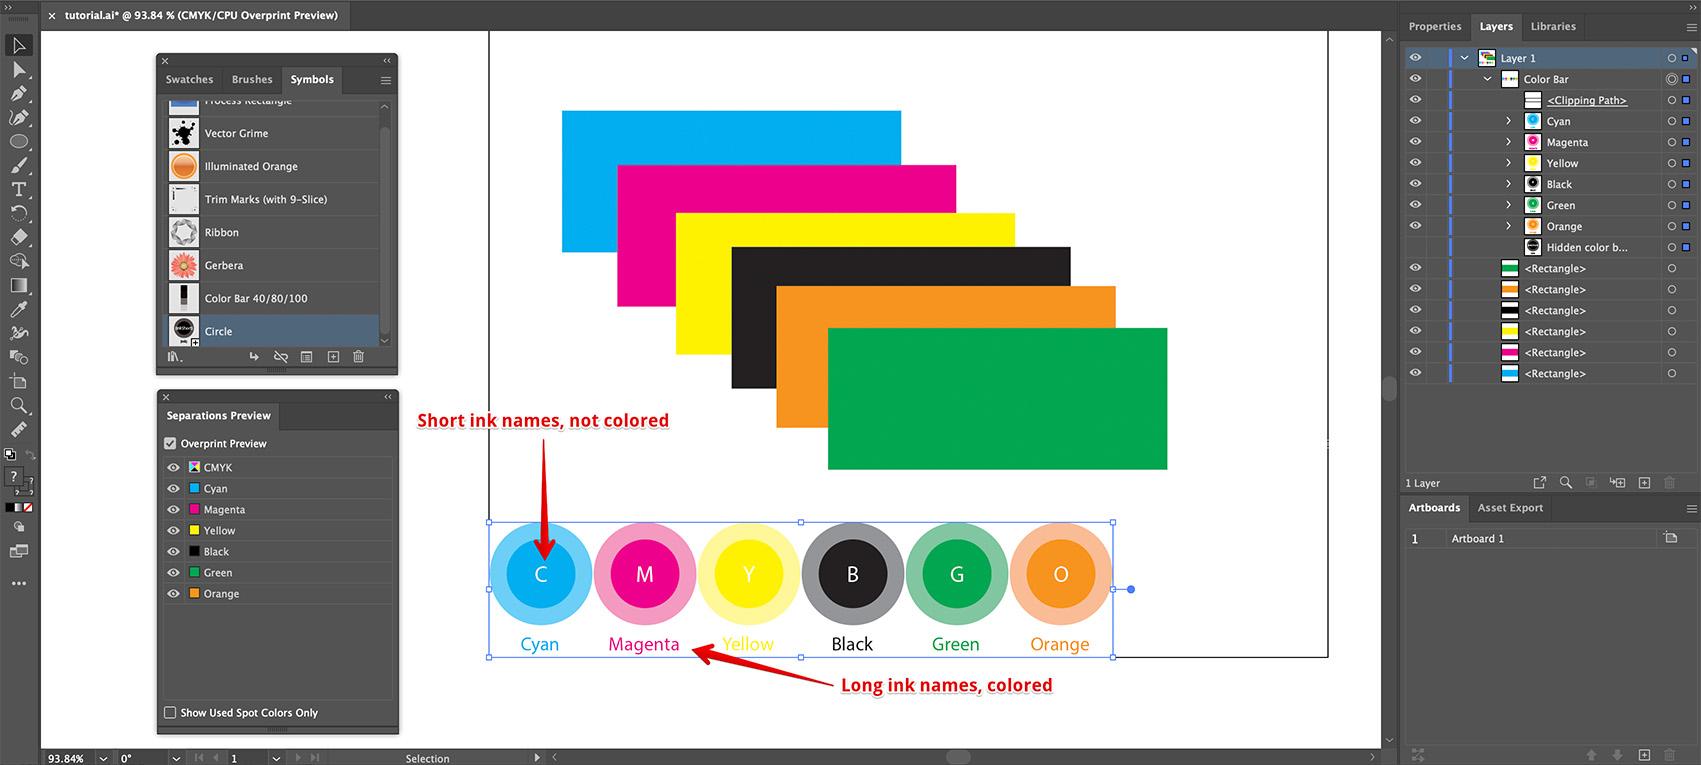
Yep, everything is good: the short ink names are still white, while the full names below are colored.
Note that you might add other text besides templates to the text field. Say you might do it this way:

Here we added angle brackets around the full ink name and the color bar displays them as is, while replacing template parameters with ink names.
Missing Symbols
What is the symbol used by the color bar is missed? Ai Toolbox needs the symbol to rebuild the color bar, so what if cannot find one? Let’s try and see. We’ll start with the same project with a color bar using the symbol named “Circle”:
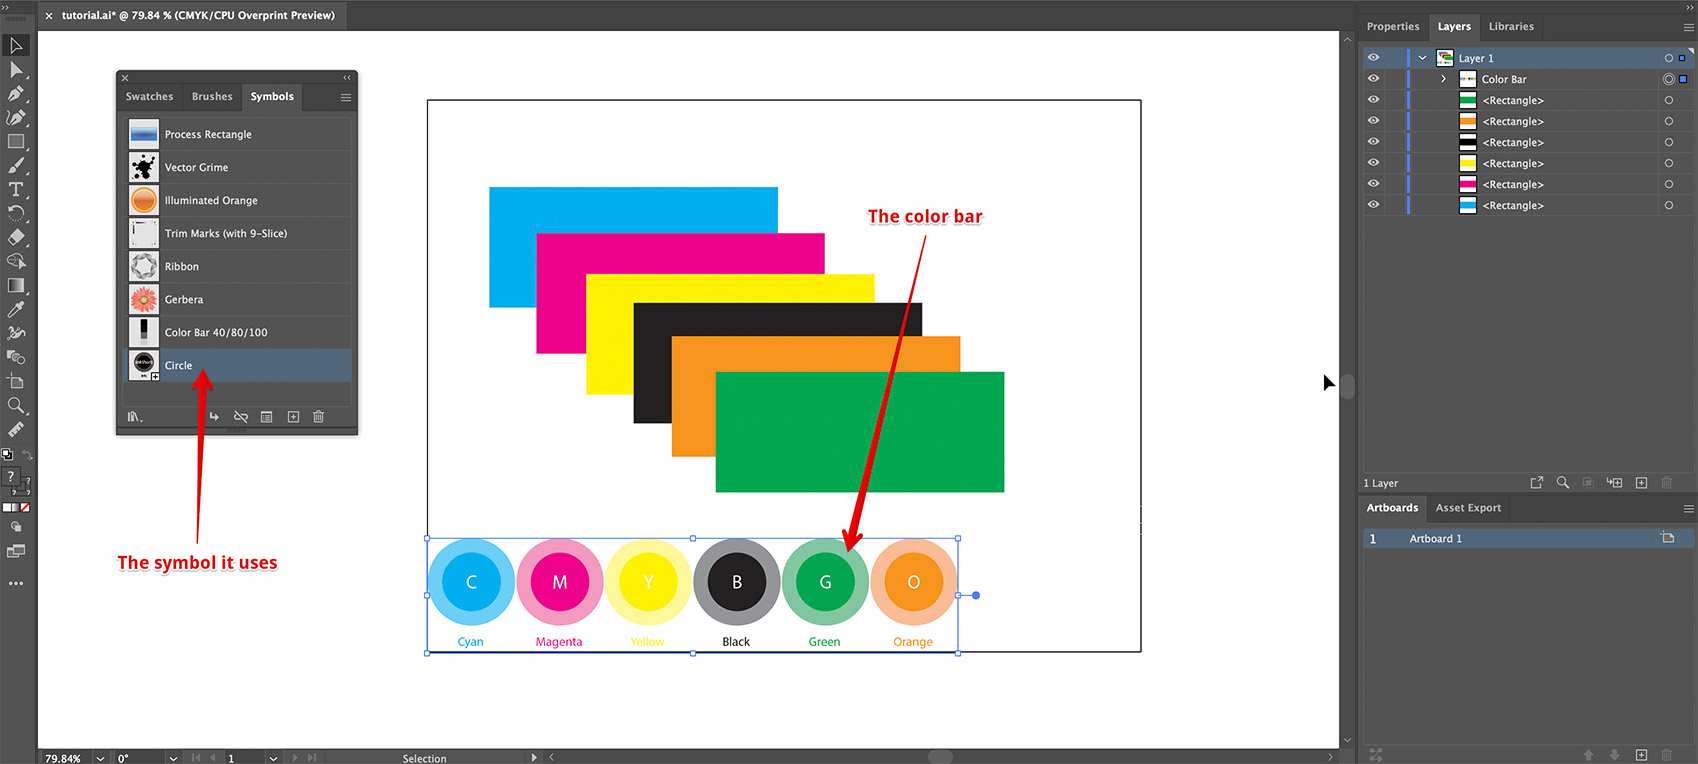
Now rename the symbol, so Ai Toolbox cannot find it when it tries to update the color bar:
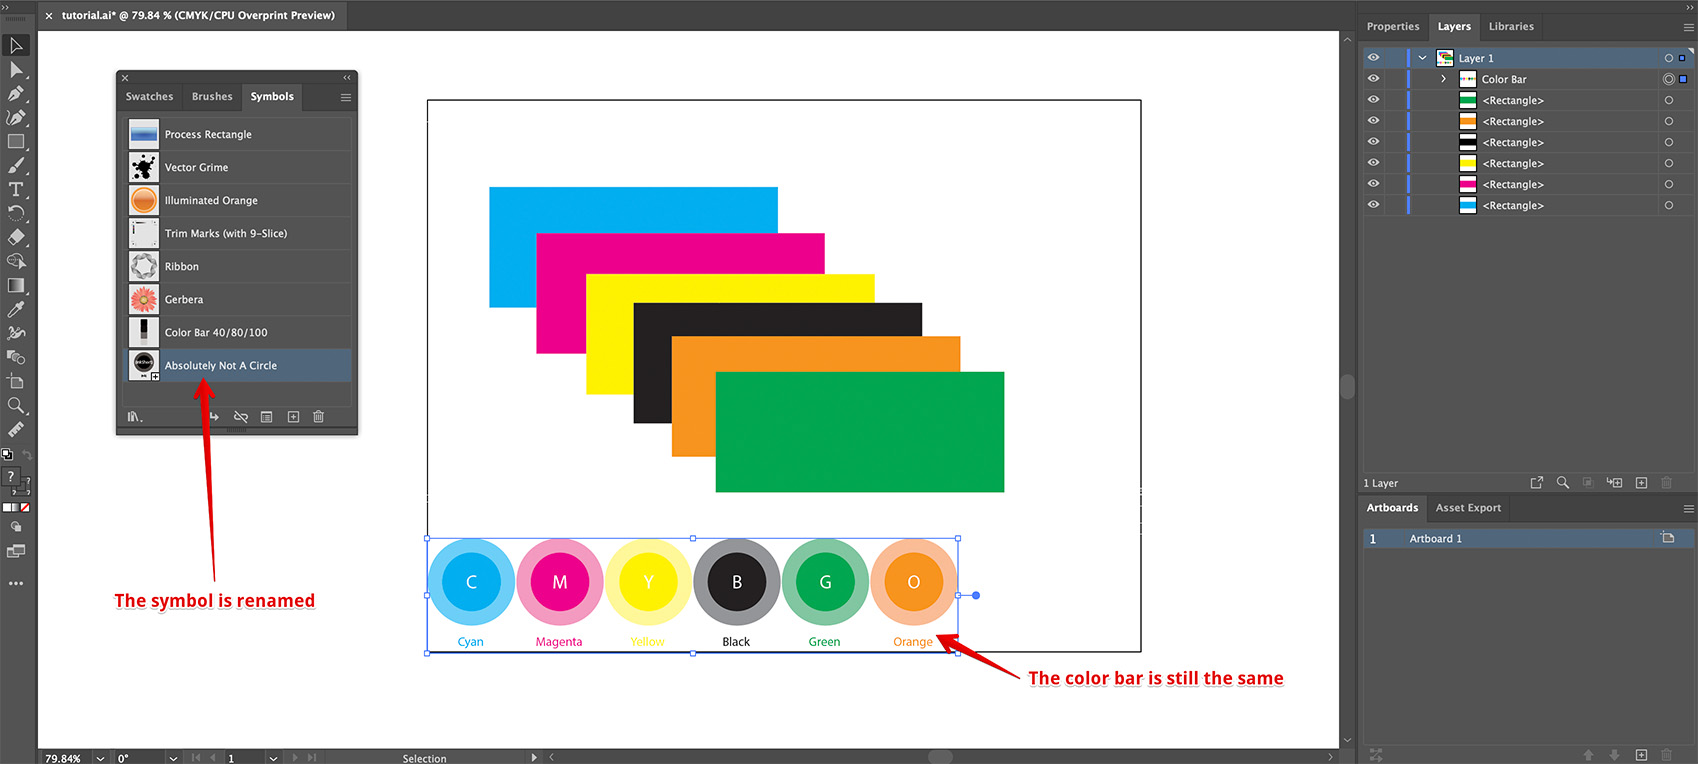
The color bar still looks fine as Ai Toolbox doesn’t update them after every edit. Click Object → Color Bar → Update All Color Bars in the menu to get the color bar updated:
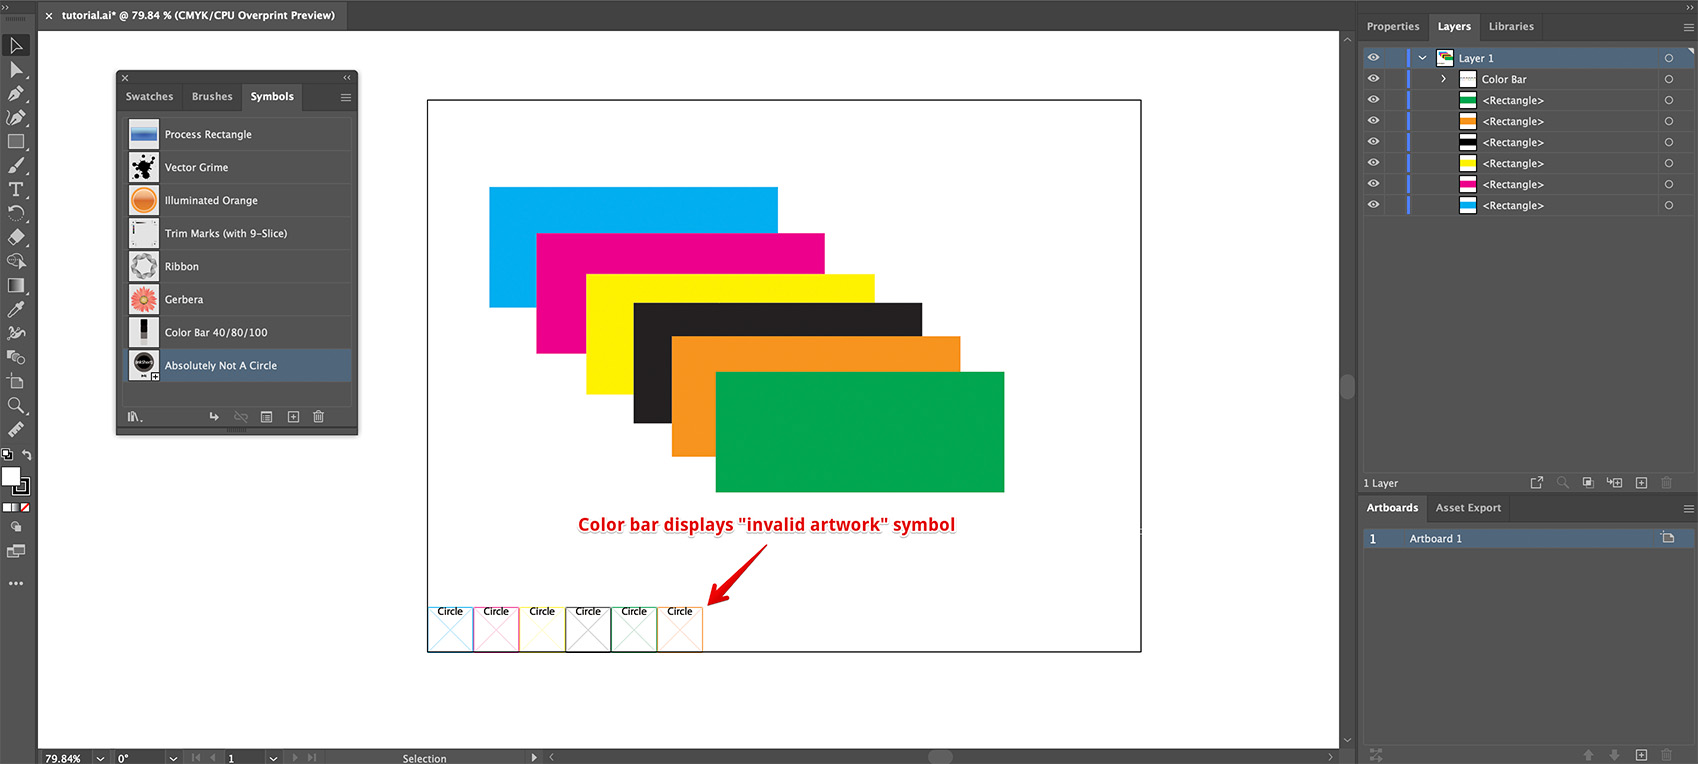
The color bar changed and now displays crossed rectangles colored with the document inks. This is similar to what it does for missing inks and basically means that the plugin cannot find the symbol to build a color bar. The missing symbol name is displayed for your convenience.
There are two ways to fix that:
- To rename the symbol back or make a new one with that name;
- To open the color bar properties and select a new symbol to use.
Both options are pretty obvious, so if something happens to symbols and you see the color bar like that — do not be surprised, just fix it using one of the methods above.
Want More?
Have a look at these tutorials to get even more from color bars:
- Color Patches — making color bars display the inks you want;
- Reusing Color Bars — how to copy color bars between projects.
More Ai Toolbox Tutorials
Installation
- Installation — how to install the plugin;
- License Activation — how to activate the plugin with a license key.
Renaming and Creating Elements
- Bulk Rename in Illustrator — rename multiple elements at once;
- Create Artboards from Selection — make artboards from selected elements.
Selection Operations
- Selecting Paths by Name — bulk selection by name in Illustrator;
- Select → Same → Font — selecting objects with the same font in Illustrator.
Text Operations
- Merging Texts in Illustrator — combine text elements, keeping lines intact;
- Dynamic Texts — add dynamic information to text elements in Illustrator.
Files Operations
- Collect Resources — package multiple files at once, including the nested ones.
Conical Labels
- Conical Label from Selection — making the label from the selected artwork;
- Conical Label from Artboard — making the label from the artboard content.
Color Bars
- Making Color Bars — how to make color bars in Illustrator in a few clicks;
- Color Bar Appearance — customizing color bars to display the data you need;
- Color Patches — color bars that display the inks you want;
- Reusing Color Bars — how to copy color bars to another project.
Adobe and Adobe Illustrator are either registered trademarks or trademarks of Adobe Systems Incorporated in the United States and/or other countries.