Backside Artwork
In Making a Dieline tutorial we found out that the artwork we apply is shown on the bottom side of the paper in Origami. In this tutorial we’ll learn to put the artwork to the other side of the paper, as well.
A Sample Scene
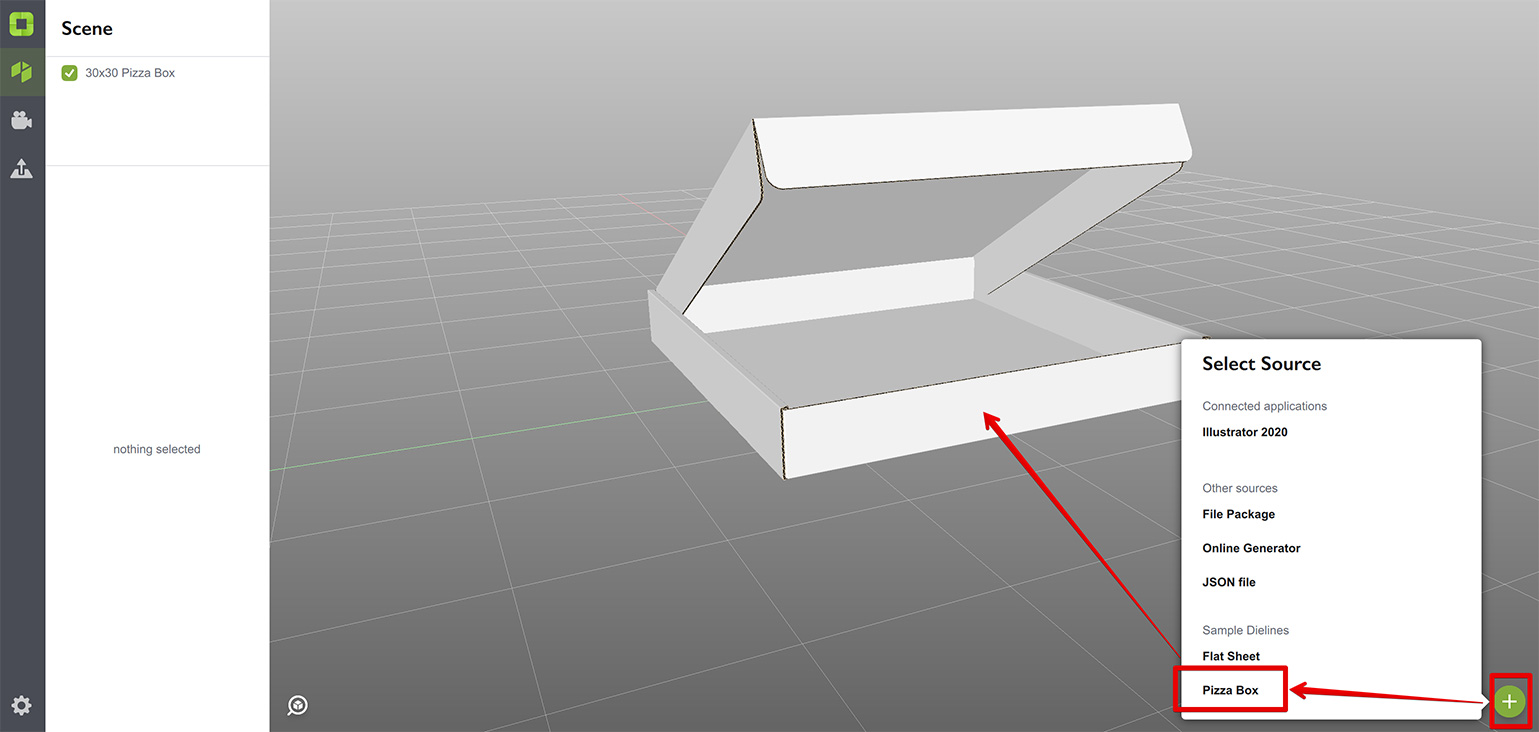
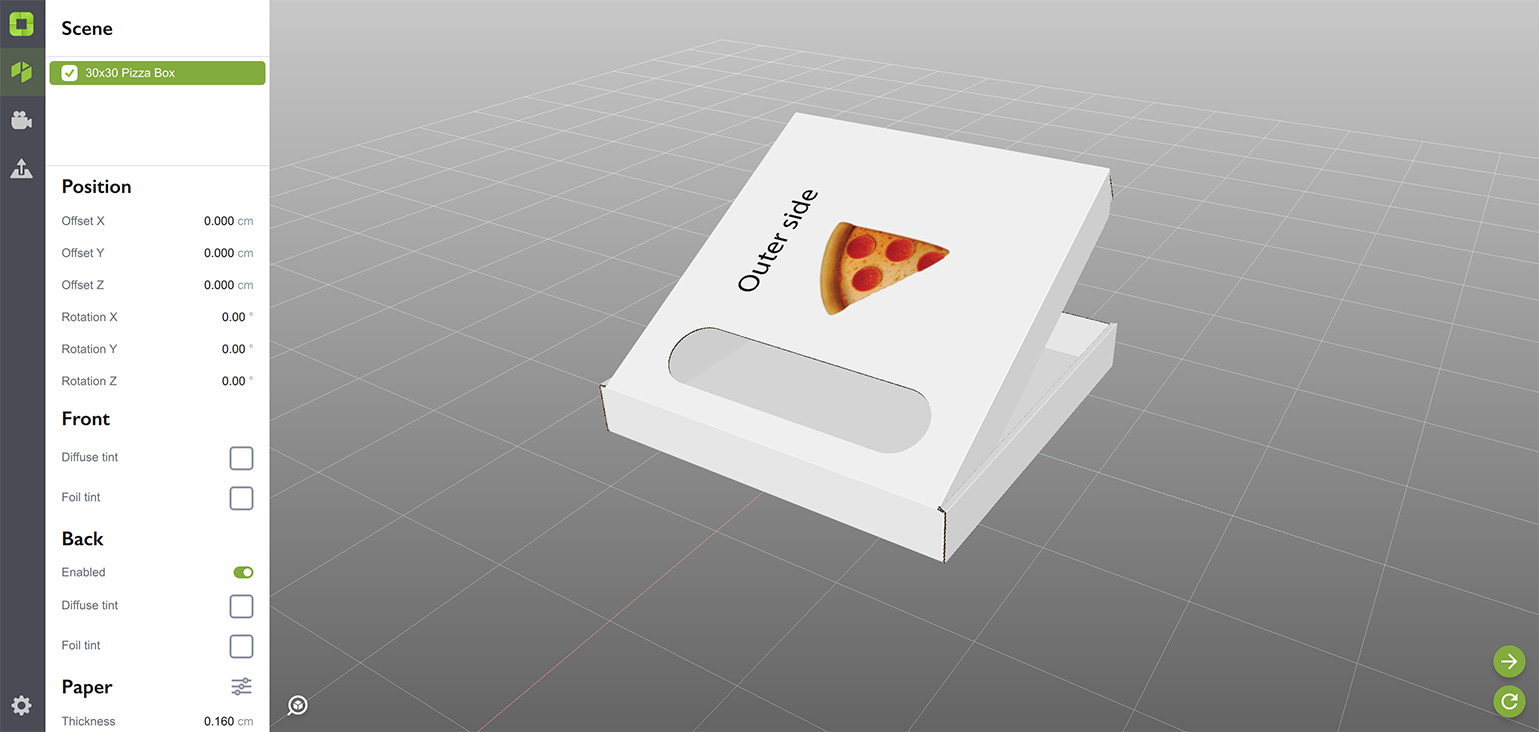
Let’s start with a new project and add a sample pizza box that we will cover with the artwork:
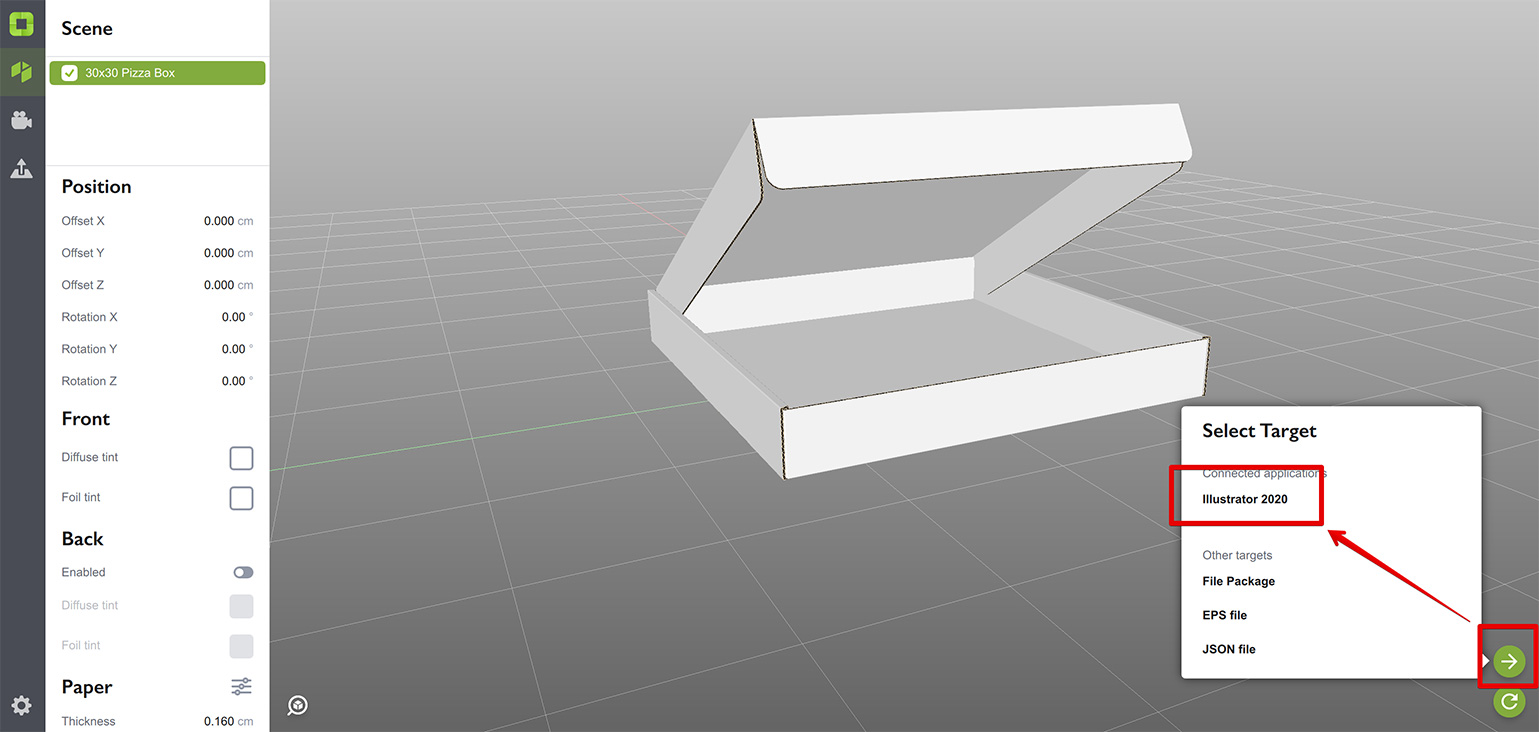
Now run Illustrator, make a new document there and send the pizza box dieline to Illustrator:
You should get the dieline in Illustrator like below:
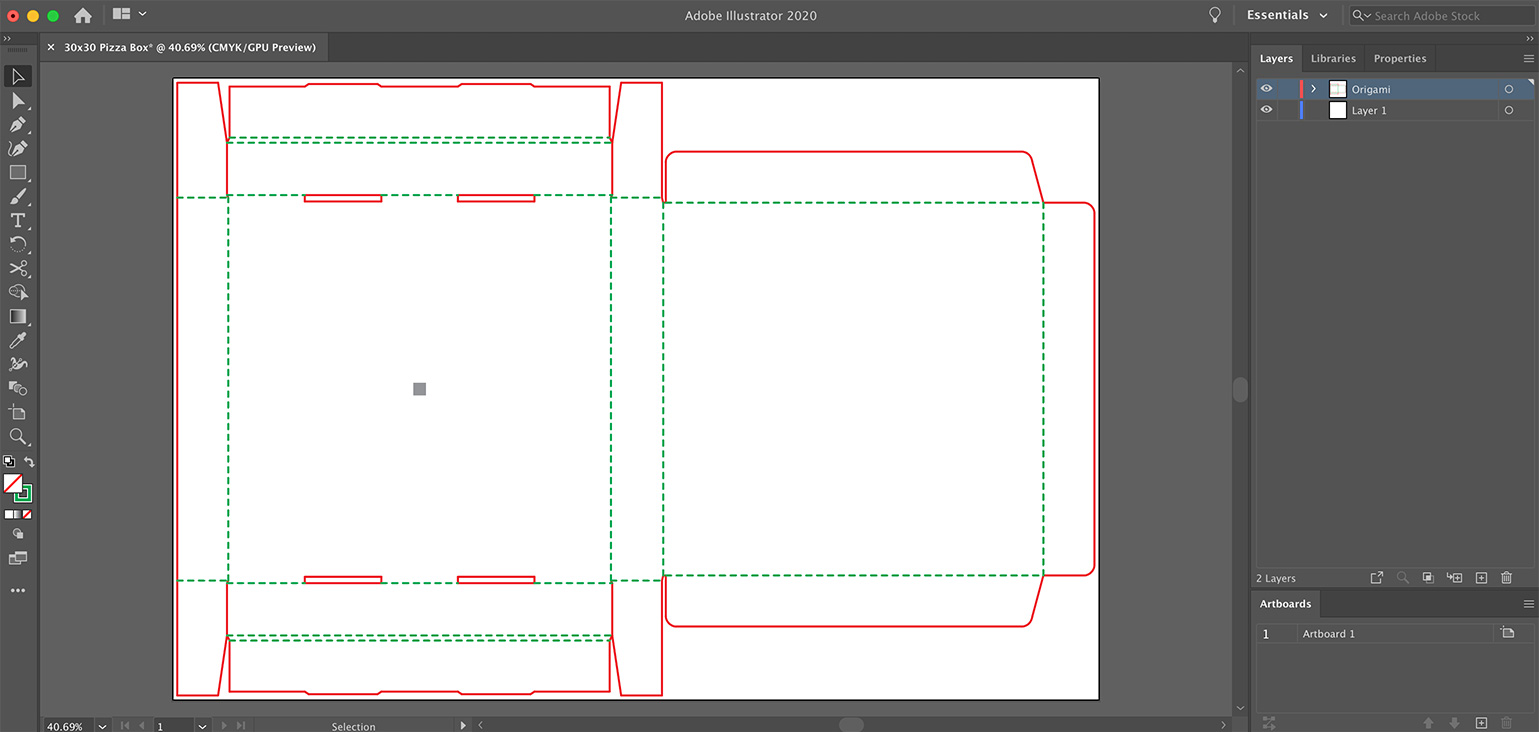
Once you see the dieline in Illustrator, we’re good to go with the lesson. Let’s start!
Enabling Backside
Switch back to Origami and scroll the pizza box element parameters panel to the “Back” section. There will be Enabled box that you need to check:
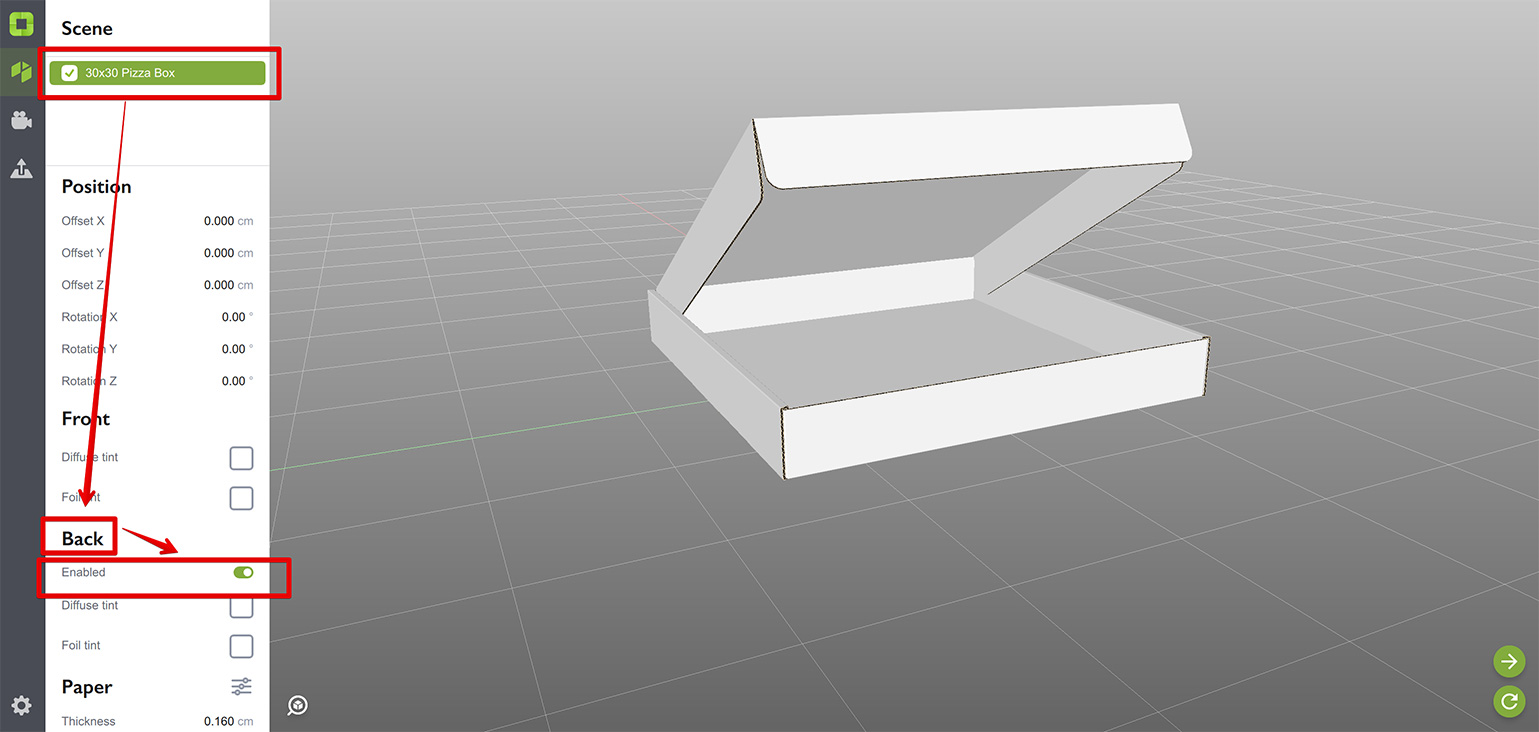
Nothing really changes when you check the box, except for the two fields enabled nearby. However, the magic happens when you send the dieline back to Illustrator again. Click the Send button at the bottom right corner of the window and see the changes in Illustrator:
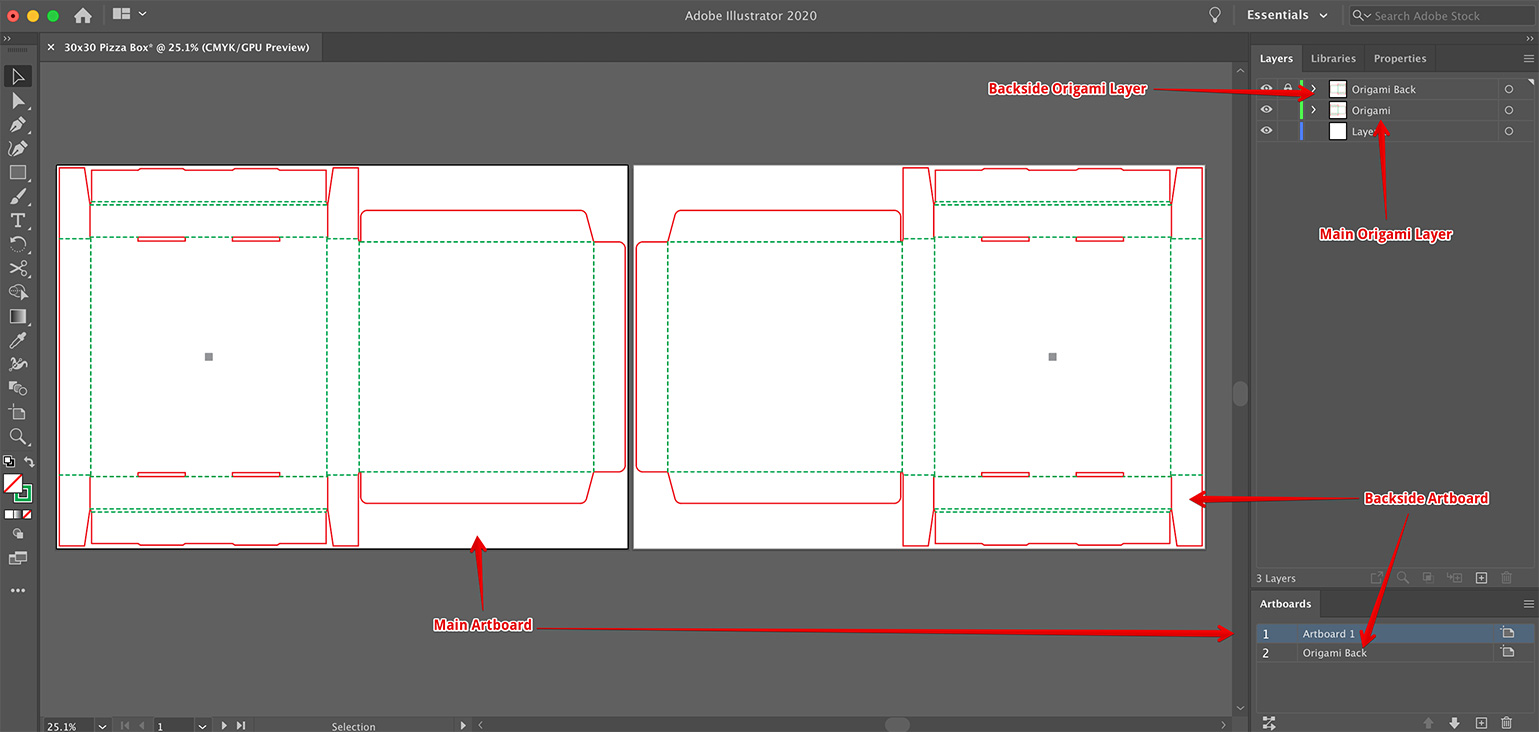
Wow, lots of changes! Let’s see what happens. First of all, the new artboard has been added. Origami use artboards for getting artwork for different sides of the shape (and also for different shapes).
When you send a dieline to Illustrator, Origami checks if the backside option is enabled and updates the backside pieces, as well. If there is no backside elements in the project, Origami creates them. This only happens when you send dieline to Illustrator, the missing parts are ignored when you reading data back to Origami.
Besides the artboard, Origami also created a new layer named “Origami Back”. The layer contains the flipped version of the dieline and can be used as the artwork template. The layer is locked and you should never edit it manually, as Origami never reads it back and overwrites it every time you send the dieline to Illustrator. So simply use it as a template for the artwork, not more.
Layers–Artboards Matching
Let me briefly explain the logic Origami uses when you click the Refresh button to get the latest dieline and artwork from Illustrator. Origami knows its layer names (you can change them in settings) and when you request the latest data it looks through the Illustrator document’s layers to find a layer that matches the “Origami” name. Once the layer is found, Origami checks its contents and finds the artboard that has the content. This artboard is then used for the main artwork.
Then if the backside is enabled, Origami looks for the backside layer and finds the matching artboard the same way. That’s why the “Origami Backside” layer is added and its contents (even disabled) is placed in that second artboard.
Adding Artwork
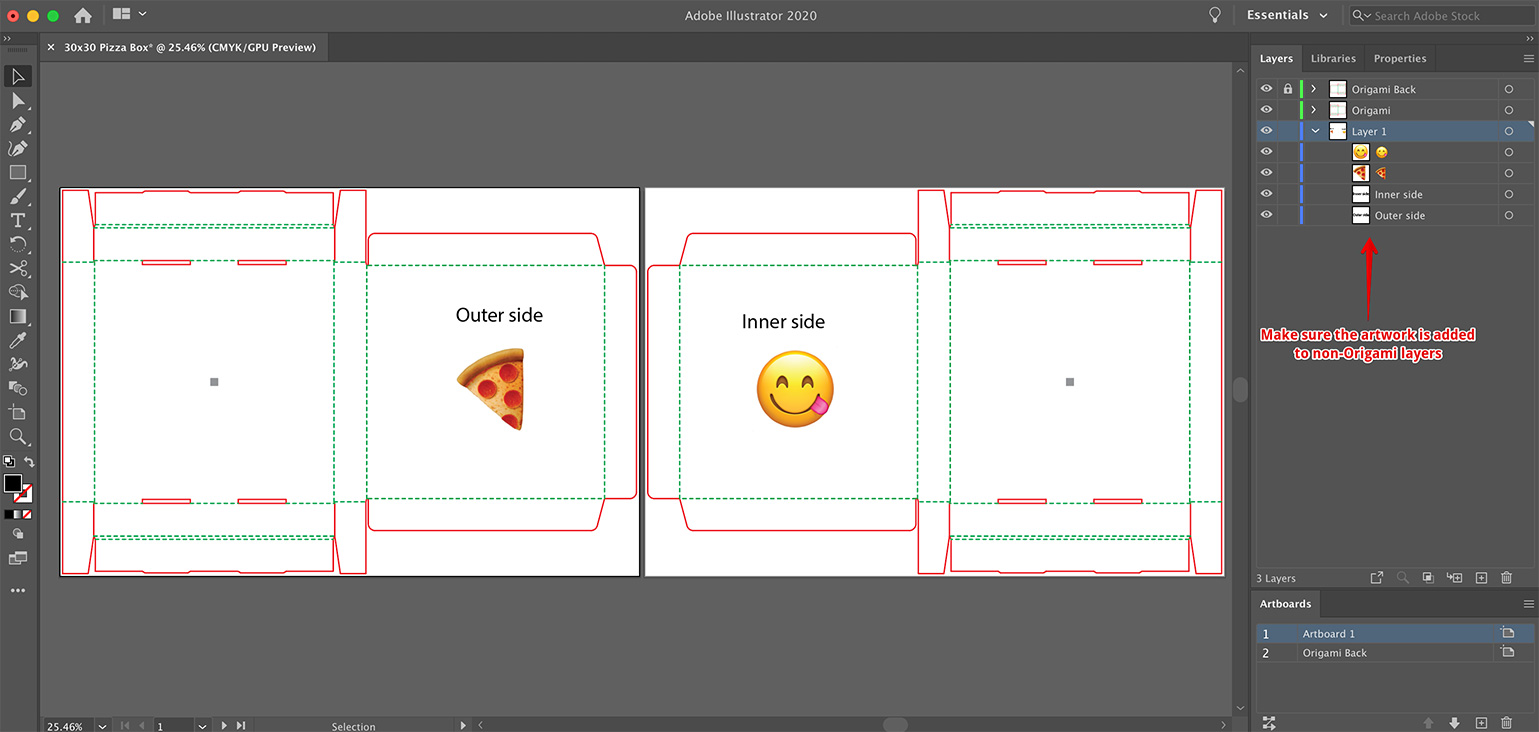
Let’s put some art on both sides of the box lid. Make sure you add the artwork to a non–Origami layer. Here’s what I did:
And that’s what you get after refreshing the shape in Origami. Note that I duplicated the shape after refreshing to show both outer and inner sides of the box lid on one screenshot:
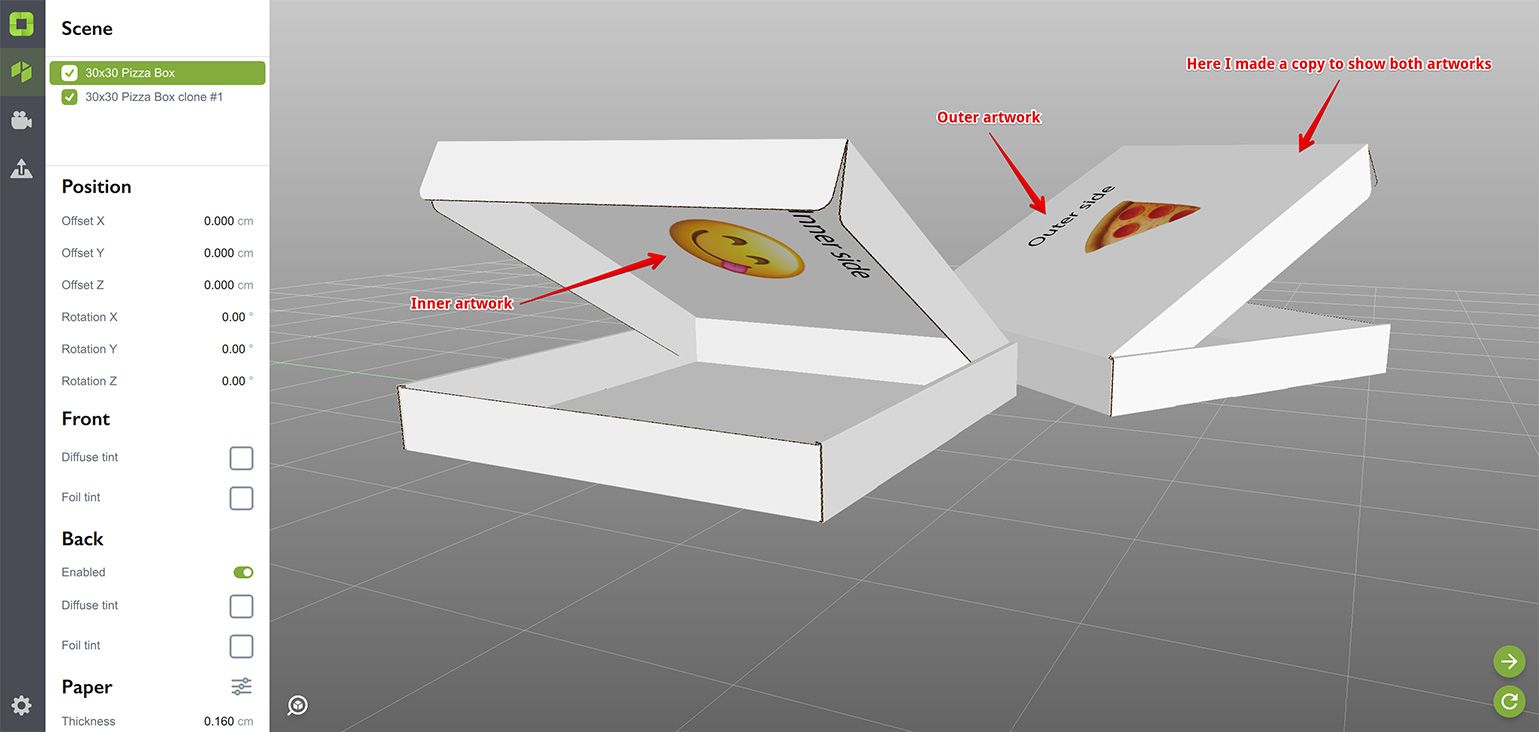
Now try disabling the backside in Origami, the inner artwork should disappear. Origami will still remember it though, until you reload the shape from Illustrator.
Updating Backside Dieline Template
What if you need to change the dieline? Let’s try adding a small window to the pizza box lid:
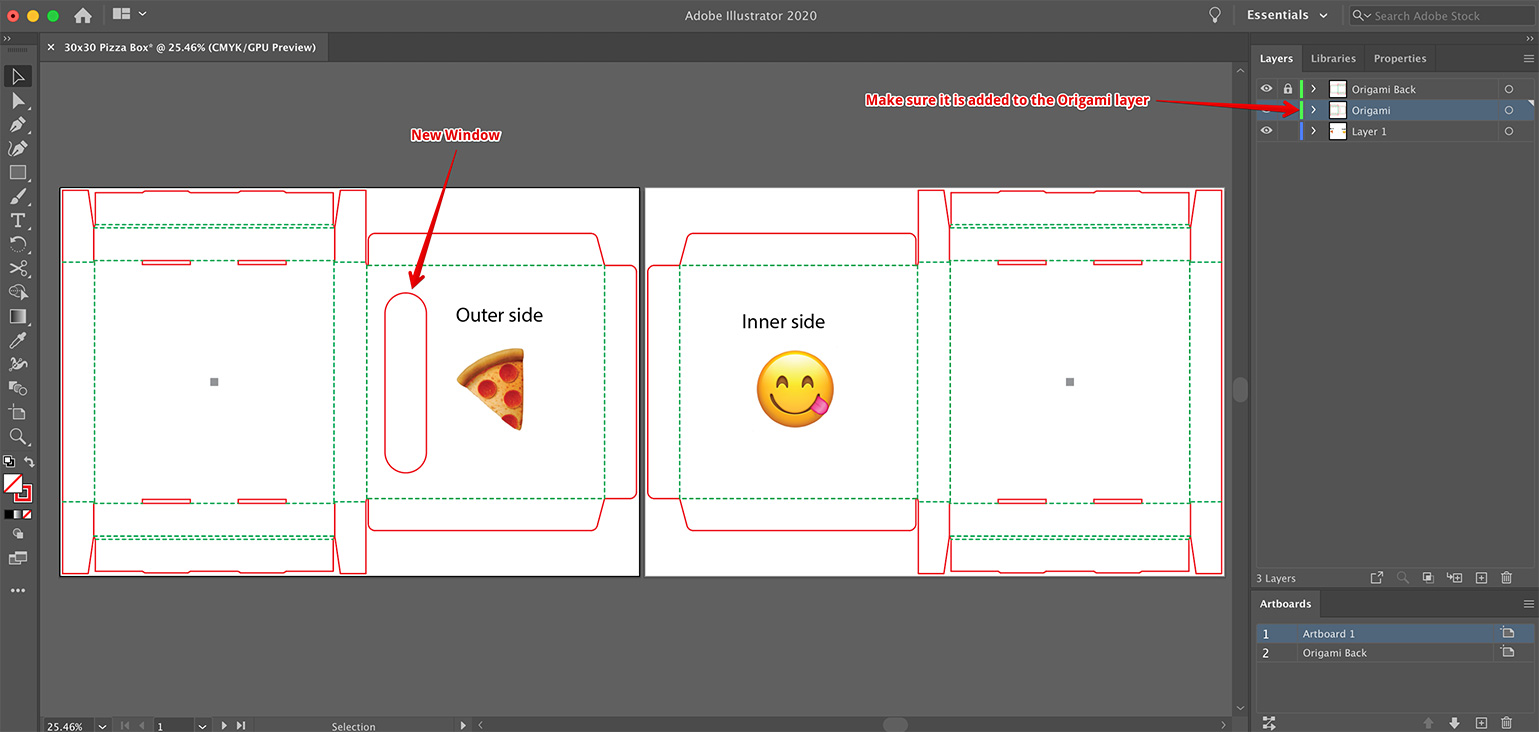
Note that the backside template is not updated automatically. It is only updated when you send the dieline from Origami to Illustrator, so in order to update it we first need to refresh the Origami shape and then send it back to Illustrator. Let’s refresh the shape first:
Note that the window appears in the box lid. Then send the dieline back to Illustrator to update the backside template:
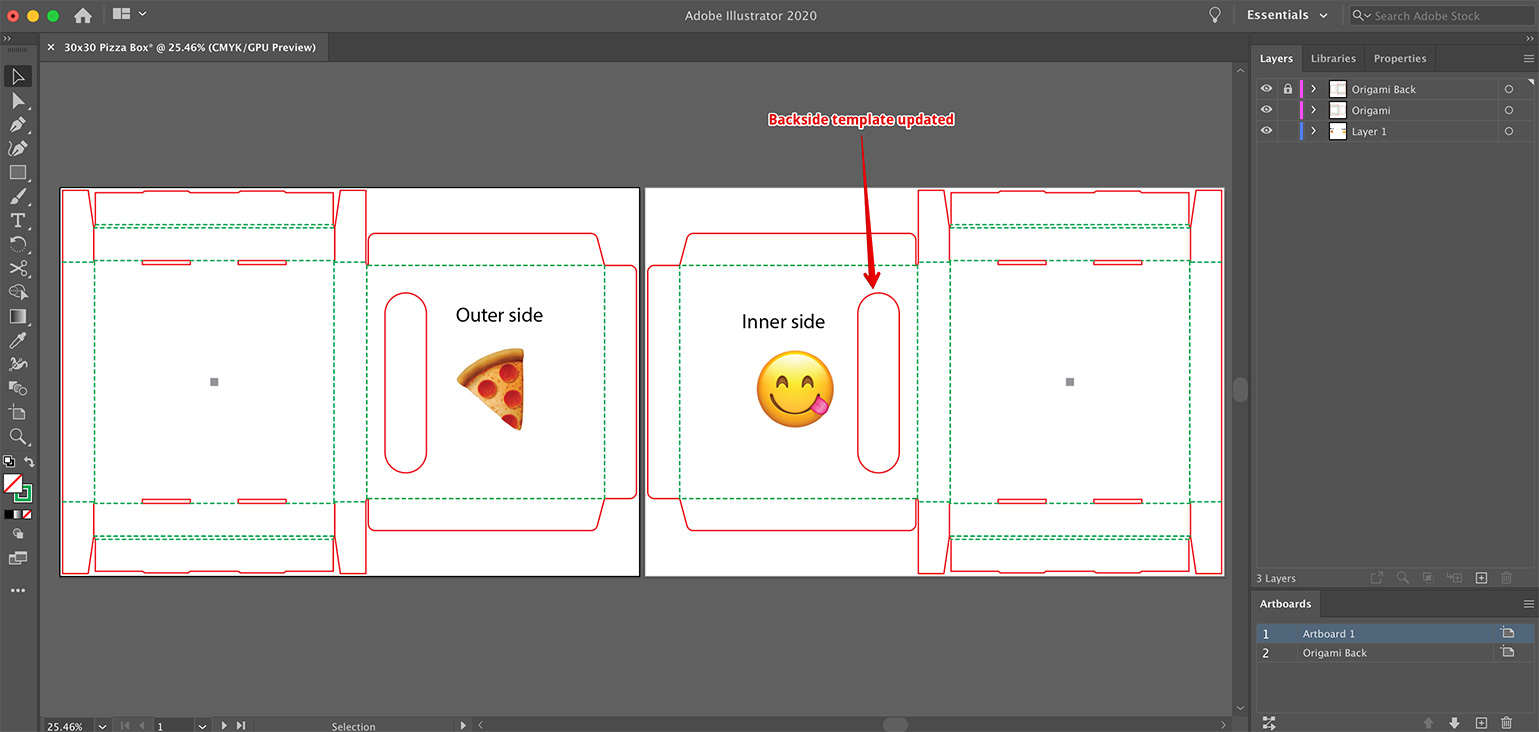
Now the backside dieline template has the window too, so you can carefully place the artwork around it.
Done
That’s pretty much all you need to know about the backside artwork in Origami. Have a look at other tutorials for more information.
Adobe and Adobe Illustrator are either registered trademarks or trademarks of Adobe Systems Incorporated in the United States and/or other countries.