Bump
Boxshot support both normal and relief (parallax) bump modes with some options allowing you to configure the effect. This tutorials explains all the bump modes and options.
Bump Modes
Boxshot supports three types of bump effect:
- Change normals — just the surface normals are changed, which mostly affects reflection;
- Change relief (push) — relief is also changed and is pushed into the object;
- Change relief (pop) — relief is also changed and is popped out of the object.
You can select the bump mode and configure its other options in the “Bump” section of the material panel:

In order to use the bump effect you need to select bump mode and load a heightmap — the image that defines the relief of the surface. Darker areas of the heightmap mean “lower”, brighter areas mean “higher”.
Note that Boxshot does not support normal maps (yet), so if your bump image is not grayscale and red–violet–blue instead — that will not work and you need a grayscale heightmap image.
Normal Bump
When the “change normals” option is enabled, Boxshot only changes surface normals leaving the surface flat. This helps simulating liquid or some other uneven surfaces, where the displacement is not necessary:
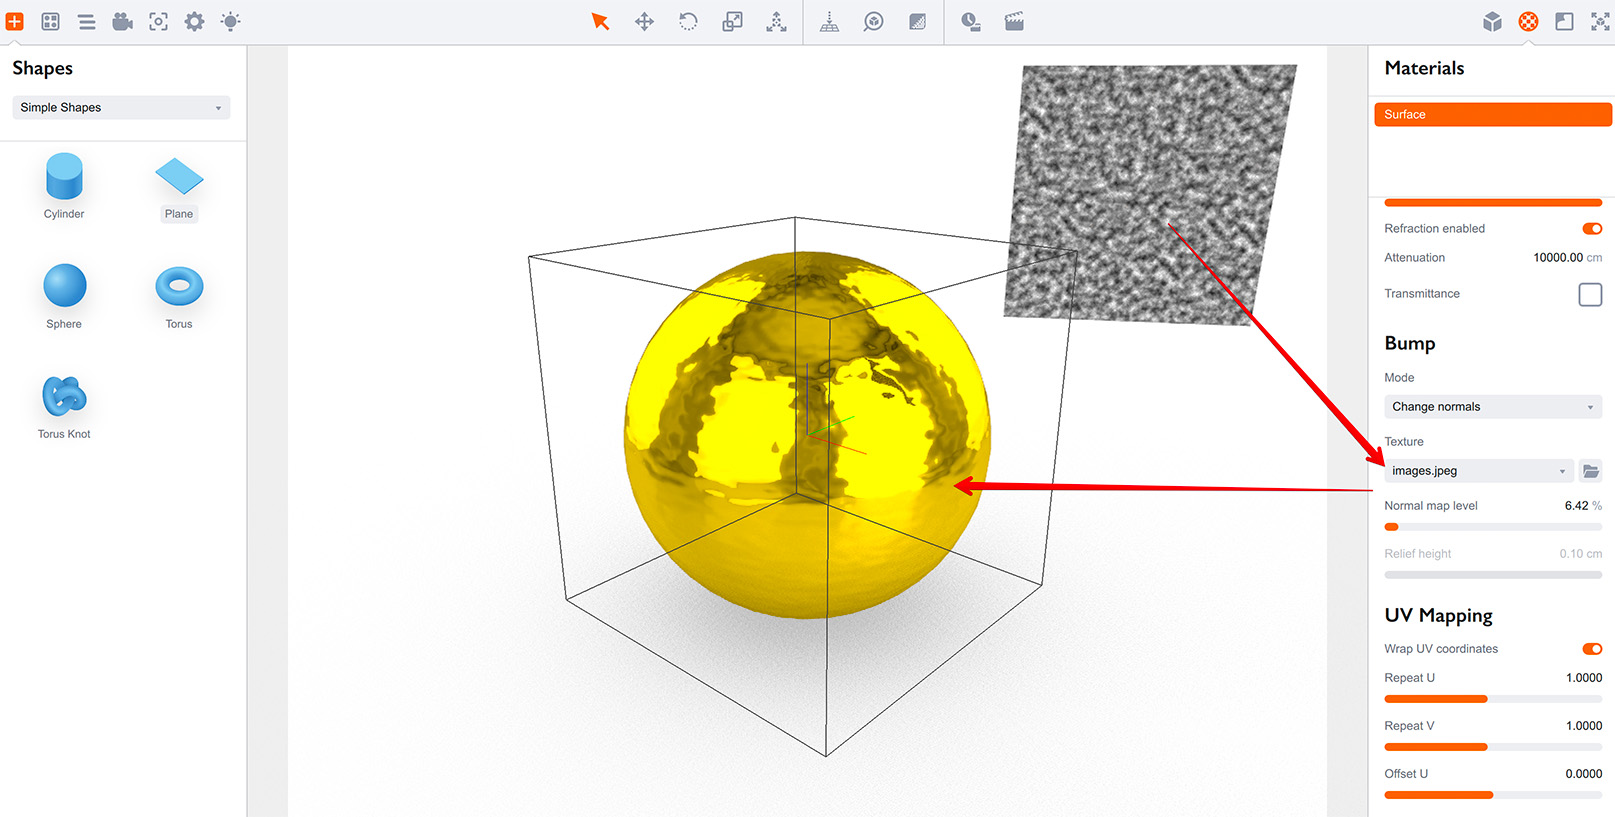
Here a grayscale noise image is loaded as a heightmap and the normal map level is adjusted to make subtle “wavy” reflection.
Normal Map Level
The Normal map level controls how the heightmap affects normals of the surfaces. The higher the level, the more normals are changed. Here is the same sphere with the same noise heightmap, but with a higher normal map level:
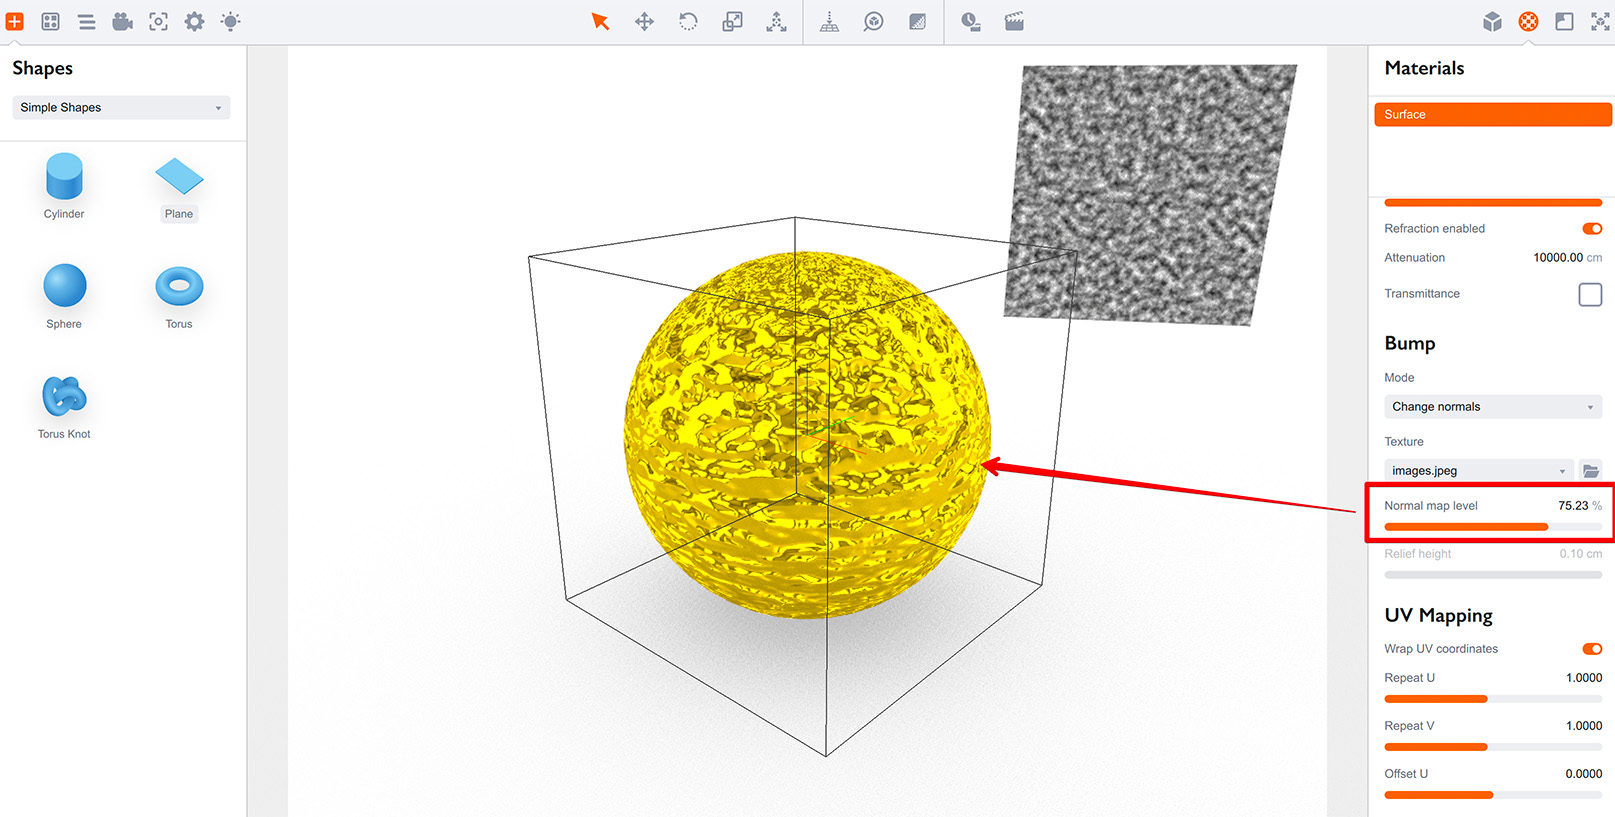
When “Change normals” bump mode is used, “normal map level” parameter usually needs to be adjusted in order to get a proper result.
Relief Bump
Another bump option in Boxshot is relief bump, which comes in two modes: push and pop. Both act the same, so we’ll start with the latter and explain the difference later below. For relief bump we’ll need a more specific heightmap, like this:

Let’s start with a simple blue plastic sphere and apply the bump texture leaving the “change normals” bump mode:
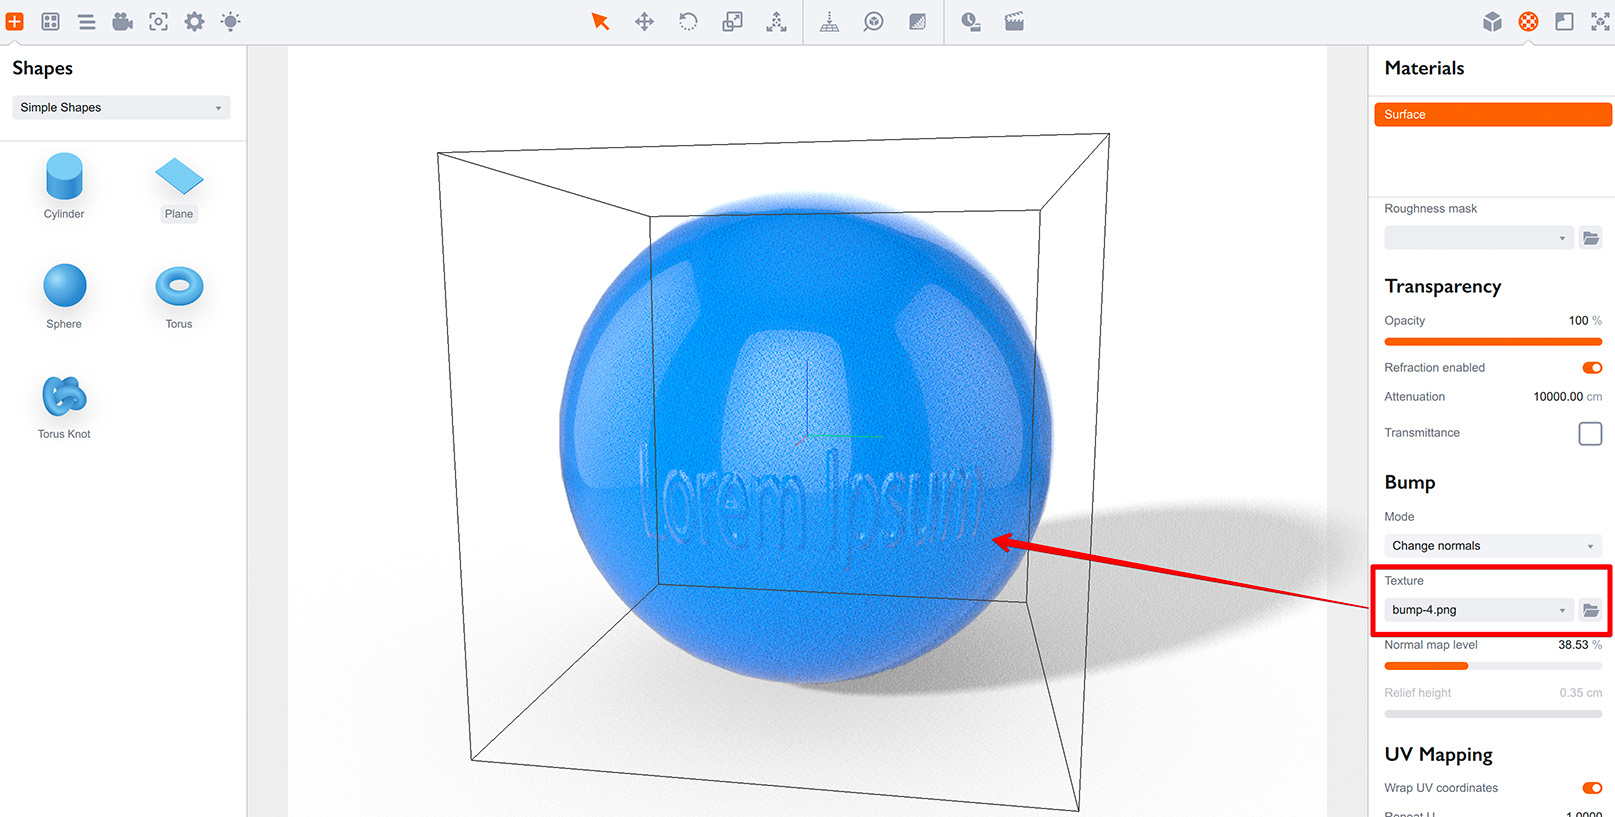
You can see the bump effect on the surface, but it is pretty subtle as only the reflection is really changed. In order to get a stronger effect we need to see the shadows, as well. Let’s now change the bump mode to Change relief (pop):
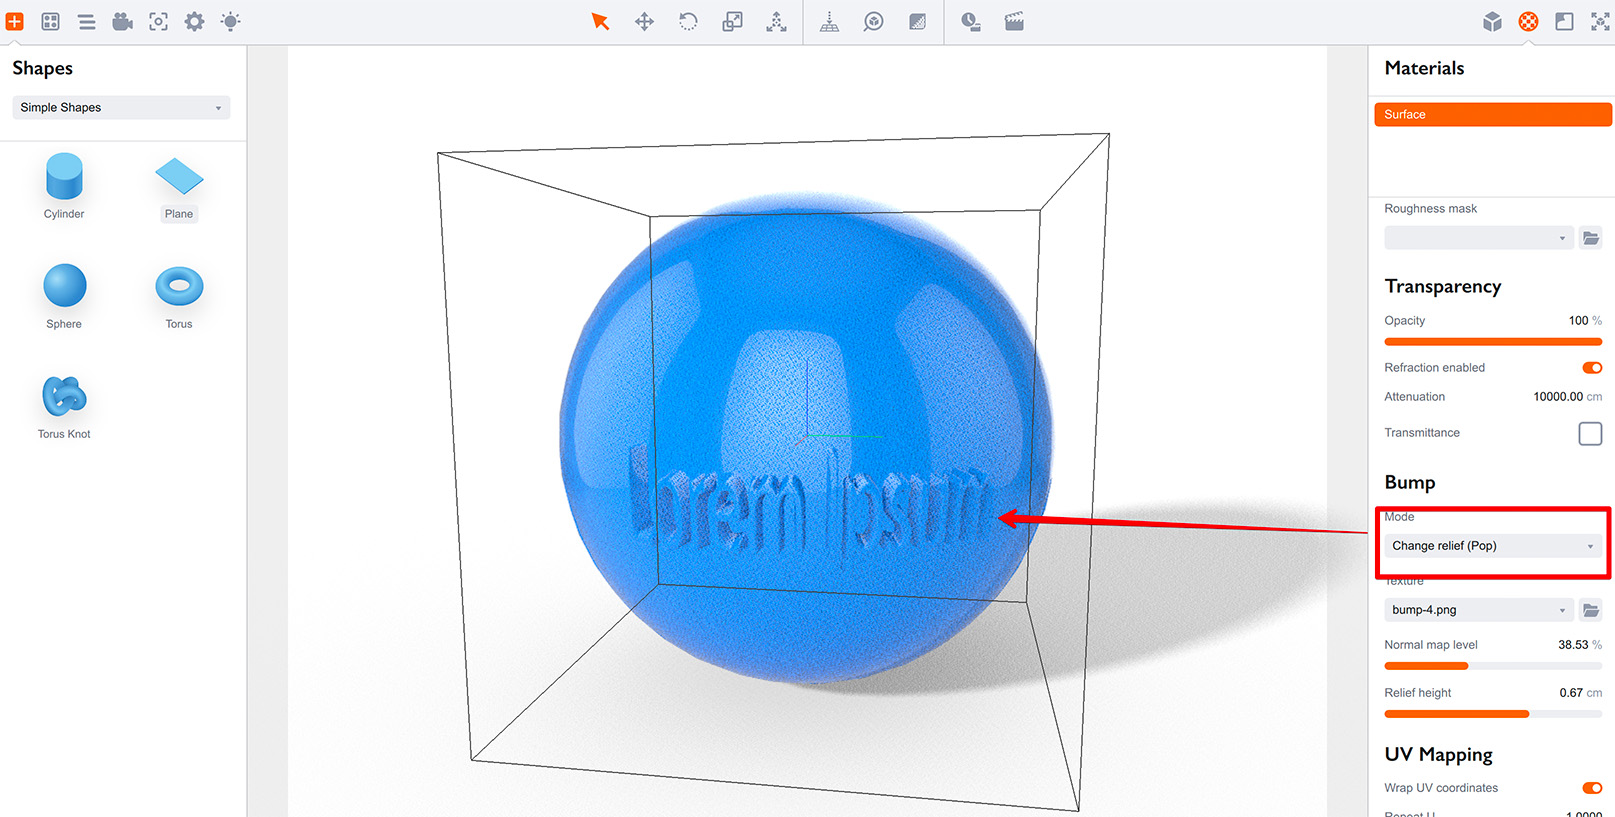
Now you see the letters actually stand out of the sphere surface. You can adjust the Relief height option in order to control the effect. At some point you might also want to adjust the normal map level, as in some cases high normal map level may lead to issues like this:
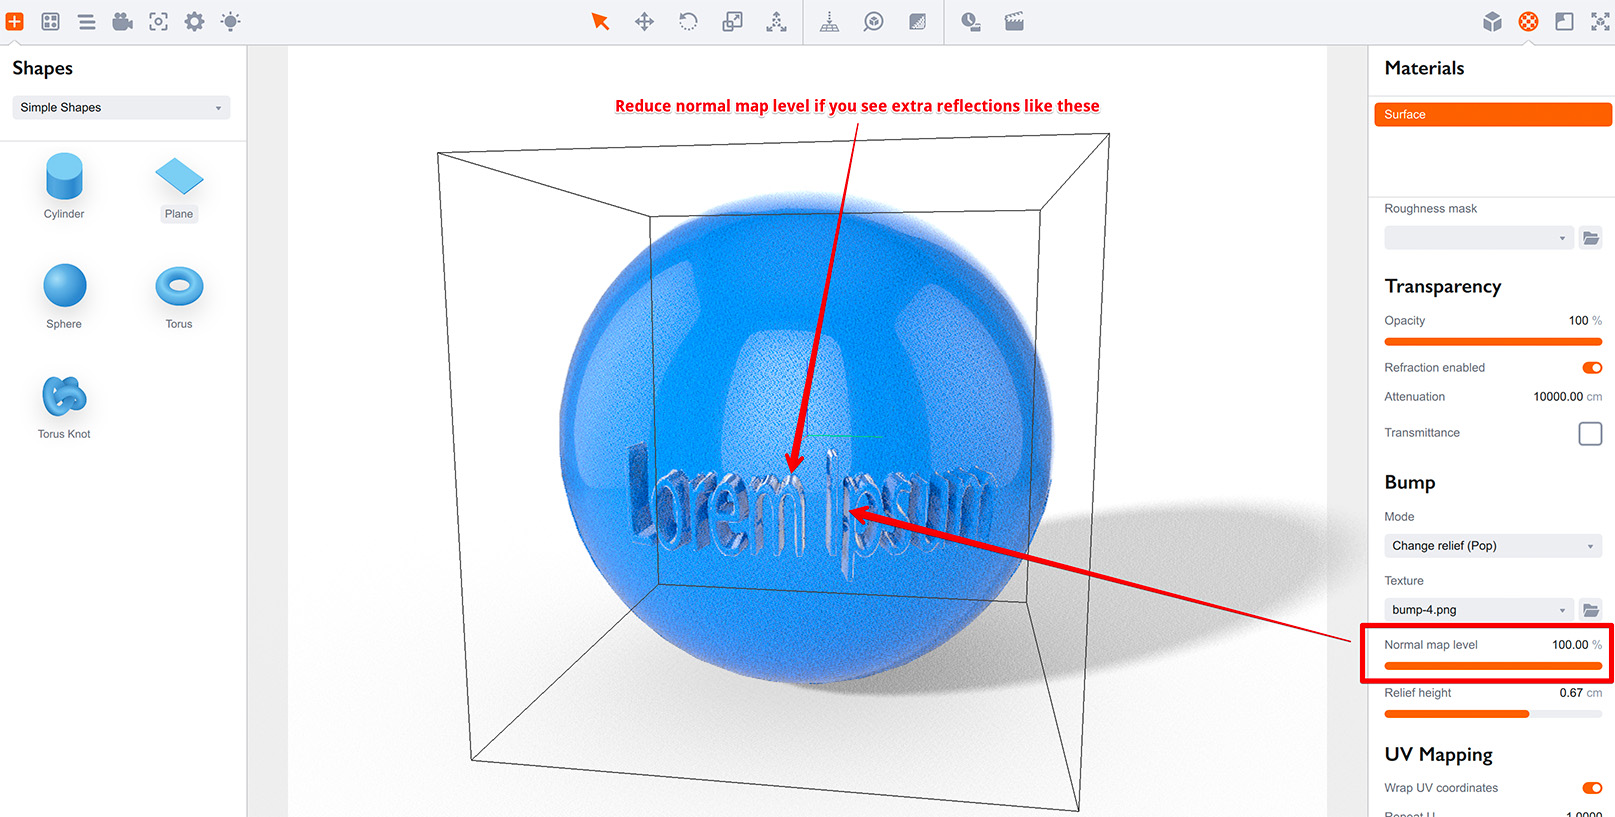
This happens when the normals are two steep compared to the relief and rendering goes the wrong way. Reducing normal map level usually helps to sort this out.
Relief Bump Is Not Displacement
It is important to note that relief bump effect is not a displacement, so no geometry is really changed. You can check this by rotating the sphere a bit:
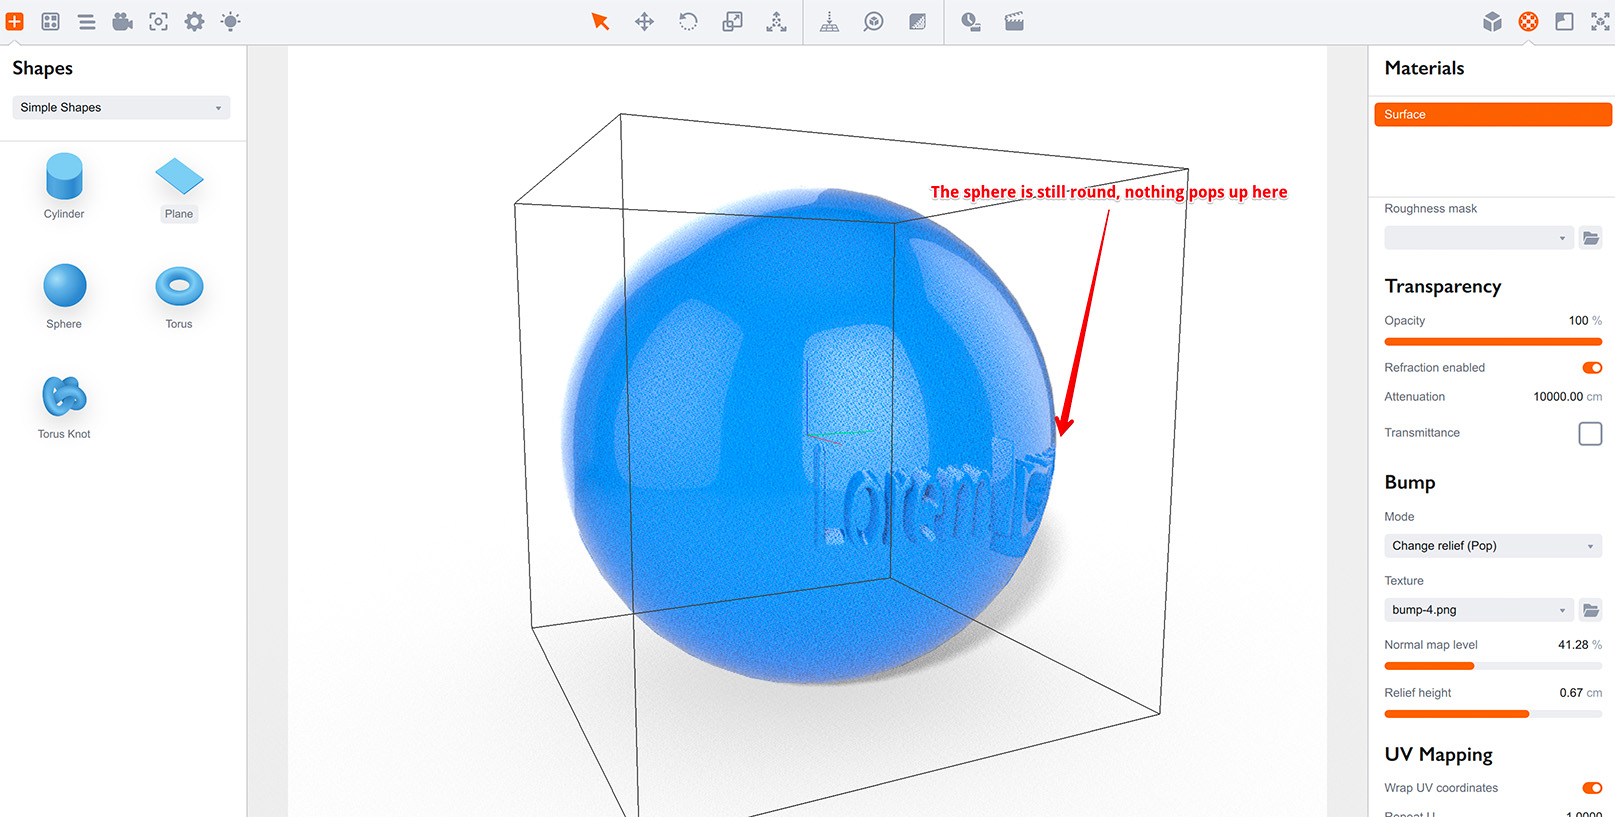
Boxshot simulates the relief by changing the look of the rendered elements, but only where the elements are actually rendered. As the sphere itself is still round, Boxshot cannot extend the relief beyond the sphere’s boundaries on the screen.
Keep an eye on the edges of objects when using strong relief bump effect.
Relief Bump: Push vs Pop
When using relief bump you configure the relief height using one of the parameters in the materials panel. The question here is where that height goes: into the surface or out of it? Boxshot lets you do both, so the “push” mode is when the relief goes inside the object and the “pop” mode is when the relief goes out.
Black areas of the heightmap will be rendered relief height deep if the bump mode is “push” and exactly on the surface if the bump mode is “pop”. Same for the white areas: they will be rendered on the surface if the bump mode is “push” and relief height above the surface if the bump mode is “pop”.
The relief bump mode doesn’t really matter if you apply it to the whole object like the sphere above. You can try switching between push and pop modes and seeing for yourself as it simply moves the relief a bit here or there. Most of the time you can safely use the “push” mode bump for objects.
As for “pop” relief bump it works best for creating effects like stamps, water drops, dew etc. When all the relief should stay on top of the surface and then the relief is applied as a decal, the “pop” bump mode works best.
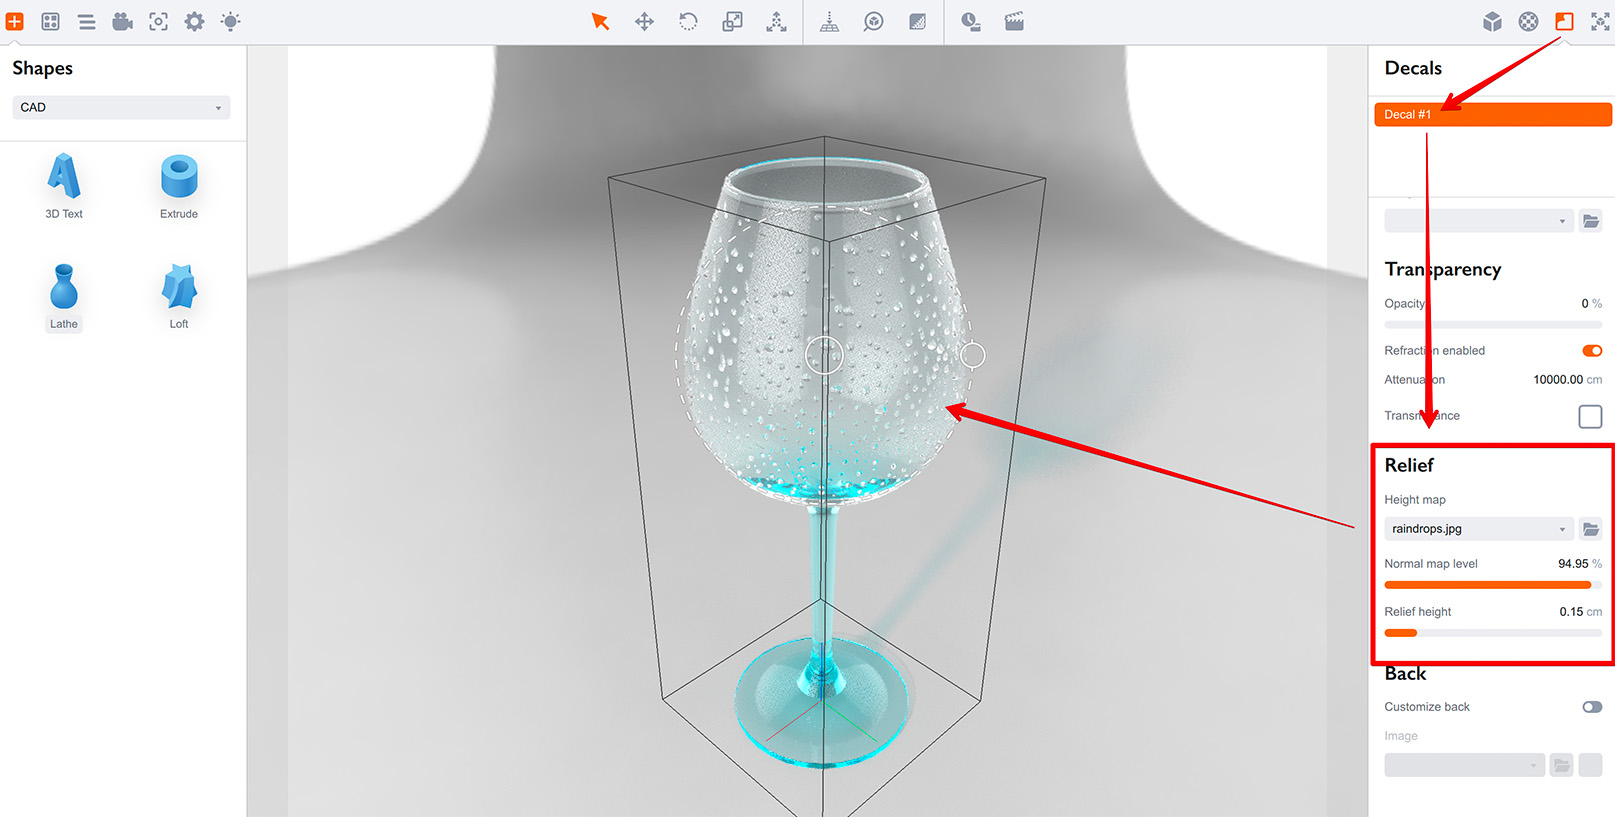
Here a transparent decal is applied with the relief bump to simulate the water drops on a glass.
You can read more about bump decals in our Bump Decals tutorial.
More Tutorials
Rendering
- Realistic Rendering — improving scenes visual appearance;
- Lighting — control environment and directional lighting;
- Saturated Reflection — make "rich" colorful reflections;
- Floor Reflection — reflecting scene objects in the floor;
- Job Manager — rendering jobs later;
- GPU Rendering — rendering scenes faster on GPU;
- Rendering Time and Quality — getting more control on rendering;
- Simple and Realistic Lighting — speeding up scene rendering.
Materials
- Texture Slots — how to use texture slots in Boxshot;
- Glass Materials — how to make semi–transparent objects look attractive;
- UV–Spot — how to make a UV–spot effect easily;
- Foil Effect — how to add foil–finishing to your shapes;
- Bump — adding relief to your materials;
- Copying Materials — how to copy materials to other shapes;
- Custom Materials — extend the materials library with your own ones;
- Semi–Transparent Labels — making semi–transparent and partial labels;
- Boxshot Materials — more details about Boxshot materials.
Features
- Decals — applying decals and configuring them;
- Bump Decals — applying bump where it is needed;
- Depth Of Field — adding more realism to your renderings;
- Tools — read more about Boxshot tools;
- Managing Images — how to manage image files used by Boxshot projects;
- Shapes Instances — creating lightweight copies of other shapes;
- Model Editor — edit embedded models in many ways;
- Shrink Wrap — heat–shrink film simulation for objects wrapping;
- Physics Simulation — applying gravity to your scene;
- Palletize — arrange scene objects for the pallet;
- Snapshots — save scene state to re–use it later;
- Translation — teach Boxshot to speak your language;
- Vector Artwork — how to maintain the quality of vector artwork.
Shapes
- Lathe Objects — making symmetrical objects using revolving curves;
- Loft Objects — making custom objects with 2D cross–sections;
- 3D Text — making 3D text objects in Boxshot;
- Extruded Objects — how to make thick 3D object of your flat 2D curve;
- Conical Labels — making conical labels with distorted artwork;
- Dieline Box — a very realistic dieline–based box;
- Custom Shapes — adding custom shapes to the left panel;
- Third Party Shapes — importing third party shapes to Boxshot.