Lighting in Boxshot
Boxshot has two main types of lighting: environment and directional. There is a third one — omni lights, but it is rarely used and is not covered by this tutorial.
Environment Lighting
This is the main light source for any Boxshot scene. It is enabled by default for new scenes and provides the “ambient” lighting. The best analogy would be the light coming from the sky in a cloudy day: everything is lit up, but there are no shadows and you can’t point to a specific light source: the light just come from all directions. That’s the environment lighting — the lighting provided by the environment.
Boxshot uses high definition range (HDR) textures for environment lighting. Such a texture has all the lighting “baked” into an HDR image and Boxshot simply uses that image when it needs to estimate the lighting from a given direction.
Controlling Environment Lighting in Boxshot
Here are the environment light controls in Boxshot user interface:
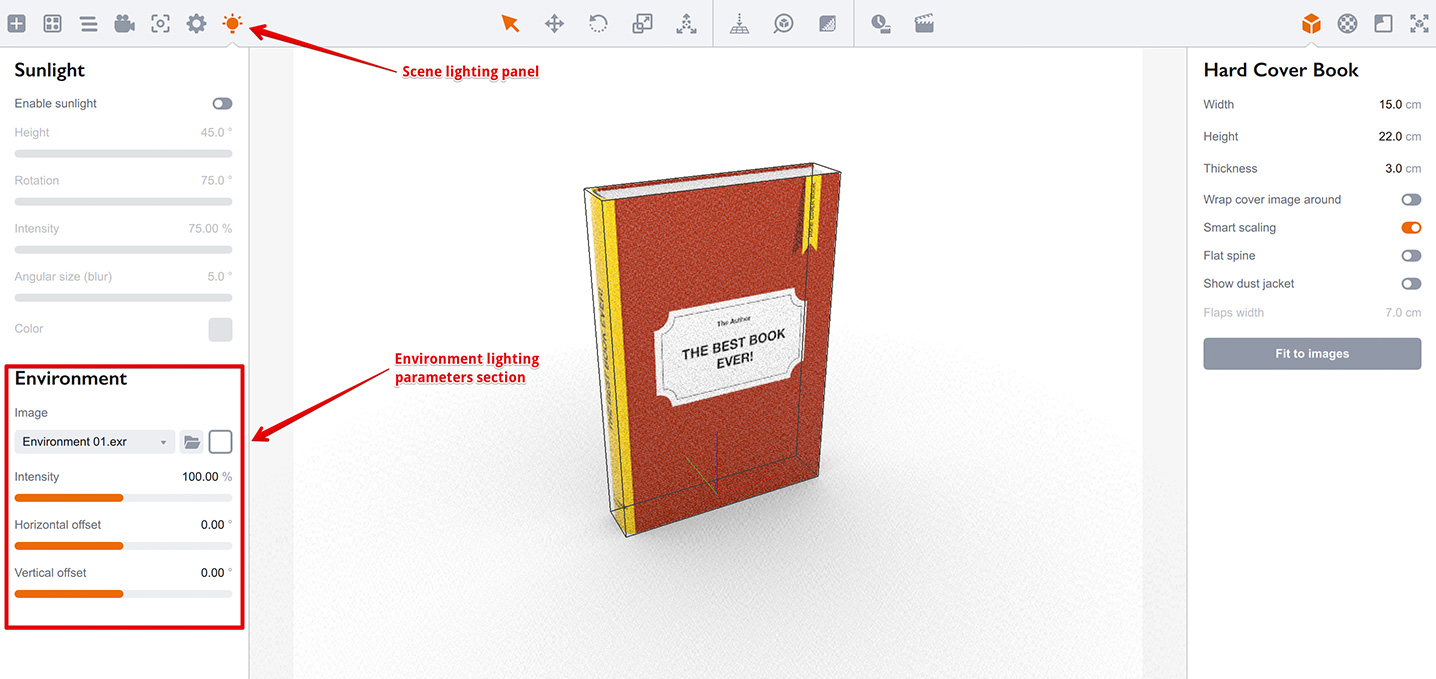
The image selector shows the currently loaded HDR environment texture and you can change it to achieve a different scene look. Boxshot comes with some built–in environment images and here we loaded a different one, so you can see the difference:
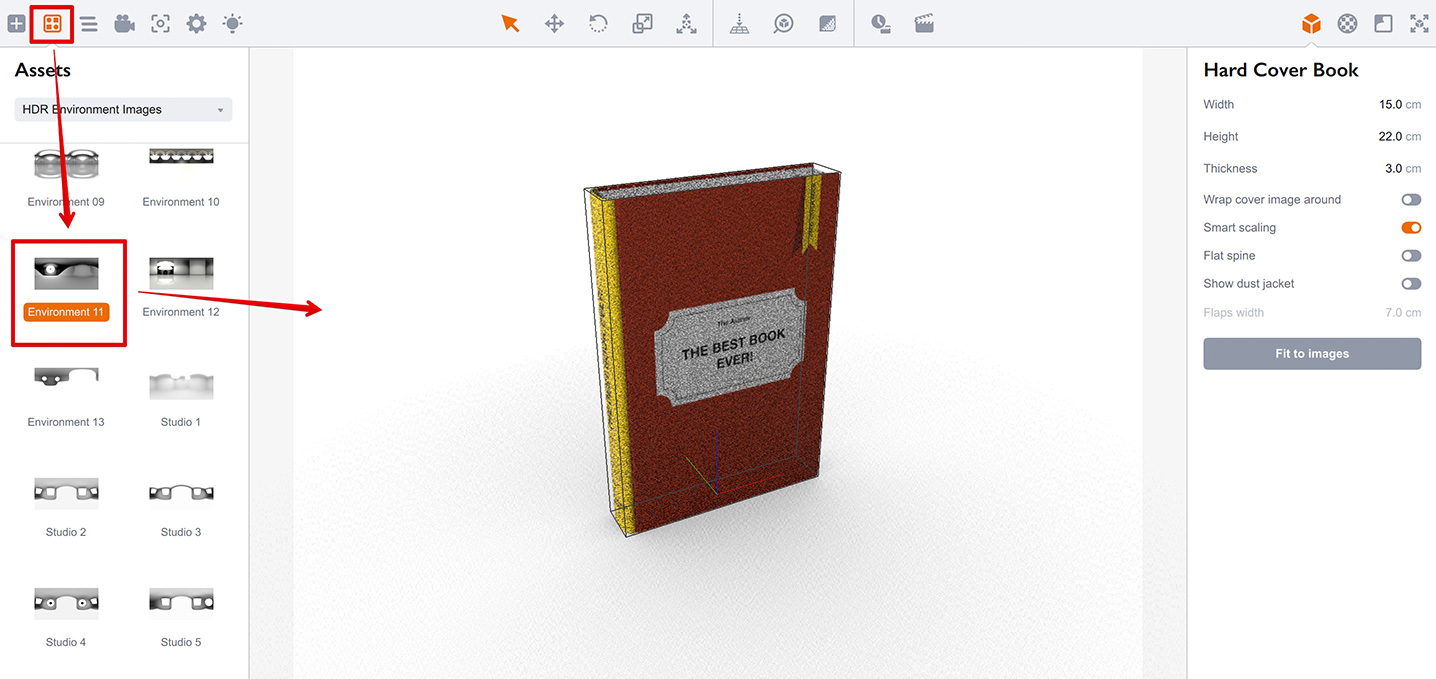
Notice the book looks darker as the environment image is not that bright as the initial one. You can load your own HDR images — any HDR image in lat–long format should work. Here we loaded a different HDR image from Koru and also enabled displaying it in the background:
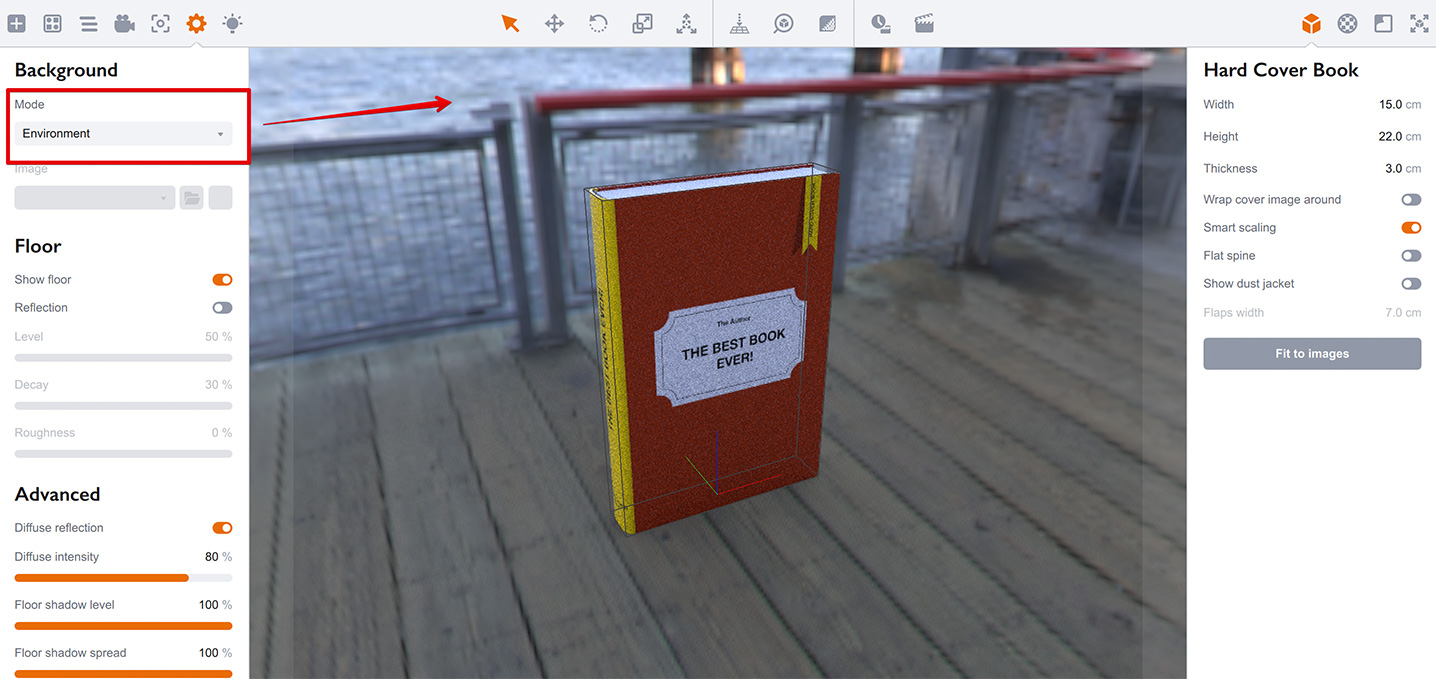
The book now has a blue tint from the environment image, the environment itself is also visible as the background mode is switched to Environment.
Environment image is also used for reflections, so selecting a proper image is the key to a nice rendering. Read more about realistic rendering in this tutorial.
Environment Lighting Parameters
You can adjust the tint of environment image using the color–picker next to the file selector. This helps if you need to color the environment up say to make it warmer or colder.
The other three parameters are: Intensity, Horizontal Offset and Vertical Offset. The first one controls the brightness of the image and so lets you adjust the lighting level. The other two let you rotate the environment image around the scene to find the best highlights and shadows. They are also useful for reflective surfaces, as you can make sure the objects reflect exactly what you need.
Directional Lighting
Directional light is the light coming at a given direction and making a shadow. It is quite similar to the light made by the Sun, so its another name is “Sunlight”. It is disabled by default in Boxshot, but you can turn it on with a single click:

You can control the light direction with Height and Rotation parameters mostly to position the shadow the way you want. The next Intensity option is pretty much the same as for the environment light and lets you control the brightness of the light source.
Then goes Angular size parameter which effectively controls the shadow blur. The more it is, the softer is the shadow.
Finally, the Color parameter lets you color up the light, which is again helpful to make cold or warm effect, when needed.
Both Lights Together
As in real life, Boxshot adds up lighting coming from both environment and directional light sources when rendering scene. This means that if you enable direct lighting the scene might look too bright:
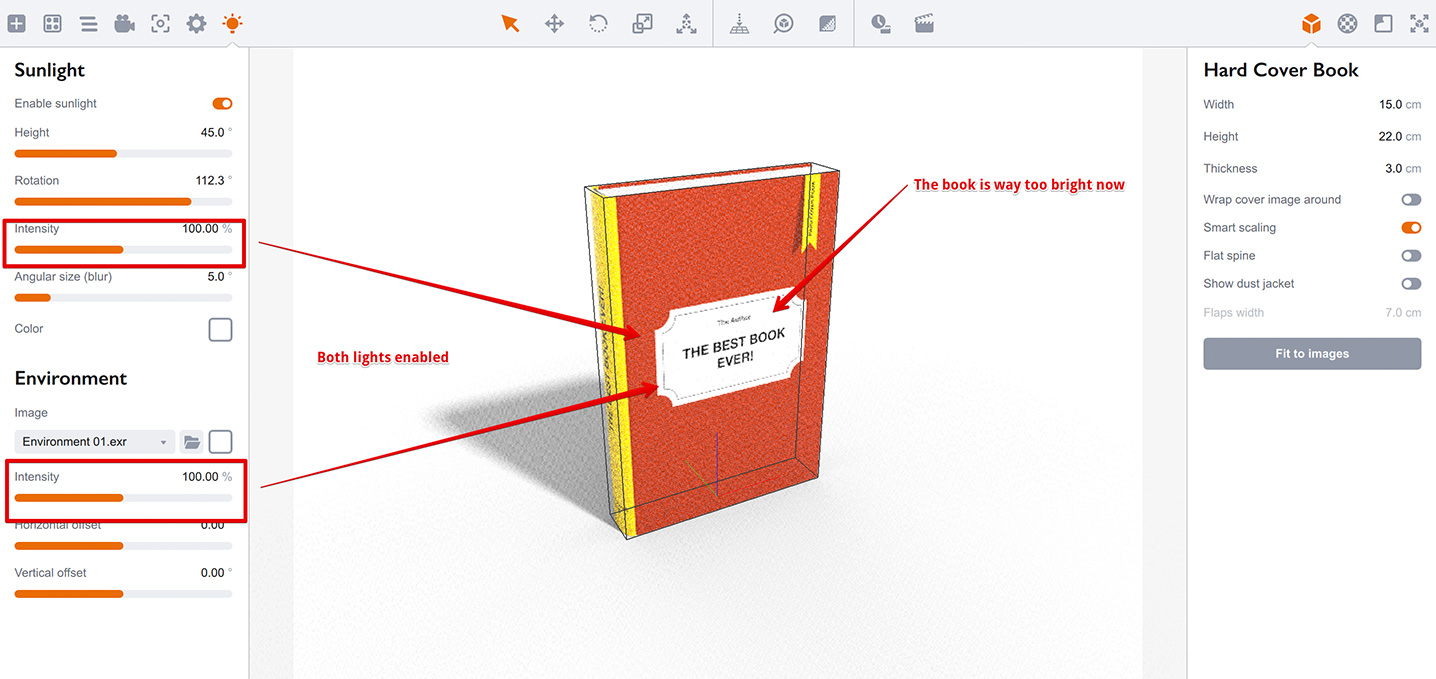
You need to balance both lights sources using their Intensity parameters to make the lighting fit the scene. Here we reduced environment lighting to zero:
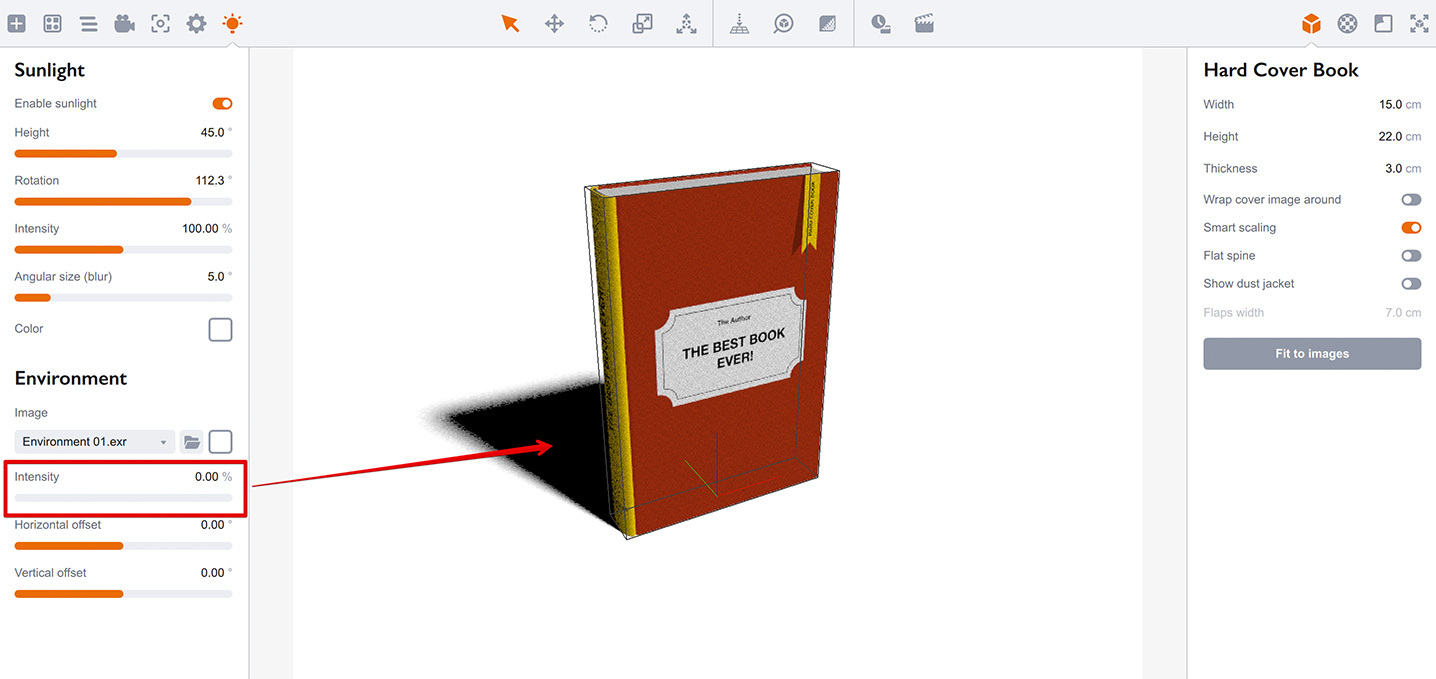
The scene is now only lit by the directional light and the shadow is completely black as there is no light sources there at all.
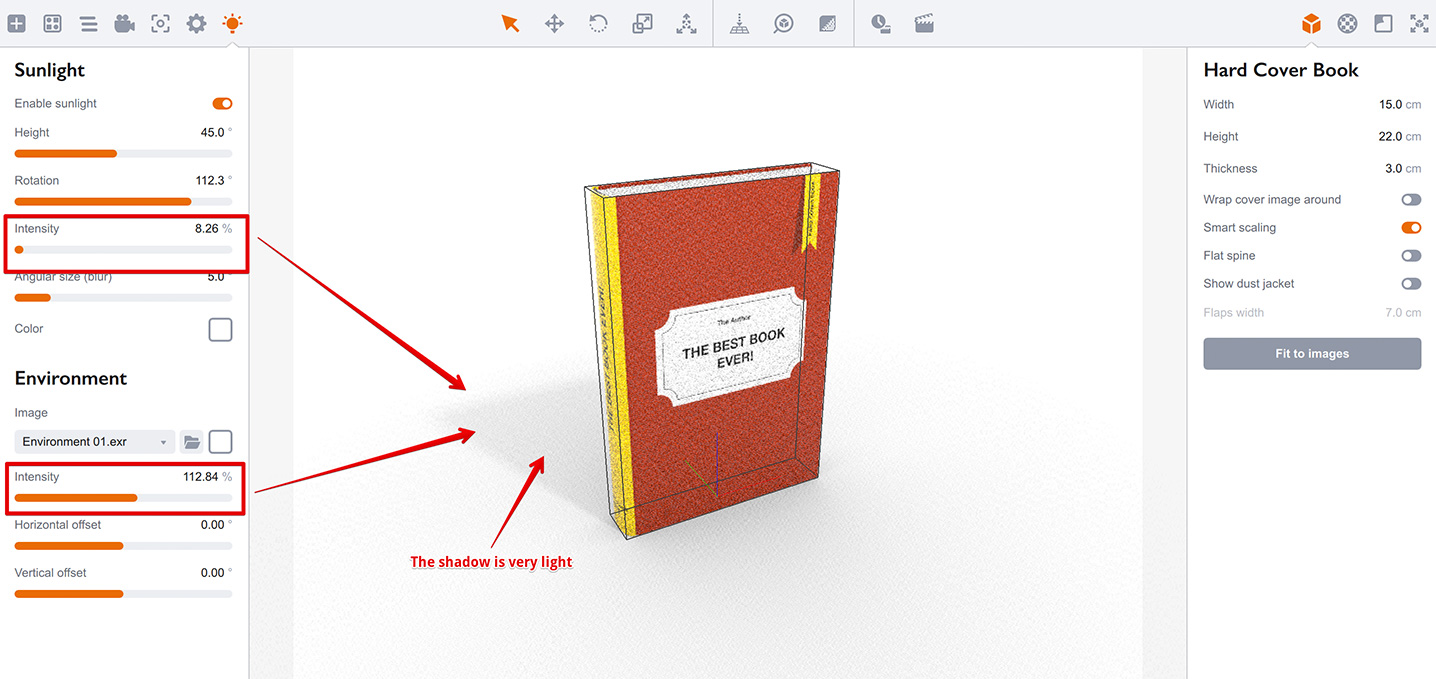
Shadow Intensity
You can control the shadow contrast by balancing light intensities. Here we balanced both lights to make a very light shadow:
And here we re–balanced the lighting to make the shadow darker by increasing the directional lighting intensity and decreasing the environment lighting intensity.
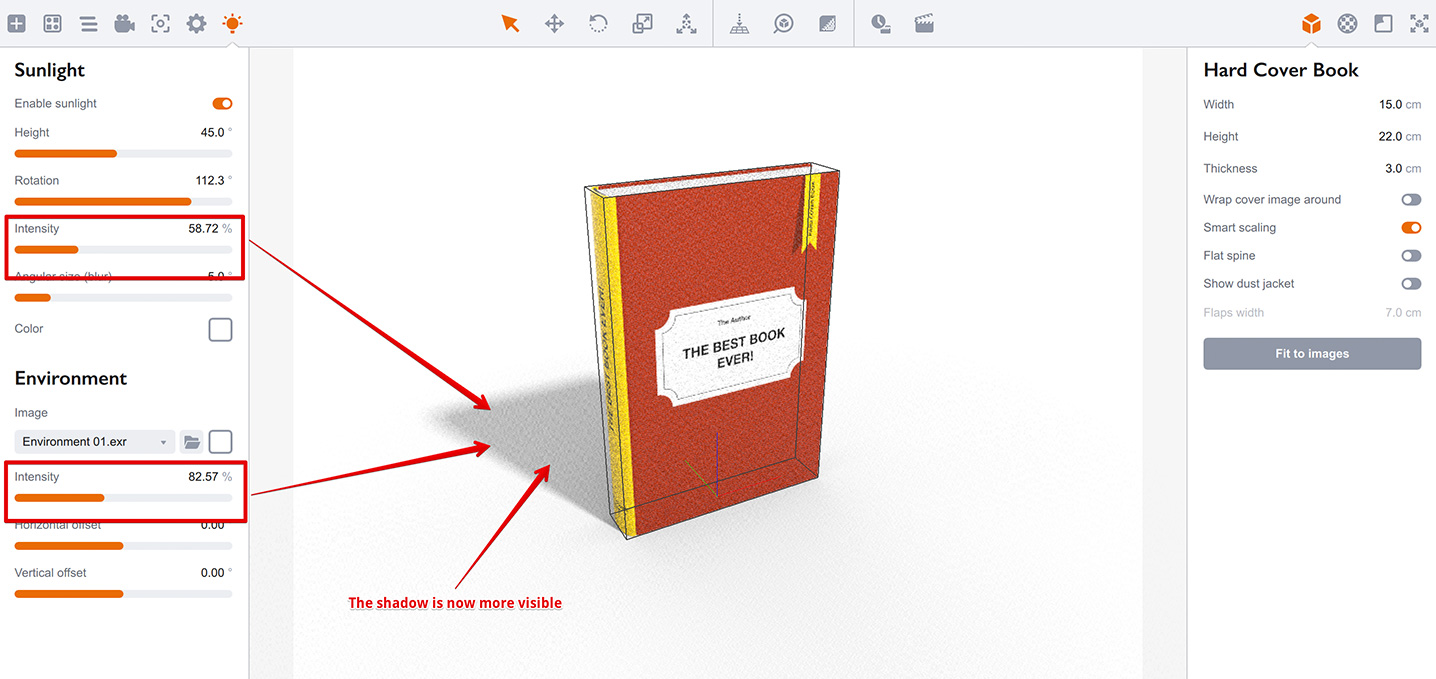
Now the shadow area gets less light and looks darker, while the front part of the book gets about the same amount of light as before. Finding the perfect balance may be tricky, but it is well worth the time spent.
That’s All
As in photography, lighting is essential for good rendering. Consider spending some time to get used to both lighting options in Boxshot to add more realism to your renderings.
More Tutorials
Rendering
- Realistic Rendering — improving scenes visual appearance;
- Lighting — control environment and directional lighting;
- Saturated Reflection — make "rich" colorful reflections;
- Floor Reflection — reflecting scene objects in the floor;
- Job Manager — rendering jobs later;
- GPU Rendering — rendering scenes faster on GPU;
- Rendering Time and Quality — getting more control on rendering;
- Simple and Realistic Lighting — speeding up scene rendering.
Materials
- Texture Slots — how to use texture slots in Boxshot;
- Glass Materials — how to make semi–transparent objects look attractive;
- UV–Spot — how to make a UV–spot effect easily;
- Foil Effect — how to add foil–finishing to your shapes;
- Bump — adding relief to your materials;
- Copying Materials — how to copy materials to other shapes;
- Custom Materials — extend the materials library with your own ones;
- Semi–Transparent Labels — making semi–transparent and partial labels;
- Boxshot Materials — more details about Boxshot materials.
Features
- Decals — applying decals and configuring them;
- Bump Decals — applying bump where it is needed;
- Depth Of Field — adding more realism to your renderings;
- Tools — read more about Boxshot tools;
- Managing Images — how to manage image files used by Boxshot projects;
- Shapes Instances — creating lightweight copies of other shapes;
- Model Editor — edit embedded models in many ways;
- Shrink Wrap — heat–shrink film simulation for objects wrapping;
- Physics Simulation — applying gravity to your scene;
- Palletize — arrange scene objects for the pallet;
- Snapshots — save scene state to re–use it later;
- Translation — teach Boxshot to speak your language;
- Vector Artwork — how to maintain the quality of vector artwork.
Shapes
- Lathe Objects — making symmetrical objects using revolving curves;
- Loft Objects — making custom objects with 2D cross–sections;
- 3D Text — making 3D text objects in Boxshot;
- Extruded Objects — how to make thick 3D object of your flat 2D curve;
- Conical Labels — making conical labels with distorted artwork;
- Dieline Box — a very realistic dieline–based box;
- Custom Shapes — adding custom shapes to the left panel;
- Third Party Shapes — importing third party shapes to Boxshot.