Glass Materials
Boxshot supports physically–correct glass simulations with reflection, refraction and absorbance. This allows you to easily create various glass–like materials.
A Bit of Theory
When light hits a surface two things might happen: part of the light goes through the surface and another part is reflected.
How much light is reflected depends on the reflection level of the surface. For instance, a mirror has a reflection level of 100%, so nothing goes through. A completely transparent material has zero reflection level, so all the light goes through.
The light that goes through the surface may change its direction. The change depends on the ratio of the indices of refraction of two mediums. Each medium (i.e. air, glass, plastic) has its own index of refraction (IOR) and it is essential to use the correct index values when dealing with transparent materials. There are lots of online tables of refraction indices, so it shouldn’t be a problem to find the right values.
If the surface is smooth, the light is reflected in one direction. Otherwise rays are reflected randomly, so you see a “frosted glass”, or “ripple” effect. The same is true for the light that goes through, as the direction of the refracted light also depends on the surface.
The medium that the light passes through may absorb it. The thicker the medium, the more light is absorbed.
That’s probably all you need to know to work with transparent materials in Boxshot.
Let’s Start
We need a sample scene for the tutorial, so let’s put a plane on the floor and assign a checkerboard texture to it. Then put a pharma bottle shape on the plane and hide its label and cap:
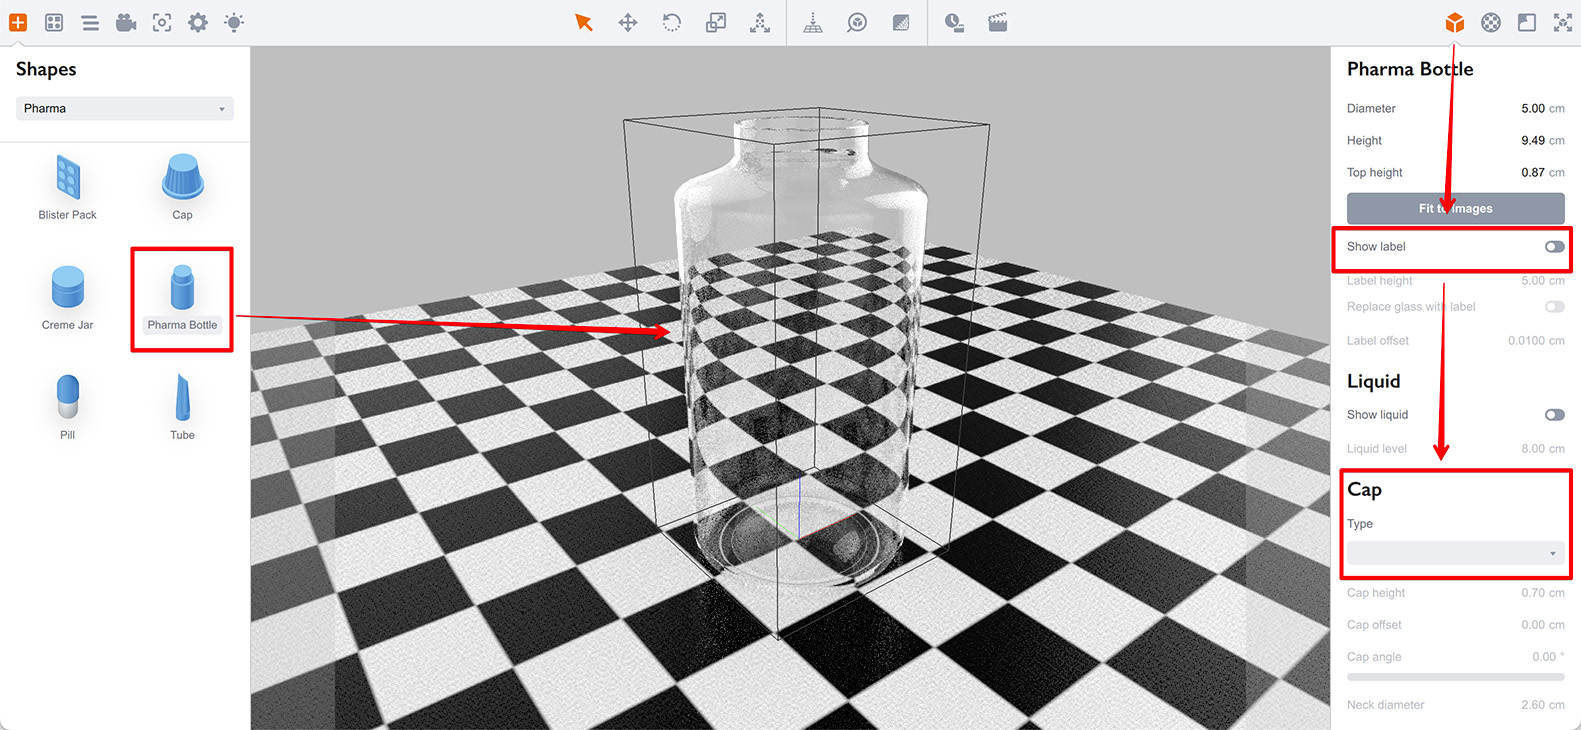
You see the glass bottle that reflects the black and white tiles and you can also see a little distortion of the tiles that are visible through the glass. This is what you would see with a real glass bottle on a real checkerboard.
Reflection
Let’s now switch to the materials panel of the bottle and scroll down to the “Reflection” section.
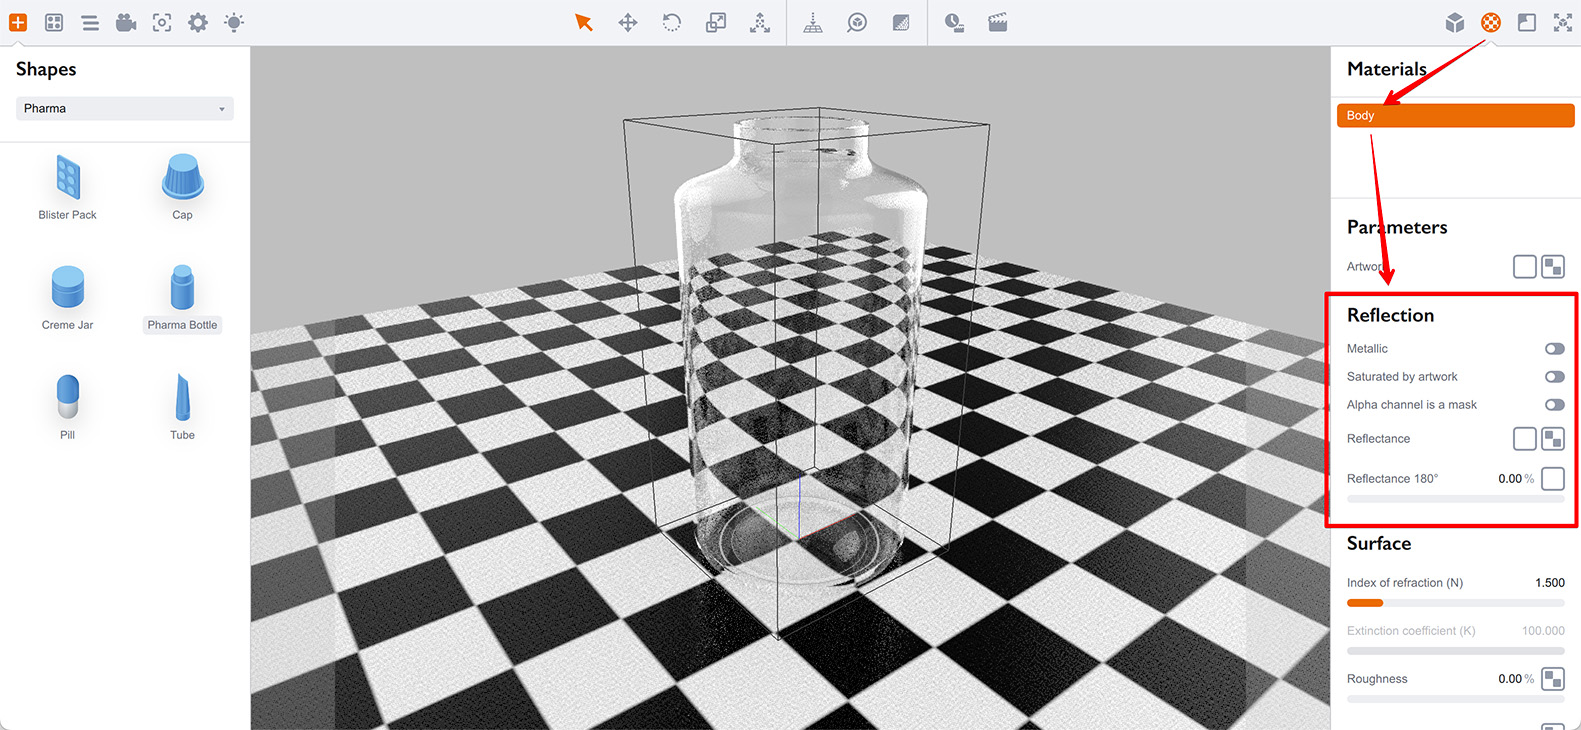
There you can see the “Metallic reflection” option and the “Reflectance” texture slot. Metallic reflection is turned off and there is no reflection level option in the reflectance slot, as Boxshot currently simulates the dielectric (plastic or glass) which is configured using the index of refraction parameter.
Although this option is perfect for glass simulation, let’s turn it off for a second to test the reflection first. Switch the metallic reflection option on and notice the reflectance slot now have the level option. Set it to 100% and see what happens:
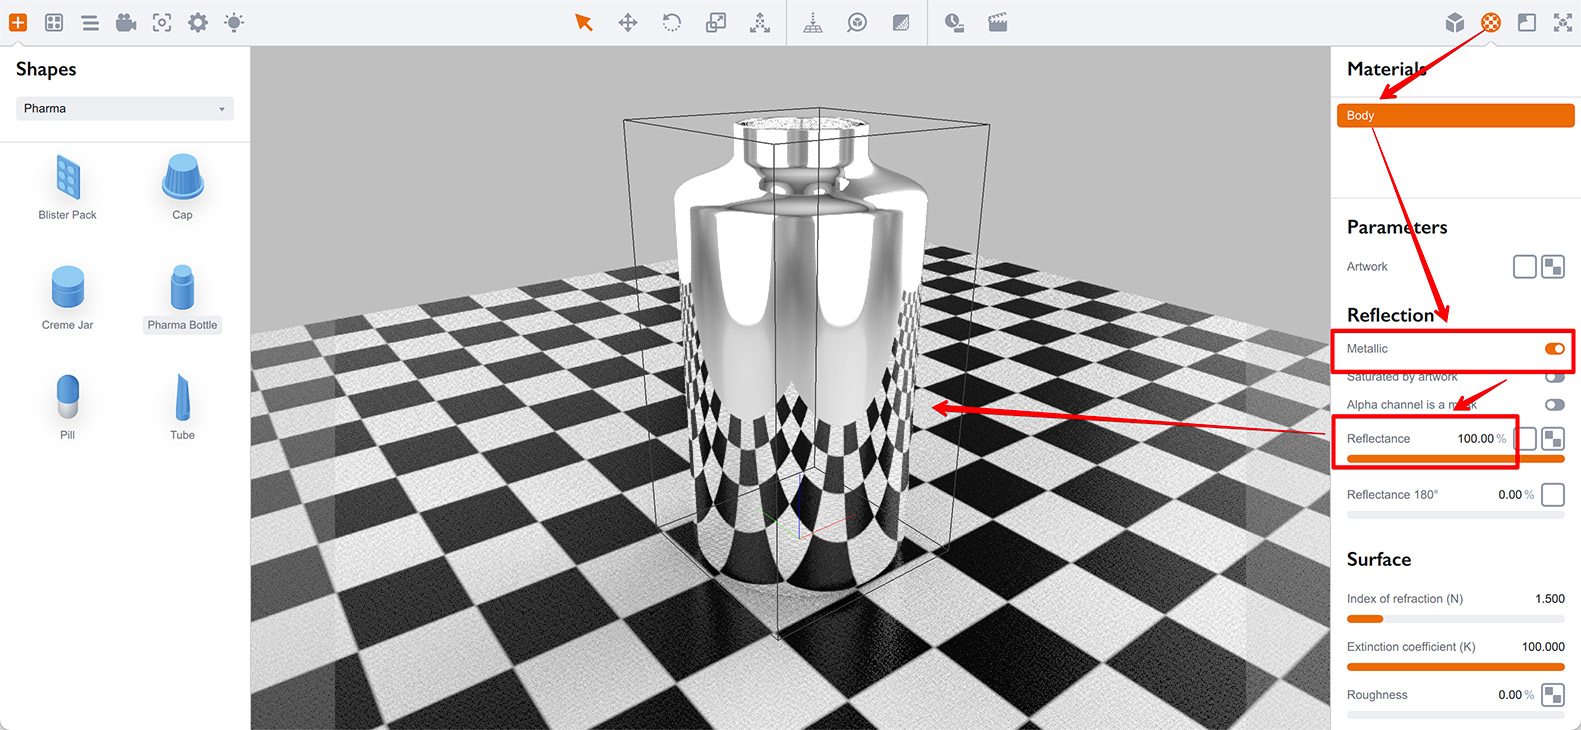
The bottle now completely reflects the environment and doesn’t refract at all. Now reduce the reflection level to 30% and see the difference:
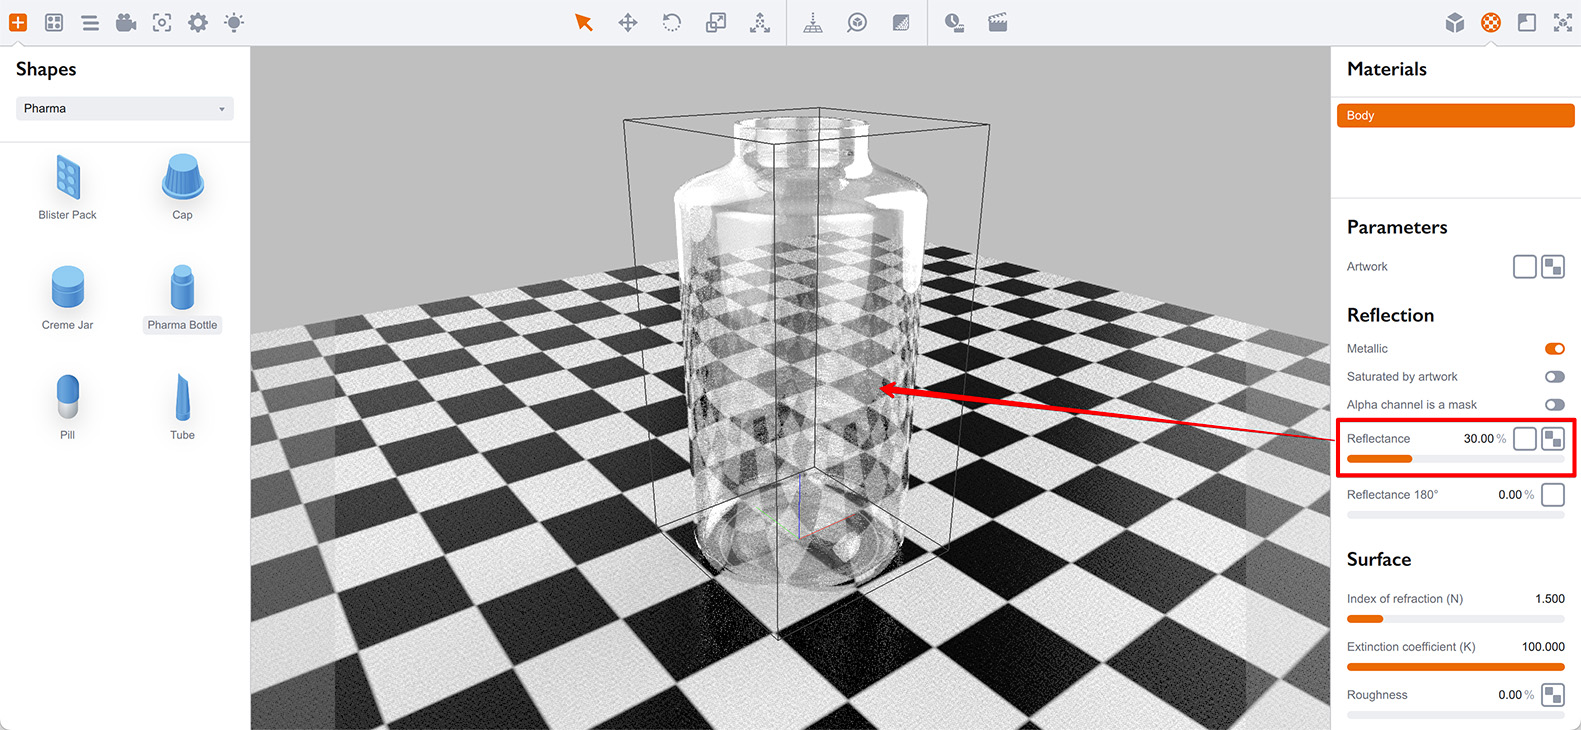
It looks strange, right? That’s because in real life glass (and most other semi–transparent materials) respond to light depending on the angle it falls to the surface. With the metallic reflection enable, it doesn’t depend on the angle and all the parts of the bottle reflect the same.
Although this doesn’t work well for glass materials, it is good to be able to manually control the reflection level for metallic materials simulation.
Now disable the metallic reflection option back, so we can continue with refraction.
Refraction
Refraction is controlled using the two sections named Surface and Transparency.
Those properties control how the light goes through the material and what happens to it.
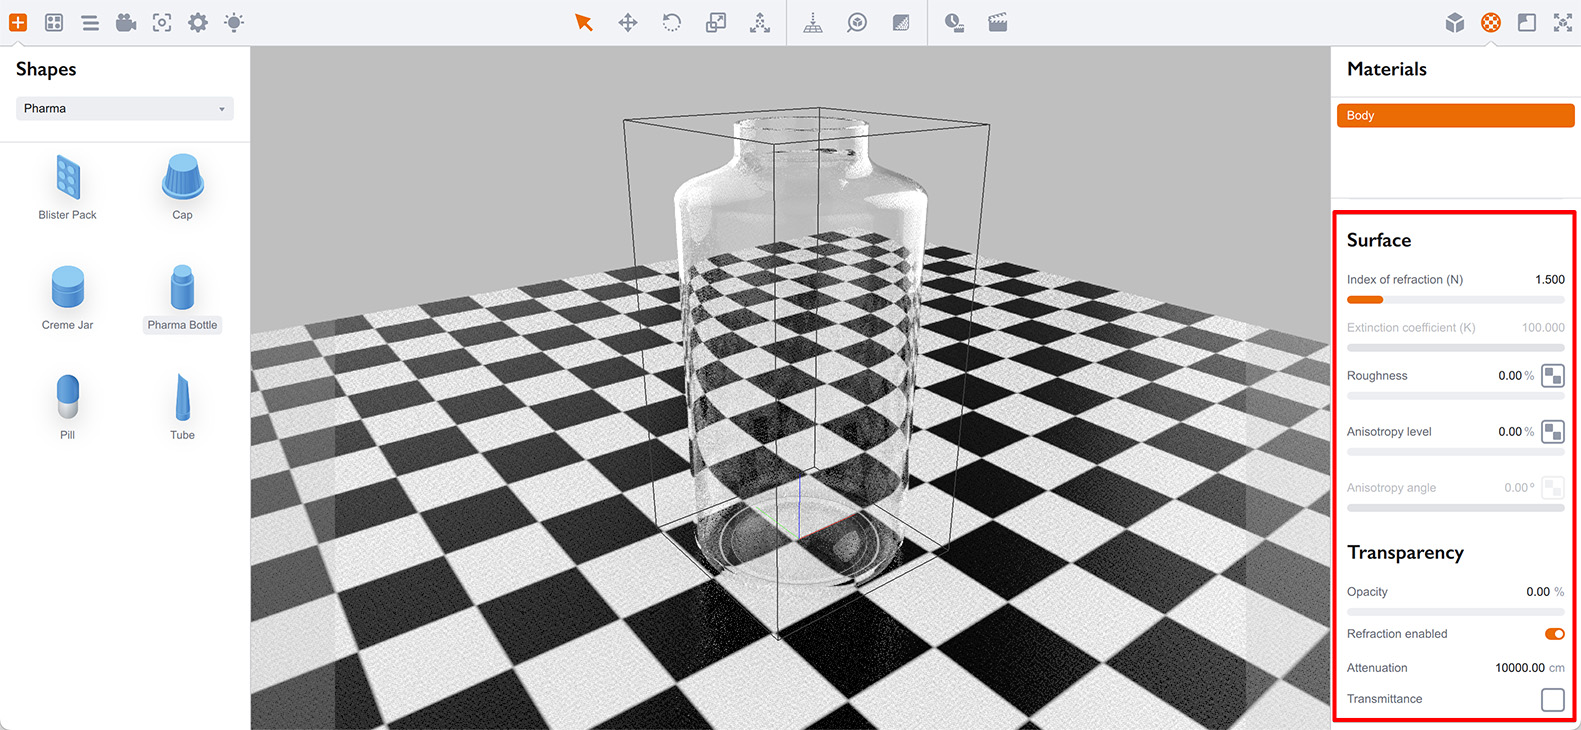
One of the properties was mentioned above — the index of refraction (also called N). There is a special slider for it the surface section. This parameter works for both reflection and refraction, so it is in the Surface section which contains the shared properties.
Let’s change the index of refraction to 1:

Now set it to 2. See the difference?
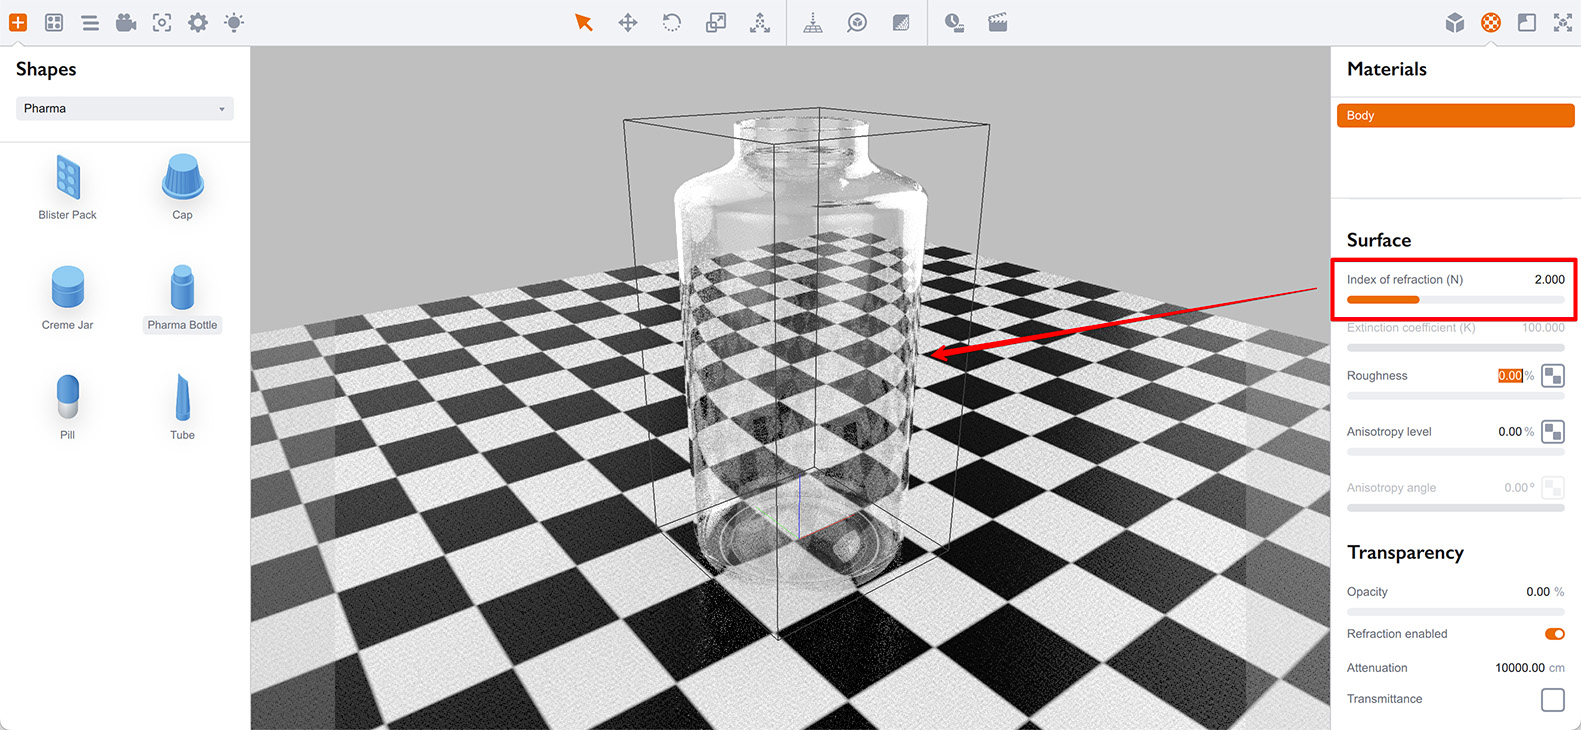
Basically, the index of refraction controls how much the background is distorted and how much the surface reflects the environment.
When the index of refraction is 1, it matches the index of refraction of air, so no refraction happens. As the glass itself is transparent and no refraction happens, the light goes straight through it and the bottle becomes invisible.
However, when the index of refraction is set to 2, the light is refracted much more and the background looks much more distorted.
The next slider we’ll test is “Opacity”. When Boxshot traces light to surface it checks the reflection properties of the material, computes the amount of light to be reflected and reflects it. Then it checks the “Opacity” slider to see how much light to pass through. Then it passes that amount of light in and use the rest to display the normal (diffuse) artwork.
Let’s make the bottle semi–transparent by setting the opacity slider to 30%. Then adjust the (diffuse) artwork tint color at the top of the material panel to make it green:
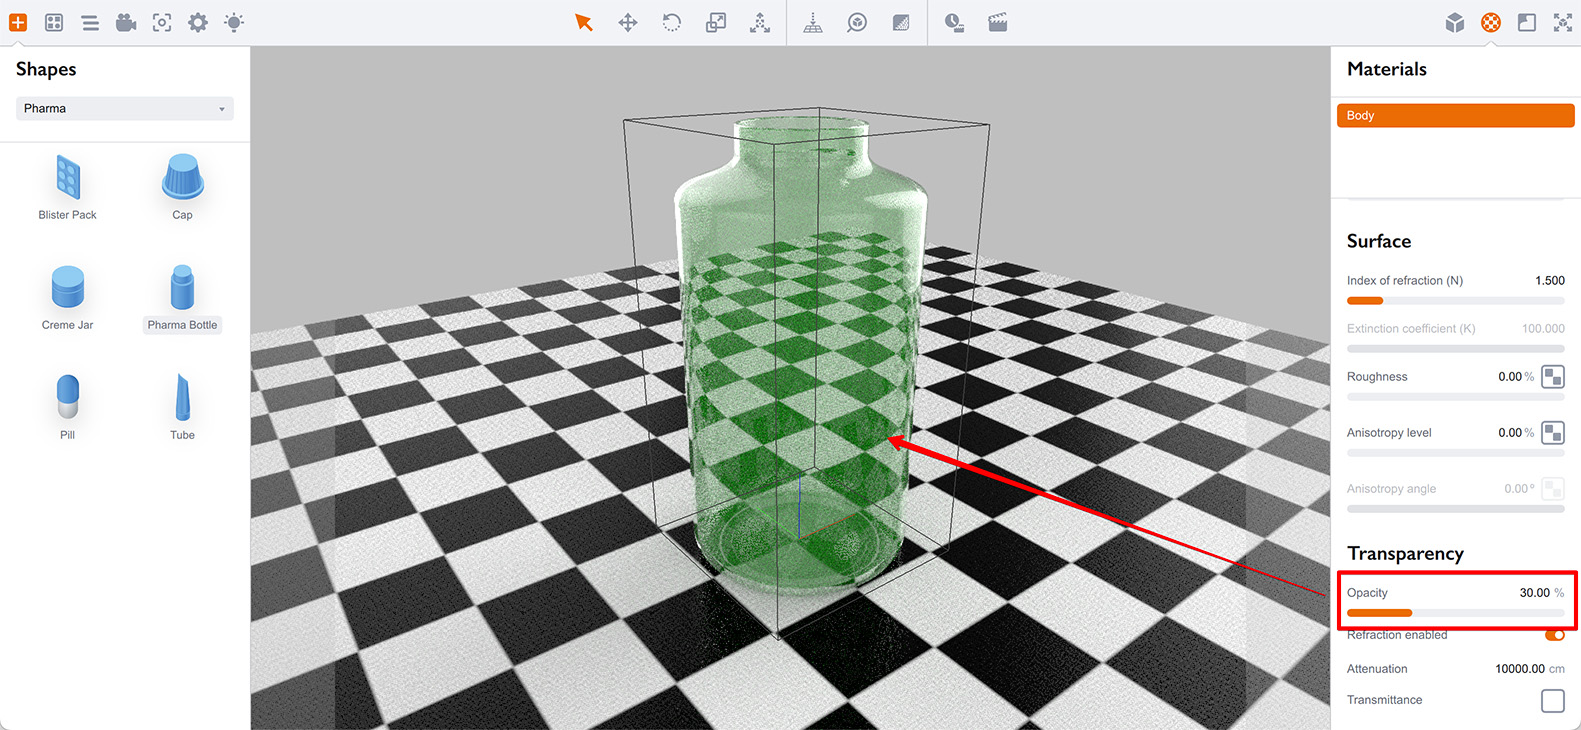
It looks like we’ve just made a green bottle, did we? No, we didn’t. For the real glass, the color depends on the thickness of the medium, but not on the image above.
We’ll cover that below, meanwhile set the artwork tint back to white and set the opacity to 0%.
Absorbance and Medium Color
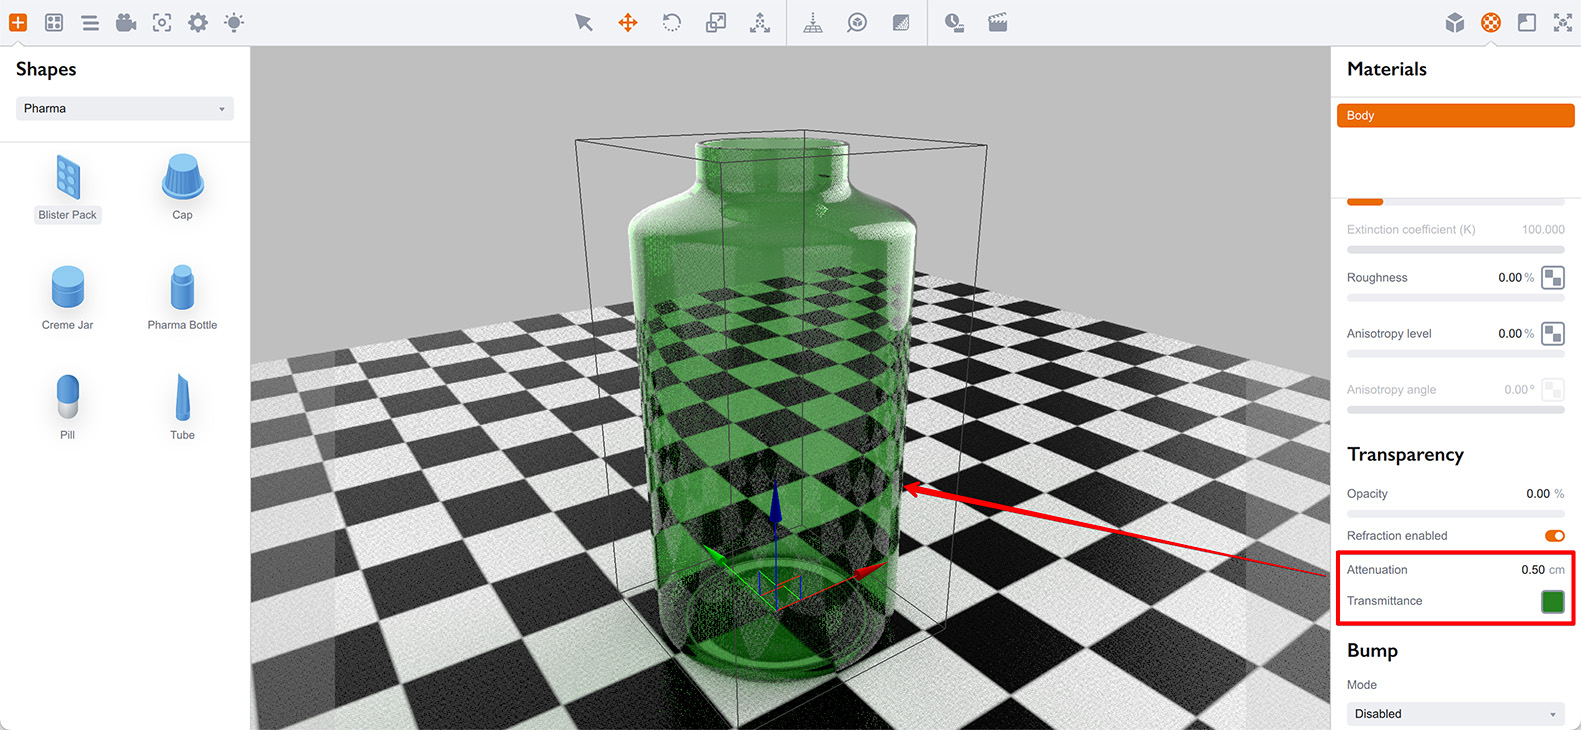
Scroll the materials panel down to the Transparency section. Here we’ll do the magic: set the Transmittance option color to dark green and set the Attenuation to 0.2cm:
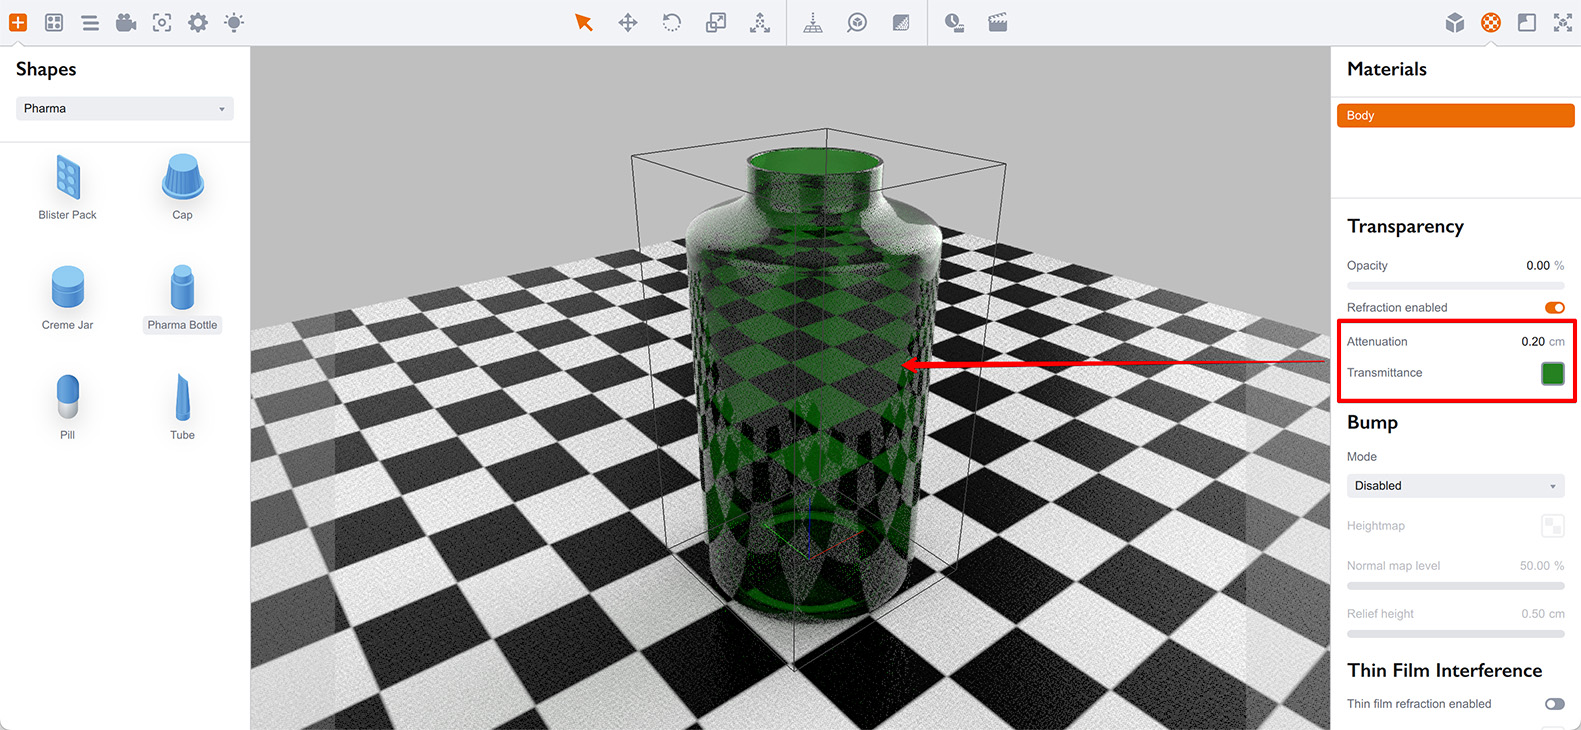
That’s how real glass looks. You see the thicker parts are more dark and thinner ones are more transparent.
What is the difference? Adjusting the diffuse tint color simply colors the pixel without taking into account the path that light has traveled through the medium. Medium color settings do take this into account.
Here is a more complex scene made of two beer bottles:

The bottle on the right uses diffuse tint, while the left one is done using the medium color. You can easily see the glass thickness on the left, but not on the right. That’s how absorbance works — the longer light travels through the medium, the more it changes.
Transmittance color is the color that white light becomes after travelling through the Attenuation distance through the medium. You can read more about this in the materials tutorial. Let’s copy and paste our bottle several times and assign different attenuation values to each bottle:
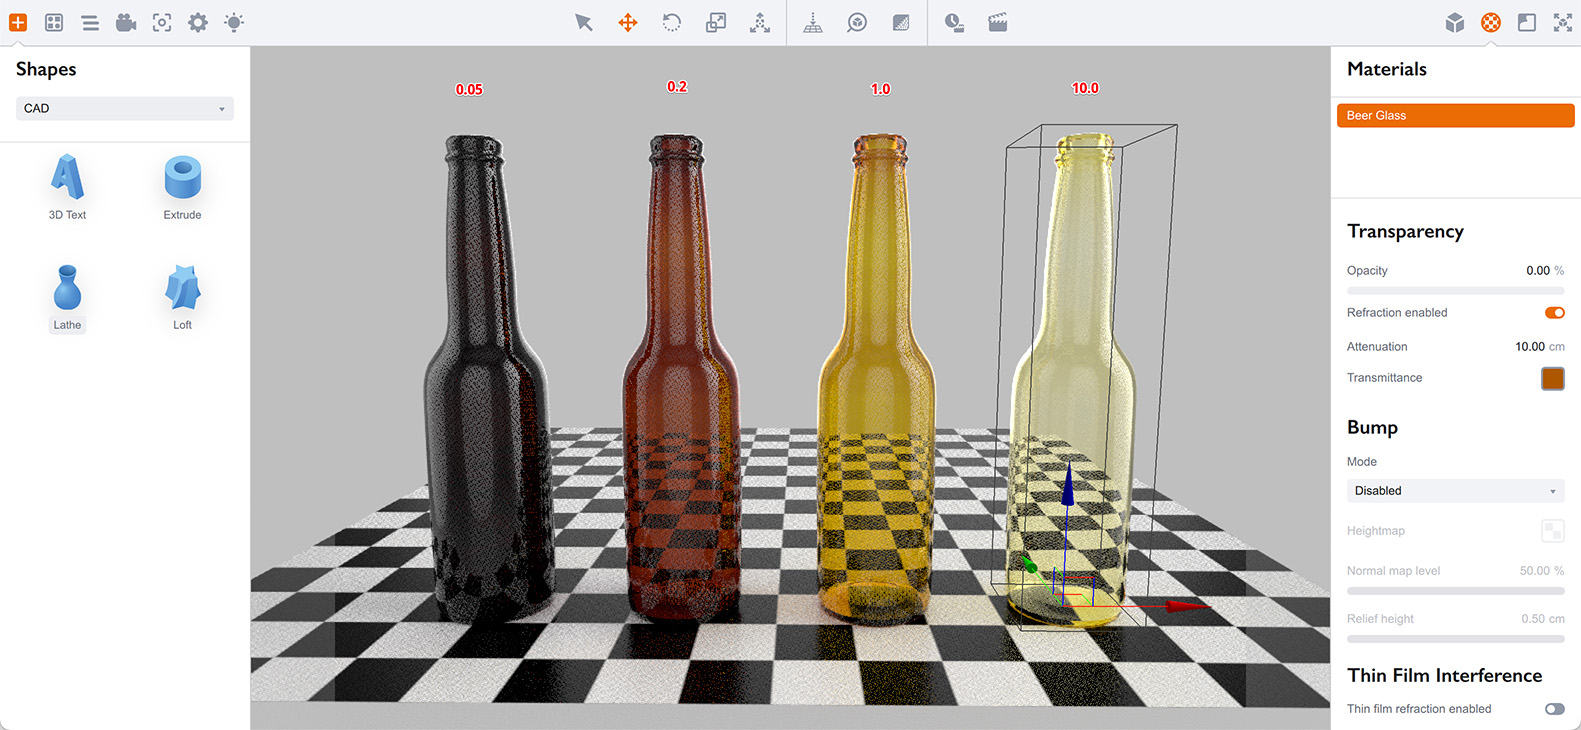
All the bottles are the same, except for the attenuation level. From left to the right, the attenuations are: 0.05cm, 0.2cm, 1cm and 10cm.
The left bottle looks opaque as its walls are thicker than 0.05cm, so the light quickly fades down inside it and becomes brown, effectively hiding the scene behind the bottle. On the other hand, the right most bottle is almost transparent as the attenuation level of 10cm is much bigger compared to the bottle walls thickness, so the medium color is barely visible there.
All you need to make pleasing glass materials is to set up the transmittance color and adjust the attenuation level to match the shape and your expectations.
Here are some points to keep in mind:
- White transmittance color doesn’t work — you will simply not see any difference, as white means “no absorbance”;
- The same is true for the “maximum” colors — for example, if you set transmittance to RGB (0, 255, 0), you will get the same green color regardless of the attenuation level. Use lower values instead, something around (0, 250, 0) could provide a satisfactory result.
Roughness
Boxshot lets you configure surface roughness in the Surface section of the material and it affects both reflection and refraction of light for this material.
As the bottle doesn’t reflect much, we’ll test the roughness option using the refracted part of the light. Revert to the scene with a single pharma bottle (you can use the Undo command to get back there) and increase its attenuation to better see the background:
Let’s now locate the Roughness control in the Surface section and set it to 10%:
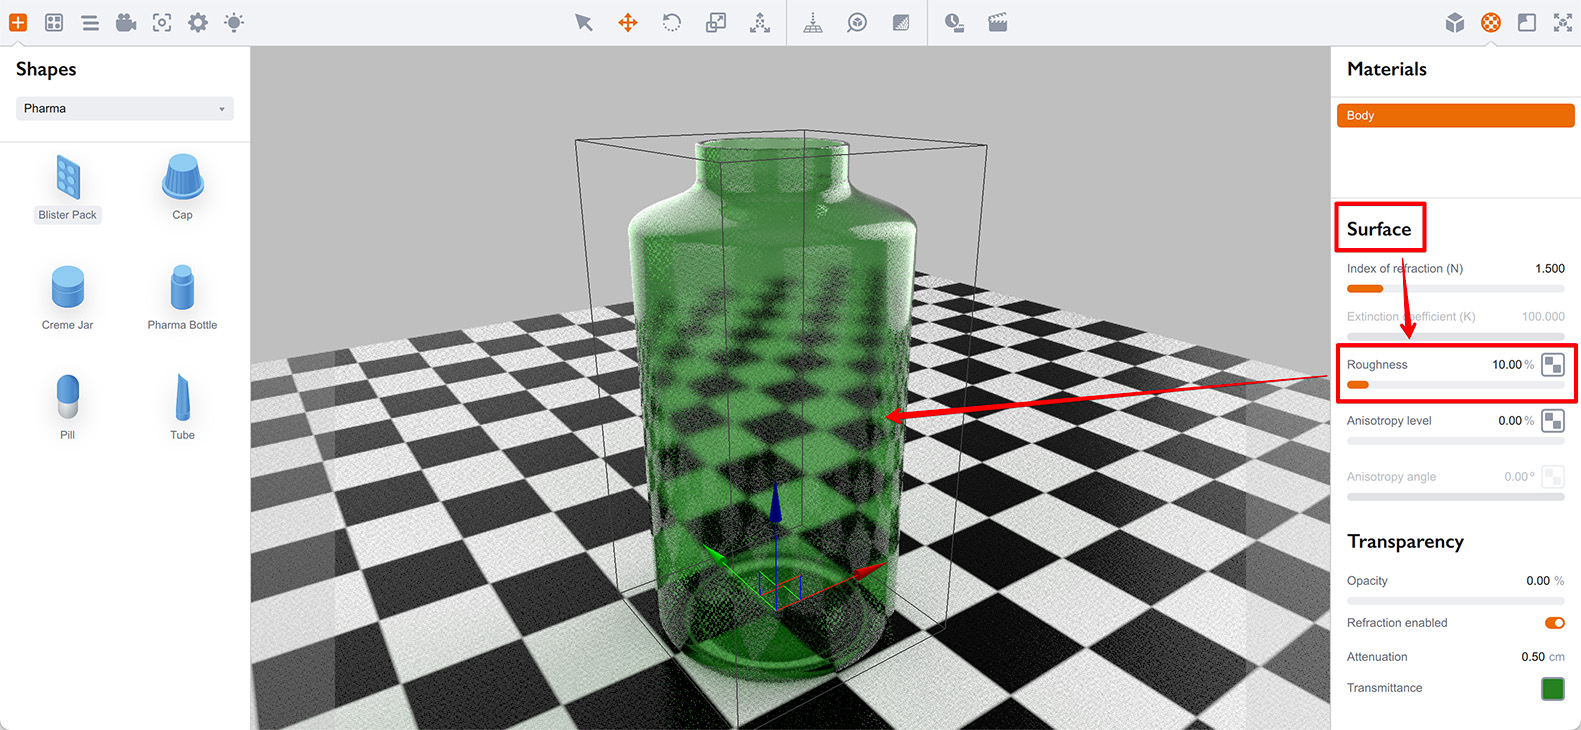
You can see the surface became rough, the reflections at the top became smooth and blurred and the same happened to the background visible through the bottle.
Increasing the roughness further will make the surface almost diffuse looking, effectively hiding the refracted part of the scene.
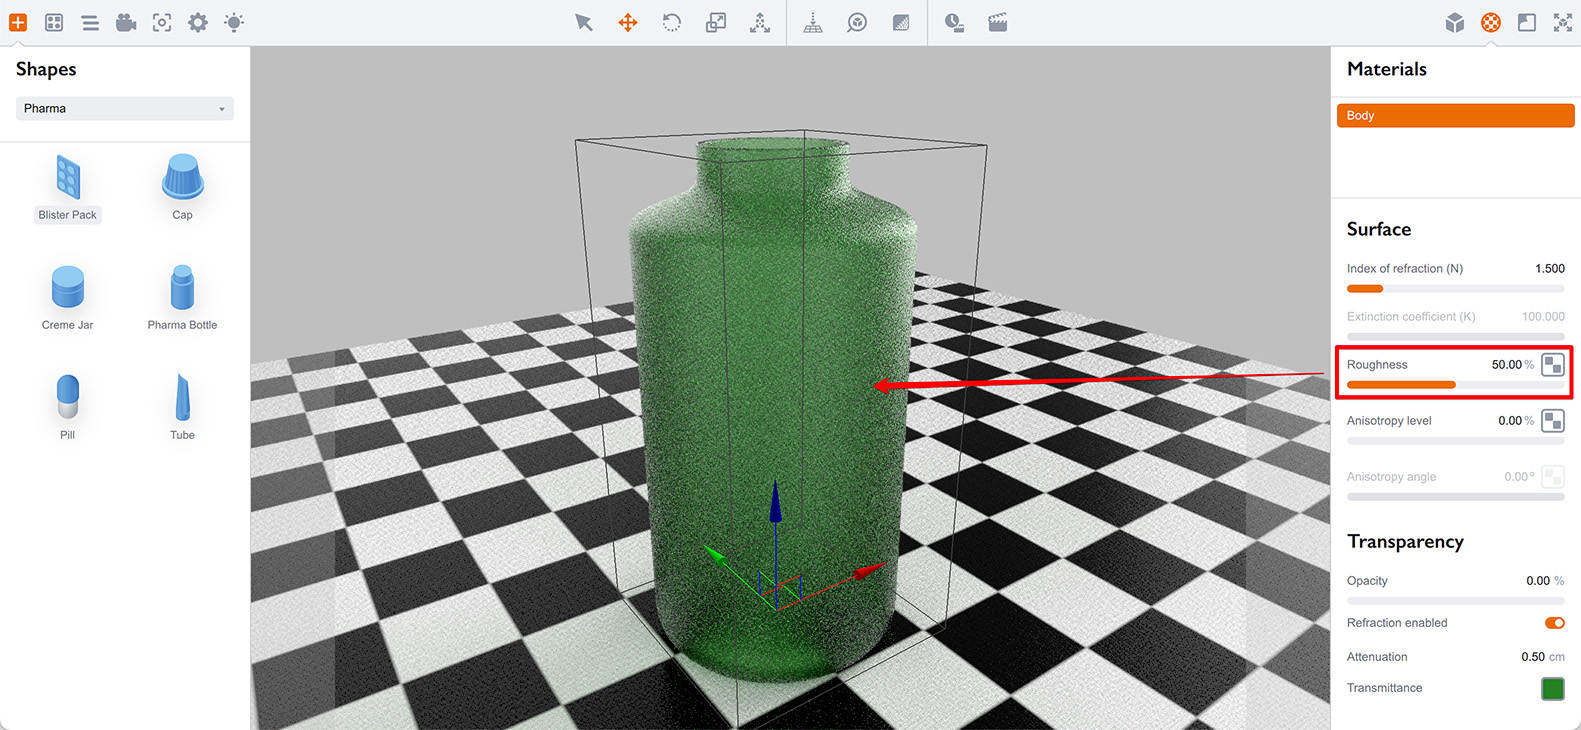
This works well for non–transparent materials, so consider keeping roughness low for transparent materials.
That’s All
Great! You’ve just learned how to create semi–transparent materials in Boxshot. You are now familiar with reflection, refraction and absorbance and ready to create even more amazing things in Boxshot :).
More Tutorials
Rendering
- Realistic Rendering — improving scenes visual appearance;
- Lighting — control environment and directional lighting;
- Saturated Reflection — make "rich" colorful reflections;
- Floor Reflection — reflecting scene objects in the floor;
- Job Manager — rendering jobs later;
- GPU Rendering — rendering scenes faster on GPU;
- Rendering Time and Quality — getting more control on rendering;
- Simple and Realistic Lighting — speeding up scene rendering.
Materials
- Texture Slots — how to use texture slots in Boxshot;
- Glass Materials — how to make semi–transparent objects look attractive;
- UV–Spot — how to make a UV–spot effect easily;
- Foil Effect — how to add foil–finishing to your shapes;
- Bump — adding relief to your materials;
- Copying Materials — how to copy materials to other shapes;
- Semi–Transparent Labels — making semi–transparent and partial labels;
- Boxshot Materials — more details about Boxshot materials.
Features
- Decals — applying decals and configuring them;
- Bump Decals — applying bump where it is needed;
- Depth Of Field — adding more realism to your renderings;
- Tools — read more about Boxshot tools;
- Managing Images — how to manage image files used by Boxshot projects;
- Shapes Instances — creating lightweight copies of other shapes;
- Model Editor — edit embedded models in many ways;
- Shrink Wrap — heat–shrink film simulation for objects wrapping;
- Translation — teach Boxshot to speak your language.
Shapes
- Lathe Objects — making symmetrical objects using revolving curves;
- Loft Objects — making custom objects with 2D cross–sections;
- 3D Text — making 3D text objects in Boxshot;
- Extruded Objects — how to make thick 3D object of your flat 2D curve;
- Conical Labels — making conical labels with distorted artwork;
- Custom Shapes — adding custom shapes to the left panel;
- Third Party Shapes — importing third party shapes to Boxshot.