Extruded Shapes in Boxshot
Boxshot lets you load a flat 2D curve in SVG format (or make a new one) and extrude it by adding thickness. To start, locate the “Extrude” shape in the shapes panel and drag it into the scene:

You’ll see the default extruded disk and its properties on the right:
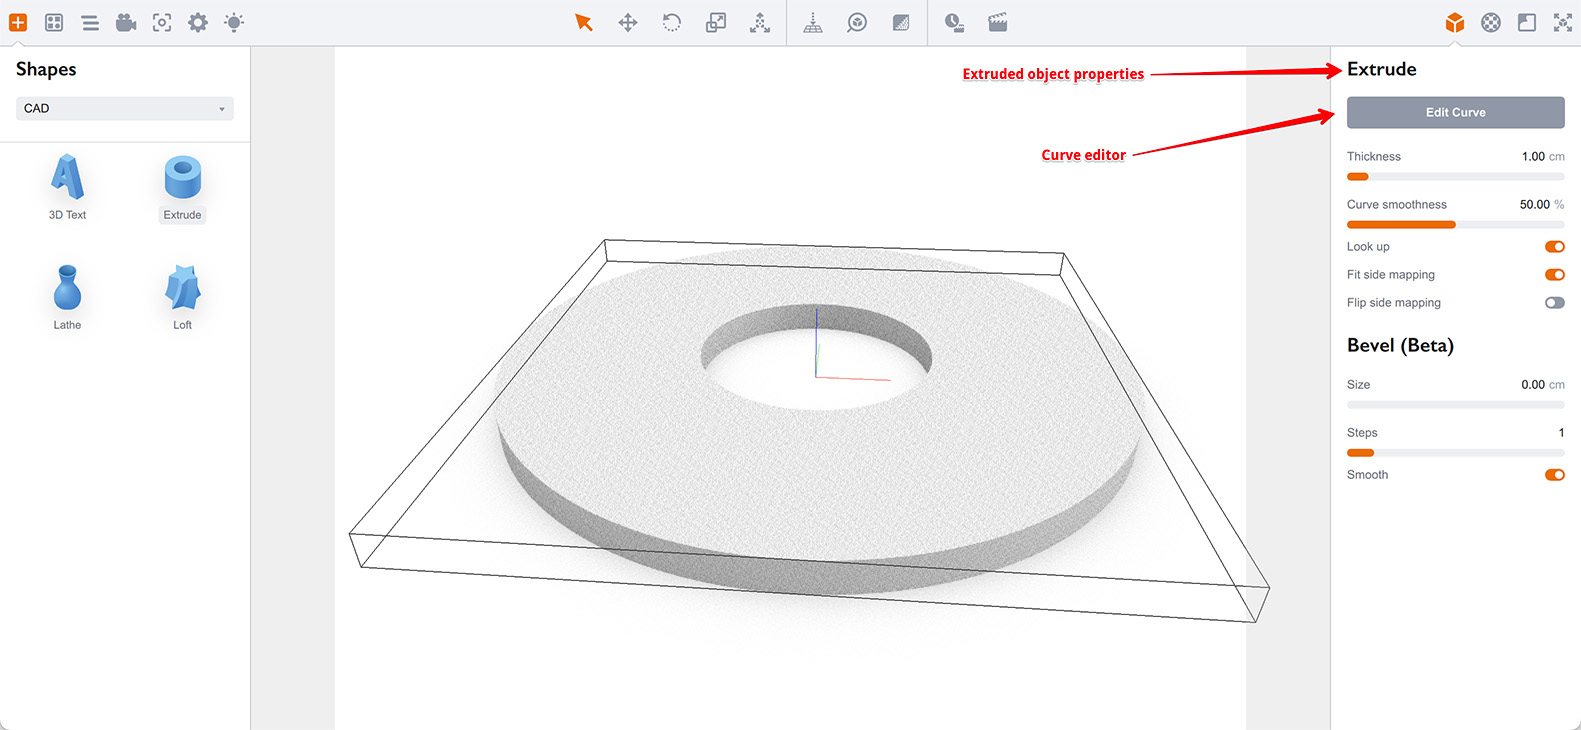
The properties are pretty much the same as for 3D Text object, so please refer to 3D Text Tutorial for the description of thickness, look up and bevel options.
The main thing is hidden under the Edit Curve button. Clicking it opens the curve editor:
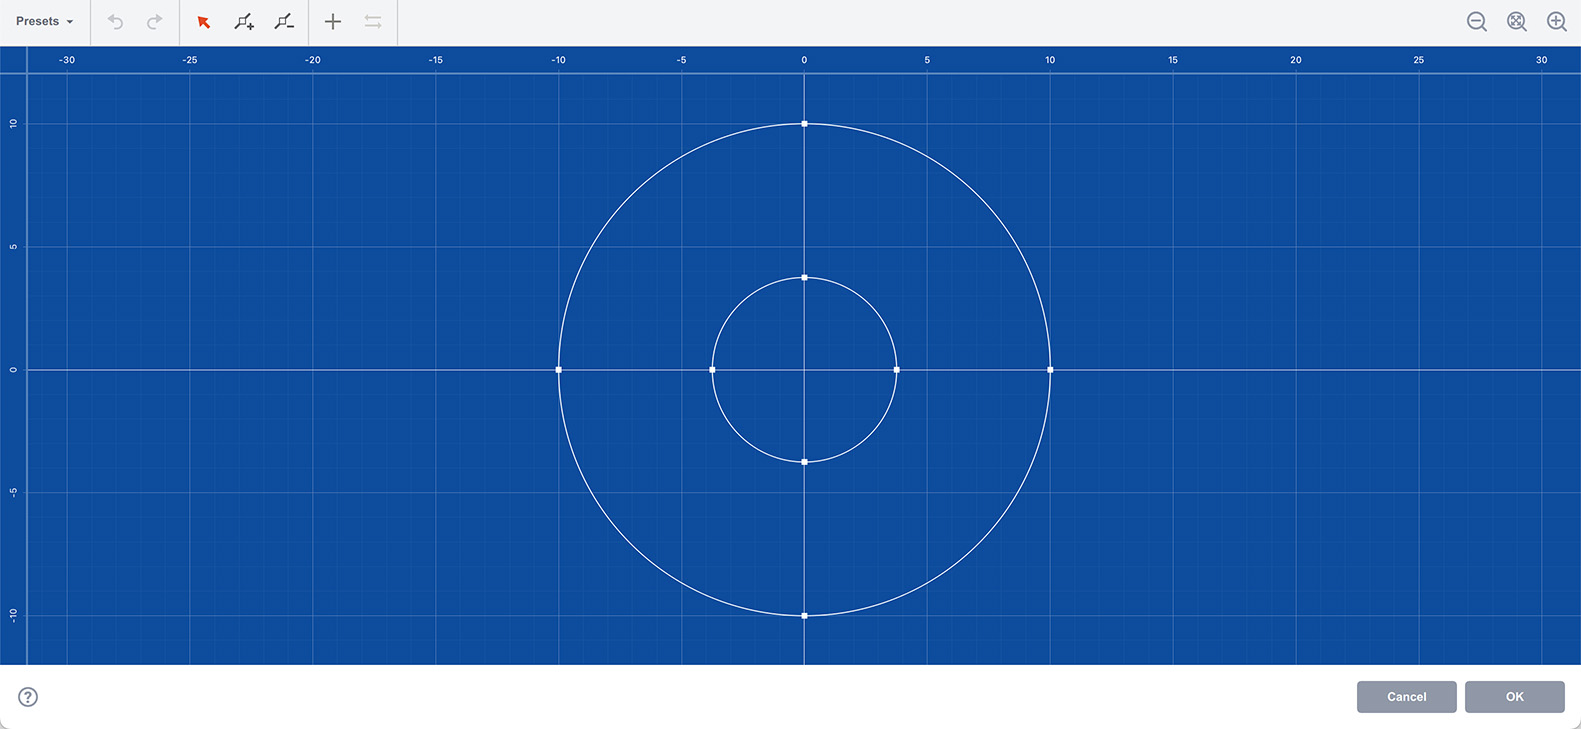
The editor is very similar to the curve editor that you use in Lathe editor so please refer there for basic operations like adding, deleting and moving points around.
Boxshot comes with some pre–defined curves that you can try:
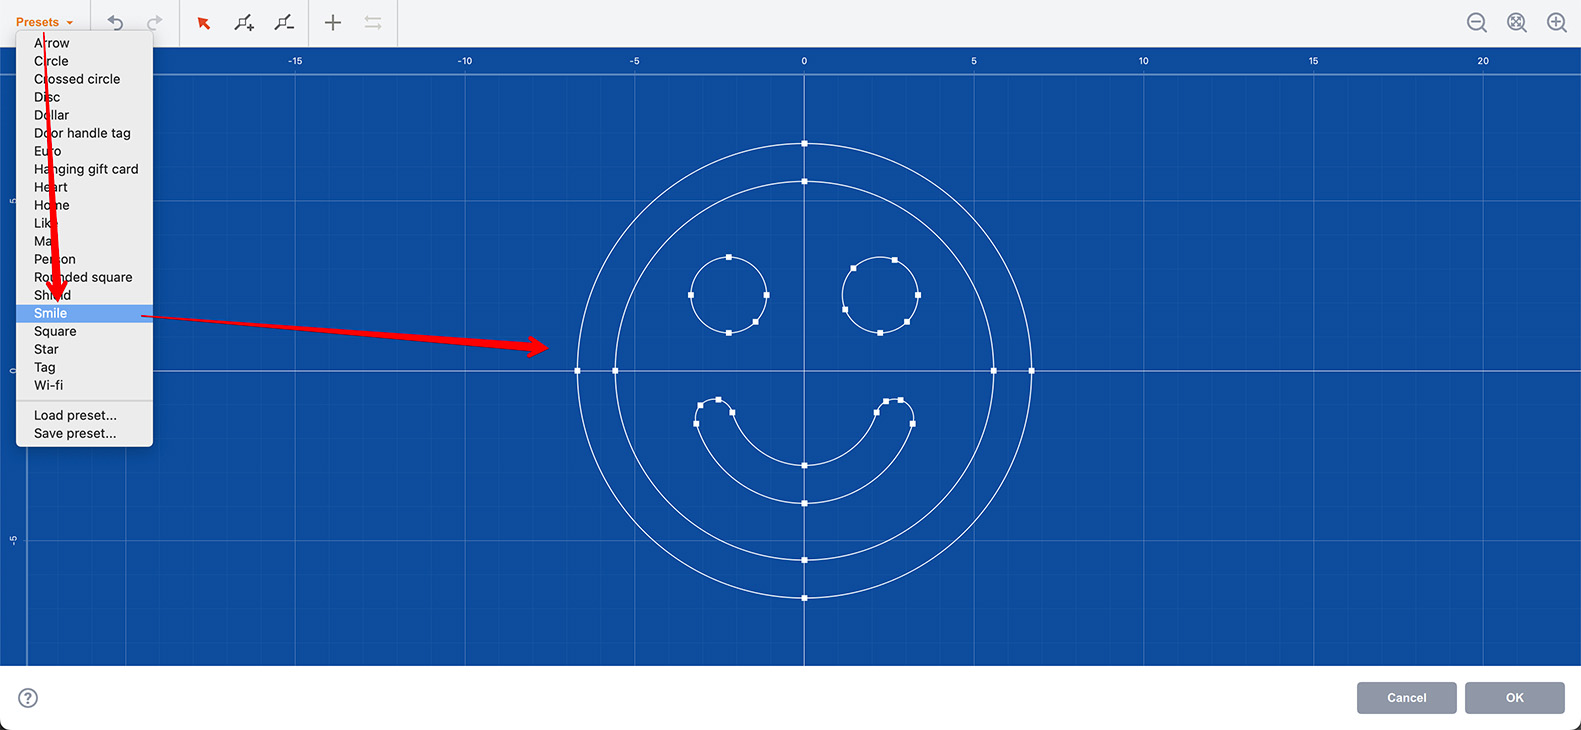
Here I loaded a smile curve and clicked OK to see it extruded:
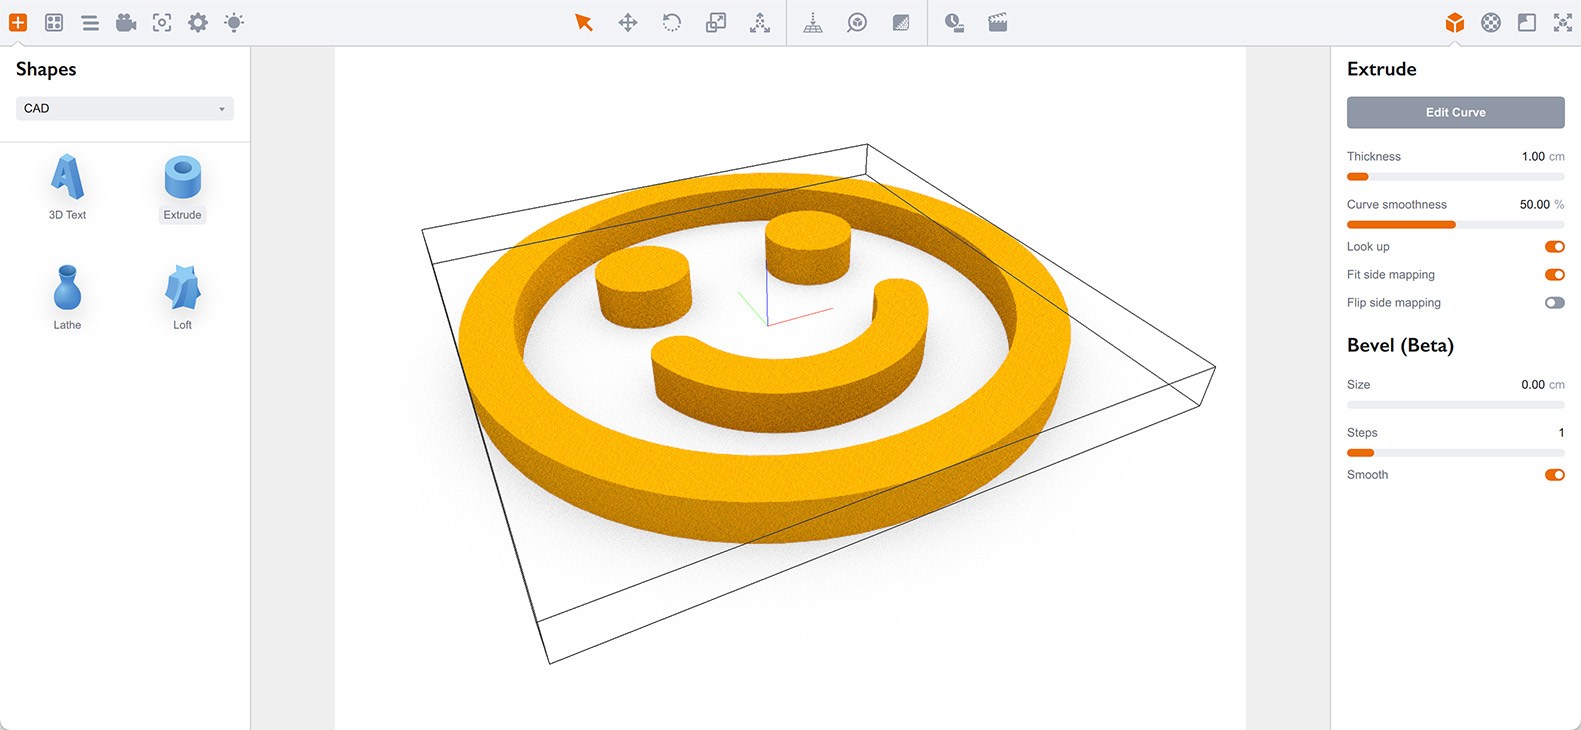
Note that I adjusted the materials, so the shape looks orange instead of the default gray.
You can load your own curves by clicking Presets → Open… in the editor menu, or by simply dragging an SVG file into the editor.
Possible Errors
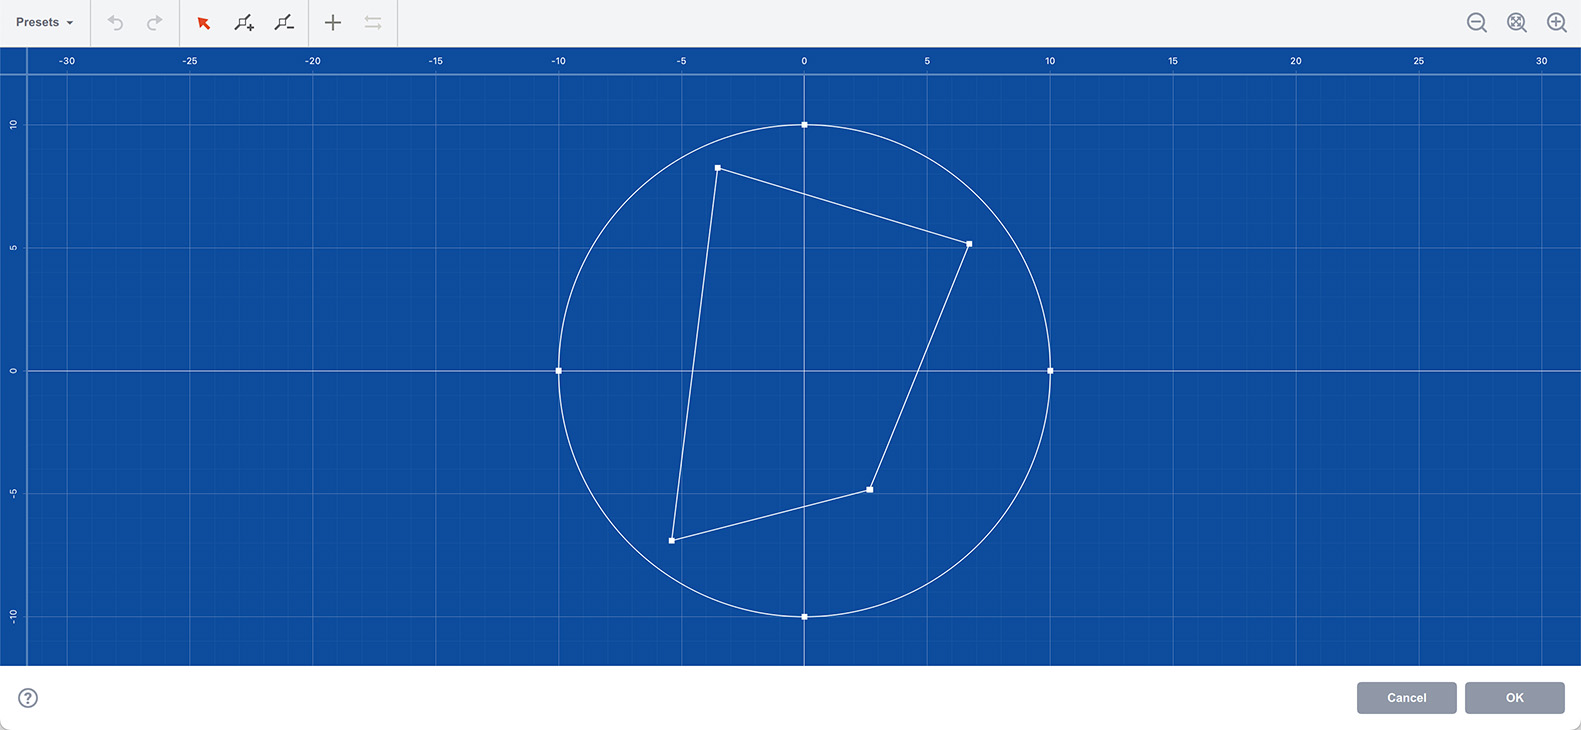
Some of the curves you make or load may produce incorrect results when extruded. Something like this:

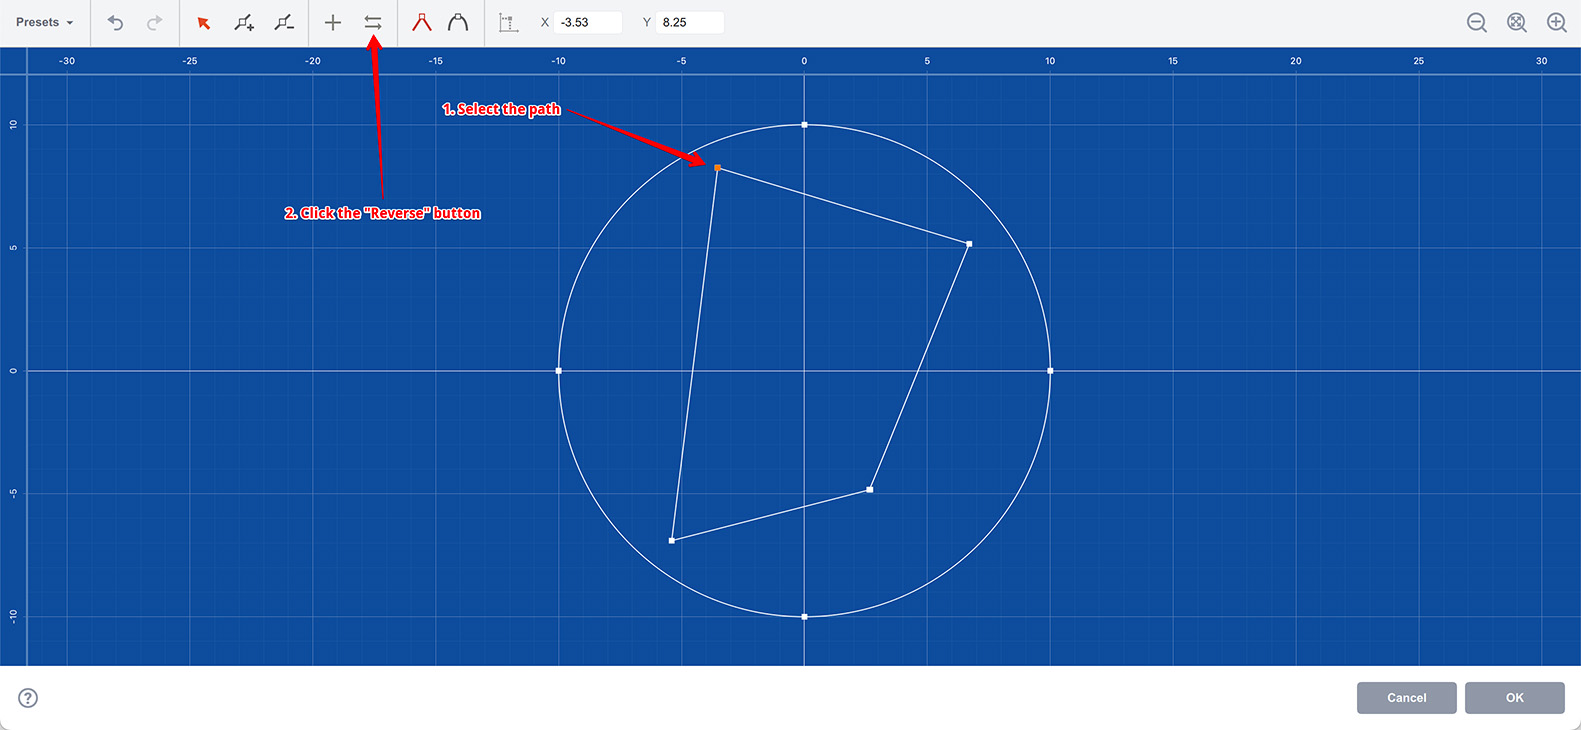
The shape element looks inverted. This is caused by the incorrect path direction and the solution is to reverse the path. To do so, go back into the curve editor and click any vertex of the path in question:
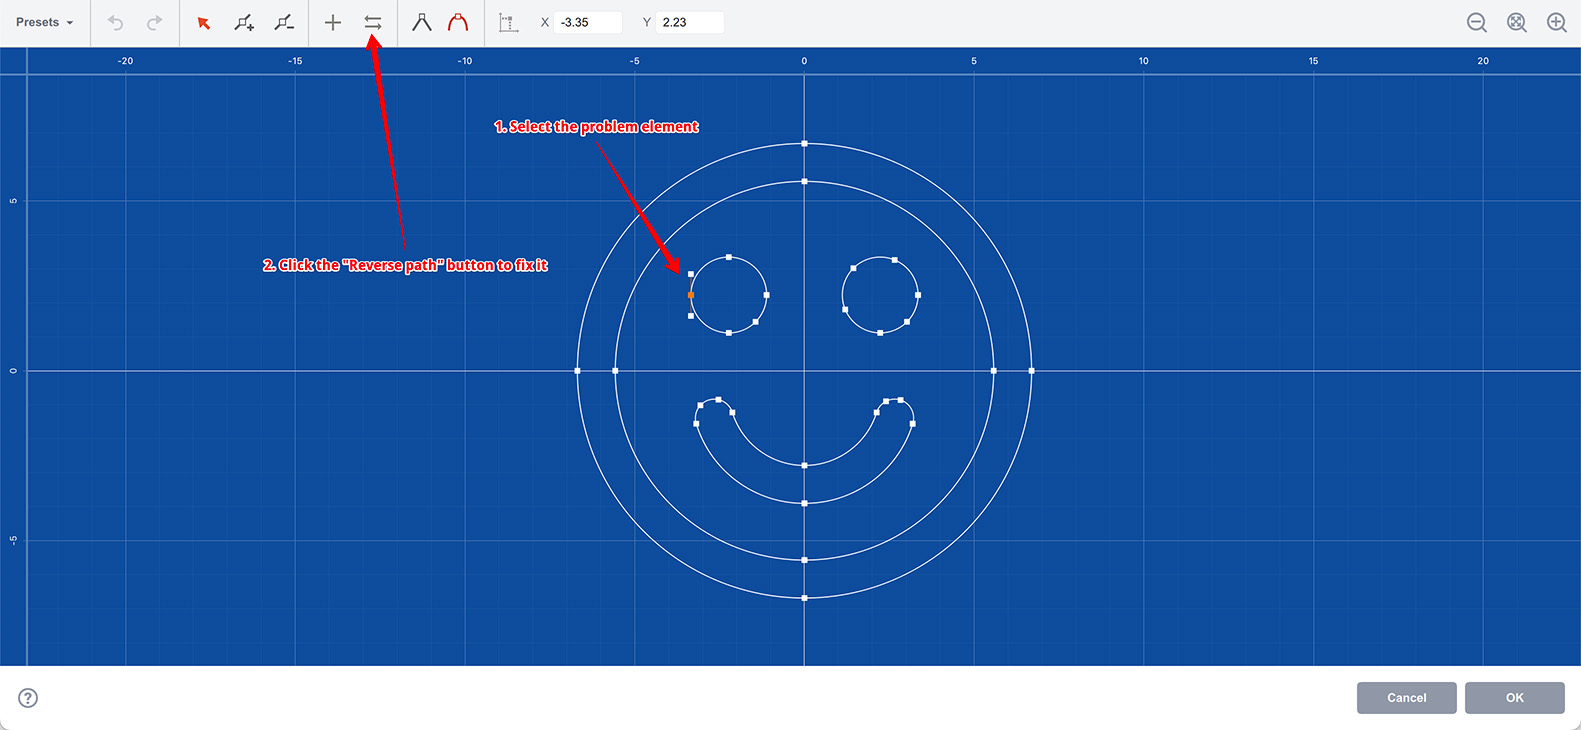
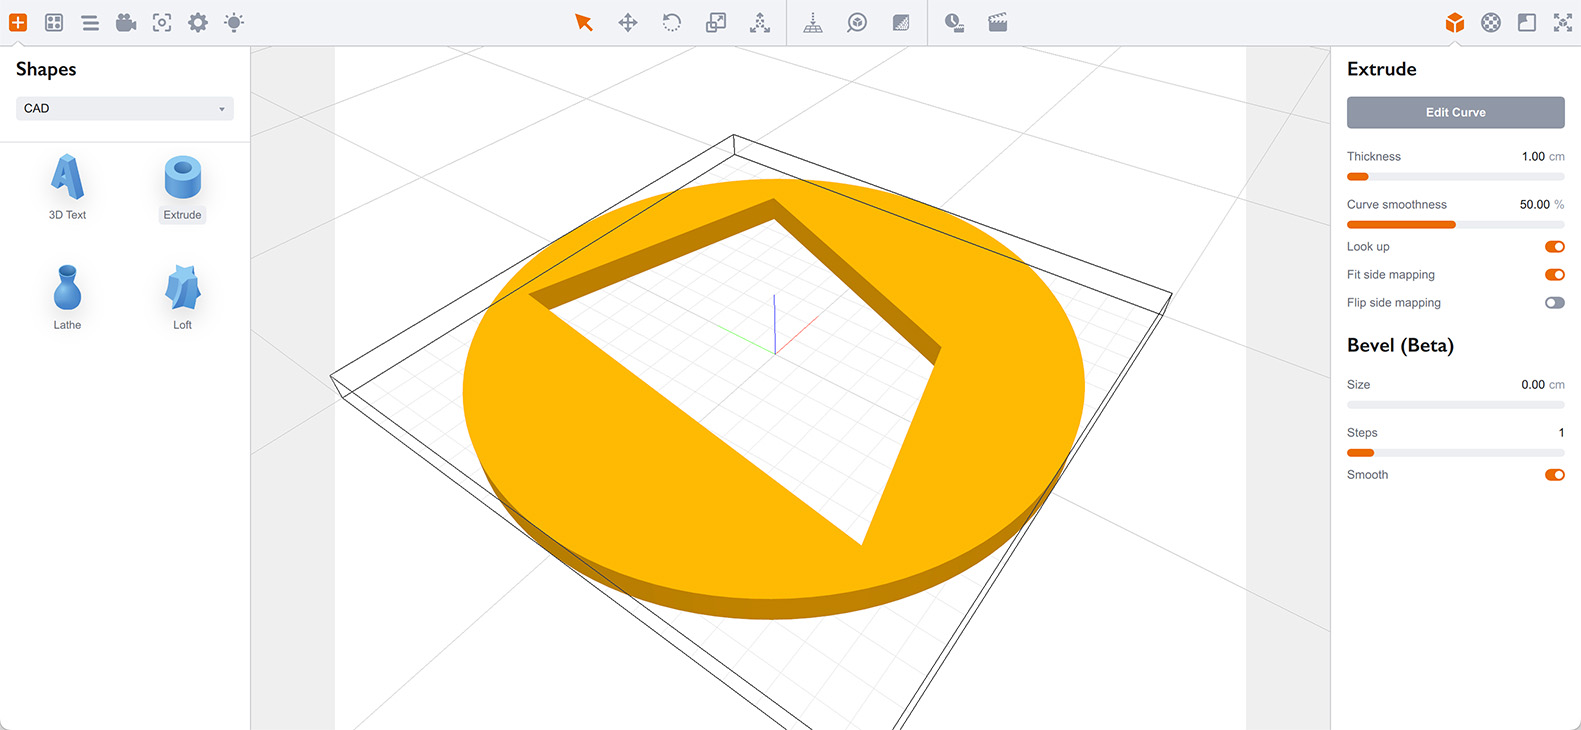
Then click the Reverse path button in the toolbar to invert the selected path. Finally, click OK to see if it helps:
Yes, it helps. Depending on the shape you may need to reverse all the paths or just some of them to get a properly looking extruded shape.
Adding Extra Paths
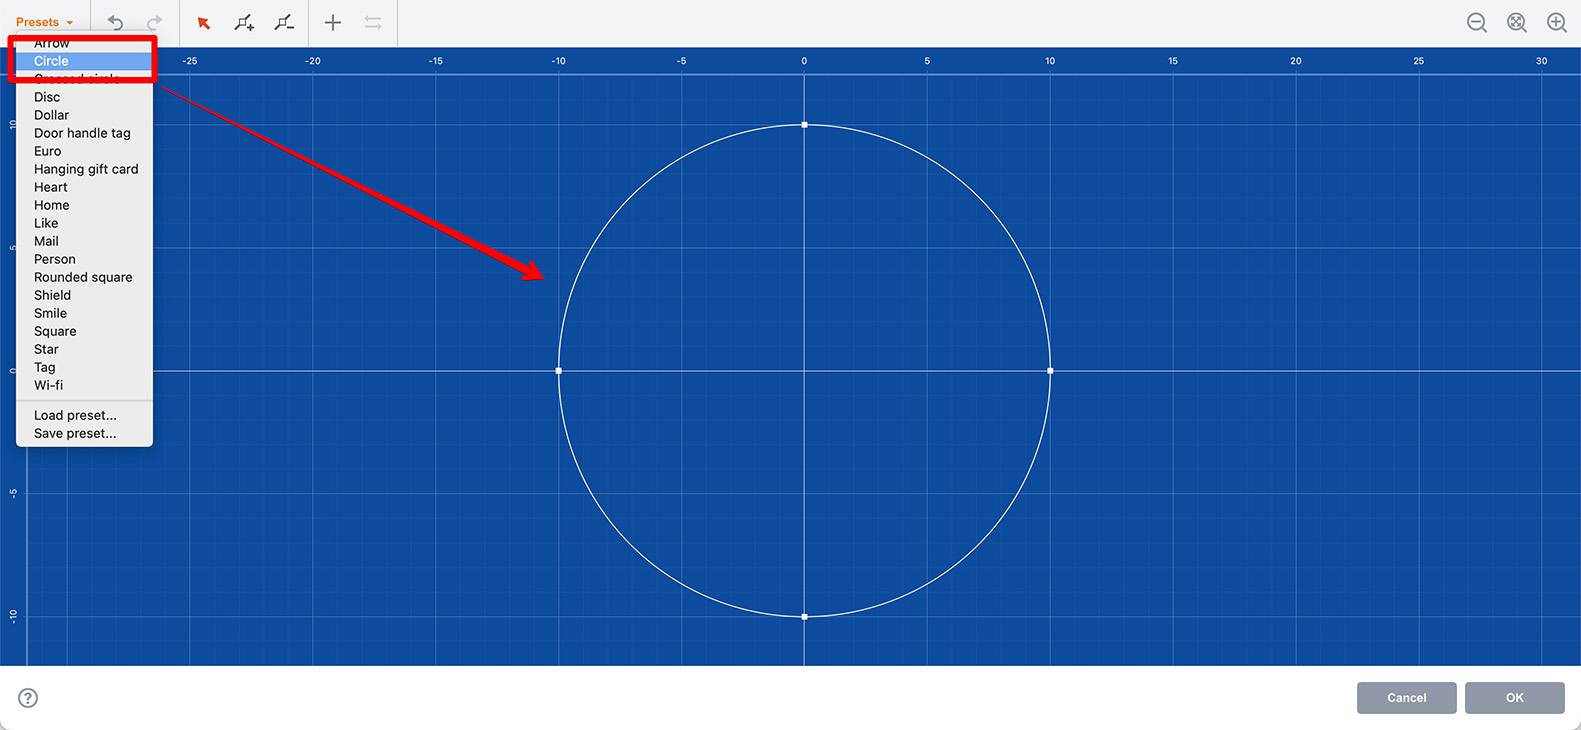
You don’t have to load external SVG file to get a curve, you can make one right in the curve editor. Let’s start with one of the built–in presets:
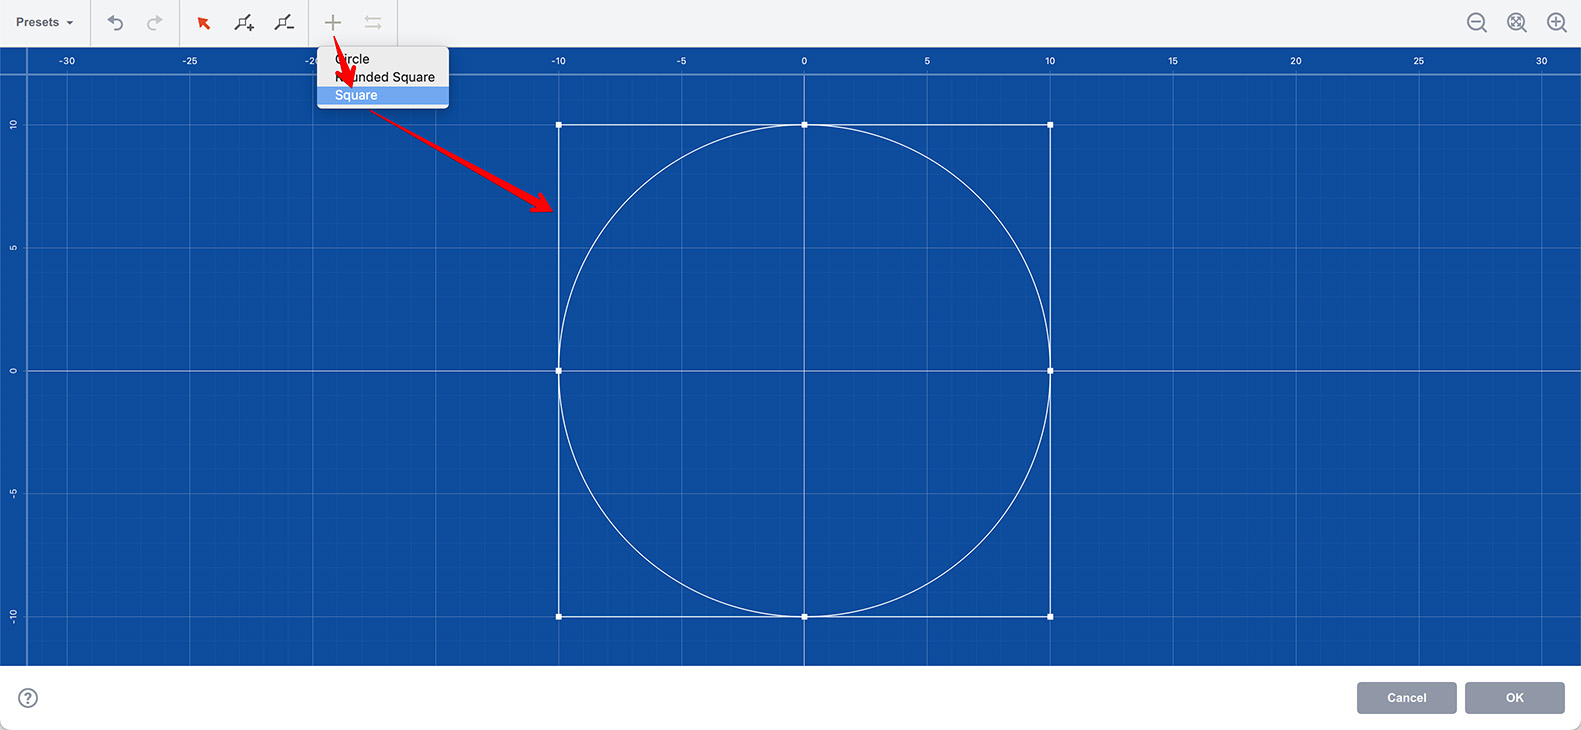
Good, now we’ll make a hole inside the circle. Click Add path button in the editor toolbar to add a new segment to the curve. There is a few to select from, choose the Square one:
Now you can adjust the new path by moving its vertices like below, or maybe adding some more vertices and making it looks much better. See the lathe editor tutorial for more instructions.
Here I simply moved the points around:
The shape looks great to me, so let’s click OK to see the extruded result:

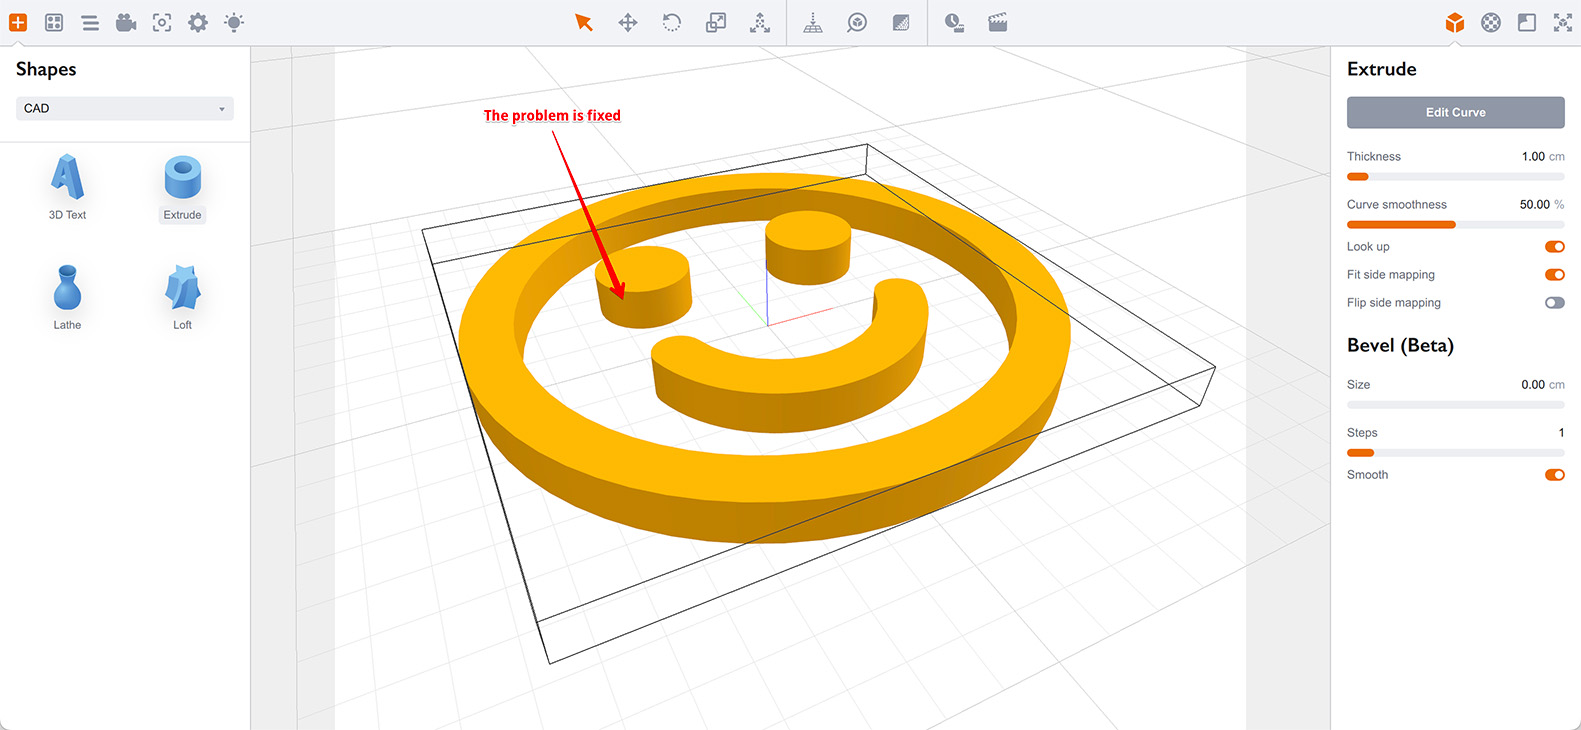
It looks like something went wrong, as there is no hole in the shape. The problem is described above and all you need is to reverse the newly created inner path.
Let’s go back to the curve editor, select that new path and reverse it:
Click OK again and see that everything is fine now:
Materials and Mapping
Exactly as with 3D text objects, Boxshot lets you specify materials for front, side and back parts of the extruded shape. If you need more styles for different parts, consider splitting the shape into several objects and styling them up separately.
Boxshot applies planar bounding–box aligned mapping to front and back of the shape. Note that back mapping is exactly the same as the front one, so it looks flipped.
Side mapping runs along the curves of the shape with its U coordinate, while V coordinate goes from zero at the back side to 1 at the front. You can always change that using UV–mapping parameters of the material’s texture slots.
Summary
Here is a quick summary of extruding curves in Boxshot:
- You can import external SVG files by dropping them into the curve editor window;
- In case of any issues with extruded objects, try reversing paths;
- See 3D Text Tutorial for more information on extruding, positioning and adding bevels;
- See Lathe Tutorial for more details on curve editing, adding extra points and configuring them.
That is all, now go and extrude something special :)
More Tutorials
Rendering
- Realistic Rendering — improving scenes visual appearance;
- Lighting — control environment and directional lighting;
- Saturated Reflection — make "rich" colorful reflections;
- Floor Reflection — reflecting scene objects in the floor;
- Job Manager — rendering jobs later;
- GPU Rendering — rendering scenes faster on GPU;
- Rendering Time and Quality — getting more control on rendering;
- Simple and Realistic Lighting — speeding up scene rendering.
Materials
- Texture Slots — how to use texture slots in Boxshot;
- Glass Materials — how to make semi–transparent objects look attractive;
- UV–Spot — how to make a UV–spot effect easily;
- Foil Effect — how to add foil–finishing to your shapes;
- Bump — adding relief to your materials;
- Copying Materials — how to copy materials to other shapes;
- Custom Materials — extend the materials library with your own ones;
- Semi–Transparent Labels — making semi–transparent and partial labels;
- Boxshot Materials — more details about Boxshot materials.
Features
- Decals — applying decals and configuring them;
- Bump Decals — applying bump where it is needed;
- Depth Of Field — adding more realism to your renderings;
- Tools — read more about Boxshot tools;
- Managing Images — how to manage image files used by Boxshot projects;
- Shapes Instances — creating lightweight copies of other shapes;
- Model Editor — edit embedded models in many ways;
- Shrink Wrap — heat–shrink film simulation for objects wrapping;
- Physics Simulation — applying gravity to your scene;
- Palletize — arrange scene objects for the pallet;
- Snapshots — save scene state to re–use it later;
- Translation — teach Boxshot to speak your language;
- Vector Artwork — how to maintain the quality of vector artwork.
Shapes
- Lathe Objects — making symmetrical objects using revolving curves;
- Loft Objects — making custom objects with 2D cross–sections;
- 3D Text — making 3D text objects in Boxshot;
- Extruded Objects — how to make thick 3D object of your flat 2D curve;
- Conical Labels — making conical labels with distorted artwork;
- Dieline Box — a very realistic dieline–based box;
- Custom Shapes — adding custom shapes to the left panel;
- Third Party Shapes — importing third party shapes to Boxshot.